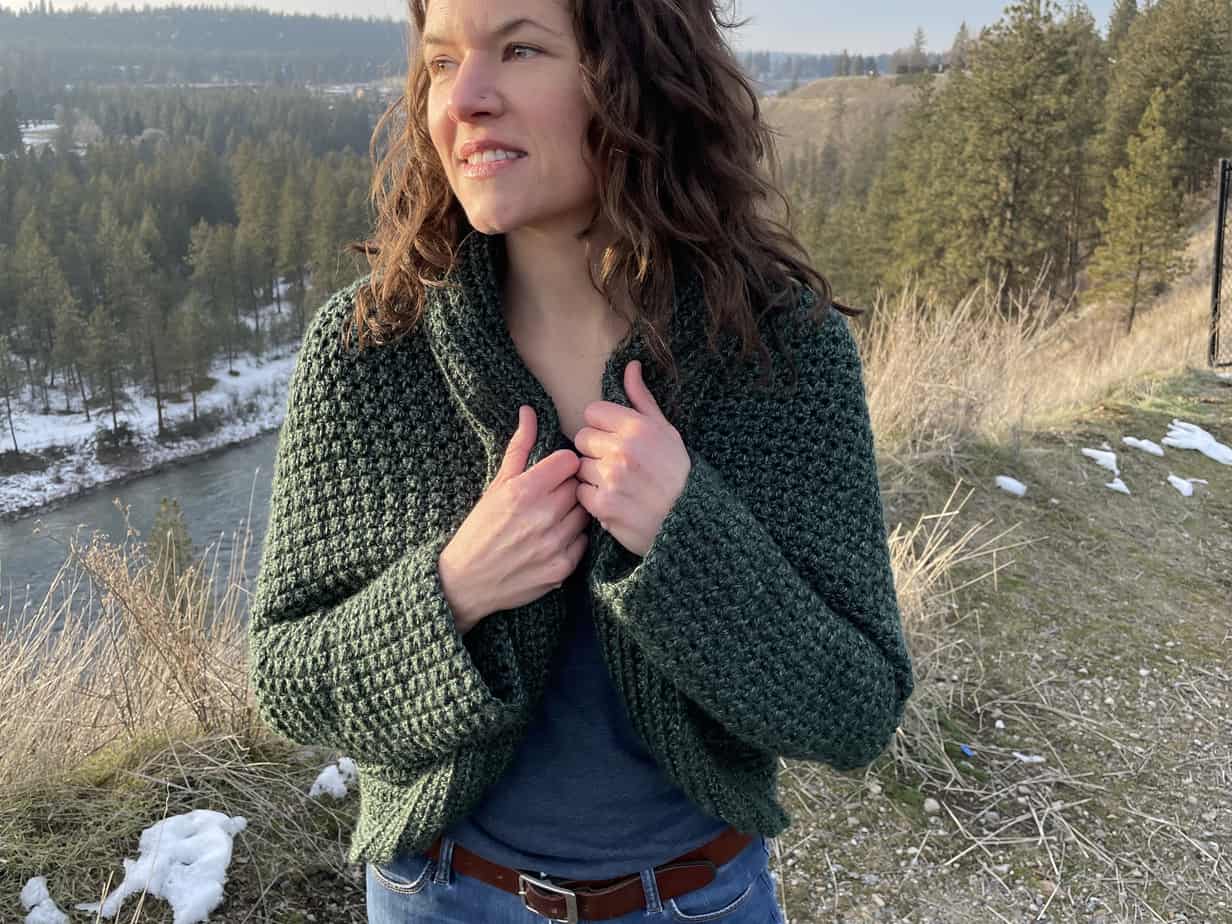
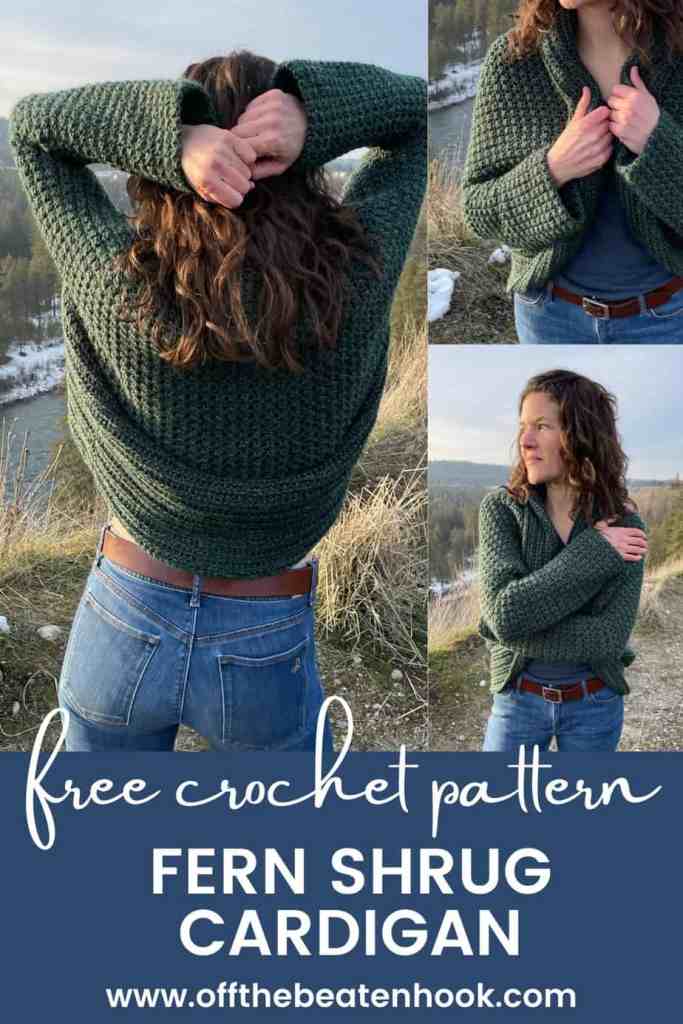
This pattern uses a single crochet/half double crochet combo stitch that I love so much. I used this same combo stitch on my Tundra Cardigan which is also made with a rectangle for the main body. I loved it so much I designed this Fern Shrug Cardigan Free Crochet Pattern using the same stitch and extended it’s use onto the sleeves. This shrug is so cute and versatile. I use Lion Brand Heartland acrylic yarn which has lots of color offerings. Green is my favorite color, so I wanted to make a sweater using the gorgeous Kings Canyon forest green. The yarn is also super soft and easy to work with. Give it a try if you never have before!
The Fern Shrug Cardigan Free Crochet Pattern is written for sizes XS through 3XL and is ready for the ambitious beginner. I hope you love it!
This free pattern is supported by ads on my blog. You can find the full, printable, ad-free pattern of the Fern Shrug Cardigan with lots of helpful pictures and additional tips on my Etsy shop here!
You can also help yourself to a printable, ad-free copy of the Fern Shrug Cardigan Free Crochet Pattern by subscribing to my blog and gaining instant access to my resource library which is full of printable patterns, printable resources (quick reference cards, guides, etc) and video tutorials.

Gauge:
4�x4� = 15 stitches x 14 rows
I encourage you to make a small rectangle swatch to be sure your gauge is correct. It’s also a good idea to measure now and again and try on the sweater as you go along. This will ensure it will fit right when it’s done!
Sizing:
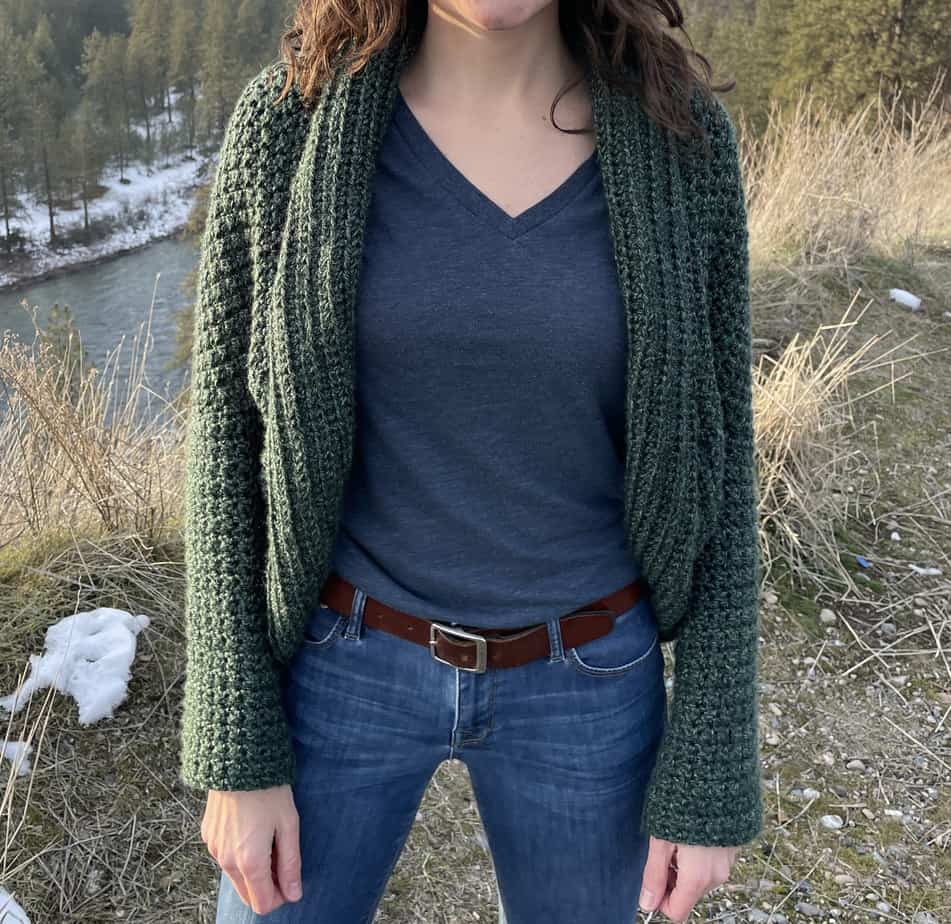
This pattern is written in size XS/S with size S/M, M/L, L/XL, XL/2XL & 2XL/3XL following in parenthesis. The model pictured is wearing size XS with a bust of 34″.
Length (shoulder to hem):
XS/S: 24″
S/M: 26″
M/L: 28″
L/XL: 30″
XL/2XL: 32″
2XL/3XL: 34″
Bust:
XS/S: 32-34″
S/M: 34-36″
M/L: 36-40″
L/XL: 40-44″
XL/2XL: 44-48″
2XL/3XL: 48-52″
I also include a detailed sizing chart for the Fern Shrug Cardigan Free Crochet Pattern in the ad-free and fully printable 7-page PDF pattern here. The sizing chart includes all measurements in inches as well in stitch count for all sizes for the bust, length and sleeves so you can easily customize for your exact size.
Materials you will need:
- Lion Brand Yarns Heartland –
- Kings Canyon – x6(7, 7, 8, 8, 8) 1506(1757, 1757, 2008, 2008, 2008) yards
- Crochet Hook Size: 6.00 mm / US J
- Tapestry Needle
- Stitch Markers
- Scissors
Abbreviations used in this pattern:
ch – chain
st – stitch
sk – skip
fhdc – foundation half double crochet
sc – single crochet
hdc – half double crochet
FLO – front loop only
[…] – number of stitches in row/round
(…) x – repeat instructions indicated number of times
The Pattern
Main Rectangle:
Notes:
- The main rectangle is worked in rows, turning at the end of each row
- The turning chain does not count as a stitch
- Wrong side (ws) is where the beginning and ending tails are on the side of your dominant hand when the rectangle is laying flat
- Tip: the sc/hdc pairs are made into the sc from the previous row (versus the hdc)
- Feel free to adjust the size of the main rectangle to best match your body. Use the gauge and the size chart on the printable version to determine measurements.

Row 1: fhdc 124(131, 138, 145, 152, 159)
Row 2-70(73, 76, 79, 82, 85): ch 1, turn, (sk next st, sc and hdc in next st) repeat to end of row
Row 71(74, 77, 80, 83, 86): hdc in each st across
Fasten off. Weave in ends.
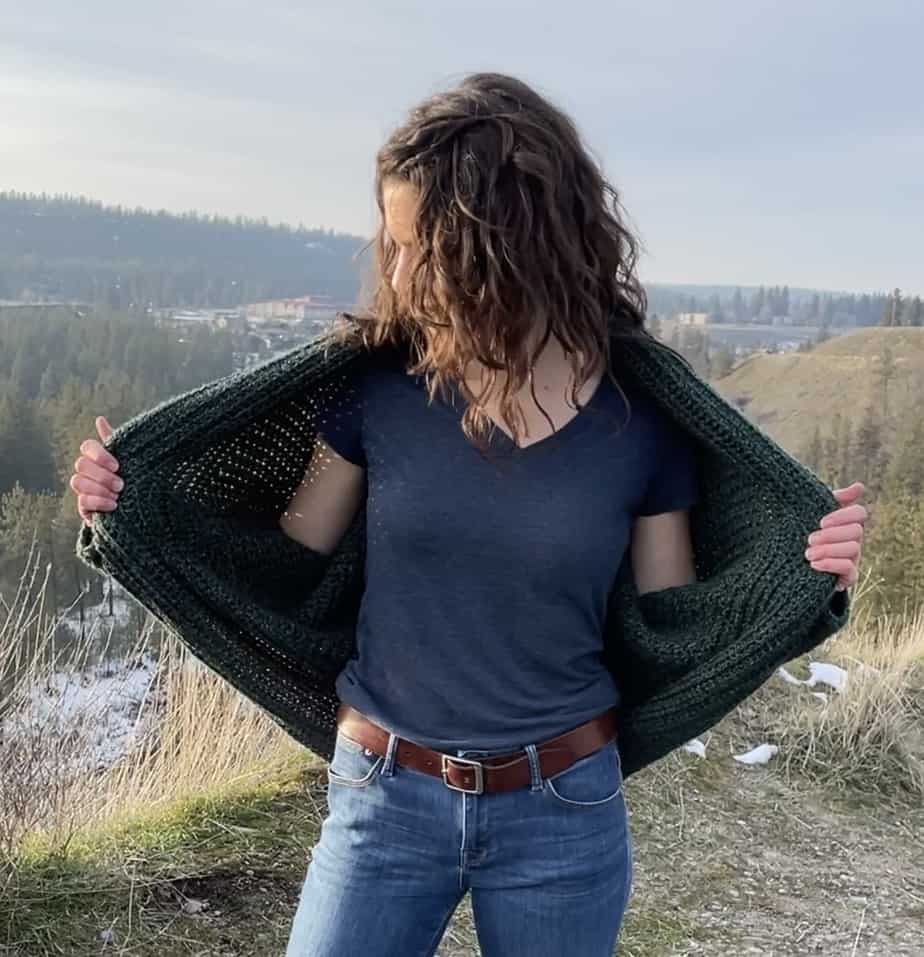
Seaming for armholes:
Lay the main rectangle flat with the wrong side facing up. The beginning and ending tails should be on the side of your dominant hand. Fold the rectangle in half hot-dog style (the longer sides together).
Beginning from the folded crease edge, measure 4.5″(4.5, 5, 5.5, 6, 6.5)and place a stitch marker. You may want to place several stitch markers to be sure your seaming will be accurate. Repeat on other side. This measured area will not be seamed together and is now the opening to the sleeves.

Beginning from the folded corners (the opposite side from where you began measuring at the crease), use a tapestry needle and seam the edge all the way up to the stitch marker. I recommend using the mattress stitch for seaming.
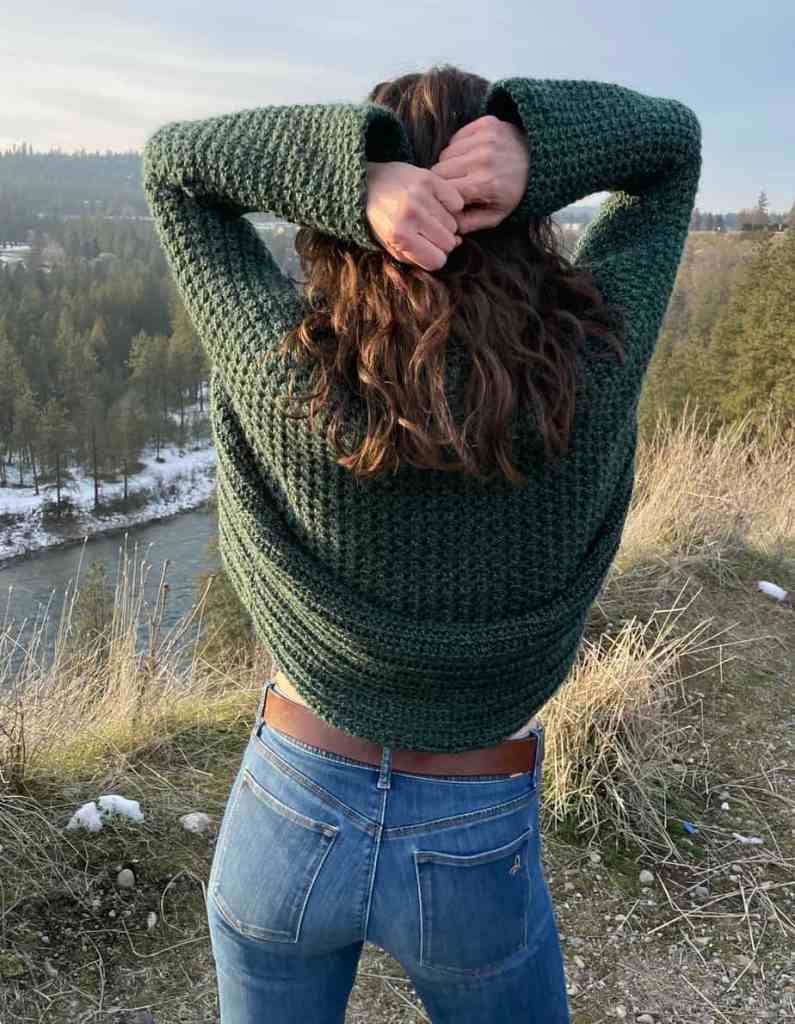
Unfold the rectangle and lay flat. You can now see the rectangle forming the main body of the cardigan – the back, the front edges and the arm holes. Place a stitch marker where bottom front edge of the cardigan meets the back bottom of the cardigan. This is where you will begin crocheting the collar. At this point, I also place a stitch marker anywhere along the outside of the cardigan to mark the right side to avoid confusion before continuing.
Collar:
- The collar is made by crocheting turning rows of hdc through the front loop only, turning at the end of each row. This is what creates the ribbing.
Rejoin yarn at the bottom front edge where you placed your stitch marker in the previous step.
Row 1: hdc around the entire front opening of the cardigan, sl st to first st
Row 2-18: ch 1, turn, FLO hdc across, sl st to first st
Fasten off. Weave in ends.
Sleeves:
- The sleeves are crocheted directly onto the cardigan, using the same sc/hdc pair stitch as with the main rectangle
- The sleeves are made using turning rounds, slip stitching, chaining 1, and turning after each round
- Tip: the sc/hdc pairs are made into the sc from the previous row (versus the hdc)
- The sleeves should have approximately 40(42, 44, 46, 48, 50) stitches around based on the sleeve opening.
- Check the length of your sleeves as you near the end and add or subtract rows to achieve your desired length.
Rejoin yarn at sleeve opening as shown in. This feels like a weird place to start the round, but starting here will ensure the seam is not on the front of your sleeve, but rather underneath.
Rnd 1: ch 1, make 40(42, 44, 46, 48, 50) hdc evenly around the opening, sl st to first st in round – (you may need to try a couple times to get these stitches placed evenly around)
Rnd 2-41(42, 43, 44, 45, 46): ch 1, turn, (sk next st, sc and hdc in next st) repeat to end of row, ending in the last st of Rnd 1, sl st to first st in round
Try on the sweater and be sure you are happy with the length of the sleeves. Fasten off and weave in ends.
Congrats! Cozy up and enjoy your hard work. Let me know what you think!
This post contains affiliate links. If you purchase materials using these links I may receive a small commission which in no way affects your cost. These partnerships help me support my small business and allows me to continue providing you with free crochet patterns! Thank you from the bottom of my heart for your support.
Want more free crochet patterns? Check these out!
- Yeti Hooded Sherpa Jacket – Free Crochet Pattern
- Mt Rainier Tweed Sweater – Free Crochet Pattern
- Diamond Ridge Throw Blanket – Free Crochet Pattern
- Seahorse Amigurumi – Free Crochet Pattern
- Milk Carton Amigurumi – Free Crochet Pattern
Leave a Reply