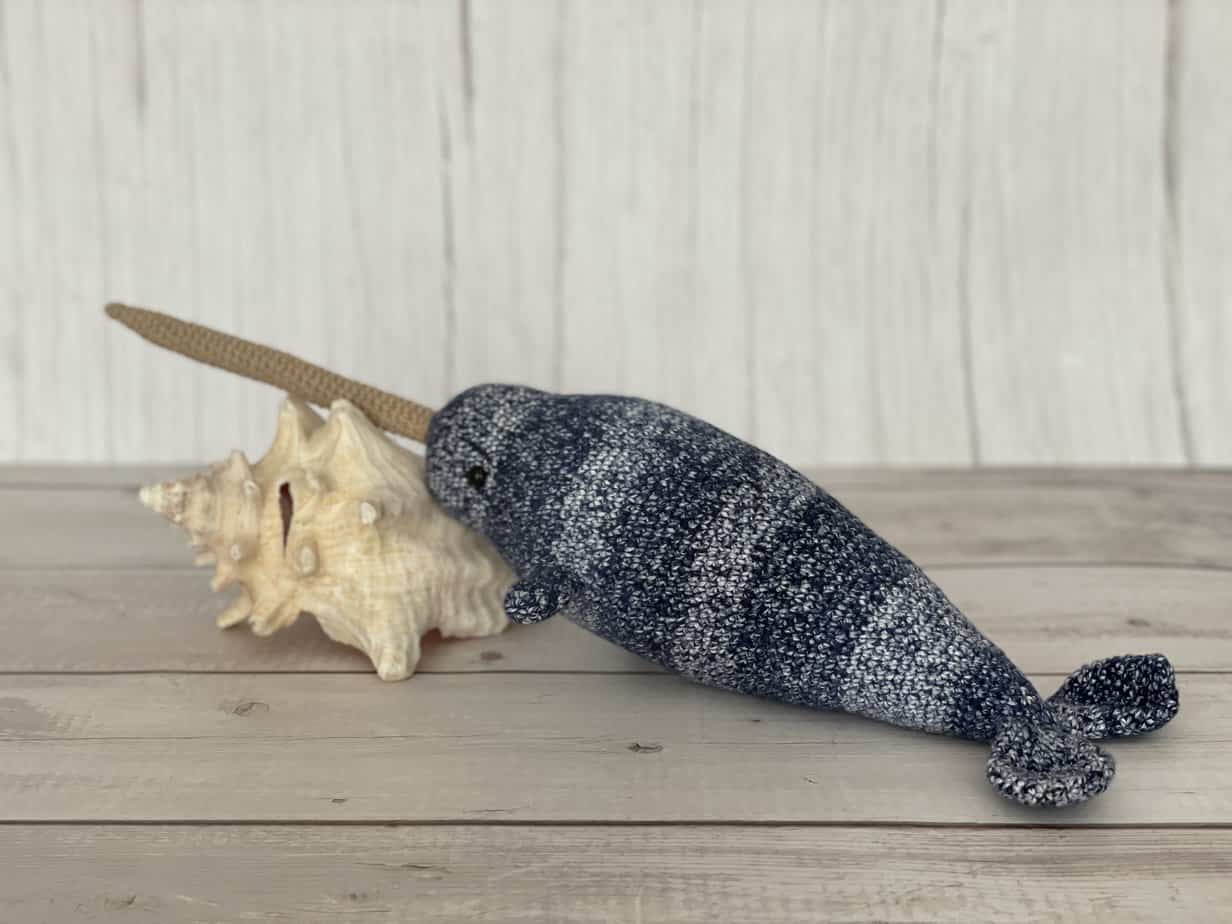
The thing that makes me the most jealous about Narwhals is they get to eat fresh halibut, cod, and shrimp every day. In fact that’s probably the ONLY thing that makes me jealous of Narwhals. Living most of my life under a thick sheet of ice just doesn’t sound pleasant. Nonetheless, the unicorns of the sea are beautiful and intriguing. And I hope I do them justice with my Filip the Narwhal crochet pattern.
This free pattern is supported by ads on my blog. You can find the printable, ad-free pattern of Filip the Narwhal on my Etsy shop here.

General Notes:
This narwhal crochet pattern is written in US terms. If needed, you can find a handy term conversion chart right here in my Resource Library. I recommend giving the narwhal crochet pattern a read-through before you begin so you can visualize the big picture and consider any specific notes for help along the way! The printable pattern in my Etsy shop comes with LOTS of in-the-making photos for each step of the way as well.
Size & Gauge:
Size: Filip will end up being 20″ from tail to tusk & 4.5″ wide.
Gauge: 4?x4? of single crochet = 28 stitches x 30 rows. Ultimately with toys, gauge doesn’t matter. It won’t have to fit someone’s body or a specific space. My patterns will include the size of the finished toy based on the yarn and hook I use. But if you want it smaller or bigger, just use a bigger yarn and hook! Just remember, when crocheting toys, crochet tightly and choose a hook one size smaller than the yarn size recommends in order to avoid holes between each stitch where the stuffing will show through.
Yarn & Stuffing:
Yarn: Take your choice of yarn! Choose colors that bring you joy and fibers that feel good between your fingers. I use 100% organic cotton yarn because I make these toys for my kids and need them to be functional. Cotton is natural, washable, soft, and relatively inflexible so the toys don?t stretch and sag ? even after being thrown across the house, down the stairs and adventured through every part of the garden!
It’s very important for me to use only sustainable and eco-friendly yarn so I feel good about the impact I’m making on the environment with my craft. This is why I choose organic cotton versus conventional cotton.
Stuffing: Stuff more than you think you should. Not enough for the stitches to stretch and show holes, but enough to make the toy stiff and able to withstand the rough trials of toy life. The filling will compress a bit over time. I encourage you to use an alternative to poly-fill (unless it’s recycled!). Try using leftover yarn scraps and snippets or old non-donate-able clothes and materials cut into strips.
The Legal Stuff:
This pattern or parts of it may not be reproduced, sold, distributed or translated without authorization. You can sell your finished items provided that you credit Off the Beaten Hook as the designer. Thank you for your respectfulness!

Materials you will need:
- Debbie Bliss Cotton Denim DK in NEW DENIM – 1 ball | 100% Cotton | DK Light Worsted
- Stylecraft Naturals Organic Cotton DK in BONE – 1 ball | 100% Organic Cotton | DK Light Worsted
- Crochet Hook Size: 3.00 mm
- Tapestry Needle
- Stitch Markers
- Scissors
- Stuffing
- Dowel or something thing and stiff for the tusk (I used a garden bamboo rod, sawed down to length)
Abbreviations used in the narwhal crochet pattern:
ch – chain
st – stitch
sc – single crochet
dec – decrease
inc – increase
[…] – number of stitches in row
(…) x – repeat instructions indicated number of times

The Pattern
Notes:
- the head and body are crocheted in continuous rounds – do not join
- the head and body use the denim colored yarn
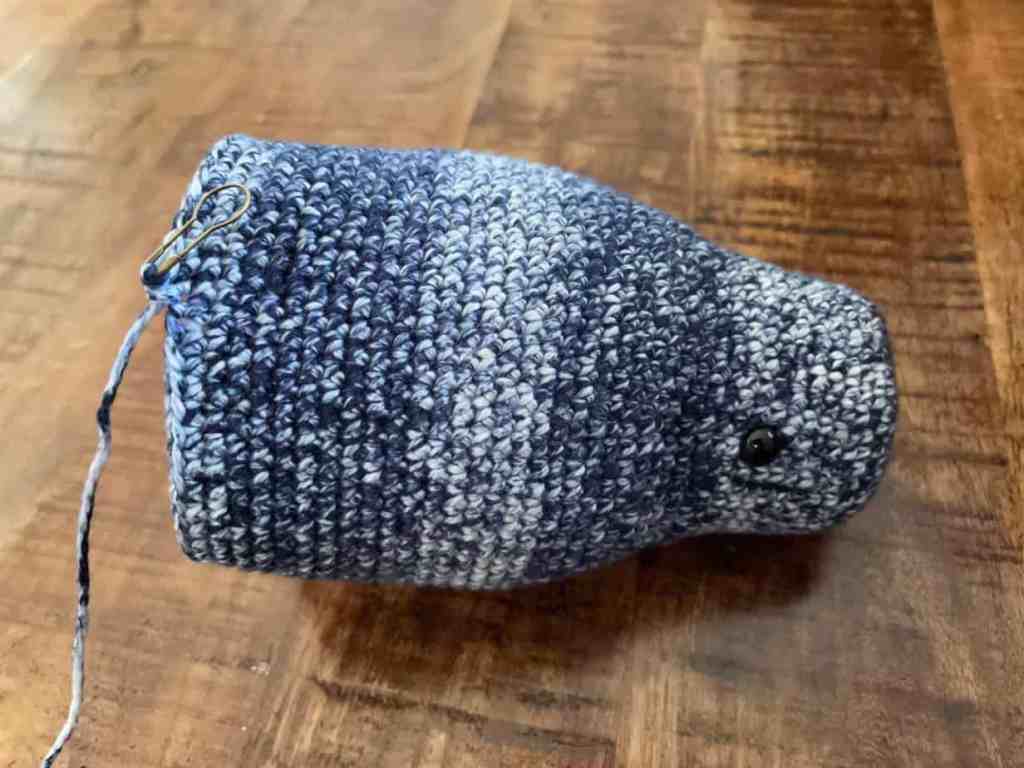
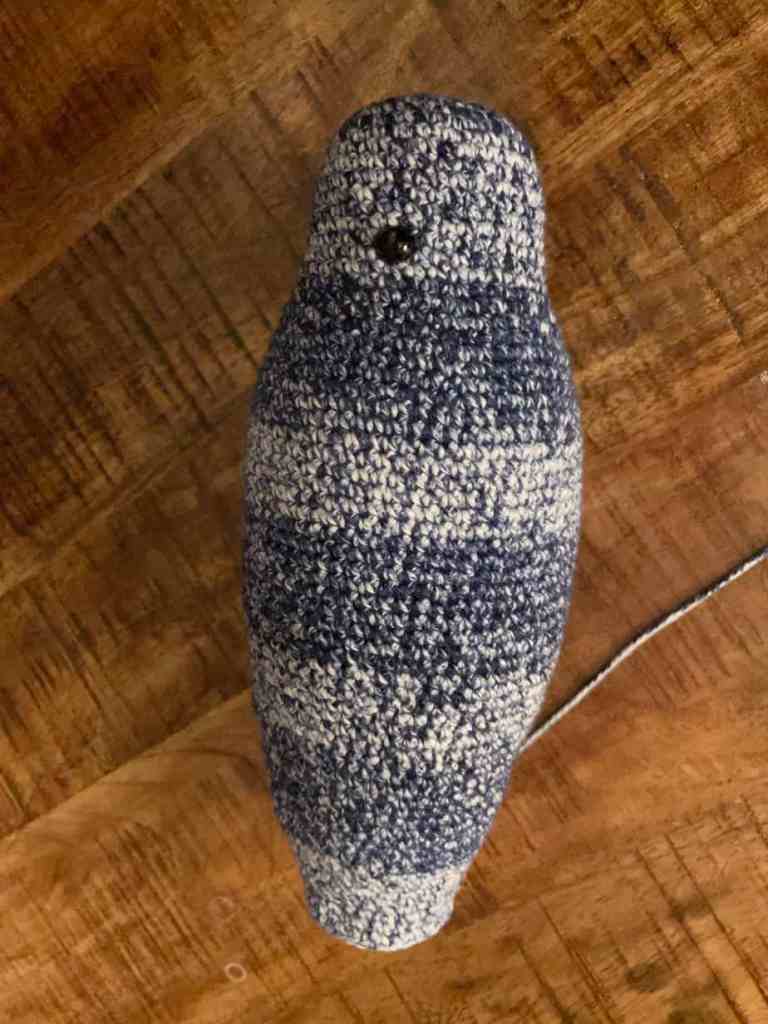
Head & Body:
Rnd 1: st 6 in a magic circle [6] When you pull to close the magic circle, first insert your dowel through the circle. You don’t want to pull it all the way tight to close or the dowel will be impossible to insert later.
Rnd 2: inc in each st around [12]
Rnd 3: (sc in next st, inc in next st) x6 [18]
Rnd 4: (sc in next 2 st, inc in next st) x6 [24]
Rnd 5: (sc in next 3 st, inc in next st) x6 [30]
Rnd 6: (sc in next 4 st, inc in next st) x6 [36]
Rnd 7: (sc in next 5 st, inc in next st) x6 [42]
Rnd 8-17: sc in each st around [42]
Rnd 18: (sc in next 6 st, inc in next st) x6 [48]
Rnd 19: (sc in next 7 st, inc in next st) x6 [54]
Rnd 20-21: sc in each st around [54]
Rnd 22: (sc in next 8 st, inc in next st) x6 [60]
Rnd 23-24: sc in each st around [60]
Rnd 25: (sc in next 9 st, inc in next st) x6 [66]
Insert safety eyes between rounds 15 & 16, spaced over the top of the head by 39 st (bottom of head will have 27 st in between eyes)
Rnd 26-45: sc in each st around [66] START TO STUFF
Rnd 46: (sc in next 9 st, dec in next st) x6 [60]
Rnd 47-51: sc in each st around [60]
Rnd 52: (sc in next 8 st, dec in next st) x6 [54]
Rnd 53-57: sc in each st around [54]
Rnd 58: (sc in next 7 st, dec in next st) x6 [48]
Rnd 59-61: sc in each st around [48]
Rnd 62: (sc in next 6 st, dec in next st) x6 [42]
Rnd 63-65: sc in each st around [42]
Rnd 66: (sc in next 5 st, dec in next st) x6 [36]
Rnd 67-69: sc in each st around [36] STUFF
Rnd 70: (sc in next 4 st, dec in next st) x6 [30]
Rnd 71-73: sc in each st around [30]
Rnd 74: (sc in next 3 st, dec in next st) x6 [24]
Rnd 75-76: sc in each st around [24]
Rnd 77: (sc in next 2 st, dec in next st) x6 [18]
Rnd 78-79: sc in each st around [18]
Rnd 80: (sc in next st, dec in next st) x6 [12]
Rnd 81: sc in each st around [12] STUFF
Rnd 82: dec in each st around [6]
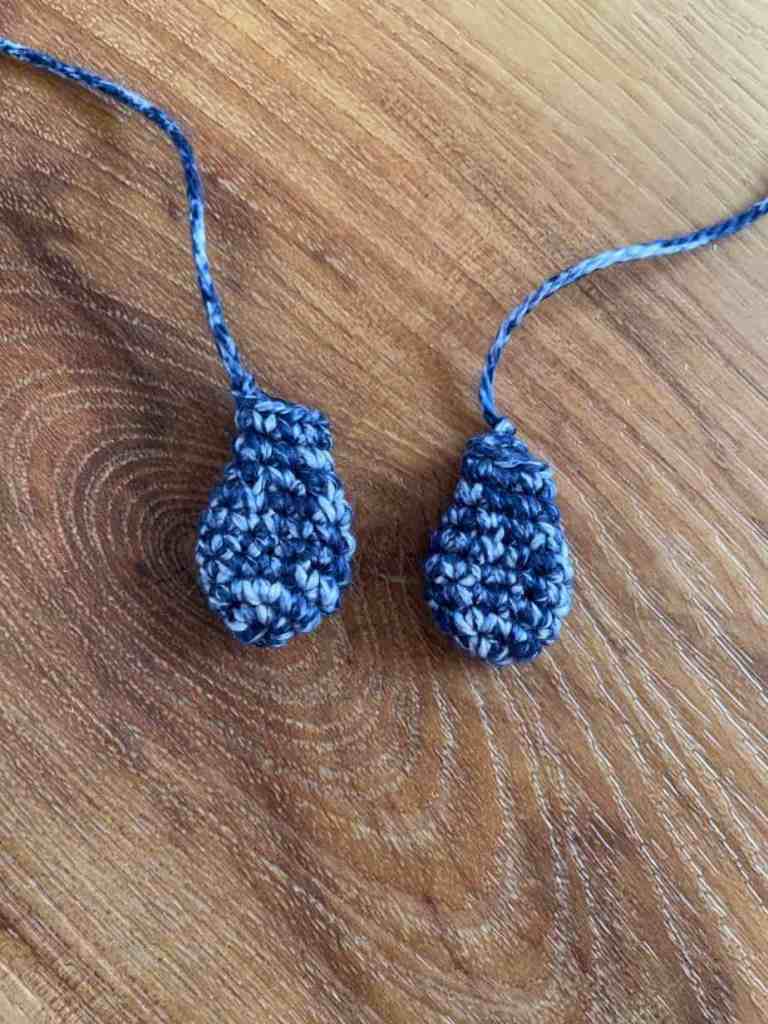
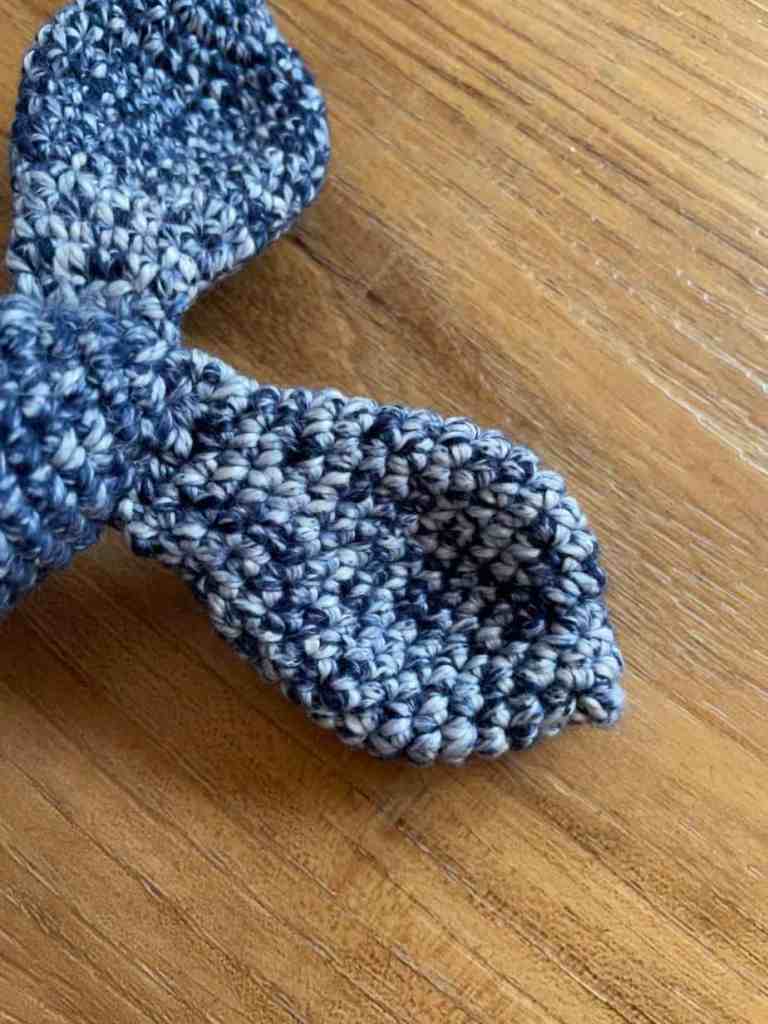
Fins – make 2
Rnd 1: st 6 in a magic circle [6]
Rnd 2: inc in each st around [12]
Rnd 3-5: sc in each st around [12]
Rnd 6: (sc in next 2 st, dec in next st) x3 [9]
Rnd 7-9: sc in each st around [9]
Fasten off and leave a long tail for sewing.
Tail – make 2
Rnd 1: st 6 in a magic circle [6]
Rnd 2: sc in each st around [6]
Rnd 3: inc in each st around [12]
Rnd 4: (sc in next st, inc in next st) x6 [18]
Rnd 5: sc in each st around [18]
Rnd 6: (sc in next 2 st, inc in next st) x6 [24]
Rnd 7-10: sc in each st around [24]
Rnd 11: (sc in next 2 st, dec in next st) x6 [18]
Rnd 12-14: sc in each st around [18]
Rnd 15: (sc in next st, dec in next st) x6 [12]
Rnd 16: sc in each st around [12]
Fasten off and leave a long tail for sewing.
Tusk
Rnd 1: st 4 in a magic circle [4]
Rnd 2: sc in each st around [4]
Rnd 3: (sc in next st, inc in next st) x2 [6]
Rnd 4: sc in each st around [6]
Rnd 5: (sc in next 2 st, inc in next st) x2 [8]
Rnd 6-11: sc in each st around [8]
Rnd 12: (sc in next 3 st, inc in next st) x2 [10]
Rnd 13-42*: sc in each st around [10]
*The tusk will be approximately 7″ long if you’d rather just flow with it for a while and measure, versus counting rows. Alternatively if you want to count stitches, you’ll make 300 stitches between rounds 13-42. Fasten off and leave a long tail for sewing.
You’re done with all the components of Filip the narwhal crochet pattern. Now all you have to do is put it all together.

Assembly:
Assemble the narwhal:
- Sew the tail pieces to the sides of the body over rounds 78-82, using the eyes as a centering point.
- Sew the fins to the sides of the body over rounds 29-32, spaced across the tummy by 20 stitches.
- Cut your dowel to the length of the narwhal body (approx. 12″)
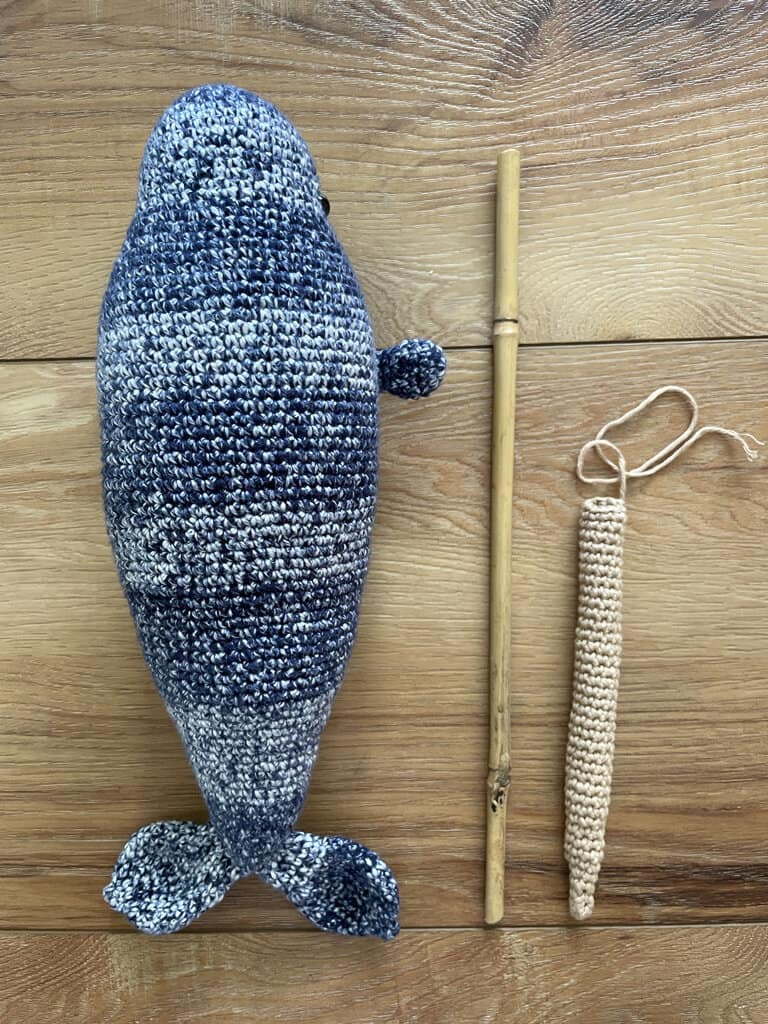
- Slide the tusk over one end of the dowel (I didn’t have to stuff my tusk because the dowel was the same width as the tusk. But, if your dowel is skinnier than the tusk, you may want to consider adding some stuffing)
- Push the other side of the dowel into the center of the nose on the body until the end of the tusk meets up with the nose. You’ll have to wiggle and push and work your way through the magic circle in the nose and through the dense stuffing.
- Use a tapestry needing and the yarn tail of the tusk to sew the tusk to the body over round 2, threading the needle through the inside loop of a stitch on the tusk and one loop of a stitch on round 2. Repeat all the way around with each of the 12 stitches. Pull the yarn tail back and forth under the tusk a couple times to secure the yarn and snip.

Admire your crochet skills. You did it! I’d love to see your finished narwhal crochet pattern results! Please tag me on instagram @offthebeatenhook with pictures!

Want more free amigurumi crochet patterns? Check these out!
- Esteban the Raccoon Free Crochet Pattern
- Leaf Lettuce Free Crochet Pattern
- Raspberry & Blackberry Free Crochet Pattern
Leave a Reply