Who doesn’t love the Minions? They’re tiny, adorable and apparently still incapable of going anywhere without causing a delightful amount of chaos. Whether you’ve loved these funny little yellow characters for years or have a brand-new Minion fan in your life, this free Minion crochet pattern is the perfect way to bring some of that mischievous charm to your crochet hook.
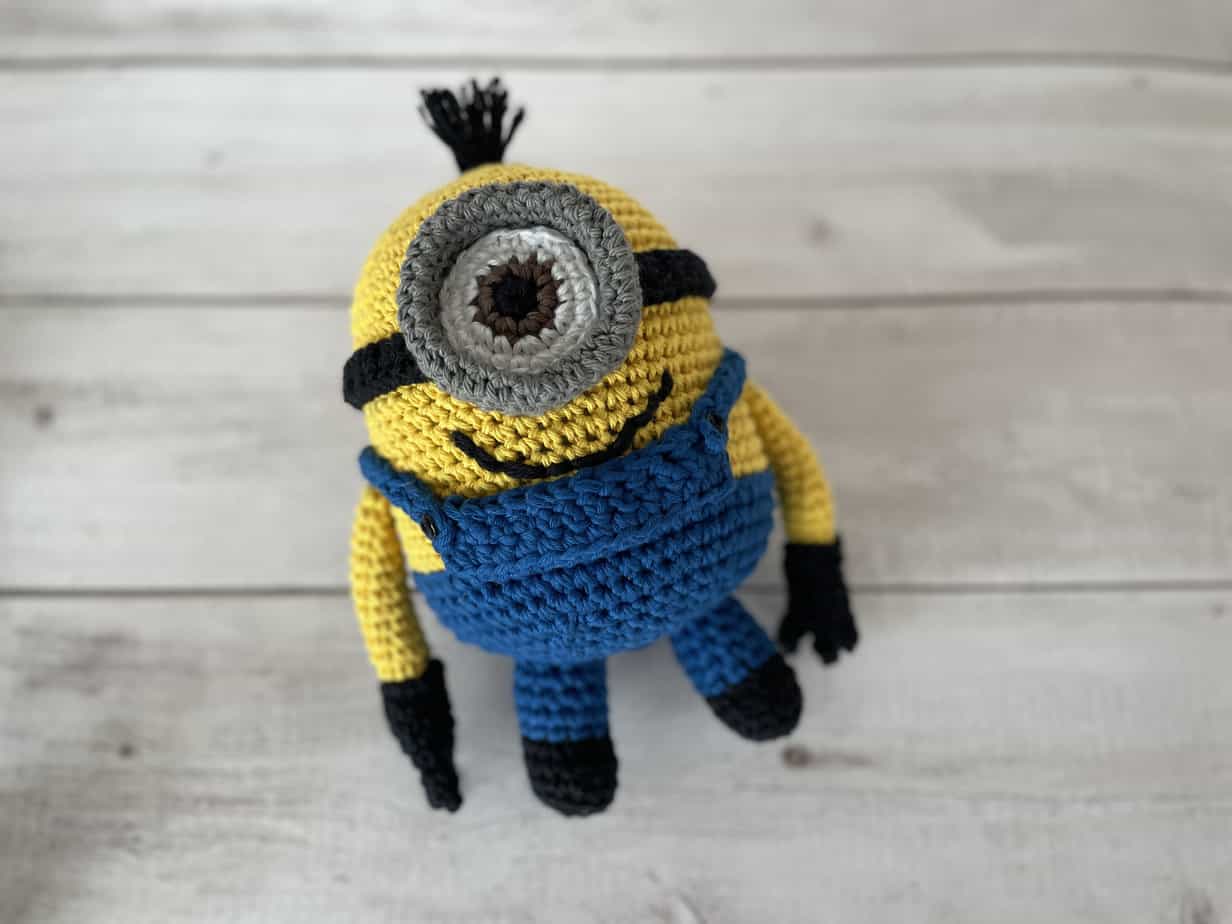
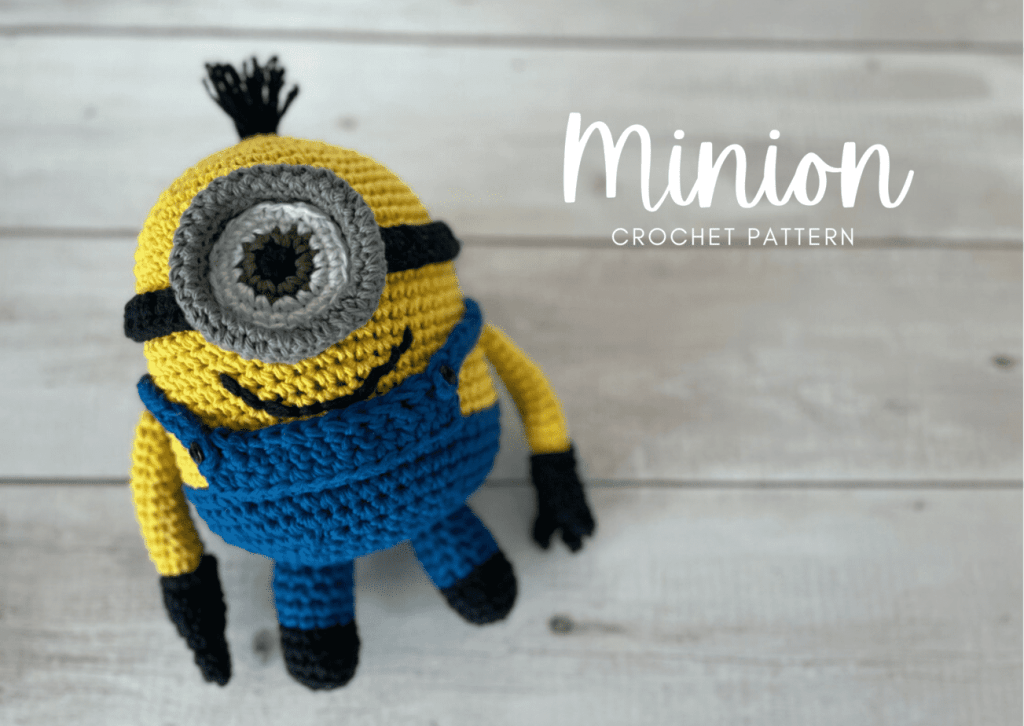
With his bright yellow body, signature overalls, oversized goggles, and wonderfully goofy expression, this crocheted Minion makes an adorable handmade toy, gift, or display piece. He is full of personality, fun to customize, and considerably less likely to destroy your living room than a real Minion.
Probably.
Jump into the minion crochet pattern now, or Pin it for later!

LOVE COLLECTING Patterns?
If you love collecting crochet patterns, you might enjoy my Fiber Love Club — it gives you lifetime access to every pattern I’ve ever designed (plus all future releases).
Instead of buying patterns one by one, unlock the full pattern vault forever in one simple payment.
Minion Crochet Pattern Notes & Tips:
This Minion crochet pattern is made using the amigurumi technique, which means you’ll work mostly in continuous rounds to create a firmly stuffed, three-dimensional character.
The individual pieces are crocheted separately and then assembled to create the finished Minion. Once you add the goggles, overalls, facial details, and tiny limbs, his personality really begins to take shape.
This is such a fun project for anyone who loves character-inspired crochet. The finished Minion would make a wonderful:
- Handmade birthday gift
- Movie-night surprise
- Nursery or playroom decoration
- Gift for a Minion collector
- Addition to a crocheted character collection
- Just-because project for someone who could use a little more nonsense in their life
You can also personalize your Minion by changing his expression, hair, eye style, or overall details. Every Minion has his own personality, after all—and a questionable understanding of workplace safety.
🌿 Eco-Friendly Crafting
What makes this crochet pattern eco-friendly and sustainable?
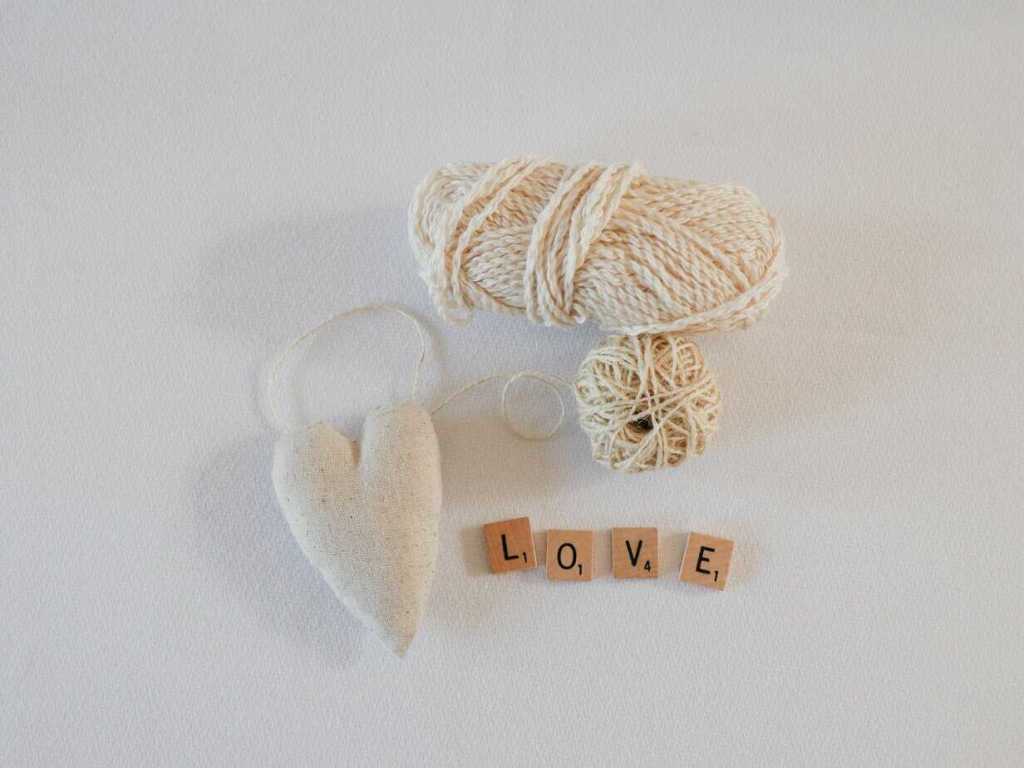
THE YARN: I use only sustainable and eco-friendly yarn that has been ethically grown/raised and processed, putting the people and the planet first. This is why I chose 100% natural yarn for this pattern.
HANDMADE FOR LONGEVITY: Creating your own minion crochet pattern promotes mindful consumption. This durable, handmade stuffy reduces the need for mass-produced alternatives.
THE SLOW YARN MOVEMENT: I’m participating in the Slow Yarn Movement. There’s far too much to talk about here, but please take a few minutes to learn about what this means by reading the article I wrote about the Slow Yarn Movement as part of my 6-part Sustainable Crochet Series.
If you’re interested in learning more about sustainable crochet you can read all about it in the 6-part series I wrote covering everything about Sustainable Crochet and how to implement it into your own crafting starting today!
Materials You Will Need For This Minion Crochet Pattern
A smooth cotton or acrylic yarn works well for this pattern because the stitch definition is great.
Cotton yarn creates a firm, defined fabric and holds its shape beautifully. Acrylic yarn is often softer, widely available, and comes in plenty of bright colors. Either can work well, so use the yarn that you enjoy crocheting with most.
The most important thing is to choose a cheerful Minion-yellow yarn. Subtlety is not the goal here.
You will need one ball or less of the following colors:
- Bright Yellow – 1 ball
- Cobalt Blue – 1 ball
- Black – leftovers
- Gray – leftovers
- White – leftovers
- Brown – leftovers
Here are some excellent yarn options
- Woobles Easy Peasy
- Caron All Day Cotton
- Lily Sugar ‘N Cream Cotton
- Red Heart Super Saver Yarn
- Big Twist Worsted Acrylic Yarn
Other yarn options
I chose the yarn recommended in this pattern because it works so well for this design. However, if you’re looking for substitutes or wanting to go with a fluffy chenille or velvet textured minion, here are some that would work well with this pattern. These are all bulkier than worsted weight so your minion will be much larger than mine! Also, you will need to adjust your hook size accordingly.
- Bernat Blanket Chenille (this is bulky yarn so remember your minion will be REALLY BIG!)
- Hobbymia Chenille
- Bernat Velvet
Crochet Hooks Needed
Additional Supplies Needed
- Tapestry Needle (bent tips make all the difference!)
- Stitch Markers
- Scissors
- Stuffing
- OPTIONAL: buttons if you’d like to use them to embellish the trouser straps

Size & Gauge
Size: This Minion will end up being 10″ tall.
Gauge: 4″x4″ of single crochet = 14 stitches x 18 rows. Ultimately with toys, gauge doesn’t matter. It won’t have to fit someone’s body or a specific space. My patterns will include the size of the finished toy based on the yarn and hook I use. But if you want it smaller or bigger, just use a bigger yarn and hook! Just remember, when crocheting toys, crochet tightly and choose a hook one size smaller than the yarn size recommends in order to avoid holes between each stitch where the stuffing will show through.
Abbreviations used in the Minion crochet pattern:
ch – chain
st – stitch
hk – hook
sl st – slip stitch
mc – magic circle
sc – single crochet
fsc – foundation single crochet
BLO – back loop only
inc – increase
dec – decrease
(…) x – repeat instructions indicated number of times
[…] – number of stitches in row/round
Skill Level
Beginner/Advanced Beginner
A great next step after learning the basics. This pattern includes simple stitch combinations, shaping, or light assembly while still being approachable for newer crocheters ready to grow their skills.
FAQ & Terms
Affiliate Links & Ad Support
This post may contain affiliate links. At no extra cost to you, purchases made through these links may earn Off the Beaten Hook a small commission which in no way affects the cost to you. The content on this site is supported by advertisements. By using this site, you agree not to circumvent, block, or tamper with these ads.
Copyright & Intellectual Property
All content on this blog, including free crochet patterns, instructions, charts, photos, videos, and written materials, are the property of Off the Beaten Hook and are protected under copyright and other intellectual property laws. Screenshots or any other method of copying the pattern for offline use or redistribution is prohibited. Sharing patterns in forums, social media groups, or private messages without permission is also prohibited.
Despicable Me and MINIONS are protected trade marks and copyright of Universal Studios. This pattern is my creative interpretation of those lovable characters, but the character is not my own invention.
Personal Viewing & Use Only
Free patterns published on this site are provided for viewing only on this blog. You may not copy, download, print, take screenshots, or redistribute the pattern in any form (digital or physical) outside this blog. You may not post the pattern or instructions elsewhere online or share it publicly without written consent.
Questions & Permissions
For questions about these permissions or to use or share patterns outside of these rules, please contact Off the Beaten Hook in writing.
As a policy of Off the Beaten Hook, you may sell finished items made from Off the Beaten Hook’s patterns, while crediting “Pattern by Off the Beaten Hook”.
However, please remember that Minions are protected characters belonging to their respective rights holders. Selling items based on trademarked or copyrighted characters may involve restrictions beyond the terms of this crochet pattern.
Pattern Support is only available in our Facebook Community group and Video Tutorials. No additional support is provided for modified patterns, alternate yarns, or changes to gauge.
No. You can substitute another yarn of a similar weight. Keep in mind that a different yarn weight or hook size will change the size of your finished Minion.
Use the same yarn weight for all the main pieces to keep the proportions consistent.
Visible stuffing usually means your stitches are too loose or your crochet hook is too large. Try using a smaller hook or slightly firmer tension.
You may also be overstuffing the piece, which can stretch the fabric and create gaps.
The Minion Crochet Pattern
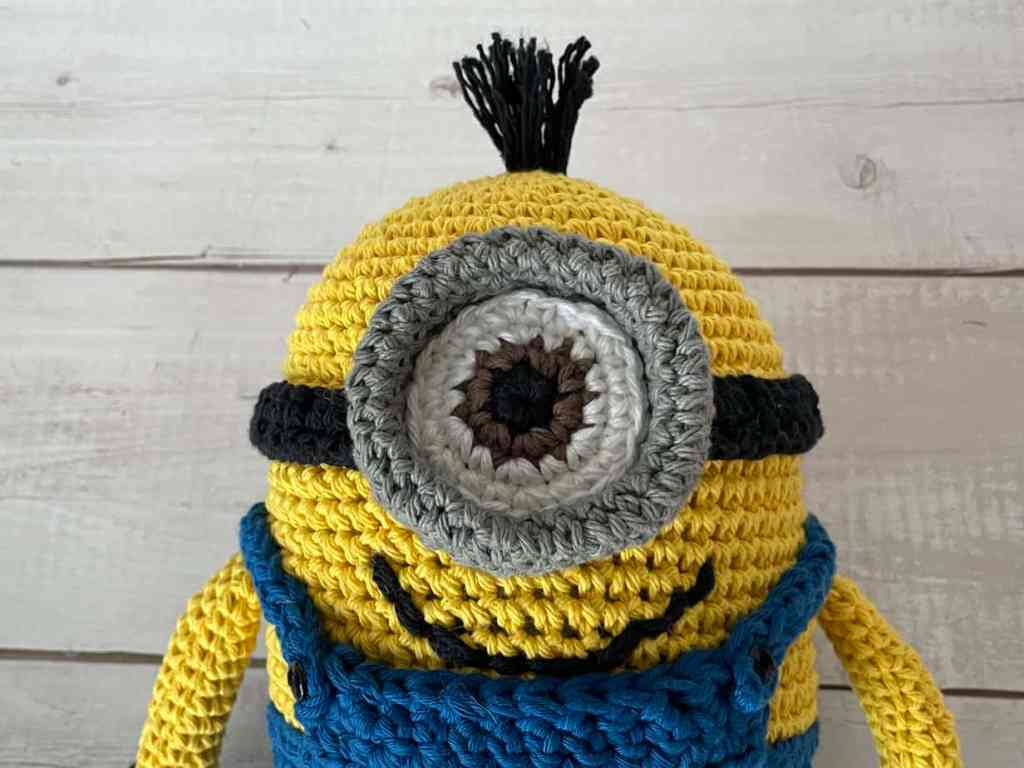
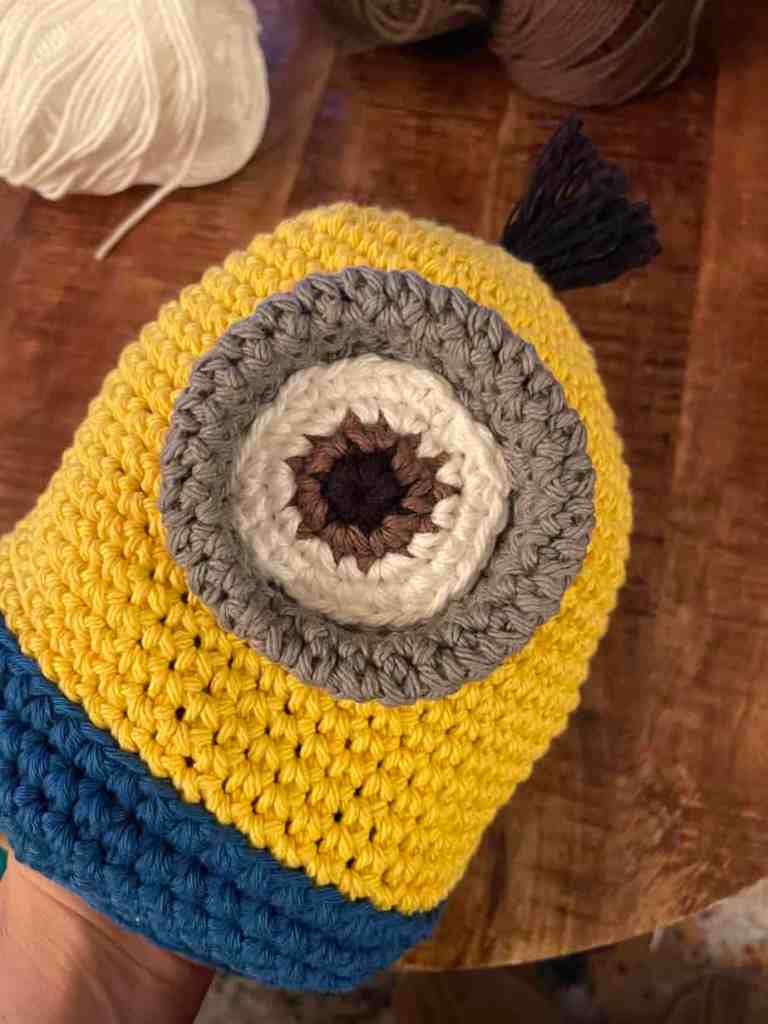
EYE:
NOTE: The eye is worked in rounds – to minimize seeing the color changes, you will join and chain at the end of each round. Join with a slip st, and pull in the new color in with the chain.
Start with black yarn
Rnd 1: st 6 sc in a mc [6]
Switch to brown yarn
Rnd 2: inc in each st around [12]
Switch to white yarn
Rnd 3: (sc, inc) x6 [18]
Rnd 4: (sc 2, inc) x6 [24]
Fasten off and snip leaving a long tail for sewing.

GOGGLE & STRAP:
NOTE: The goggle and strap are are worked as separate pieces – each beginning with a chainless foundation single crochet. If needed, you can find a video tutorial of how to make a chainless foundation single crochet in the resource library.
GOGGLE:
Row 1: fsc 28, join ends into a ring
Row 2-5: sc around [28]
Fasten off and snip leaving a long tail for sewing on. Fold ring in half, curling it into a double sided ring. Row 3 will end up being the center/top.
STRAP:
Row 1: fsc 54, ch 1, turn
Row 2: sc across [54]
Wait to fasten off strap until you’ve made and stuffed the head to be sure it is long enough to wrap around the head.
HEAD & BODY:
NOTES:
- The head & body are worked in continuous rounds – do not join after each round
- Begin with yellow yarn
Rnd 1: st 6 sc in a mc [6]
Rnd 2: inc in each st around [12]
Rnd 3: (sc, inc) x6 [18]
Rnd 4: (sc 2, inc) x6 [24]
Rnd 5: (sc 3, inc) x6 [30]
Rnd 6: (sc 4, inc) x6 [36]
Rnd 7: (sc 5, inc) x6 [42]
Rnd 8: (sc 6, inc) x6 [48]
Rnd 9: (sc 7, inc) x6 [54]
Rnd 10-26: sc around [54]

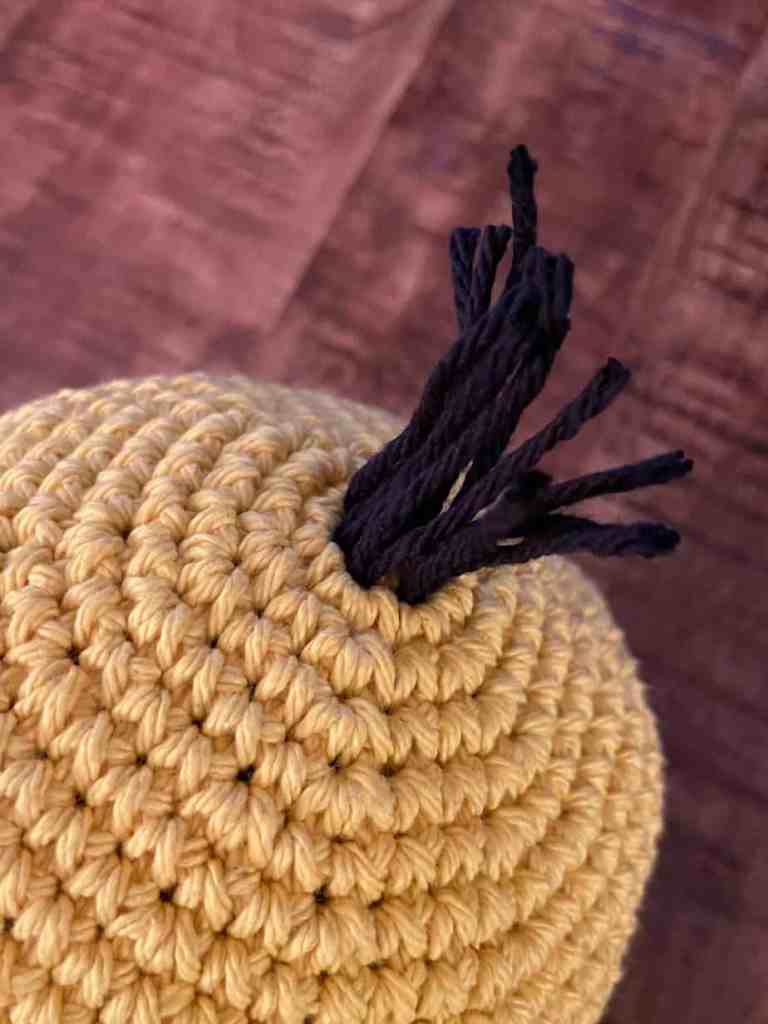
- ADD HAIR: Cut 6 strands of black yarn, 8″ each. Fold in half and pull one at a time to the inside in between rounds 1 & 2, plus one more straight through the center of the magic circle. Tie off to one another on the inside. Trim as desired.
- EYE: Sew the eye to the center of the head over rounds 11-19.
- GOGGLE & STRAP: Sew the goggle directly over the eye. Add the strap around the head, and sew along at several places to secure.
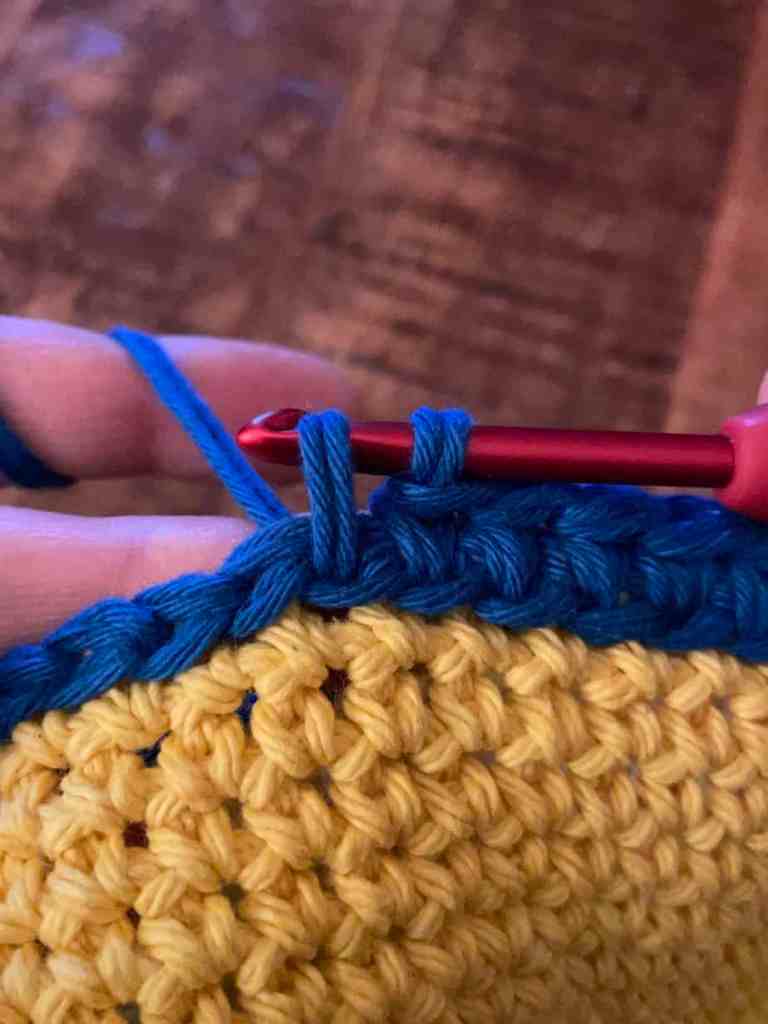
Switch to blue yarn…
Rnd 27: sl st around [54]
Rnd 28-30: sc around [54] Place Rnd 28 in between the top two loops of the sl st from Round 27
Rnd 31: (sc 7, dec) x6 [48]
Rnd 32: (sc 6, dec) x6 [42]
Rnd 33: (sc 5, dec) x6 [36]
Rnd 34: (sc 4, dec) x6 [30] STUFF
Rnd 35: (sc 3, dec) x6 [24]
Rnd 36: (sc 2, dec) x6 [18] STUFF
Rnd 37: (sc, dec) x6 [12]
Rnd 38: dec around [6]
Sl st in the next st and snip, leaving a long tail. Pull the tail through the final 2 loops. Using the yarn end and a tapestry needle, thread the yarn through the front loop only of the remaining 6 stitches and pull tightly to close. Bring the yarn to the inside and back out one of the side walls. Snip cleanly with the surface.
LEGS – make 2:
NOTES:
- The legs are worked from the bottom of the foot up
- The foot starts with a chain and is crocheted around both sides of the chain, and on up the leg
Using the black yarn, begin by chaining 5
Rnd 1: inc in 2nd ch from hk, sc 2, inc. Continue working on other side of the chain: inc, sc 2, inc [12]
Rnd 2: inc, sc 4, inc 2, sc 4, inc [16]
Rnd 3: BLO sc around [16]
Rnd 4: sc 6, dec 2, sc 6 [14]
Rnd 5: sc 5, dec 2, sc 5 [12]
Switch to blue yarn
Rnd 6-10: sc around [12]
Stuff and sew onto body/pants over rounds 33-36.
ARMS – make 2:
NOTE: The arms are worked in continuous rounds (do not join rounds) using the yellow yarn
Rnd 1: st 4 sc in a mc [4]
Rnd 2: inc around [8]
Rnd 3-14: sc around [8]
Fasten off leaving a long tail for sewing.
HANDS & GLOVES – make 2:
NOTES:
- The hands/gloves are worked in continuous rounds from the wrist down to the fingers, using black
- The fingers are worked individually onto the glove in continuous rounds
Leave a long starting tail and chain 10. Sl st to join into a ring and ch 1.
Rnd 1: sl st around [10]
Rnd 2: BLO sc around [10]
Rnd 3-4: sc around [10]
Rnd 5: (inc, sc 4) x2 [12]
Using stitch markers, split the round into fingers – each finger will have 4 stitches.
Picking up where you left off, begin making the first finger…
Rnd 6: sc 2, then join to opposite side of glove with a sc to close the round for the 1st finger, sc in next st, completing the first row of the finger.
Rnd 7-8: sc around [4]
Sl st and snip leaving a long tail. Using the yarn tail and a tapestry needle, weave the yarn through the front loop of the remaining 4 stitches and pull tightly to close. Bring yarn to inside.
Rejoin black yarn in the next available st, and repeat Rnd 6-8 for the 2nd and 3rd fingers. Pull all yarn tails to the inside except for the starting tail which you will use to sew on. Put glove onto hand and using a tapestry needle, pass the yarn back and forth several times under Rnd 1 to secure the glove onto the arm.

BIBS & STRAPS – make 2:
NOTES:
- The bibs and straps are worked in turning rows using the blue yarn – chain 1 and turn at the end of each row
- The turning chain does not count as a stitch
TROUSER BIBS:
Row 1: fsc 13, ch 1, turn
Rnd 2-3: sc across [13]
Fasten off leaving a long tail for sewing. Sew the bibs onto the center front and back, lining the first row of the bib over the first round of the blue pants (round 27).
TROUSER STRAPS:
Row 1: fsc 20
Fasten off and snip leaving a very long tail for sewing on. Sew the straps onto the corners of the bibs, but wait to finish off the strap securing until after you sew on the arms – then you’ll know exactly where the strap should be sewn up over the shoulder. If using the optional buttons for the straps, sew those on now.
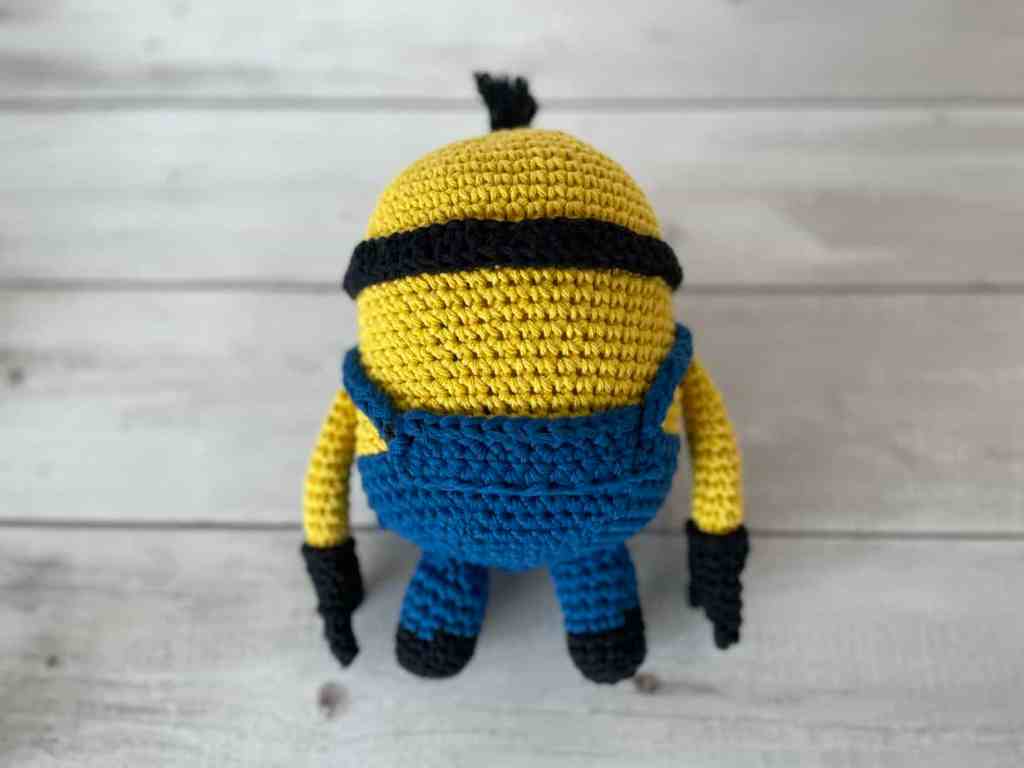
FINALLY, FINISH UP YOUR MINION CROCHET PATTERN:
- Stuff the arms lightly and sew them to the sides at round 21.
- Pull the trouser straps up over the shoulder and finish securing on by using a tapestry needle and taking several stitches all along it from out to in, out to in.
- Using black yarn, embroider on the mouth.
- Clean up, bringing all yarn tails to the inside and snipping clean with the surface.
- Stop, admire your skills and enjoy your Minion! Well done!
Show Off Your Work! ✨
I can’t wait to see your adorable minions! Be sure to tag me on social media @offthebeatenhook or use the hashtag #offthebeatenhook so I can admire your makes. ❤️
SOCIAL MEDIA YOUR THING?
Connect with me on your favorite social network!
🔗 Other Amigurumi Patterns To Check Out:
Did you love this Minion free crochet pattern? Want more free amigurumi crochet patterns? Check these out!
- Cat Crochet Pattern
- Octopus Crochet Pattern
- Bear Crochet Pattern
- Rabbit Crochet Pattern
- Orca Crochet Pattern
Leave a Reply