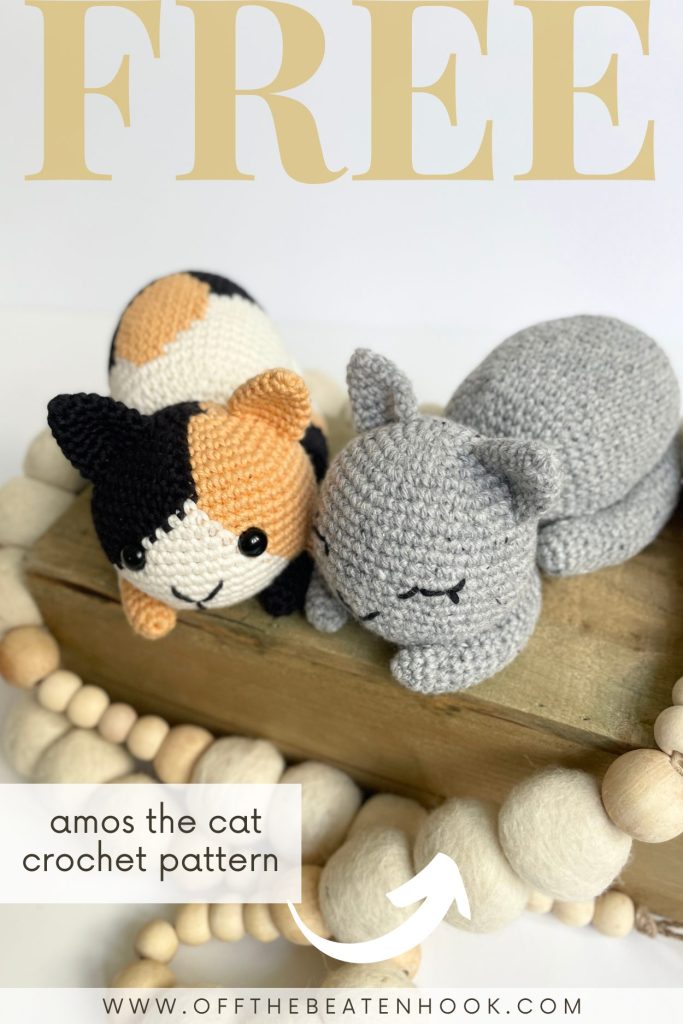
Looking for a fun and beginner-friendly project that’s both adorable and quick to make? This free crochet cat pattern is the perfect blend of cute and cuddly! Whether you’re crafting a gift for a cat-loving friend, making a soft toy for a little one, or just adding to your collection of handmade animals, this crochet cat loaf is a paw-sitively purrfect project.
This pattern uses just single crochet and works up fast, making it ideal for confident beginners and seasoned crocheters alike. You can customize it with different colors or add little accessories to give your cat a unique personality.
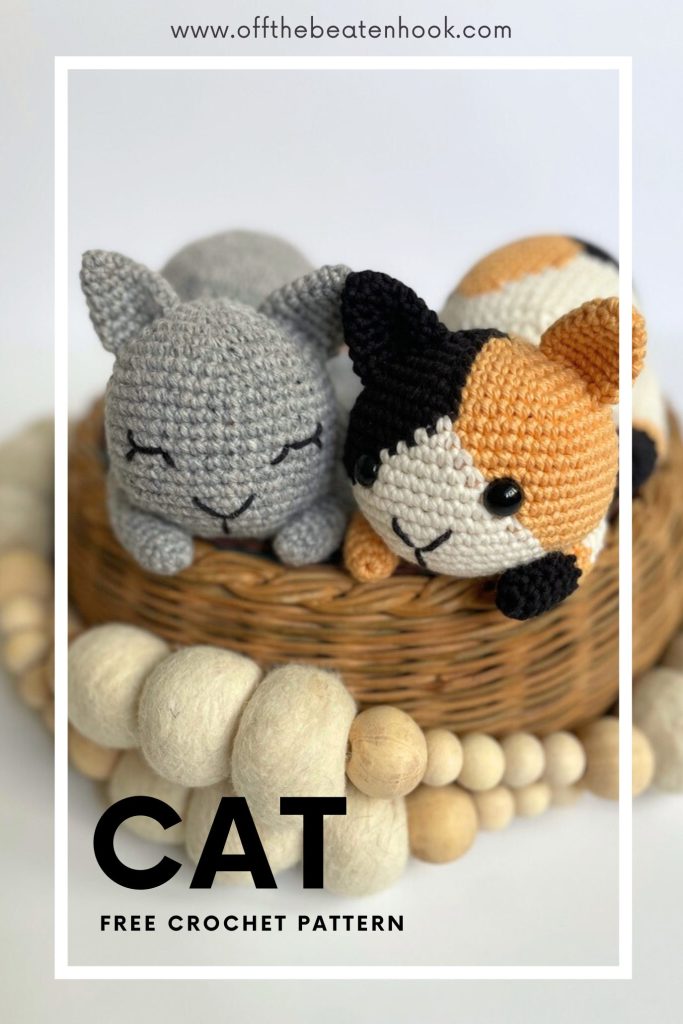
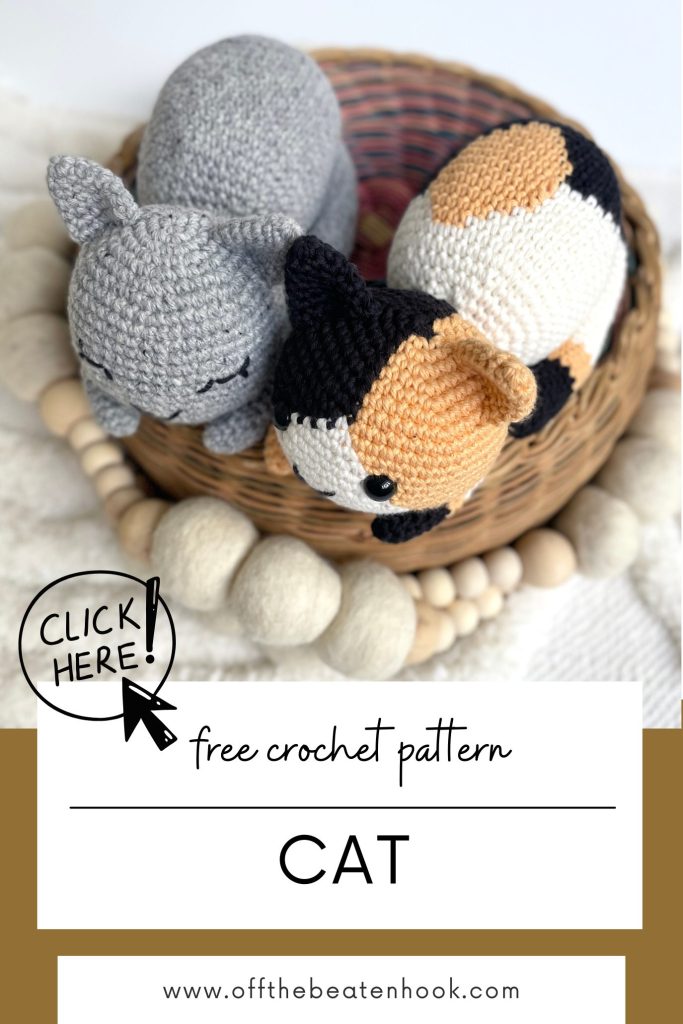
Jump into the free crochet cat pattern now, or pin it for later here!
Why You’ll Love the Free Crochet Cat Pattern
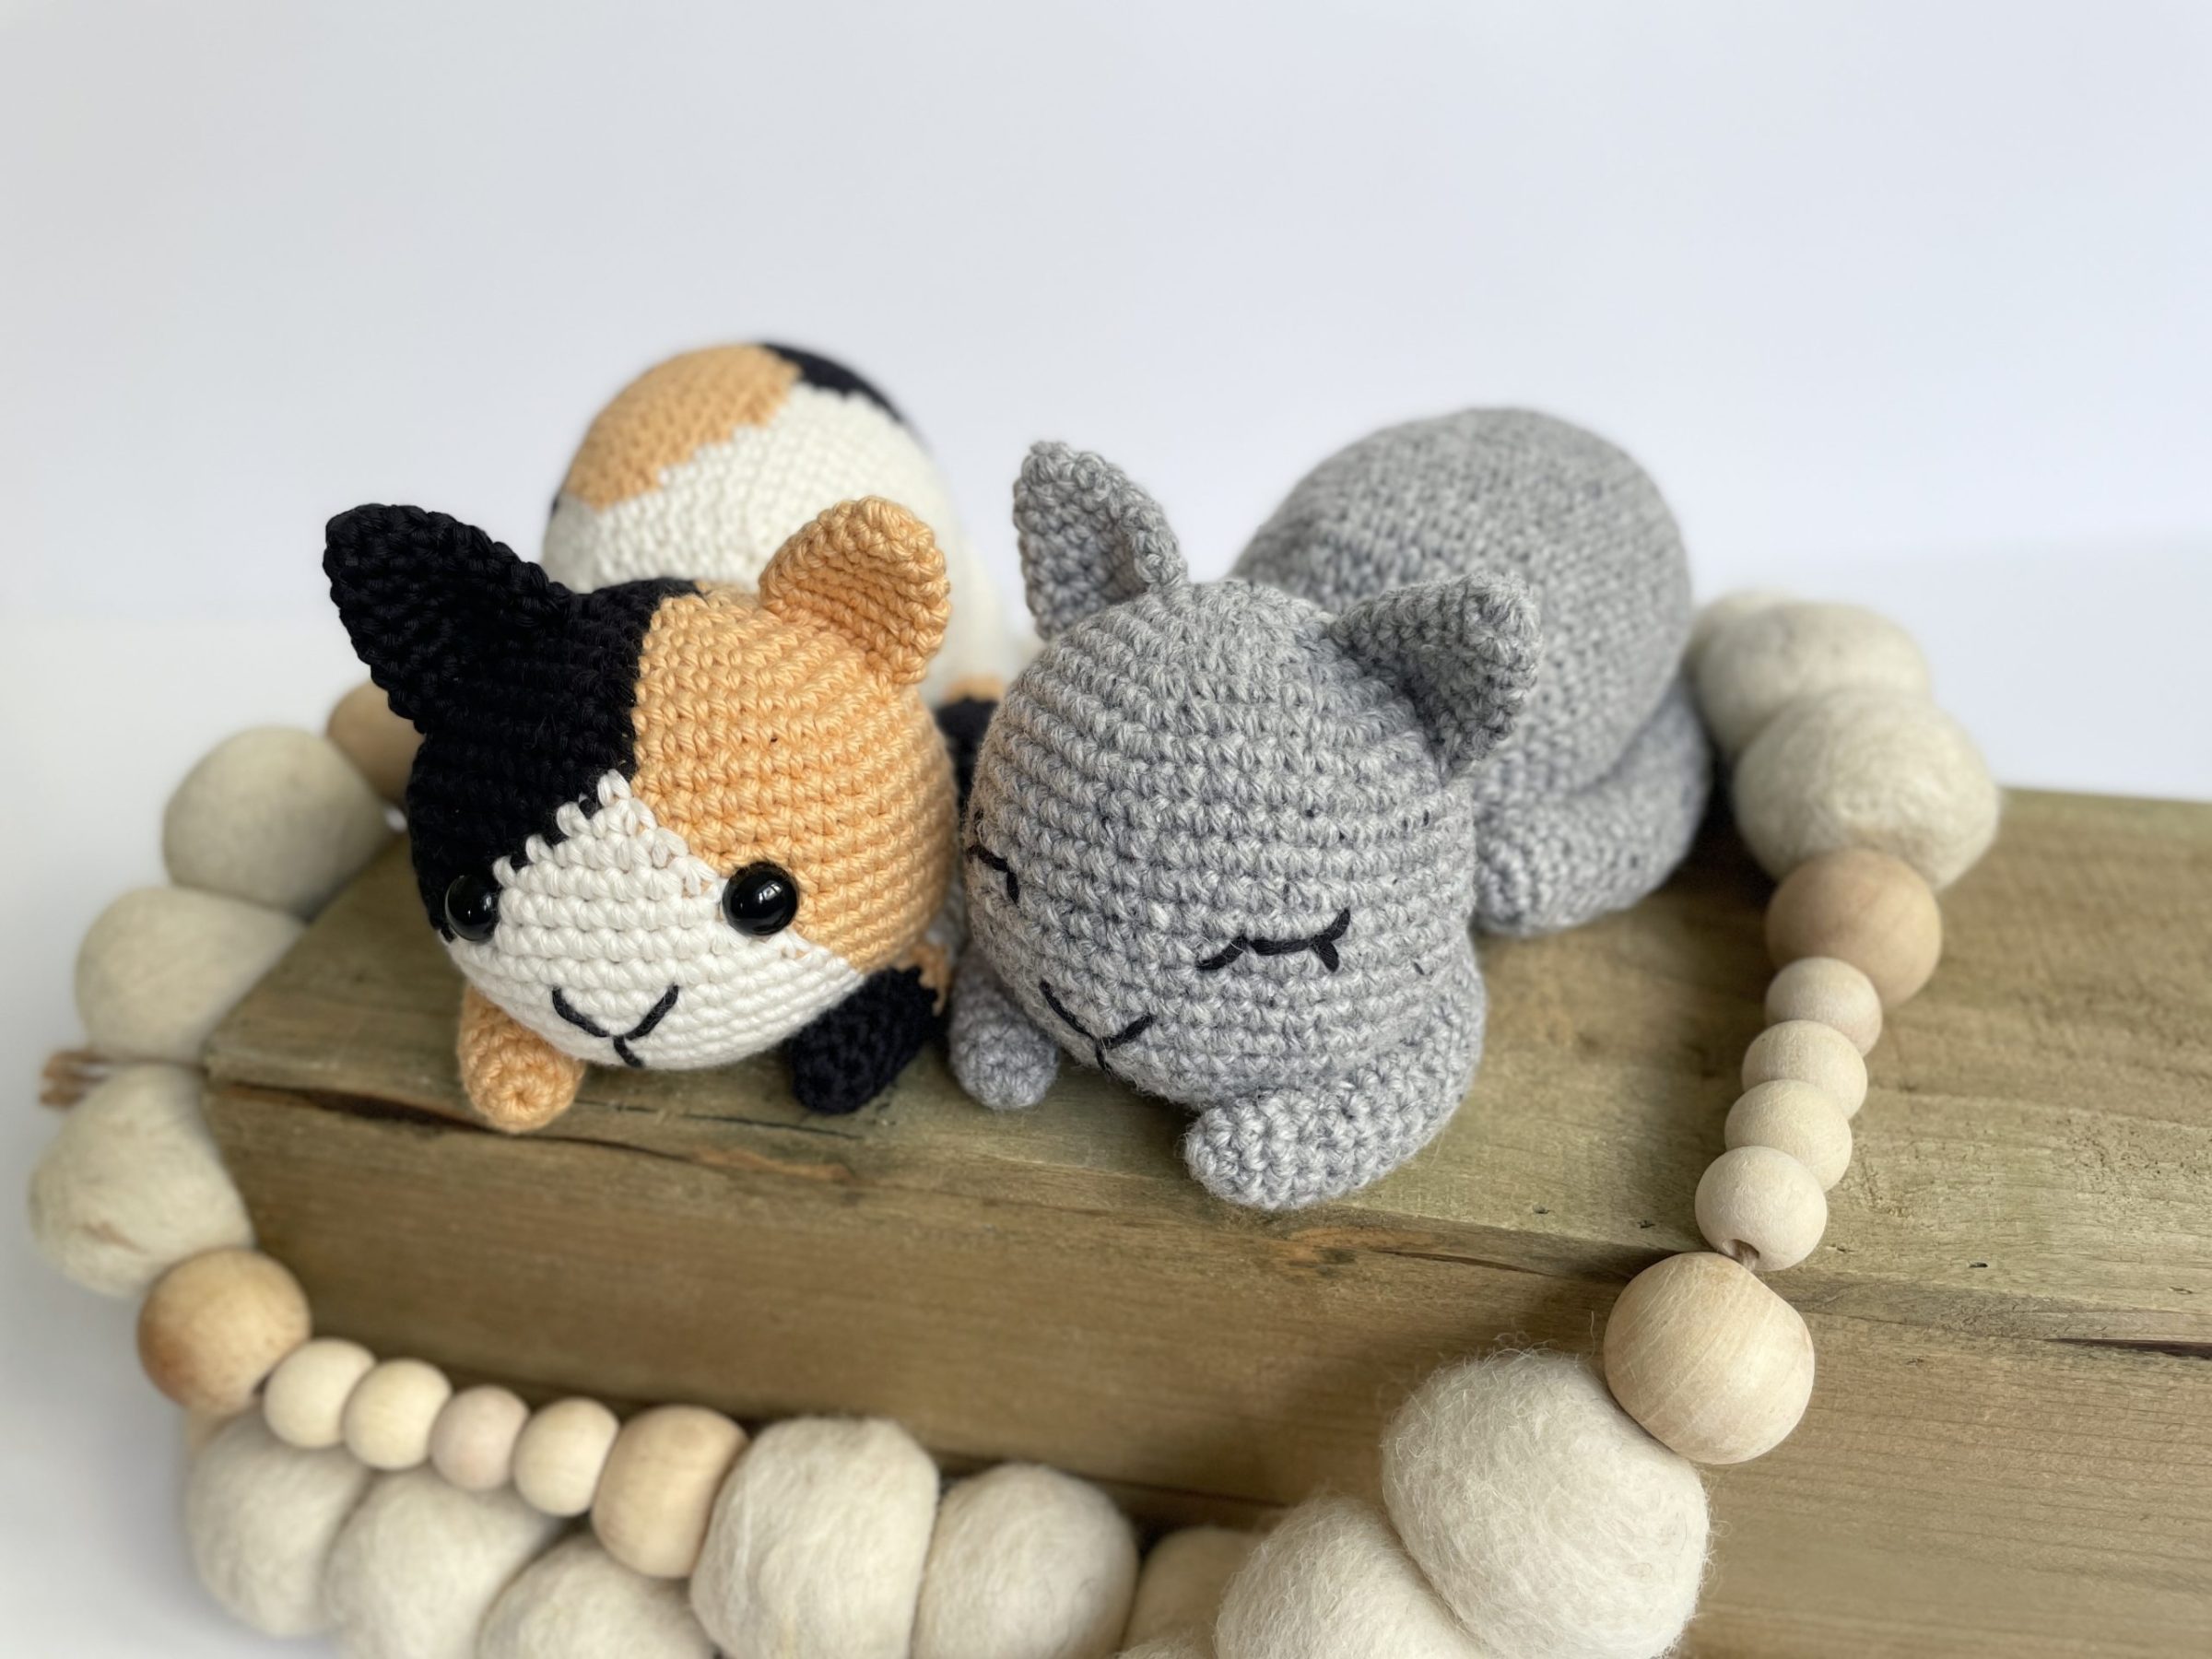
Whether you love the look of a classic calico cat or want something more minimalist and modern, this pattern includes two versions: a tri-color calico and a solid-color kitty (I made mine in gray, but you can choose any color that suits your style!).
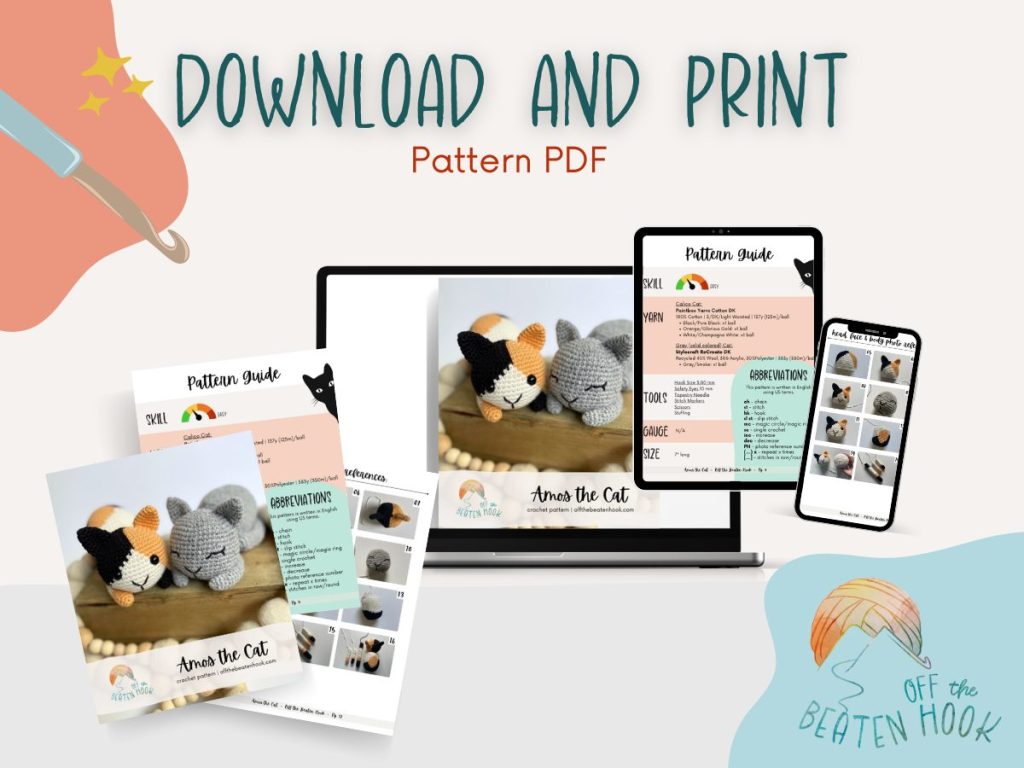
This crochet pattern is reader supported by ads on my blog. If you’d rather print the pattern for some cozy couch crocheting, you can find the ad-free, printable PDF in my shop here or on Ravelry here.
Policies & Disclaimers:
This crochet pattern is for PERSONAL USE ONLY. This pattern or parts of it may not be reproduced, resold, distributed, published, altered, translated, posted or shared without authorization. You can sell your finished items provided that you credit Off the Beaten Hook as the designer using this verbiage, “This pattern was designed by Lindsey Roe and Off the Beaten Hook.” Thank you for your respectfulness!
This post contains affiliate links for materials I use and love. If you purchase something using one of these links I may earn a small commission which in no way affects the cost to you. These partnerships help me support my small business which allows me to provide you with free crochet patterns. Thank you from the bottom of my heart for your support!
🌿 Eco-Friendly Crafting
What makes this crochet pattern eco-friendly and sustainable?
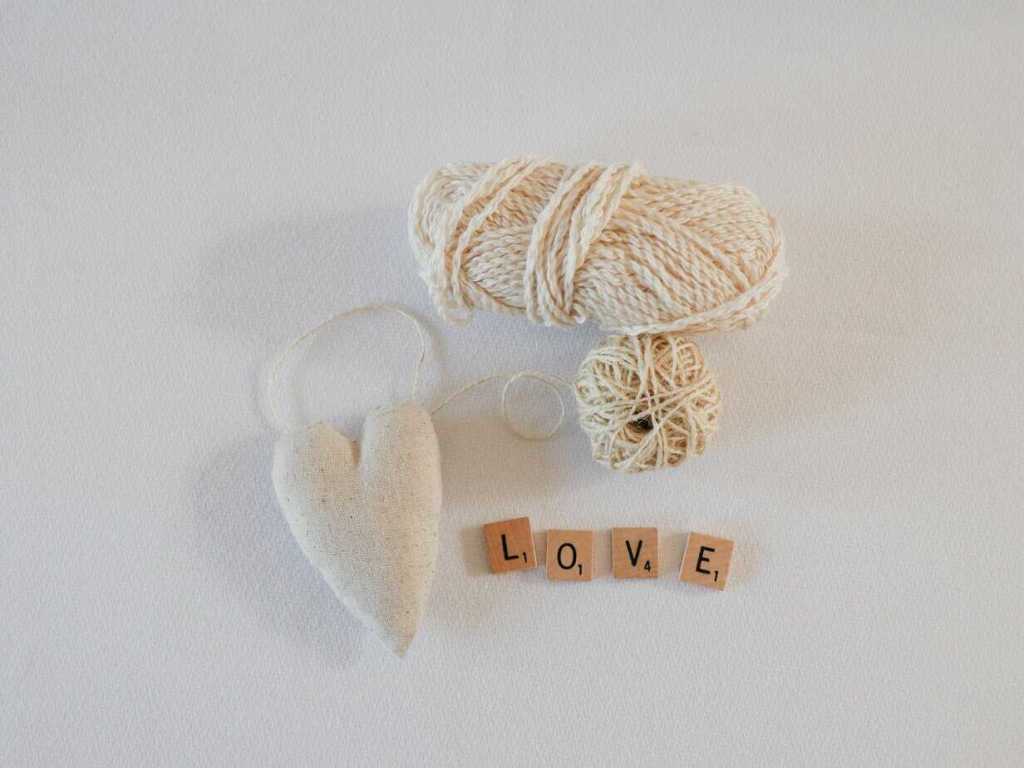
THE YARN: I use only sustainable and eco-friendly yarn that has been ethically grown/raised and processed, putting the people and the planet first. This is why I chose 100% natural yarn for this pattern.
HANDMADE FOR LONGEVITY: Creating your own cat stuffy promotes mindful consumption. This durable, handmade cat toy reduces the need for mass-produced alternatives.
THE SLOW YARN MOVEMENT: I’m participating in the Slow Yarn Movement. There’s far too much to talk about here, but please take a few minutes to learn about what this means by reading the article I wrote about the Slow Yarn Movement as part of my 6-part Sustainable Crochet Series.
If you’re interested in learning more about sustainable crochet you can read all about it in the 6-part series I wrote covering everything about Sustainable Crochet and how to implement it into your own crafting starting today!
Free Crochet Cat Pattern Guide:
Size & Gauge:
Size: 7″ using DK weight yarn + 3.00 mm hook
Stitch Multiple: N/A
Gauge: N/A
Materials you will need:
Yarn:
Calico Cat:
Paintbox Yarns Cotton DK | 100% Cotton | 3/DK/Light Worsted | 137y (125m)/ball
- White/Champagne White: x1 ball
- Black/Pure Black: x1 ball
- Orange/Glorious Gold: x1 ball
Gray (solid colored) Cat:
Stylecraft ReCreate DK | Recycled 40% Wool, 30& Acrylic, 30%Polyester | 383y (350m)/ball
- Gray/Smoke: x1 ball
If you would like to explore other yarn options, here are some that would work well for this pattern:
- Deramores Studio Organic Cotton DK | 100% Organic Cotton | Weight: 3/Light Worsted
- Stylecraft Naturals Organic Cotton | 100% Organic Cotton | Weight: 3/Light Worsted
- Rico Essentials Organic Cotton DK | 100% Organic Cotton | Weight: 3/Light Worsted
- Rowan Handknit Cotton | 100% Cotton | Weight: 3/Light Worsted
- Rowan Summerlite DK | 100% Cotton | Weight: 3/Light Worsted
Other tools and materials needed:
- Crochet Hook Size: 3.00 mm
- Safety Eyes: SIZE 10 mm (SERIOUSLY, these are the ones with the backs that are easier to put on!)
- Tapestry Needle (bent tips make all the difference!)
- Stitch Markers
- Scissors
- Stuffing
Abbreviations used in the free crochet cat pattern:
This pattern is written in English, using US terms. If needed, you can find a handy term conversion chart right here in my Resource Library.
ch – chain
st – stitch
hk – hook
sl st – slip stitch
sc – single crochet
inc – increase
dec – decrease
rep – repeat
(…) x – repeat instructions indicated number of times
[…] – number of stitches in row/round
PH – photo reference number

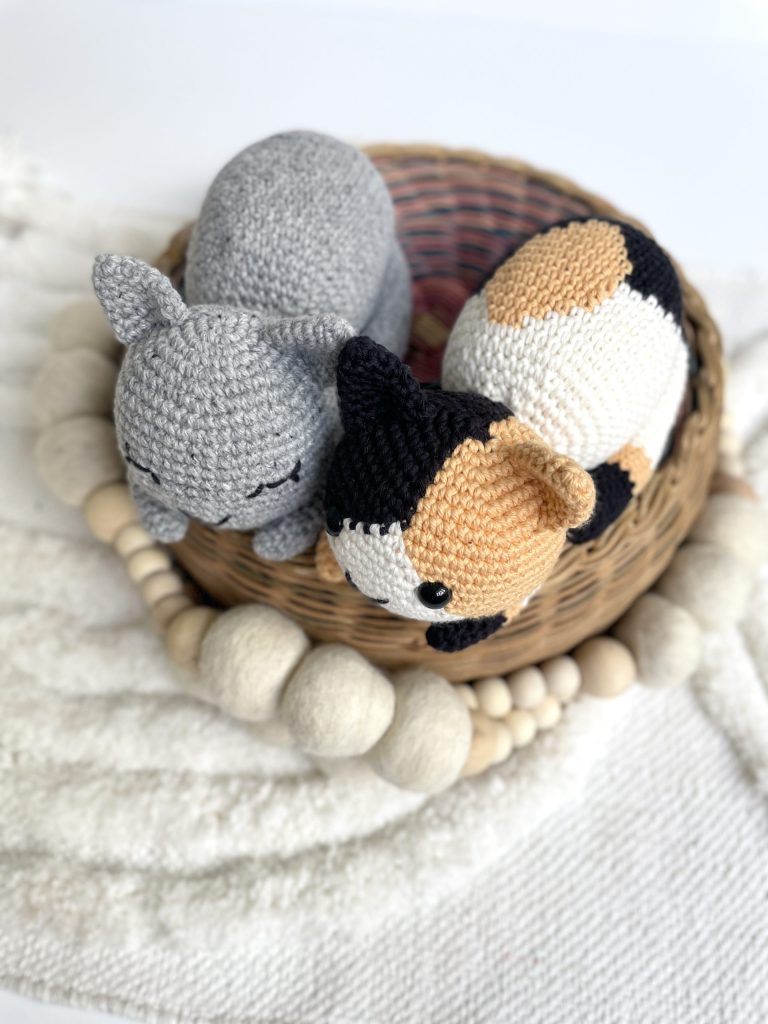
Meet Amos:
Amos the Cat was a curious guy,
With soft little paws and a thoughtful shy eye.
He liked quiet mornings and lukewarm tea,
And curling up solo with a good mystery.
He baked little biscuits with nutmeg and clove,
He read under blankets in his quiet alcove.
He traveled by train with a tote and a hat,
Just Amos, a suitcase, a journal, and map.
But once he believed he was doing life wrong,
That to be shy meant that he didn’t belong.
He thought he should sparkle, be louder, be more—
He tried and he tried, but it felt like a chore.
Until one sweet day, with the sun on his fur,
He heard his own heartbeat begin to confer:
“You don’t have to change to be brave or be true.
Your quiet is lovely, and so very you.”
Now Amos the Cat lives life from his core,
He travels, he reads, he bakes, he explores.
He once feared his softness, but now he can see—
Being true to yourself is the best way to be.
So here’s to the quiet, the thinkers, the kind,
The ones who explore with their hearts and their minds.
Like Amos the Cat, shy and splendid and true—
There’s magic in being exactly like you.
Amos the Crochet Cat Pattern:
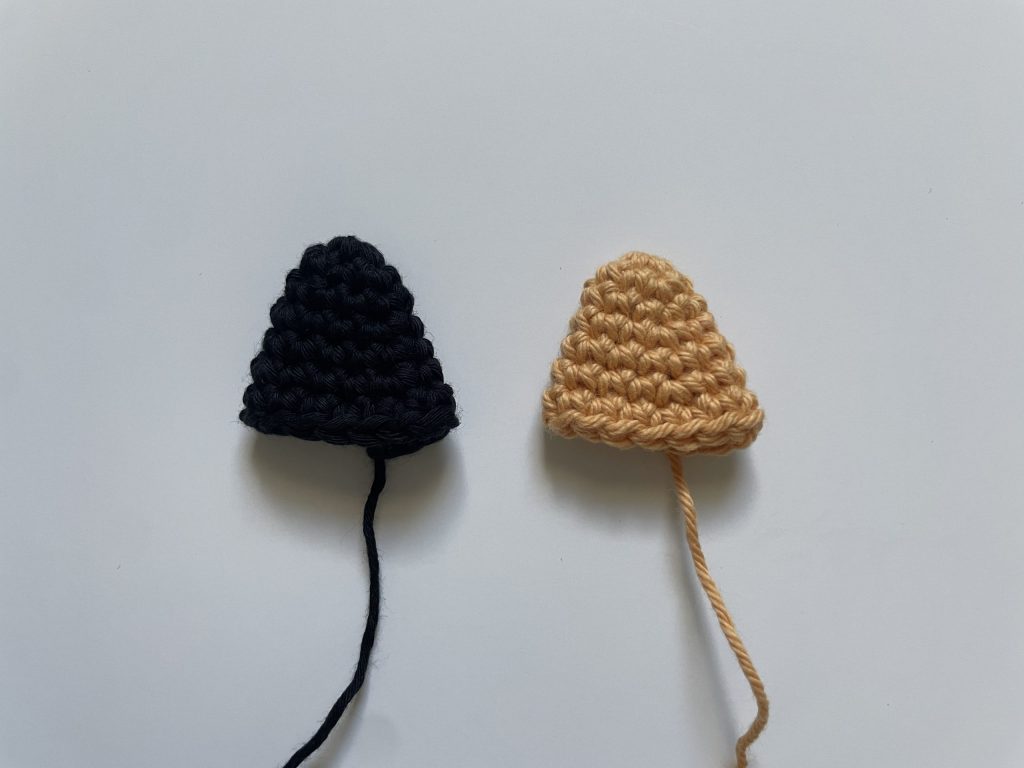
Ears – make 2
NOTES:
- The ears are worked in continuous rounds – do not join after each round
- For the calico cat color, make one ear in black and the other in orange
| Rnd 1: | st 6 sc in a magic circle | [6] |
| Rnd 2: | (sc 1, inc) x3 | [9] |
| Rnd 3: | sc around | [9] |
| Rnd 4: | (sc 2, inc) x3 | [12] |
| Rnd 5: | sc around | [12] |
| Rnd 6: | (sc 3, inc) x3 | [15] |
| Rnd 7: | sc around | [15] |
| Sl st to fasten off and snip leaving a tail to sew on. Flatten and pinch ears to curve them in a bit. | ||
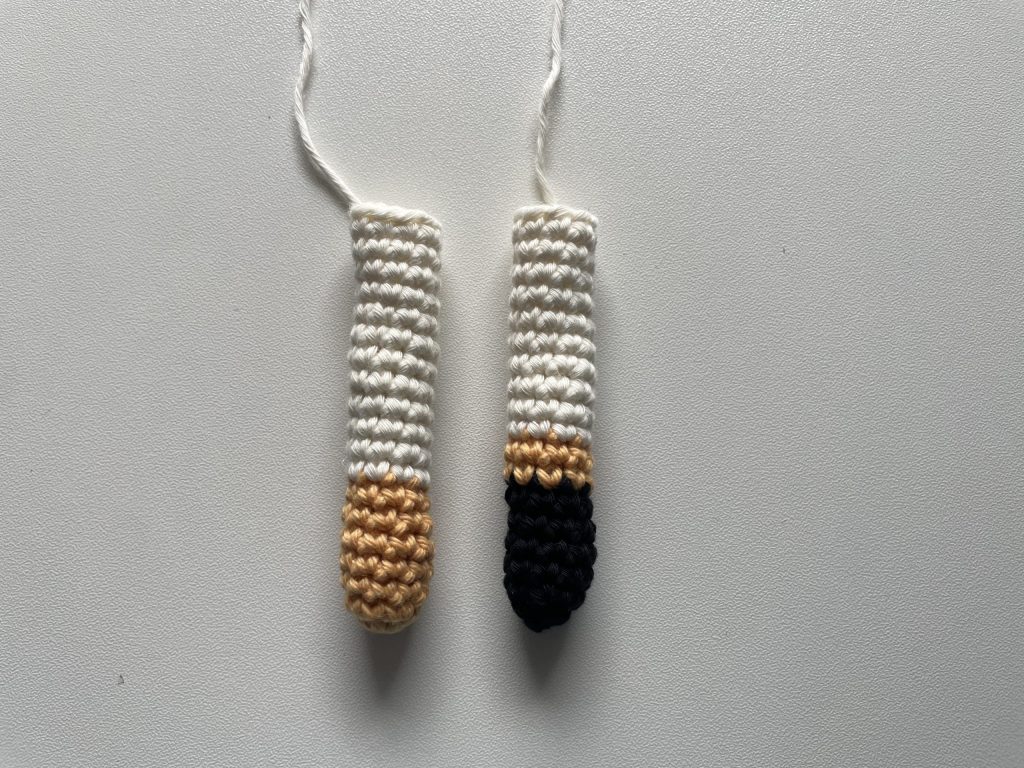
Legs – make 2
NOTES:
- The legs are worked in continuous rounds – do not join after each round
- For the calico cat color, the two legs have different color schemes – the colors for each of the rounds can be found below, after the method.
| Rnd 1: | st 6 sc in a magic circle | [6] |
| Rnd 2: | (sc 1, inc) x3 | [9] |
| Rnd 3-20: | sc around | [9] |
| Sl st to fasten off and snip leaving a tail to sew on. Stuff arms lightly – leave the last 6-7 rnds unstuffed so they will bend easily when sewn on. | ||
| Calico cat color scheme: | ||
| Leg 1: | Rnds 1-7 = OrangeRnds 8-20 = White | |
| Leg 2: | Rnds 1-7 = BlackRnds 8-9 = OrangeRnds 10-20 = White | |
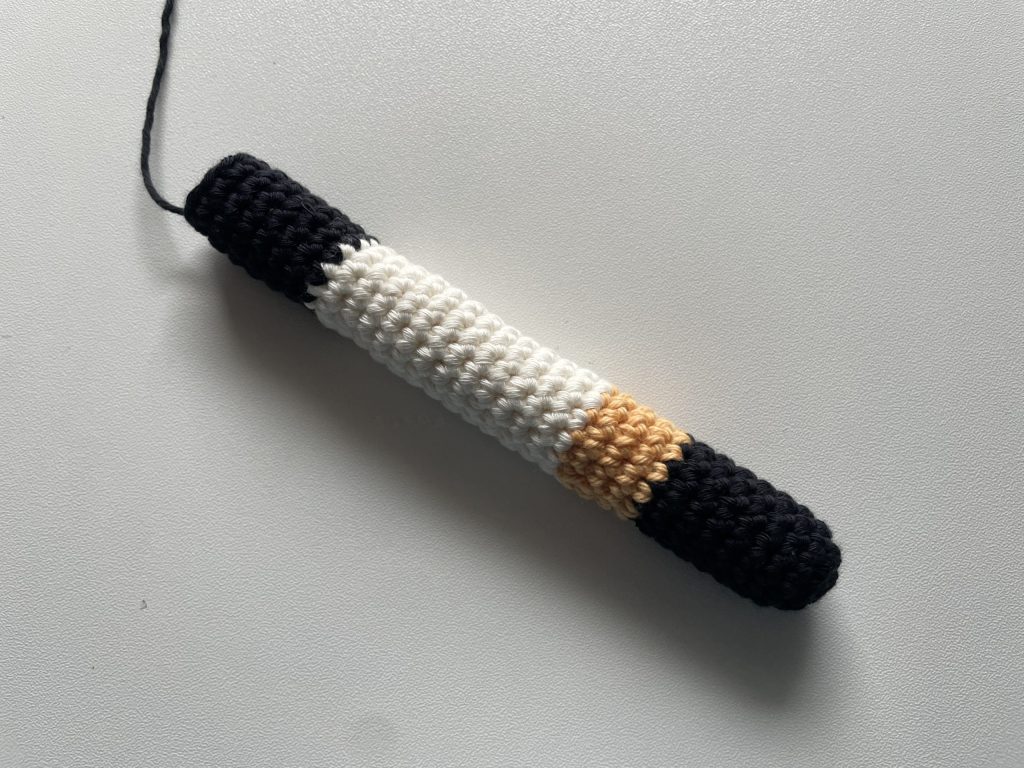
Tail
NOTES:
- The tail is worked in continuous rounds – do not join after each round
- For the calico cat color – the colors for each of the rounds can be found below, after the method.
| Rnd 1: | st 6 sc in a magic circle | [6] |
| Rnd 2: | inc around | [12] |
| Rnd 3-33: | sc around (stuff every few rnds) | [12] |
| Rnd 34: | dec around | [6] |
| Sl st to fasten off and snip leaving a tail to sew on. Leave the last 6 or 7 rows unstuffed so it will bend easily. | ||
| Calico cat color scheme: | ||
| Tail: | Rnds 1-9 = BlackRnds 10-13 = OrangeRnds 14-27 = WhiteRnds 28-34 = Black | |
Head
NOTES:
- For color changes, this pattern is written for the calico cat color, however if you want to make a solid colored cat, just use one color – the design, stitch counts and rows are exactly the same!
- The head is worked in continuous rounds – do not join after each round
- Take care with color changes – beginning in Rnd 2 you will introduce Orange.
- For color changes, B = black, O = orange, W = white
| For calico cat color, start with black. Orange will be introduced in Rnd 2 and onward. | ||
| Rnd 1: | st 6 sc in a magic circle | [6] |
| Rnd 2: | with B, inc in next 3 st, switch to Orange, with O inc in next 3 st | [12] |
| Rnd 3: | with B, (sc 1, inc) x3, with O, (sc 1, inc) x3 | [18] |
| Rnd 4: | with B, (sc 2, inc) x3, with O, (sc 2, inc) x3 | [24] |
| Rnd 5: | with B, (sc 3, inc) x3, with O, (sc 3, inc) x3 | [30] |
| Rnd 6: | with B, (sc 4, inc) x3, with O, (sc 4, inc) x3 | [36] |
| Rnd 7: | with B, (sc 5, inc) x3, with O, (sc 5, inc) x3 | [42] |
| Rnd 8: | with B, (sc 6, inc) x3, with O, (sc 6, inc) x3 | [48] |
| White will be introduced in Rnd 9. For Rnds 9-18 there will be no increasing or decreasing. You will simply sc 1 in each st around. Change color as indicated per round. | ||
| Rnd 9: | sc around: B 23, W 1, O 24 | [48] |
| Rnd 10: | sc around: O 1, B 21, W 3, O 23 | [48] |
| Rnd 11: | sc around: O 2, B 19, W 5, O 22 | [48] |
| Rnd 12: | sc around: O 3, B 17, W 7, O 21 | [48] |
| Rnd 13: | sc around: O 4, B 15, W 9, O 20 | [48] |
| Rnd 14: | sc around: O 5, B 13, W 11, O 19 | [48] |
| Rnd 15: | sc around: O 6, B 11, W 13, O 18 | [48] |
| Rnd 16: | sc around: O 7, B 9, W 15, O 17 | [48] |
| Rnd 17: | sc around: O 8, B 7, W 17, O 16 | [48] |
| Rnd 18: | sc around: O 9, B 5, W 19, O 15 | [48] |
| For the remainder of the head (Rnds 19-25) you will work with white only. | ||
| Rnd 19: | (sc 6, dec) x6 | [42] |
| Rnd 20: | (sc 5, dec) x6 | [36] |
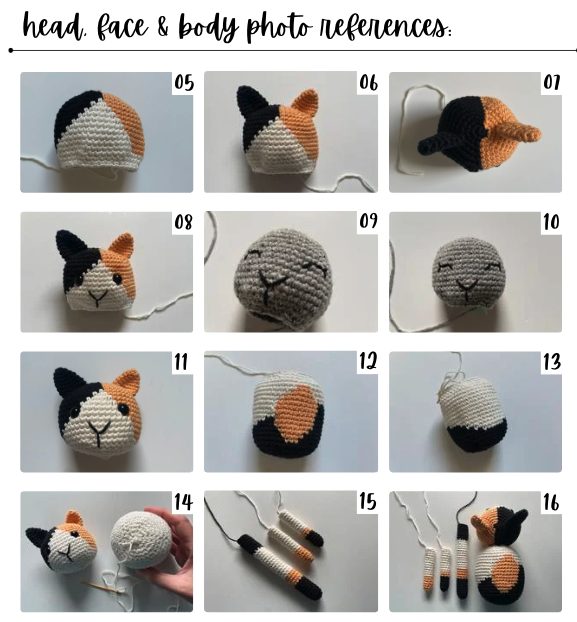
| Rnd 21: | (sc 4, dec) x6 | PH 05 | [30] |
| Sew ears on over Rnds 4-8, centered on top of head (PH 06 & 07). If using safety eyes, insert them between Rnds 13 & 14, spaced by 7 stitches (PH 08). If making “sleepy eyes”, embroider them over Rnds 13 & 14, using PH 09 & 10 for reference. Embroider nose & mouth beginning at Rnd 16 – refer to PH 08, 09 & 10 for shape and stitch placement. Stuff head. | ||
| Rnd 22: | (sc 3, dec) x6 | [24] |
| Rnd 23: | (sc 2, dec) x6 | [18] |
| Finishing stuffing head. | ||
| Rnd 24: | (sc 1, dec) x6 | [12] |
| Rnd 25: | dec around | [6] |
| Snip leaving a long tail and pull the tail through the 2 loops of your final st. Using the yarn tail on a tapestry needle, weave the needle through the front loops only of the remaining 6 st. Pull tightly to close. Bring yarn to inside. PH 11 | ||
Body
NOTES:
- For color changes, this pattern is written for the calico cat color, however if you want to make a solid colored cat, just use one color – the design, stitch counts and rows are exactly the same!
- The body is worked in continuous rounds – do not join after each round
- Take care with color changes – beginning in Rnd 10 you will introduce Orange.
- For color changes, B = black, O = orange, W = white
| For calico cat color, start with black. Orange will be introduced in Rnd 10. | ||
| Rnd 1: | st 6 sc in a magic circle | [6] |
| Rnd 2: | inc in each st around | [12] |
| Rnd 3: | (sc 1, inc) x6 | [18] |
| Rnd 4: | (sc 2, inc) x6 | [24] |
| Rnd 5: | (sc 3, inc) x6 | [30] |
| Rnd 6: | (sc 4, inc) x6 | [36] |
| Rnd 7: | (sc 5, inc) x6 | [42] |
| Rnd 8: | (sc 6, inc) x6 | [48] |
| Rnd 9: | sc around | [48] |
| White will be introduced in Rnd 10. For Rnds 10-23 there will be no increasing or decreasing. You will simply sc 1 in each st around. Change color as indicated per round. | ||
| Rnd 10: | sc around: B 15, O 3, B 30 | [48] |
| Rnd 11: | sc around: B 14, O 5, B 10, W 7, B 12 | [48] |
| Rnd 12: | sc around: B 13, O 7, B 7, W 11, B 10 | [48] |
| Rnd 13: | sc around: B 12, O 9, B 4, W 15, B 8 | [48] |
| Rnd 14: | sc around: B 12, O 9, B 2, W 19, B 6 | [48] |
| Rnd 15: | sc around: B 12, O 9, W 25, B 2 | [48] |
| Rnd 16: | sc around: B 12, O 9, W 27 | [48] |
| Rnd 17: | sc around: W 6, B 6, O 9, W 27 | [48] |
| Rnd 18: | sc around: W 9, B 3, O 9, W 27 | [48] |
| Rnd 19: | sc around: W 13, O 7, W 28 | [48] |
| Rnd 20: | sc around: W 14, O 5, W 29 | [48] |
| Rnd 21: | sc around: W 15, O 3, W 30 | [48] |
| Stuff body. For the remainder of the body (Rnds 22-30) you will work with white only. PH 12, 13 & 14 | ||
| Rnd 22-23: | sc around | [48] |
| Rnd 24: | (sc 6, dec) x6 | [42] |
| Rnd 25: | (sc 5, dec) x6 | [36] |
| Rnd 26: | (sc 4, dec) x6 | [30] |
| Rnd 27: | (sc 3, dec) x6 | [24] |
| Rnd 28: | (sc 2, dec) x6 | [18] |
| Stuff body again. | ||
| Rnd 29: | (sc 1, dec) x6 | [12] |
| Rnd 30: | dec around | [6] |
| Snip leaving a long tail and pull the tail through the 2 loops of your final st. Using the yarn tail on a tapestry needle, weave the needle through the front loops only of the remaining 6 st. Pull tightly to close. Bring yarn to inside. PH 14 | ||

Assembly

Show Off Your Work! ✨
I can’t wait to see your beautiful kitties! Be sure to tag me on social media @offthebeatenhook or use the hashtag #offthebeatenhook so I can admire your makes. ❤️
🔗 Other Free Amigurumi Patterns To Check Out:
Pin this free crochet cat pattern here:
Leave a Reply