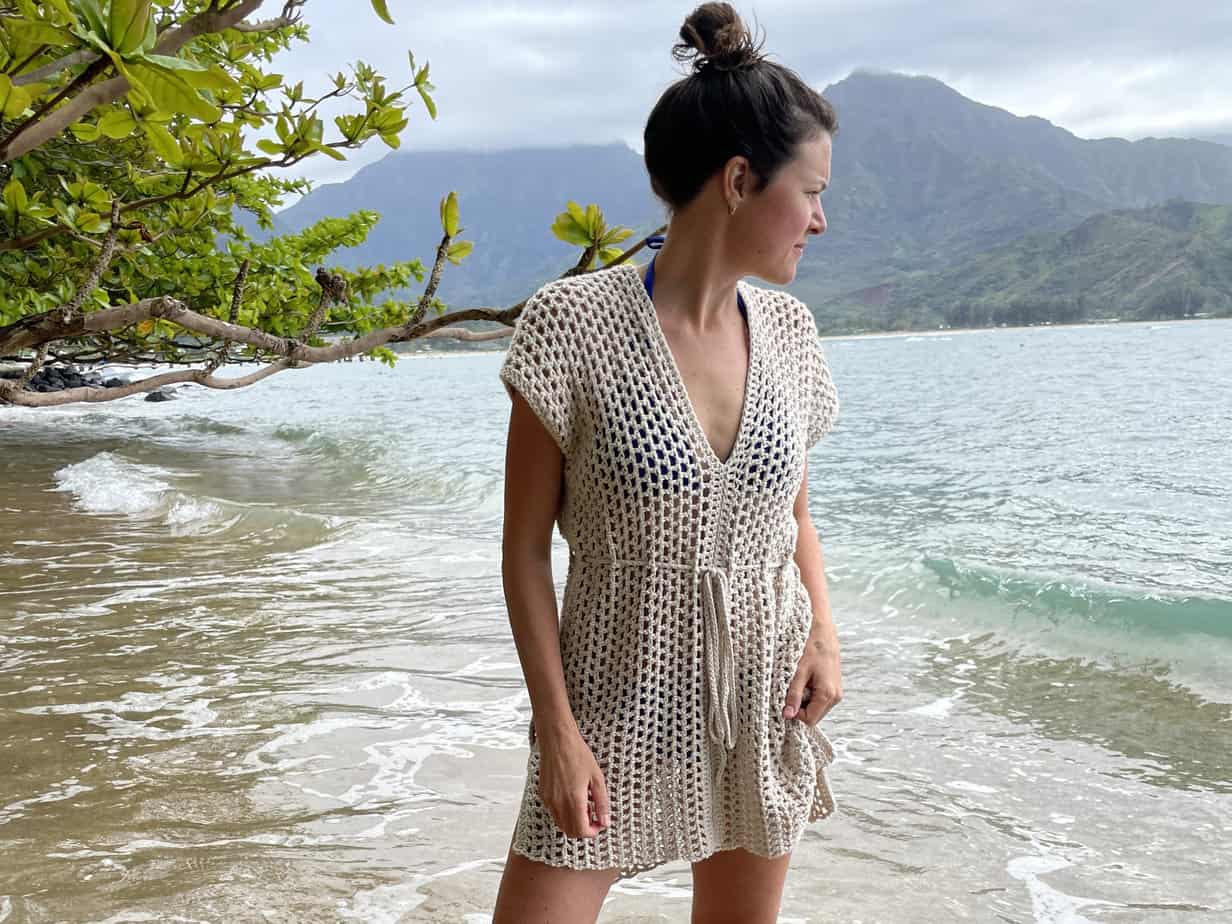
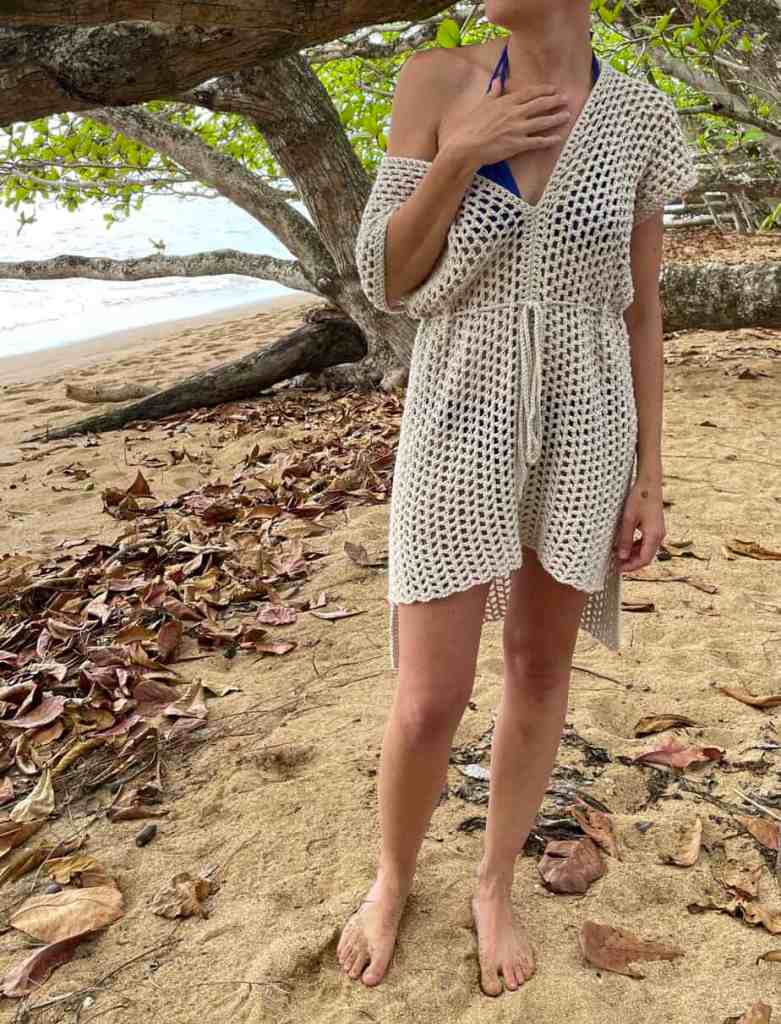
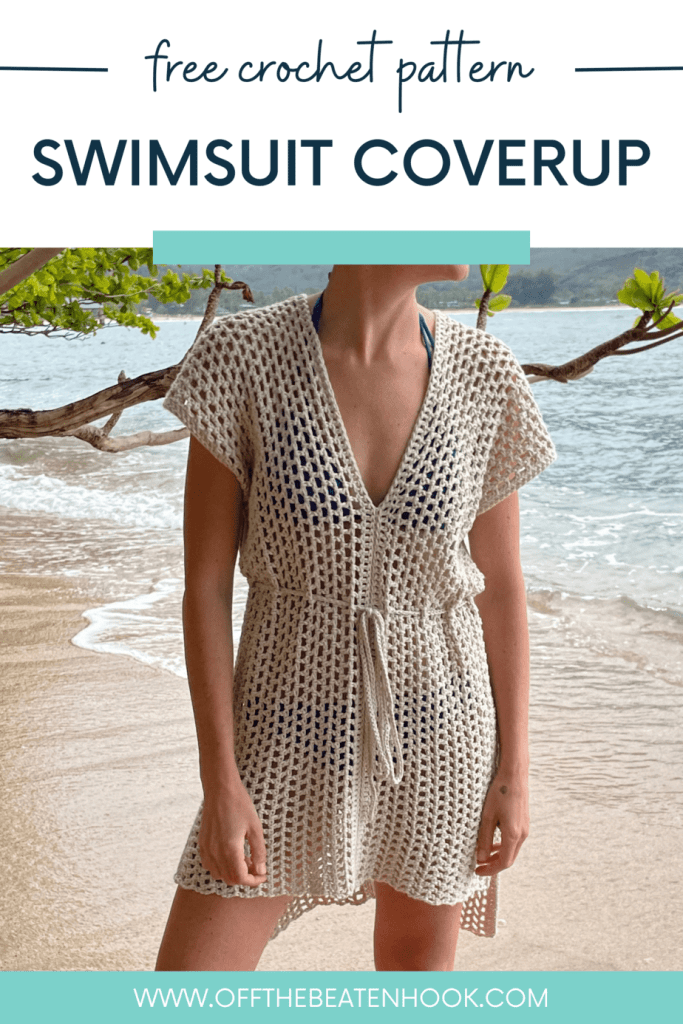
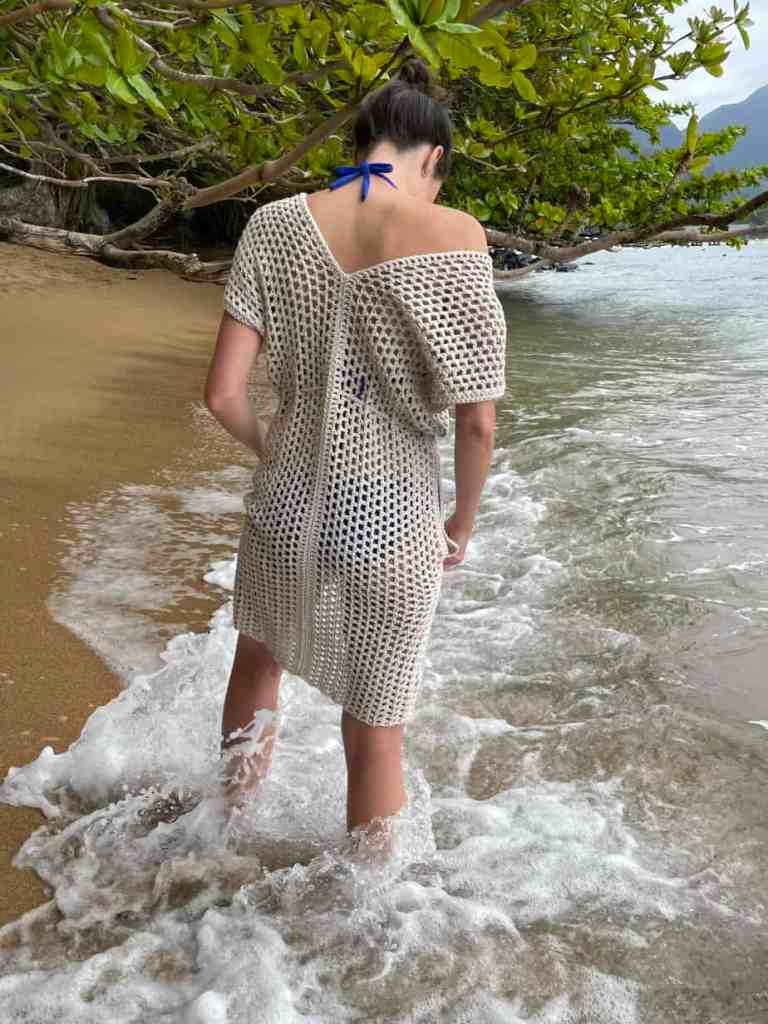
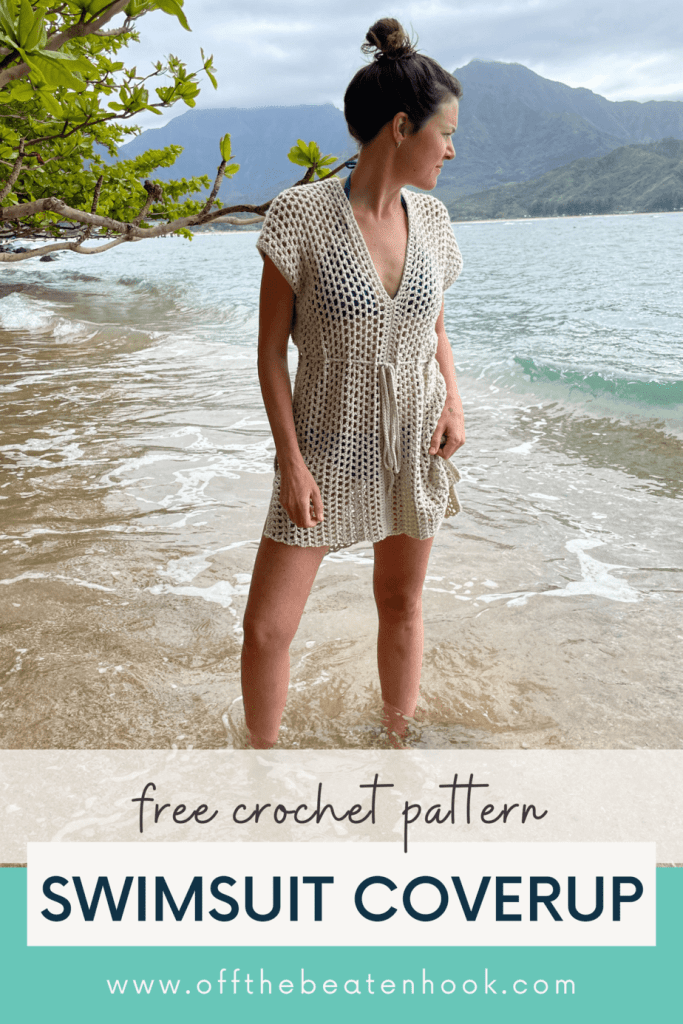
Here’s my alibi regarding the origins of the Pua Poa Crochet Beach Cover Up free crochet pattern. I absolutely could not find the perfect beach swimsuit coverup. And since I was on an extended stay in Kauai, Hawaii, with 80% of my days spent wearing a swimsuit, this was legitimate reason for panic. I knew exactly what I was looking for and I COULD NOT FIND IT. And once I get something in my head, I will settle for nothing less.
Is that a good thing or a bad thing?
The verdict’s still out on that one. Anyway, I finally just made one for myself. Enter: the Pua Poa Beach Swimsuit Coverup. Named after my favorite beach in Kauai, I’ve finally found exactly what I was looking for. And for you, obviously also looking for the perfect swimsuit coverup – look no further. Maybe this is exactly what you wanted too.
Start the Crochet Beach Cover Up pattern now, or pin it for later here:

LOVE COLLECTING Patterns?
If you love collecting crochet patterns, you might enjoy my Fiber Love Club — it gives you lifetime access to every pattern I’ve ever designed (plus all future releases).
Instead of buying patterns one by one, unlock the full pattern vault forever in one simple payment.
Why You’ll Love This Crochet Beach Cover Up
- Timeless Design: The delicate, textured stitch used in this pattern creates a beautiful, subtle drape.
- Easy to Style: Pick your favorite cover, modify it for the length you want, and off you go!
- Quick Make: This cover up works up quickly, making it a great project for last minute makes on the plane!
I’ve created a helpful video tutorial for this pattern as well. You can find that further down in this post or access it straight away on YouTube here.
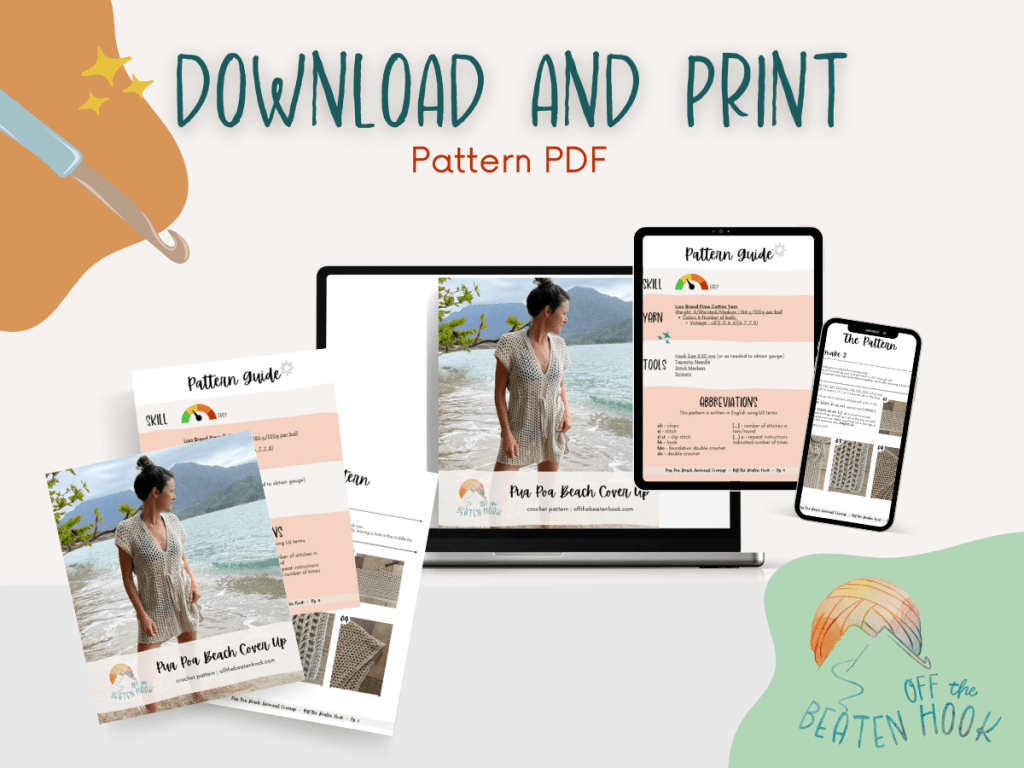
This crochet pattern is reader supported by ads on my blog. If you’d rather print the pattern for some cozy couch crocheting, you can find the ad-free, printable PDF in my shop here or on Ravelry here.
🌿 Eco-Friendly Crafting
What makes this crochet pattern eco-friendly and sustainable?
THE YARN: I use only sustainable and eco-friendly yarn that has been ethically grown/raised and processed, putting the people and the planet first. This is why I chose 100% natural yarn for this pattern.
HANDMADE FOR LONGEVITY: Creating your own garments promotes mindful consumption. This durable, handmade crochet beach cover up reduces the need for mass-produced alternatives.
THE SLOW YARN MOVEMENT: I’m participating in the Slow Yarn Movement. There’s far too much to talk about here, but please take a few minutes to learn about what this means by reading the article I wrote about the Slow Yarn Movement as part of my 6-part Sustainable Crochet Series.
If you’re interested in learning more about sustainable crochet you can read all about it in the 6-part series I wrote covering everything about Sustainable Crochet and how to implement it into your own crafting starting today!
Pua Poa Crochet Beach Cover Up Pattern Notes & Tips:
This crochet pattern is written in US terms. If needed, you can find a handy term conversion chart right here in my Resource Library. I recommend giving the pattern a read-through before you begin so you can visualize the big picture and consider any specific notes for help along the way! The printable pattern in my Etsy shop comes with LOTS of in-the-making photos for each step of the way as well.
Size & Gauge:
Gauge:
4″x4″ = 8 stitches x 8 rows (1 stitch = dc + ch)
I encourage you to make a swatch to be sure your gauge is correct. It’s also a good idea to measure now and again and try it on as you go along. This will ensure your Pua Poa Beach Swimsuit Coverup will fit right when it’s done! This coverup has a lot of drape and flexibility so gauge is a general guideline.
Sizing:
This pattern is written in size XS with sizes S, M, L, XL, 2XL, 3XL, 4XL & 5XL following in parenthesis like this: XS(S, M, L, XL)(2XL, 3XL, 4XL, 5XL). The size can be easily modified by taking your measurements and adjusting the number of stitches or rows. The model pictured is wearing size XS with height 5’4 and a bust of 33″.
TIP: The ad-free written pattern also includes a detail sizing grid with measurements in inches and the number of rows and stitches for each size. Using the sizing grid compared to your measurements will allow you to easily customize the coverup to your exact measurements.
Length: shoulder to hem front / shoulder to hem back:
XS: 28″ / 34″
S: 29″ / 35″
M: 30″ / 36″
L: 31″ / 37″
XL: 32″ / 38″
2XL: 33″ / 39″
3XL: 34″ / 40″
4XL: 35″ / 41″
5XL: 36″ / 42″
Bust:
XS: 36″
S: 40″
M: 44″
L: 48″
XL: 52″
2XL: 56″
3XL: 60″
4XL: 64″
5XL: 68″
Yarn:
Take your choice of yarn! Choose colors that bring you joy and fibers that feel good between your fingers. I use 100% cotton yarn for this coverup because it is breathable, washable and will <maybe/probably> be worn in an environment where you do not want it to itch in heat, salt and sweat.

Materials you will need for the Crochet Beach Cover Up Pattern:
YARN & TOOLS:
- Lion Brand Pima Cotton Yarn | Weight: 4/Worsted/Medium | 186 y/100g per ball
- Colors & Number of balls:
- Vintage – x4(5, 5, 5, 6)(6, 6, 6, 7)
- Colors & Number of balls:
- Crochet Hook: 5.5 mm
- Tapestry Needle
- Stitch Markers
- Measuring Tape
- Scissors
Abbreviations used in this pattern:
ch – chain
st – stitch
sk – skip
sl st – slip stitch
fdc – foundation double crochet
dc – double crochet
(…) x – repeat instructions indicated number of times
[…] – number of stitches in row/round
FAQ & Terms
Affiliate Links & Ad Support
This post may contain affiliate links. At no extra cost to you, purchases made through these links may earn Off the Beaten Hook a small commission which in no way affects the cost to you. The content on this site is supported by advertisements. By using this site, you agree not to circumvent, block, or tamper with these ads.
Copyright & Intellectual Property
All content on this blog, including free crochet patterns, instructions, charts, photos, videos, and written materials, are the property of Off the Beaten Hook and are protected under copyright and other intellectual property laws. Screenshots or any other method of copying the pattern for offline use or redistribution is prohibited. Sharing patterns in forums, social media groups, or private messages without permission is also prohibited.
Personal Viewing & Use Only
Free patterns published on this site are provided for viewing only on this blog. You may not copy, download, print, take screenshots, or redistribute the pattern in any form (digital or physical) outside this blog. You may not post the pattern or instructions elsewhere online or share it publicly without written consent.
Questions & Permissions
For questions about these permissions or to use or share patterns outside of these rules, please contact Off the Beaten Hook in writing.
Absolutely! You may sell finished items made from Off the Beaten Hook’s patterns, but please credit:
“Pattern by Off the Beaten Hook”
Pattern Support is only available in our Facebook Community group and Video Tutorials. No additional support is provided for modified patterns, alternate yarns, or changes to gauge.
The Pua Poa Crochet Beach Cover Up Pattern Video Tutorial:
The Crochet Beach Cover Up Pattern:
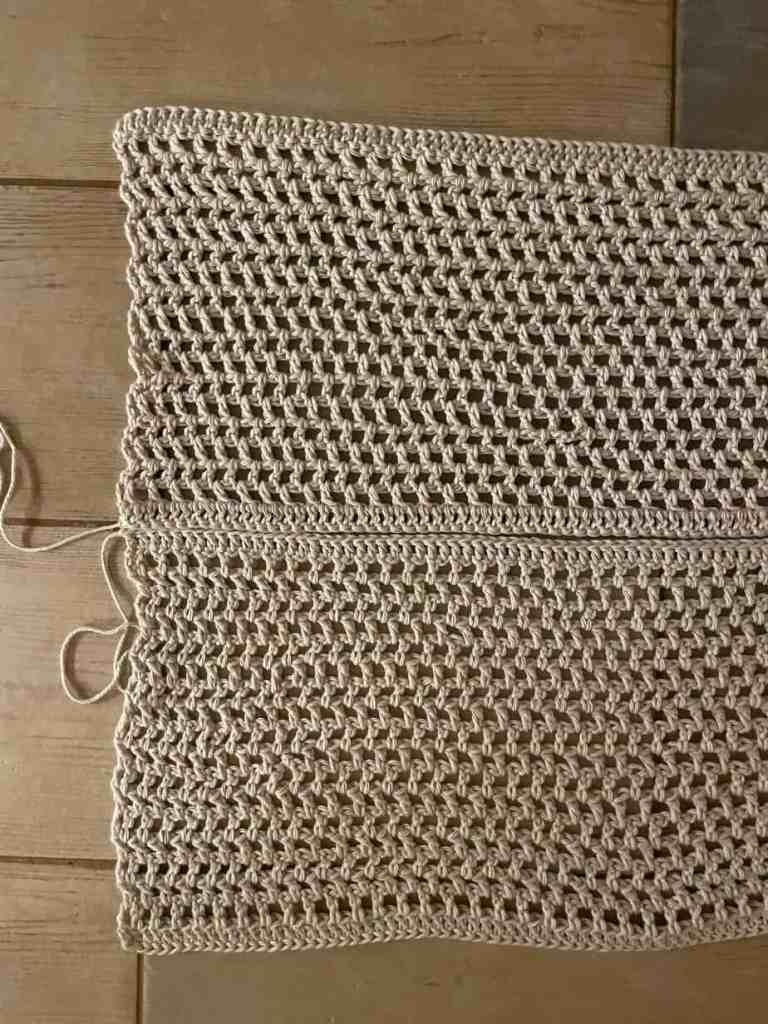
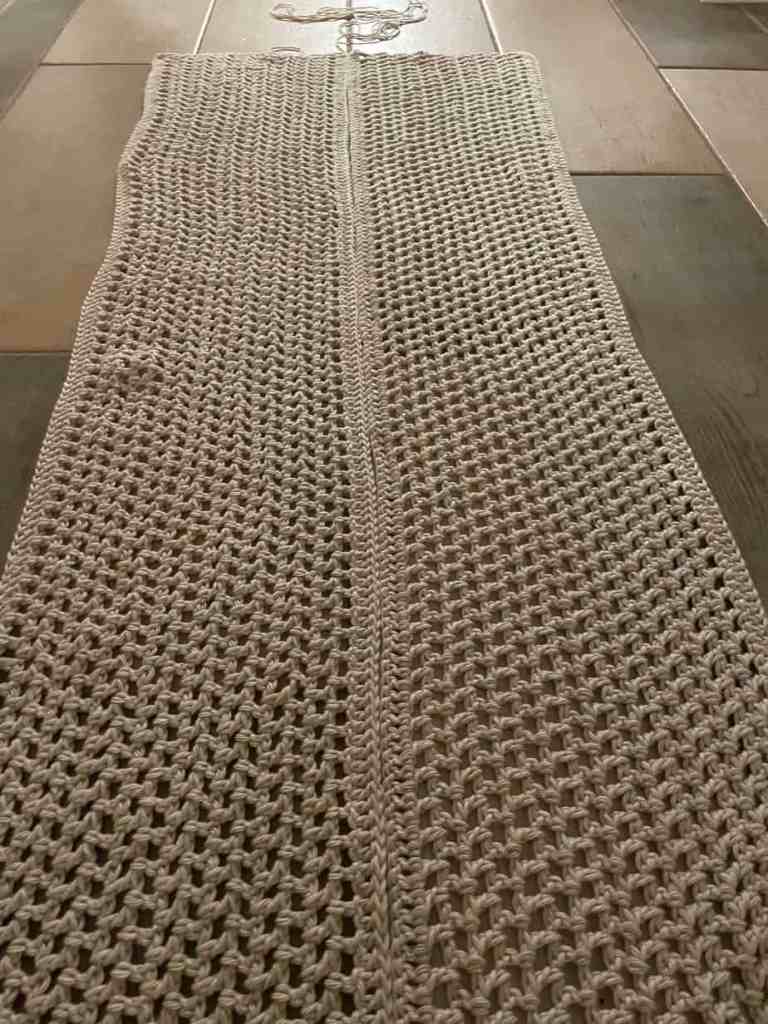
Panel – Make 2:
NOTES:
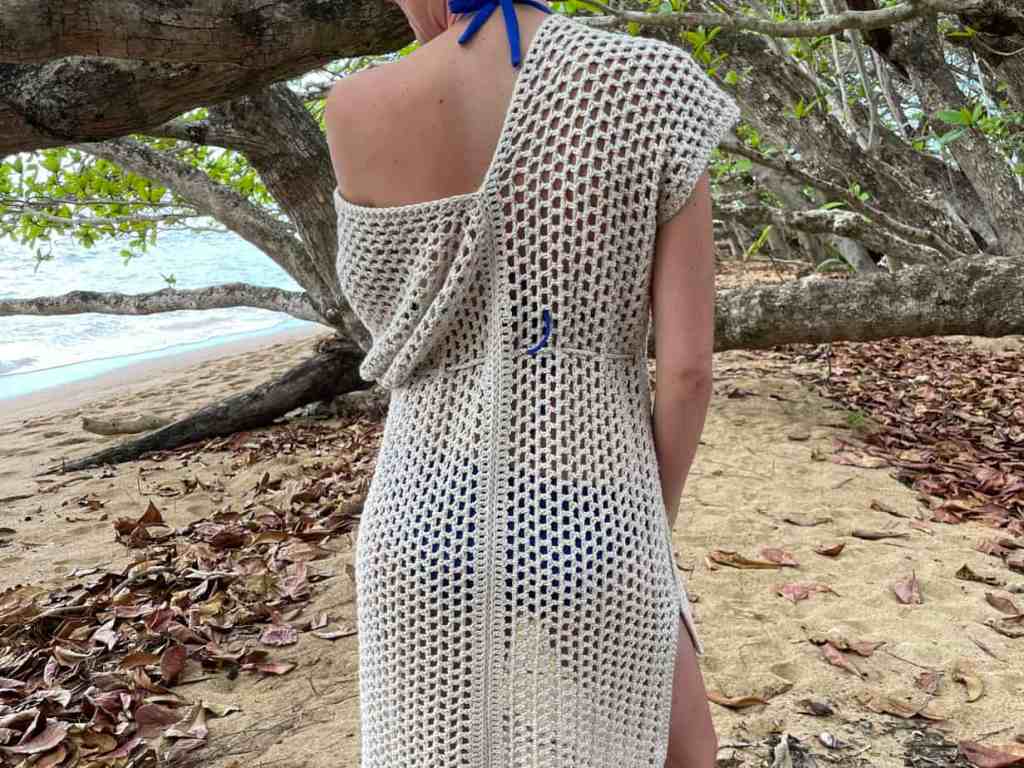
- The coverup is crocheted in turning rows, lengthwise from top to bottom.
- The turning chain of 3 counts as your first dc stitch of each row
- You will crochet 2 sides and then seam them together, leaving a hole in the middle for your head
Row 1: FDC 216(218, 220, 222, 224)(226, 228, 230, 232), ch 3, turn
Row 2: sk next st, (dc in next st, ch 1, sk 1) x across, dc in the final st, ch 3, turn
Row 3: (dc in next ch sp, ch 1) x across, ending with a dc in the last ch sp, ch 3, turn
Row 4-17(21, 25, 29, 33)(37, 41, 45, 49): repeat row 3. After your last row, ch 2, turn (ch 2 here doesn’t count as a st)
Row 18(22, 26, 30, 34)(38, 42, 46, 50): dc in each st across
Fasten off and weave in end.
BELT:
NOTES:
- The belt is made with a crochet cord – you can watch my video tutorial here
Determine how long you want your belt to be and cut a length of yarn that is SEVEN (7) times that long. If you need help determining how long you need your belt, try this: Borrow a long length of yarn and wrap it around your waist and tie it in a bow leaving the bow and it’s dangly legs however long you like. Then, measure that length of yarn and multiply it by 7 to get the length of yarn you need for these steps:
- From your yarn ball, take a long strand of yarn per the above instructions
- Fold the strand of yarn to where one side is about 1/3 longer than the other side
- Slip knot into your hook at the fold you just made
- Take the shorter end of the yarn to the back and into your hand as your working end. The longer end will dangle forward towards you.
- Next, yarn over from the non-working-hand yarn strand (the one dangling forward towards you) from front to back over your hook
- Next, yarn over with your working side of the yarn strand just like a normal yarn over and pull through both loops on the hook
- Repeat steps 5 & 6 until the entire yarn strand has been used up.
- When complete, pull both yarn ends through the final loops and tie off.
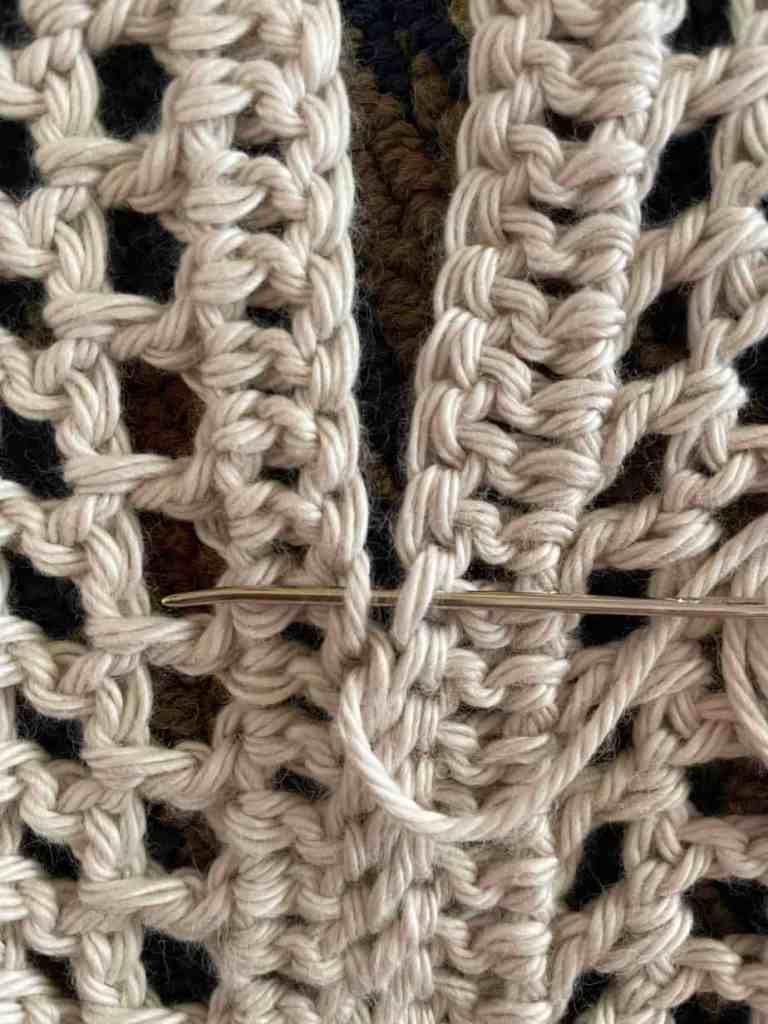
ASSEMBLING YOUR SWIMSUIT COVERUP:
CENTER SEAMING
- Lay the panels lengthwise, side by side with the final dc row together in the middle
- Choose which side you want to be the wrong side and be sure it is facing out
- From the edge of the coverup, moving toward the center, seam the sides together by passing the tapestry needle through the back two loops only of each side for 20″. This will be the front of the coverup. Secure and weave in end.
- Repeat on the opposite end, for 27″. The hole you’ve just created in the middle is the neckline where your head will go through. Before tying off, try on the coverup and make sure you are happy with the opening and the V it creates front and back. If you want the V deeper or more closed, do so now. Secure and weave in end.
- You are done with the center seam. The hole in the middle is where your head will go.
SIDE SEAMING
- Fold the coverup in half from top to bottom (still wrong side out), leaving a 6″(6″, 6″, 8″, 8″)(8″, 9″, 9″, 9″) off-set between the front and back, with the back being the longer side. Alternatively, decide how much longer you want the back to be (if any) and arrange the garment as-so right now.
- Measure 7″(7″, 7″, 8″, 8″)(8″, 9″, 9″, 9″) from the shoulder. This will be the arm opening. Alternatively, decide how big you want the arm hold to be (if different than the suggested measurements above) and arrange the garment as-so right now. Introduce your tapestry needle at the end of this measurement and whip stitch through 3 stitches down towards the hem.
- From here, count 14 stitches down and whip stitch through the next 3 stitches.
- Repeat step 3 until you get to the end of the side seam, allowing for a final gap on the outer thigh
- Weave in all ends.
- Weave the belt through every other loop around the middle of the coverup at the height you like!
- Try on the cover-up and flaunt your gorgeous body!
I would love to see your completed coverups. Please post pictures on instagram and tag me @offthebeatenhook and use #offthebeatenhook.
What would you like to do now? MAKE something else, or PIN this one for later reference?
Pin This Crochet Beach Cover Up Pattern For Later Here:

Here are some more free crochet patterns you may enjoy:
- Rainbow Love Crop Top- Free Crochet Pattern
- Mt Rainier Tweed Sweater – Free Crochet Pattern
- Diamond Ridge Throw Blanket – Free Crochet Pattern
- Seahorse Amigurumi – Free Crochet Pattern
- Milk Carton Amigurumi – Free Crochet Pattern
Leave a Reply