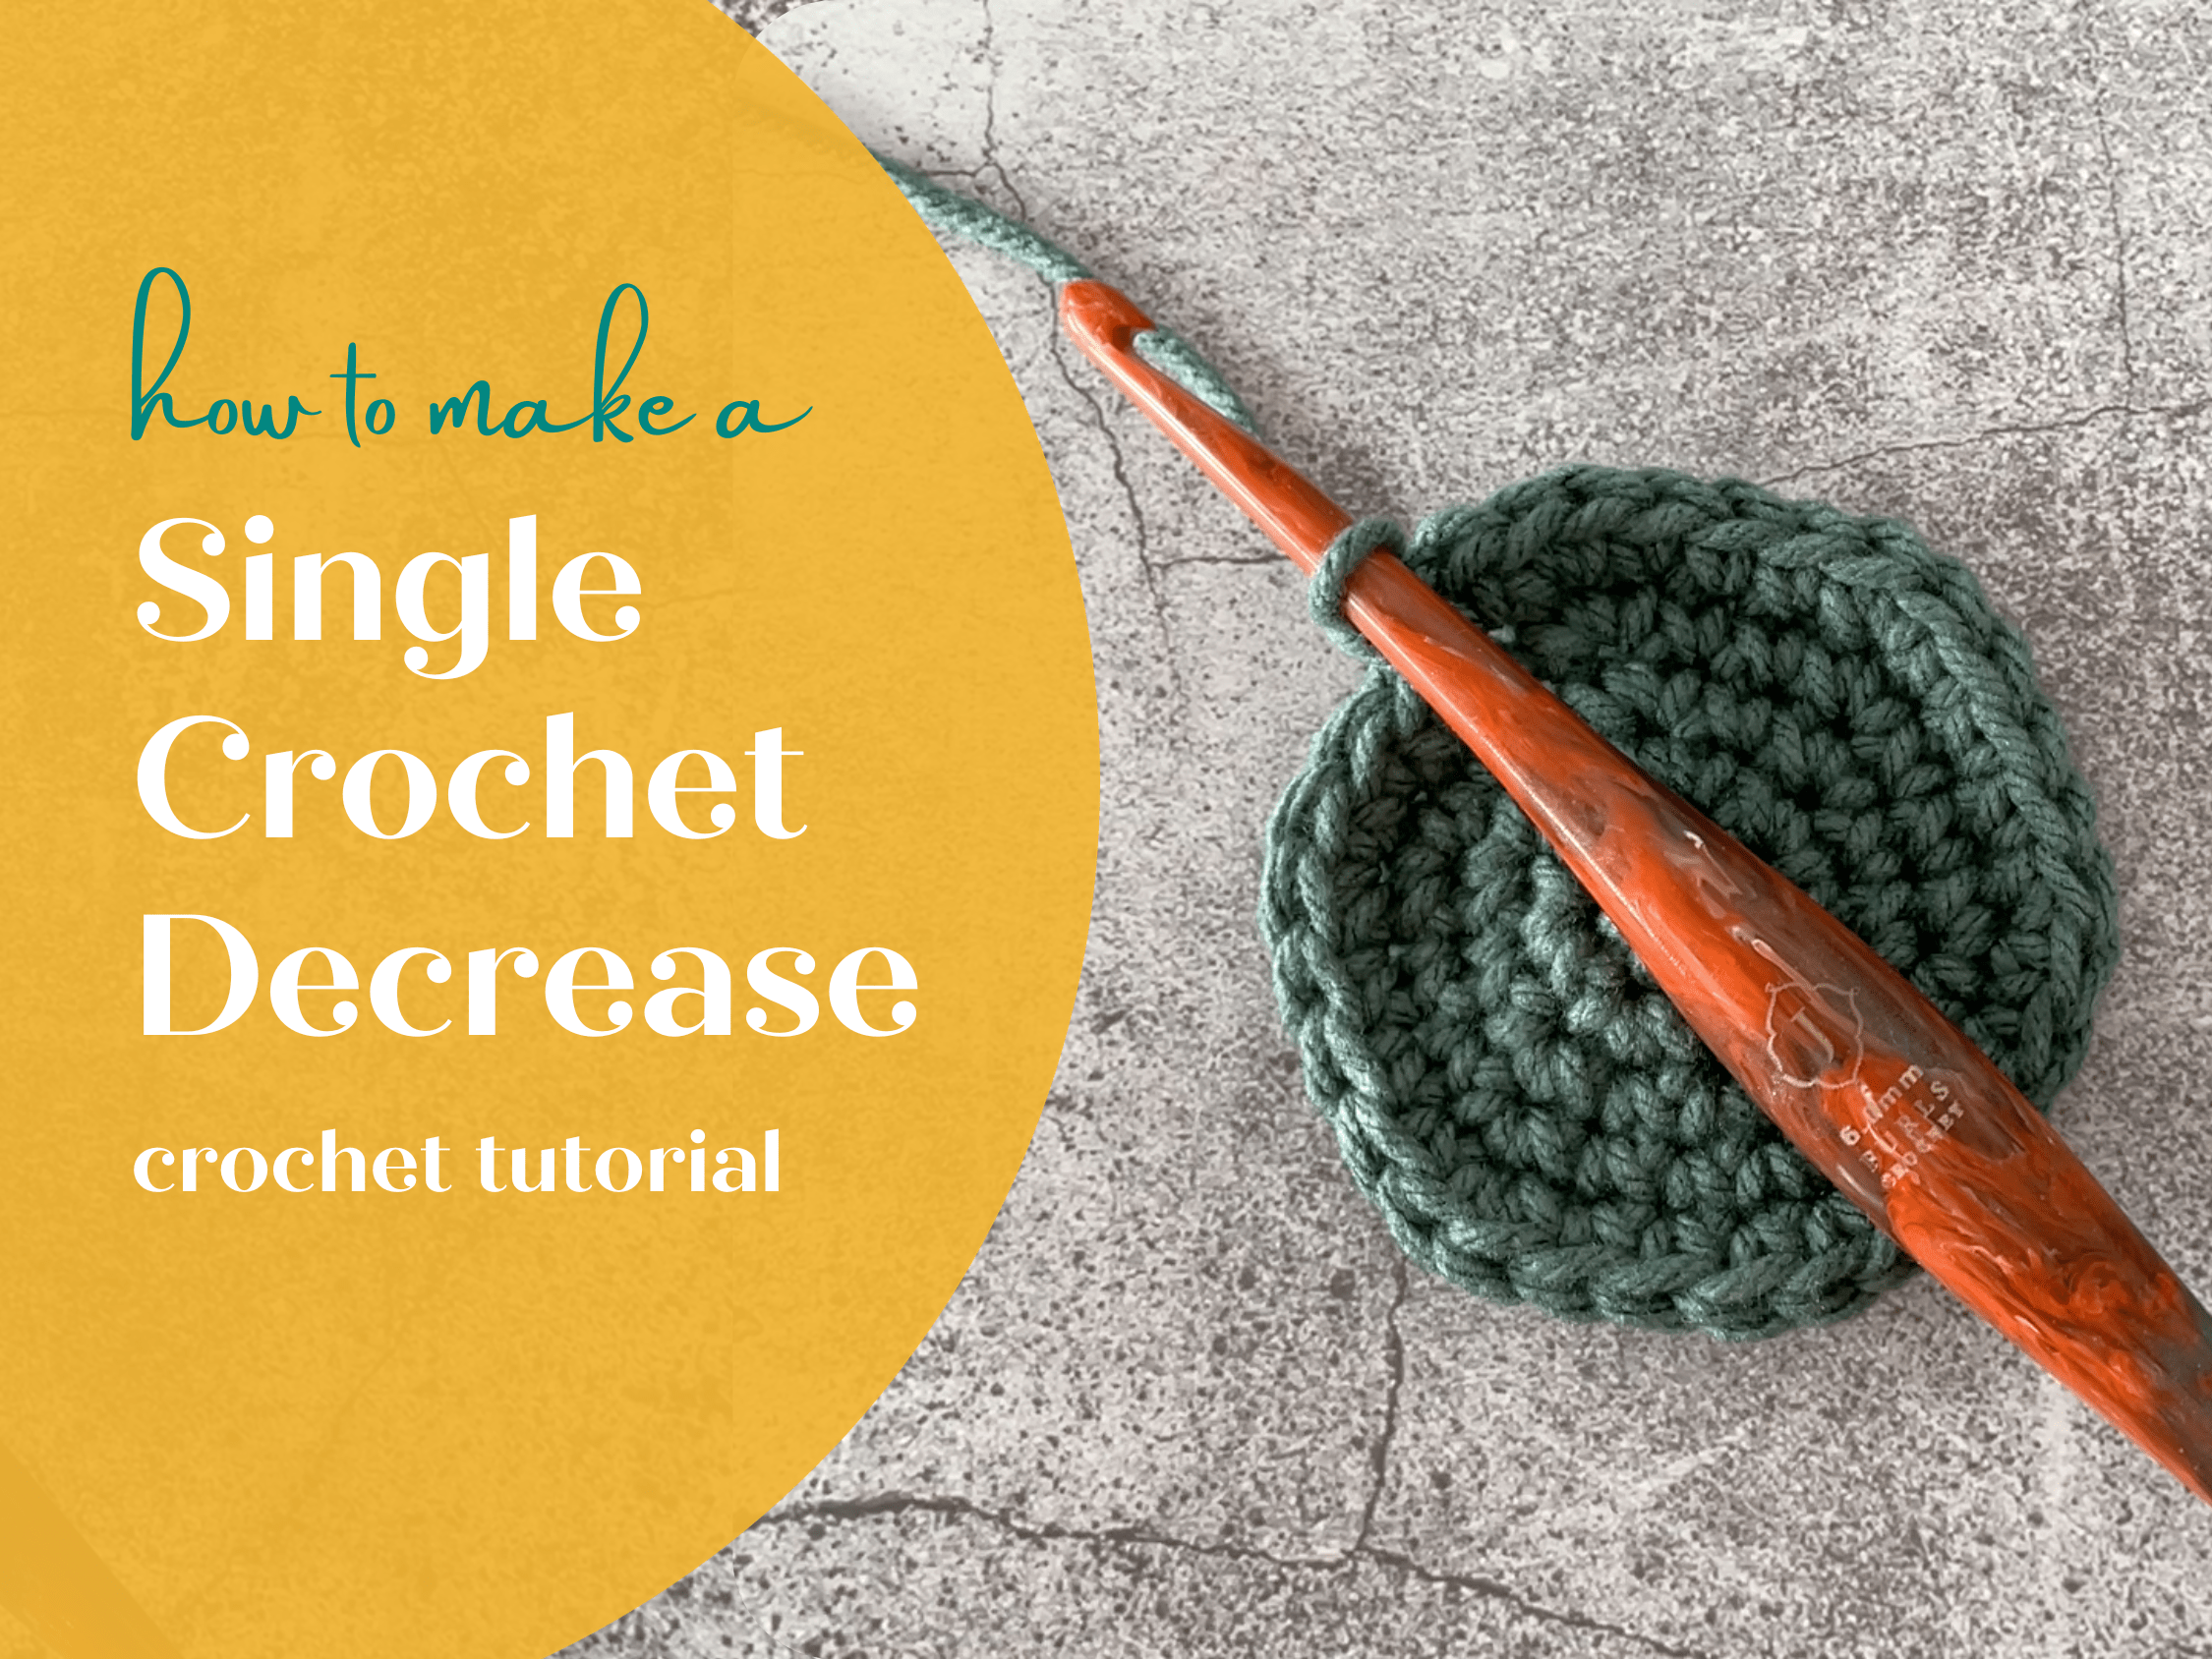
Are you ready to elevate your crochet skills and create beautiful, professional-looking projects? It’s time to master the art of the single crochet decrease (dec) stitch! In this comprehensive blog post, you’ll learn how to decrease single crochet stitches, reduce stitches effortlessly, and add shaping to your crochet projects.
I’ll guide you through the process of mastering this essential technique (2 ways!) using written steps, photo tutorials and a video tutorial. Whether you’re a beginner or an experienced crocheter, my tips and step-by-step instructions will help you take your crochet game to new heights by mastering more complex patterns. Get ready to elevate your crocheting skills!
Decrease Single Crochet: jump in now, or pin this article for later here:

Whether you’re dreaming of crocheting a cozy blanket, a stylish hat, or even an intricate amigurumi, knowing how to single crochet decrease will be your secret weapon for achieving stunning results. Get ready to wield your crochet hook and immerse yourself in the world of crochet magic. It’s time to let your creativity soar and stitch some truly remarkable designs that will leave others in awe. Let’s dive in!
UNDERSTANDING THE DECREASE SINGLE CROCHET STITCH:
In order to truly unleash the power of the single crochet decrease stitch, it’s important to understand how it works. As the name suggests, this stitch allows you to decrease the number of stitches in a row, creating a tapered or shaped effect in your crochet project. This stitch involves combining two adjacent stitches into one. By reducing the number of stitches, you can achieve various shapes, angles, and contours, bringing depth and dimension to your work.
By strategically adding or subtracting stitches in specific areas of your crochet work, you can shape the item to fit it’s intended purpose. This can be particularly important when creating garments, as achieving the right fit enhances both comfort and style. You might increase stitches to create a flared skirt or decrease stitches to form a fitted bodice. By understanding the purpose and desired shape of your project, you can plan your shaping techniques accordingly.
DECREASE SINGLE CROCHET ABBREVIATION:
In a pattern using US terms, the single crochet decrease stitch is commonly abbreviated two ways: dec or sc2tog (single crochet 2 together). In UK terms, it is called the double crochet decrease and is abbreviated dc2tog. Moving forward in this article, I may refer to the stitch using “single crochet decrease”, or simply by using the abbreviation of “dec”.
HOW TO SINGLE CROCHET DECREASE:
There are two ways to do a single crochet decrease: the traditional decrease and the invisible decrease.
To execute the traditional decrease single crochet stitch, you will insert your hook into the designated stitch, yarn over, and pull up a loop. Without completing the stitch, you will then insert your hook into the next stitch, yarn over, and pull up a loop again. Now, with three loops on your hook, yarn over once more and pull through all three loops. This completes the single crochet decrease stitch. Take care with this method because the most common issue here is that it can leave a noticeable gap in between stitches.
To execute the invisible decrease single crochet stitch, you will insert your hook into the FRONT LOOP ONLY of the designated stitch, and then immediately through the FRONT LOOP ONLY of the next stitch, yarn over, and pull up a loop. Now, with three loops on your hook, yarn over once more and pull through all three loops. This completes the single crochet invisible decrease stitch. The invisible decrease method is commonly used in amigurumi and truly stands up to it’s name – you can’t see it!
So, let’s practice! Below you will find written steps as well as video tutorial on how to make both of these versions of the single crochet decrease.
TRADITIONAL DEC WRITTEN STEPS:
- Insert your hook into the designated stitch
- Yarn over and pull up a loop
- Insert your hook into the next designated stitch
- Yarn over again and pull up a loop (you now have 3 loops on your hook)
- Yarn over again and pull through all 3 loops on your hook
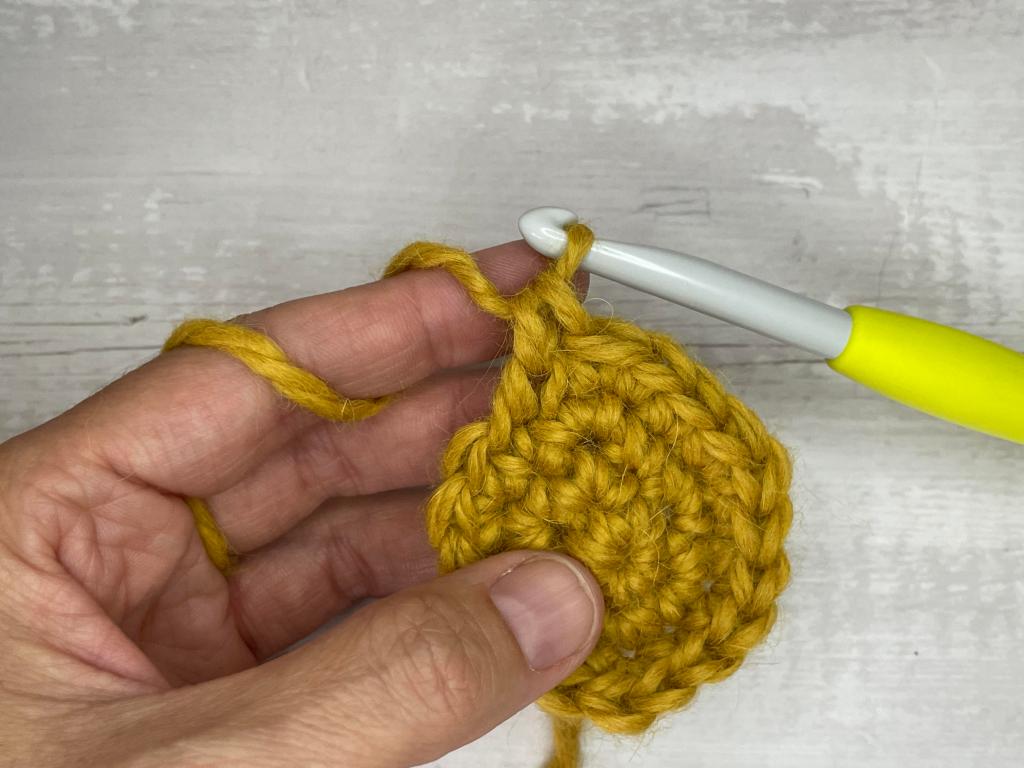
WRITTEN STEPS WITH PHOTO TUTORIALS:
1.Insert your hook into the designated stitch
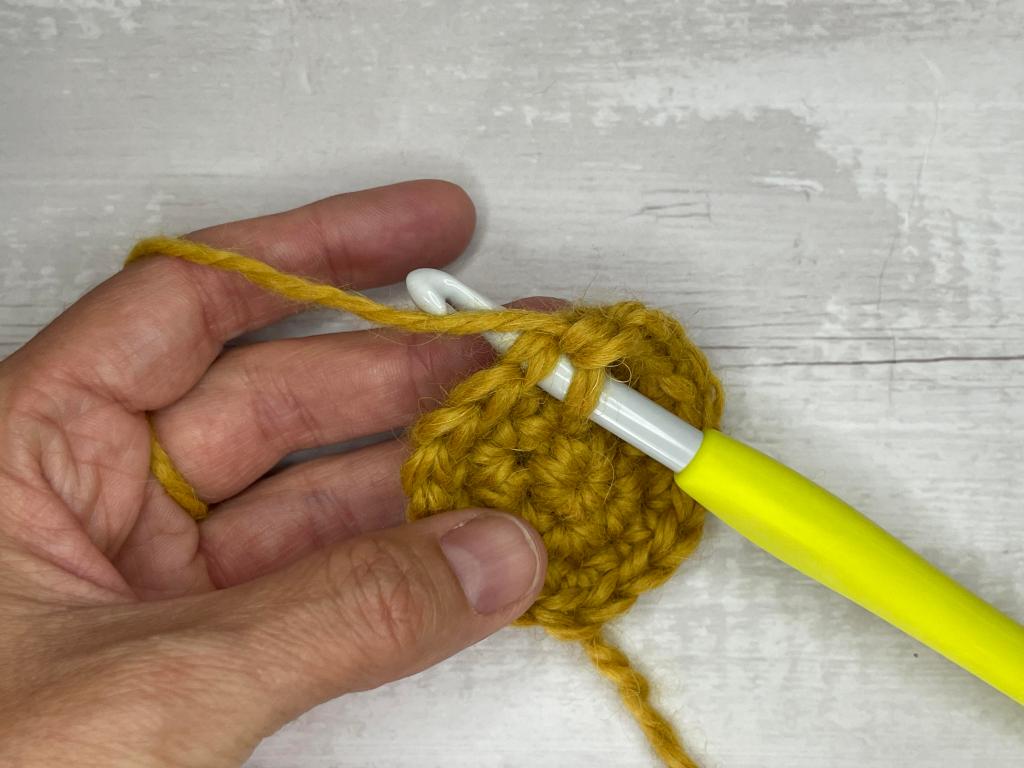
2. Yarn over and pull up a loop

3. Insert your hook into the next designated stitch

4. Yarn over again and pull up a loop (you now have 3 loops on your hook)
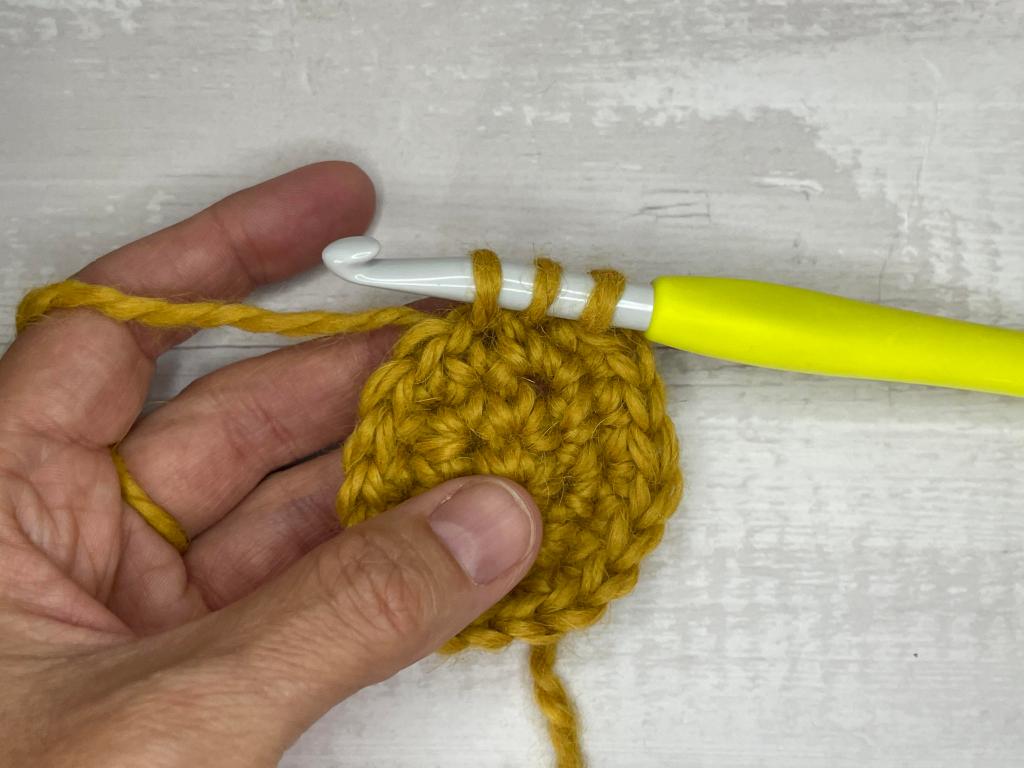
5. Yarn over again and pull through all 3 loops on your hook

6
INVISIBLE DEC WRITTEN STEPS:
- Insert your hook into the front loop only of the designated stitch
- Immediately insert your hook into the front loop only of the next designated stitch (you now have 3 loops on your hook)
- Yarn over and draw it through 2 loops on your hook (you now have 2 loops on your hook)
- Yarn over again and pull through the remaining 2 loops on your hook
WRITTEN STEPS WITH PHOTO TUTORIALS:
1. Insert your hook into the front loop only of the designated stitch
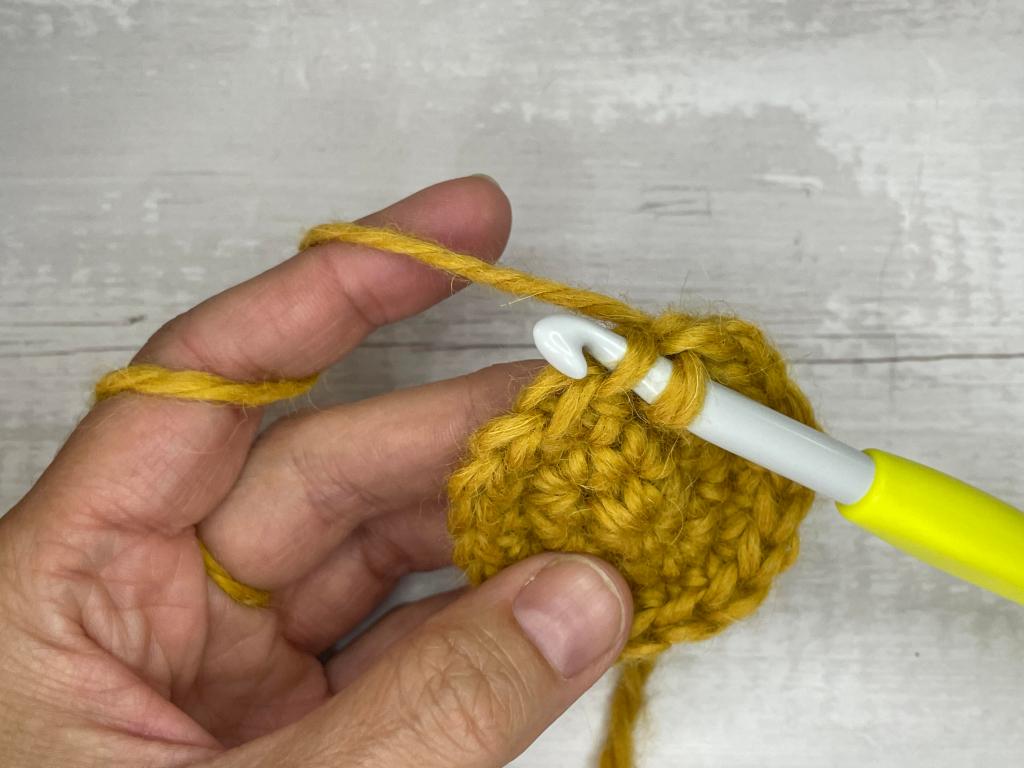
2. Immediately insert your hook into the front loop only of the next designated stitch (you now have 3 loops on your hook)

3. Yarn over and draw it through 2 loops on your hook (you now have 2 loops on your hook)

4. Yarn over again and pull through the remaining 2 loops on your hook
5
VIDEO TUTORIAL – HOW TO SINGLE CROCHET DECREASE:
TIPS AND TRICKS FOR MASTERING THE DECREASE SINGLE CROCHET STITCH:
As with any new technique, it takes practice to master the decrease single crochet stitch. Start by practicing on a swatch or a small project until you feel comfortable with the motion and tension required. Remember, don’t get discouraged if your first attempts don’t yield perfect results. Crochet is an art form that thrives on experimentation and learning from mistakes. Embrace the process and celebrate the progress you make along the way. I encourage you to embrace the magic that happens when you make mistakes and learn from them.
One common mistake that beginners often make when working with the single crochet decrease stitch is pulling the yarn too tightly after completing the stitch. This can result in a tight and awkward-looking decrease, throwing off the symmetry of your project.
Alternatively, if you leave your stitch too loose, it will result in a noticeable hole or gap in between your stitches. This is particularly unsightly with amigurumi projects where you don’t want to see the stuffing through the stitches. Remember to maintain a consistent tension throughout your work, allowing the stitches to flow naturally without being too loose or too tight.

Throughout this article, we’ve uncovered the power behind this simple yet transformative technique by learning how to single crochet decrease. From creating textured patterns to shaping and contouring our crochet items with precision, the single crochet decrease stitch truly is a game-changer.
As we wrap up, let us remember that creativity knows no bounds. Let your imagination run wild and experiment with different textures, shapes, and patterns to truly showcase your unique style. Embrace the magic in making mistakes, for it is within those moments that our art truly comes alive. So, as you pick up your crochet hook, remember that practice makes perfect. Keep honing your skills with this important technique and stitch some crochet magic today!
If you want to save this guide to refer to later, you can PIN it here!


LOOKING TO LEARN OR REFINE SOME OTHER CROCHET SKILLS? Here are some articles you might like:
- How to Single Crochet Stitch (sc)
- How to Half Double Crochet Stitch (hdc)
- How to Double Crochet Stitch (dc)
Leave a Reply