The dc stitch (double crochet) is one of the most basic crochet stitches – you will use it over and over again. When making a project with double crochet it’s so easy to settle into that nice, meditative flow that I love so much about this craft. In this post I will provide you with the written steps on how to double crochet and offer a quick video tutorial as well.
In the video and the article below, I outline several notable characteristics about the type of fabric the dc stitch makes so you can familiarize yourself with not just HOW to do it but WHY you might want to use this stitch in various different crochet projects.
I also include photo tutorials and explanations about: all 3 loops created by the double crochet (dc) stitch, how to increase and decrease with dc, how the stitch compares to other stitches and how to handle the double crochet turning chain.
So, are you read to become a DC STITCH MASTER!?
Jump in now, or PIN this article for later reference here:

INTRODUCING THE DOUBLE CROCHET STITCH:
The double crochet stitch is one of the most basic crochet stitches. It will be one of the first stitches you learn to make and one of the stitches you will see used most often.
ABBREVIATION:
In a pattern using US terms, the double crochet stitch is abbreviated dc. In UK terms, it is called the treble crochet stitch.
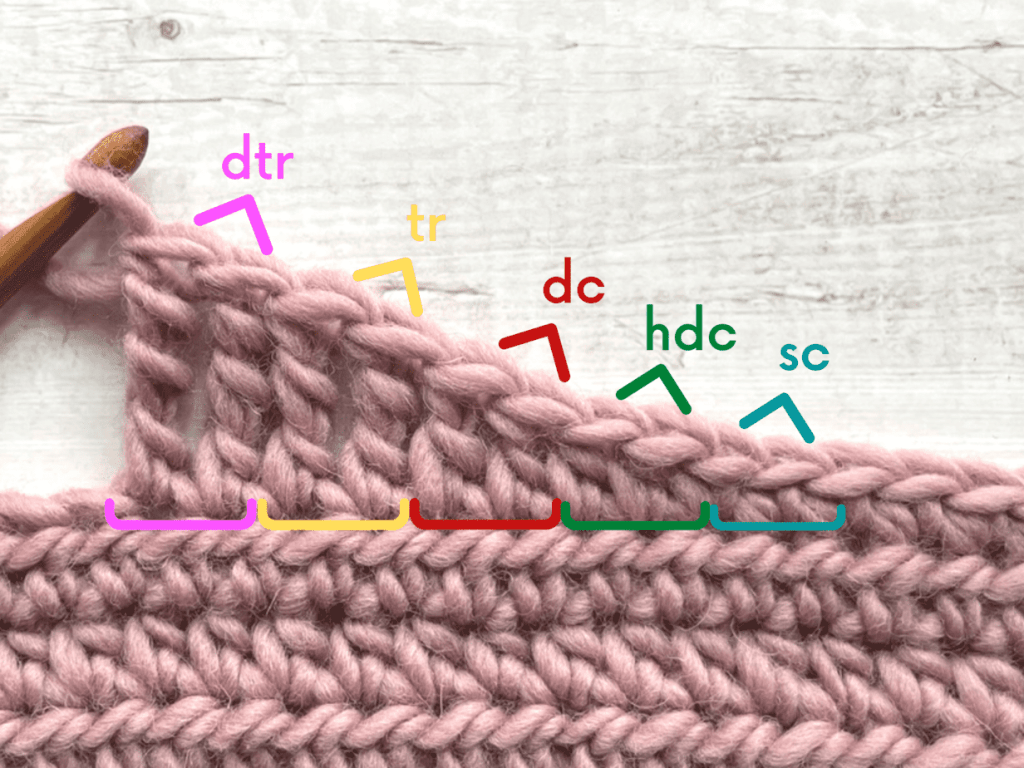
HEIGHT:
The double crochet stitch is taller than a single or half double crochet, but shorter than a treble crochet. Generally, it is twice as tall as it is wide.
VERSATILITY:
The double crochet (dc) stitch is HIGHLY versatile. It can be used when crocheting rows or rounds. It can be made by crocheting into any of the 3 different loops created by a crochet stitch (illustrated and discussed below). It can be increased or decreased (also discussed below). One of my favorite things about the dc is how MANY decorative and unique stitches it makes. Make them in multiples, cross them, post stitch them, the options are endless.
DOUBLE CROCHET FABRIC CHARACTERISTICS:
- Compared to the dense fabric created with a single crochet, the double crochet provides much more flexibility and drape because the posts are twice as tall.
- It will create a fabric that has a high amount of breathability – due to the gaps between the posts of the stitch.
- It will build your fabric very quickly because of it’s tall height.

HOW TO DOUBLE CROCHET IN MANY WAYS:
As we’ve highlighted already, the double crochet (dc) is highly versatile. So, let’s practice! Below you will find written steps as well as video tutorial on how to make a double crochet stitch. We cover the basics, as well as get down to the nitty gritty about all the 3 different loops, as well as increasing and decreasing while using the dc.
When you’re done here you will be a DC Stitch Master!
WRITTEN STEPS:
- Yarn over hook
- Insert your hook into the next stitch
- Yarn over and pull up a loop (you now have 3 loops on your hook)
- Yarn over again
- Pull through two loops on your hook (you now have 2 loops on your hook)
- Yarn over again
- Pull through final two loops on your hook
WRITTEN STEPS WITH PHOTO TUTORIALS:
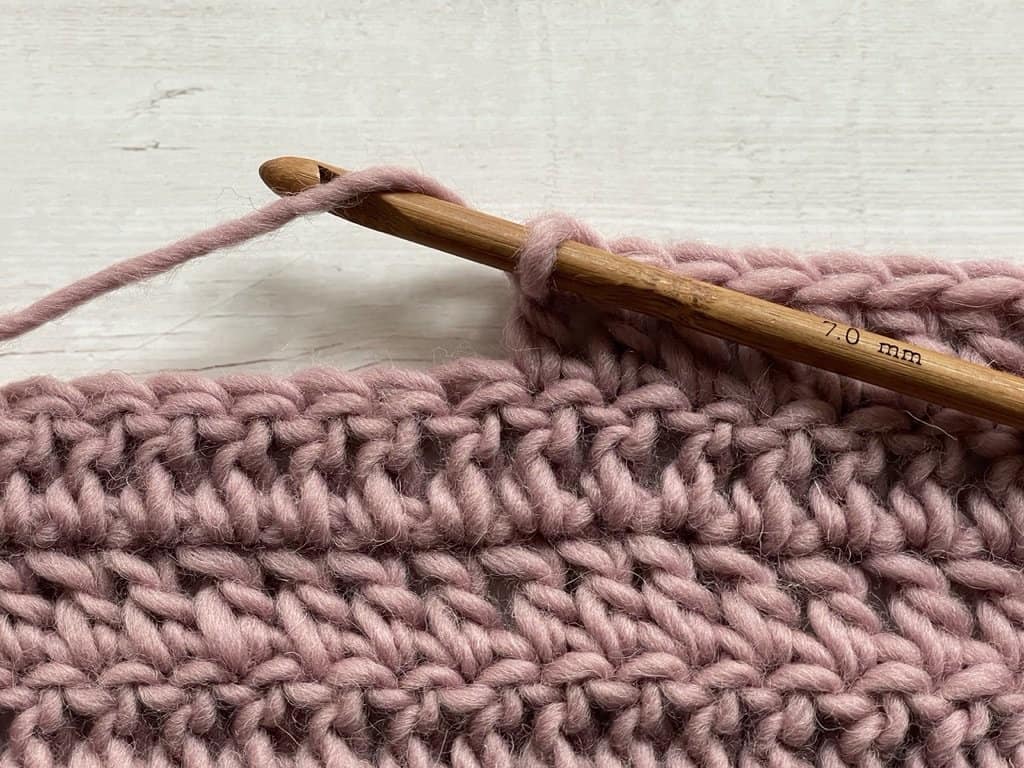
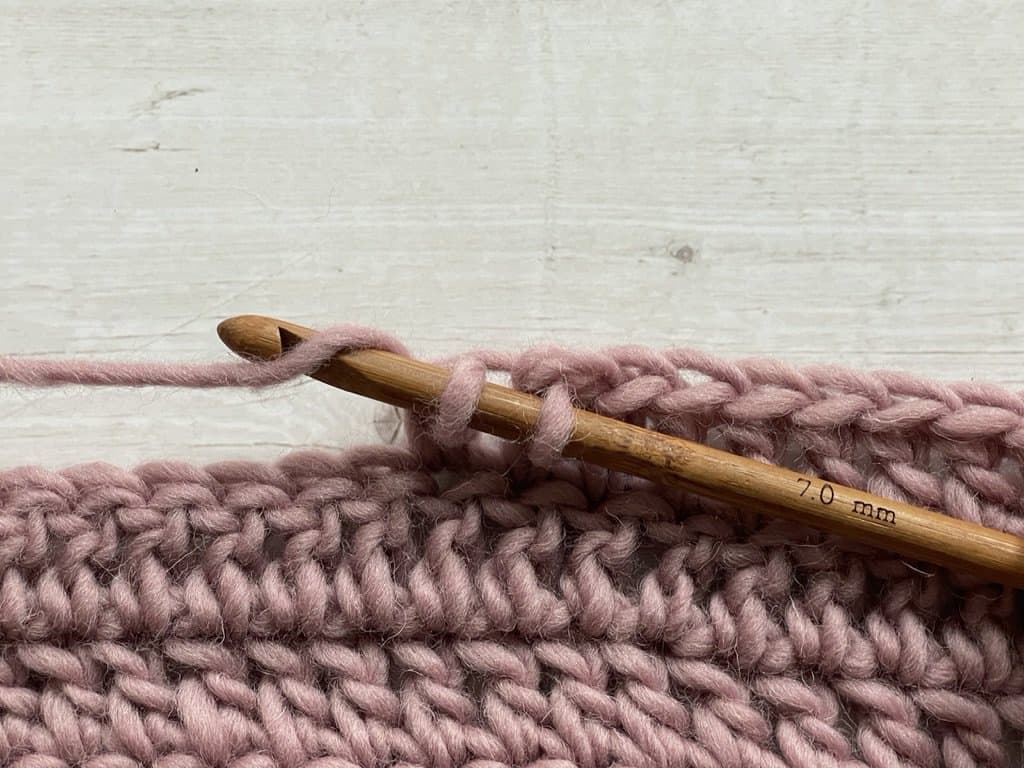
1.Yarn over hook from back to front:
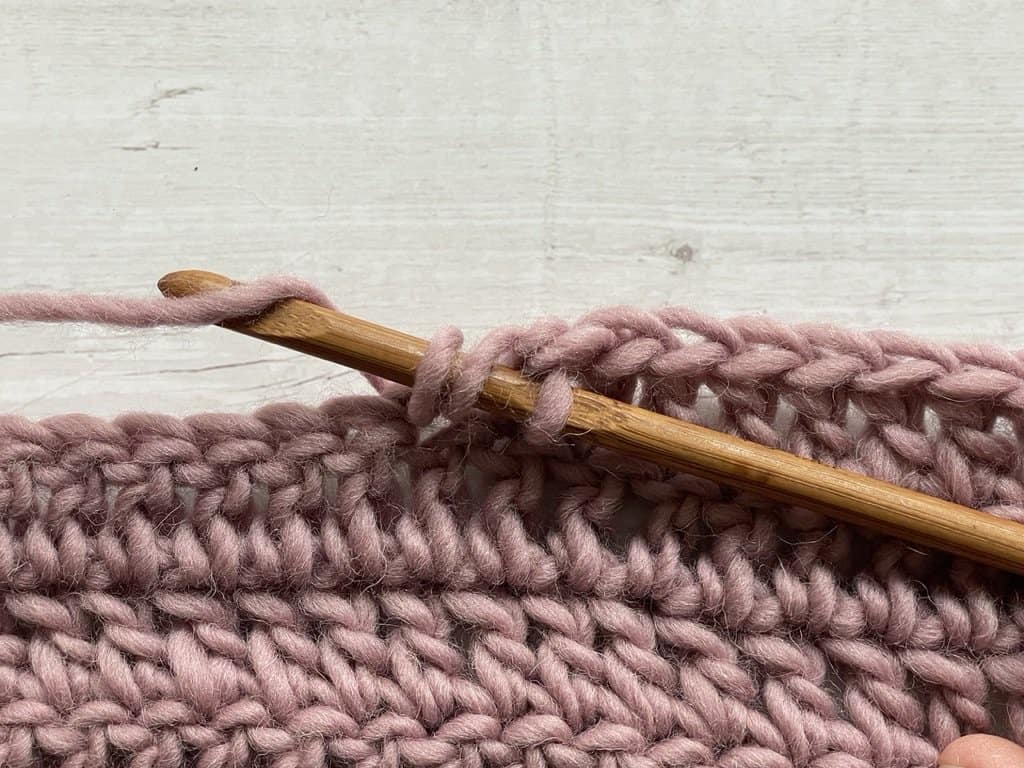
2. Insert the hook into the next stitch

3. Yarn over and pull up a loop (you now have 3 loops on your hook)

4. Yarn over again
5. Pull through 2 loops on the hook (you now have 2 loops left on the hook)

6. Yarn over again
7. Pull through final 2 loops on the hook

A CLOSER LOOK AT THE 3 LOOPS OF THE DC STITCH
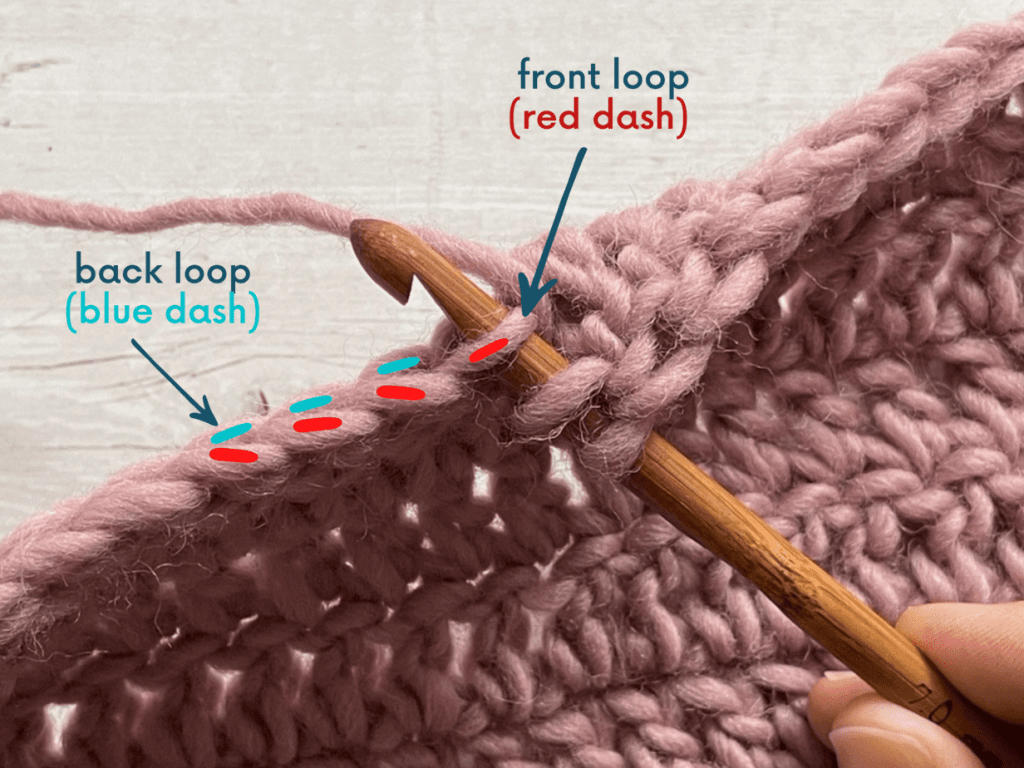
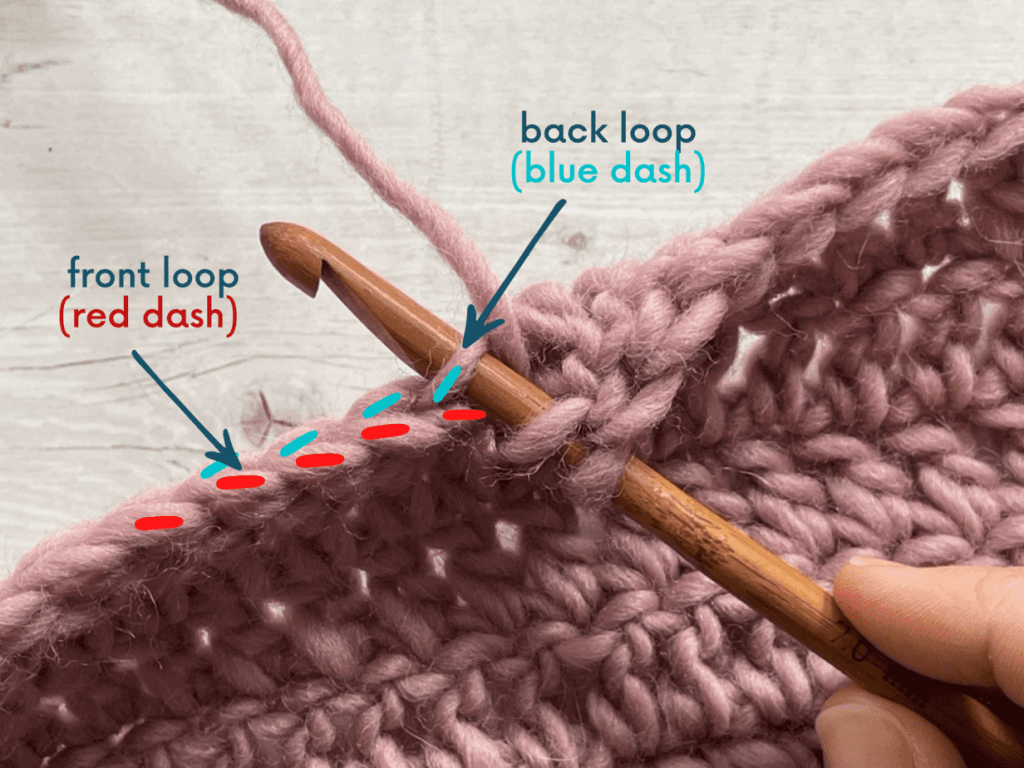
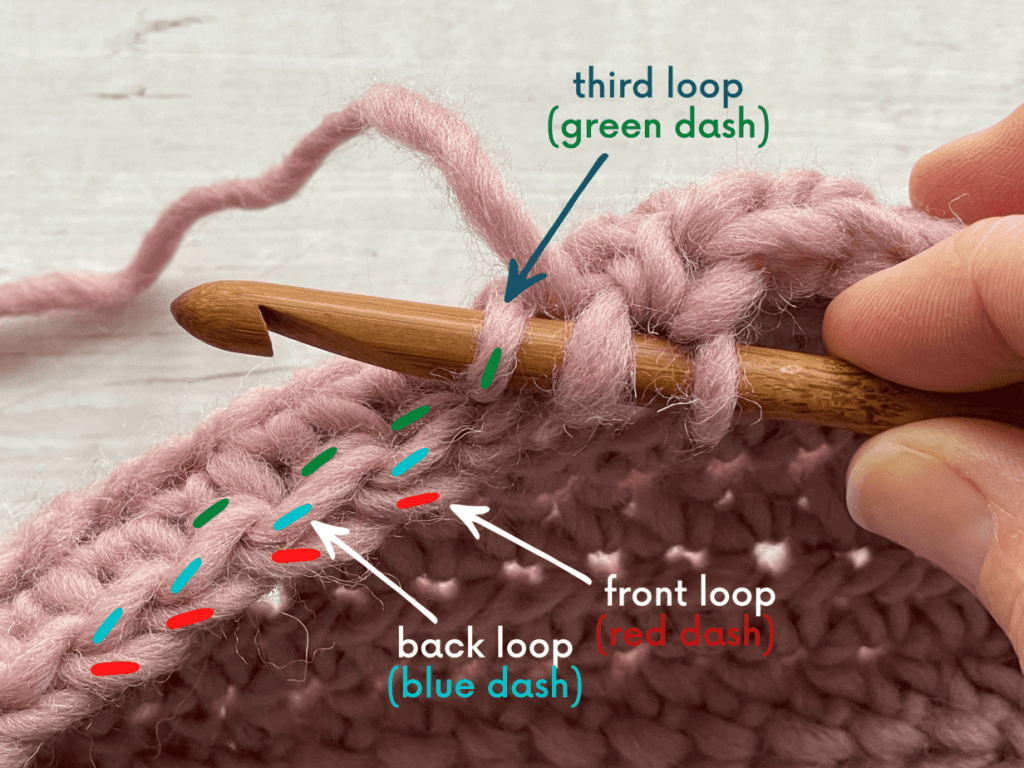
As with several of the basic crochet stitches, the dc is made up of 3 loops that you can work into: the front loop, the back loop and the 3rd loop (sometimes referred to the “back bump”). The photo below is of a swatch that I twisted slightly so you can see the progression of the front, back and third loop. The front and back loops make up the recognizable “V” made with your crochet stitches. These are the two loops we crochet through most of the time and with which we first learn how to count our stitches.
There is a third loop that is created as well which is highlighted in this photo compared to the traditional “V” shaped stitch made up from the front and back loops.
When crocheting through only one of the 3 loops row after row, you achieve a “ribbed” look to your fabric. When crocheting into the third loop in particular, it pushes the “V” created by the front and back loops to the front of your work giving it sort of a knit look.

FRONT LOOP ONLY
When reading a crochet pattern that calls for working in the front loop only, the abbreviation you will see for DOULBE CROCHET FRONT LOOP ONLY IS: DC FLO. Here is how it looks when you crochet under the front loop only:
BACK LOOP ONLY
When reading a crochet pattern that calls for working in the back loop only, the abbreviation you will see for DOULBE CROCHET BACK LOOP ONLY IS: DC BLO. Here is how it looks when you crochet under the back loop only:
THIRD LOOP ONLY
Finally, you have the third loop. You’ll find the horizontal third loop behind and beneath the back loop. When you turn your work you will see clearly the third loop. Here is what it looks like to crochet into the third loop only:
DOUBLE CROCHET INCREASE
A double crochet increase is when you make more than one dc into the same stitch. You can make 2, 3 or more dc into the same stitch too! In a pattern, the dc increase will be abbreviated DC INC.
DC STITCH INCREASE WRITTEN STEPS:
- Yarn over hook
- Insert your hook into the next stitch
- Yarn over and pull up a loop (you now have 3 loops on your hook)
- Yarn over again and pull through 2 loops on your hook (you now have 2 loops left on your hook)
- Yarn over again and pull through final 2 loops on your hook
- Repeat steps 1-5 into the same stitch for as many times as required

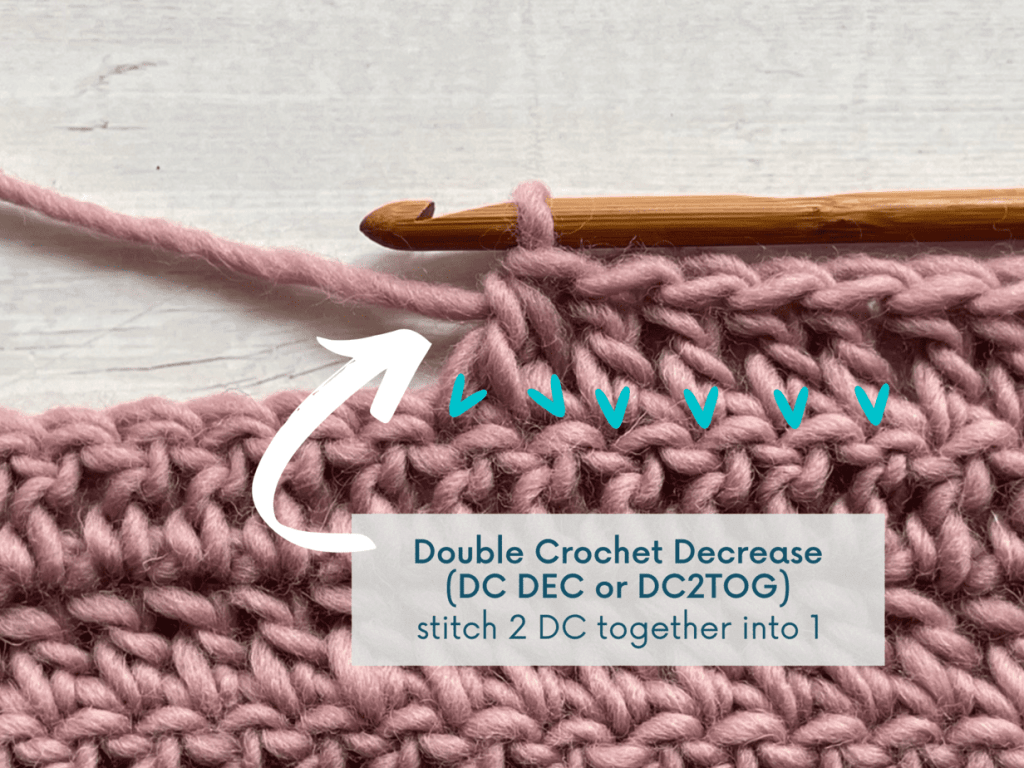
DOUBLE CROCHET DECREASE
A double crochet decrease is when you stitch 2 (or more) dc stitches together into one. In a pattern, the dc decrease will be abbreviated DC DEC or DC2TOG which stands for “double crochet 2 together”.
DC STITCH DECREASE WRITTEN STEPS:
- Yarn over hook
- Insert your hook into the next stitch
- Yarn over and pull up a loop (you now have 3 loops on your hook)
- Yarn over and insert your hook into the next stitch
- Yarn over and pull up a loop (5 loops on your hook)
- Yarn over and pull through 3 loops
- Yarn over again and pull through final 3 loops on your hook
VIDEO TUTORIAL – HOW TO DC STITCH:
WHAT ABOUT THE DC STITCH TURNING CHAIN?
A turning chain is a number of chain stitches that you make at the beginning of a row to ensure your next row is brought up to the correct height to match the height of the stitch you are making. This creates a straight edge. There are two ways to make a turning chain for dc. It is important to know the difference here because one version counts the turning chain as your first dc stitch of the row and one does not. So, let’s talk about this. Ultimately, if you’re making a pattern, you’ll want to follow what the designer instructs on how to treat the chain.
When making a turning chain for dc you will either chain ONE, TWO or THREE (chaining only ONE is uncommon, but not unheard of). When you only chain ONE or TWO, the turning chain does NOT count as a stitch. In this case you will make your first dc of the row in the very first available stitch. As a result, the turning chain will add a minor amount of bulk to the first stitch but doesn’t leave as much of a gap at the end of the row. You will make your last dc of the row in the first dc of the previous row. This is my preferred method of the dc turning chain because I hate inconsistent gaps!
When a dc turning chain consists of THREE chains, it DOES count as your first dc of the row. In this case, you will skip the first stitch of the row and make your first dc in the 2nd stitch from the hook. As a result, you will see a larger gap between the turning chain stitch and the second stitch of the row than there is between all the other stitches of the row. When you come to the end of the row you will make your final dc of the row into the top of the turning chain from the previous row.
WHEW, DEEP BREATH. SHAKE IT OUT.
I know that was A LOT, but I think you are now officially a master of the DOUBLE CROCHET. I hope you found this tutorial helpful and instructive! If you love this stitch or just want some more practice, here are some free patterns that use lots of dc!
- Misty Peaks Throw Free Crochet Pattern
- Diamond Ridge Throw Free Crochet Pattern
- Alpine Bath Soap Saver Free Crochet Pattern Set
If you want to save this to refer to later, you can PIN it here!


Leave a Reply