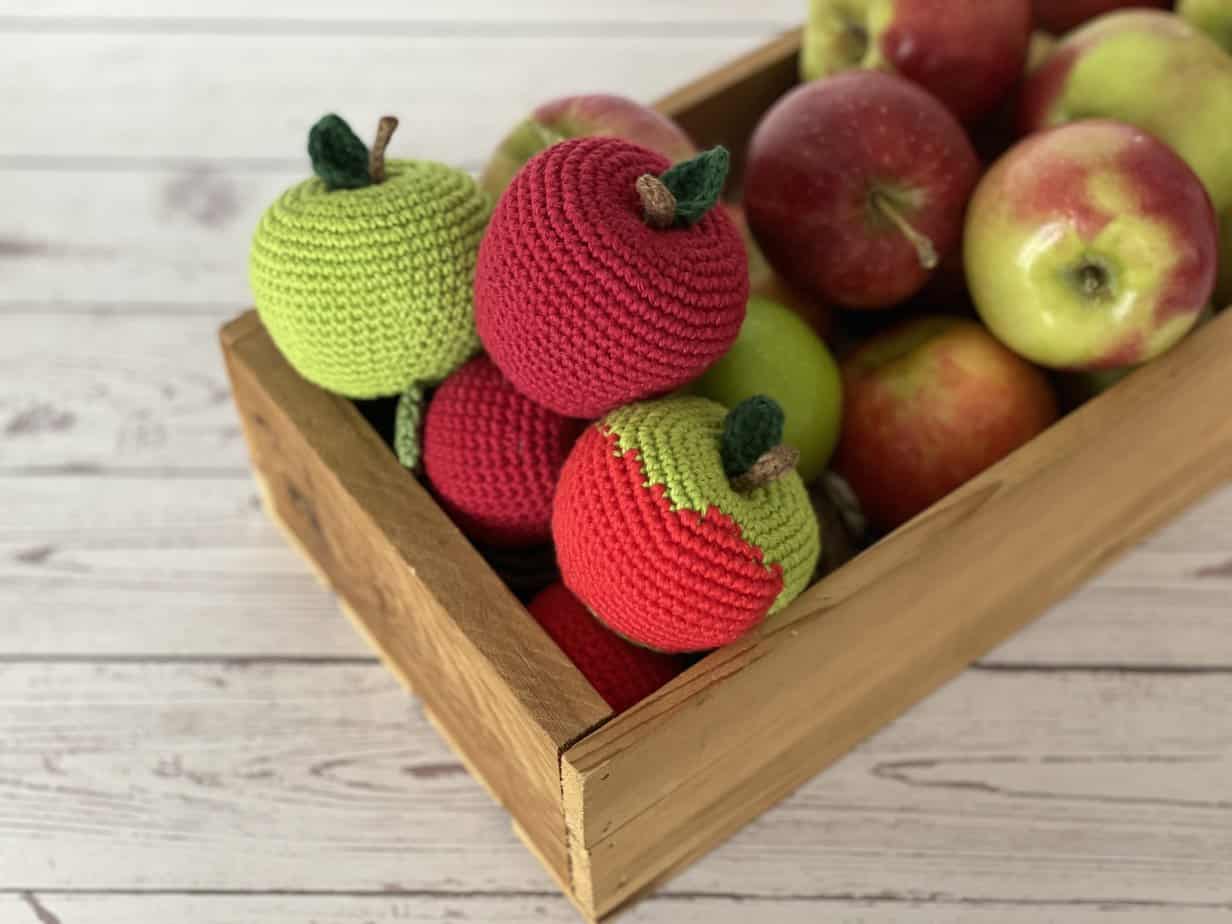
Granny Smith, Red Delicious, Honeycrisp, Gala or Fuji – there’s something for everyone in this crochet apple pattern! Pick your favorite and dive in. Whether it’s for a teacher’s gift or an addition to your own collection, these apples come together super quickly and easily with continuous rounds of single crochet. So in celebration of this juicy autumn bounty, here is an crochet apple pattern for you!
Jump into the crochet apple pattern now, of pin it for later here!

Why You’ll Love This Crochet Apple Pattern
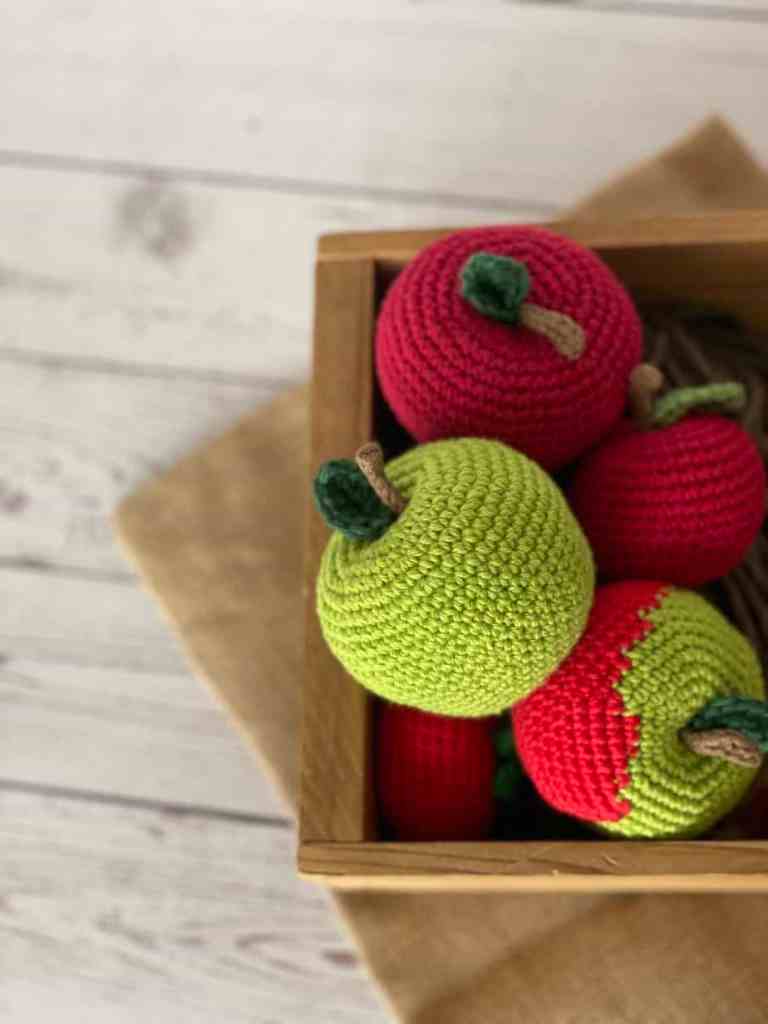
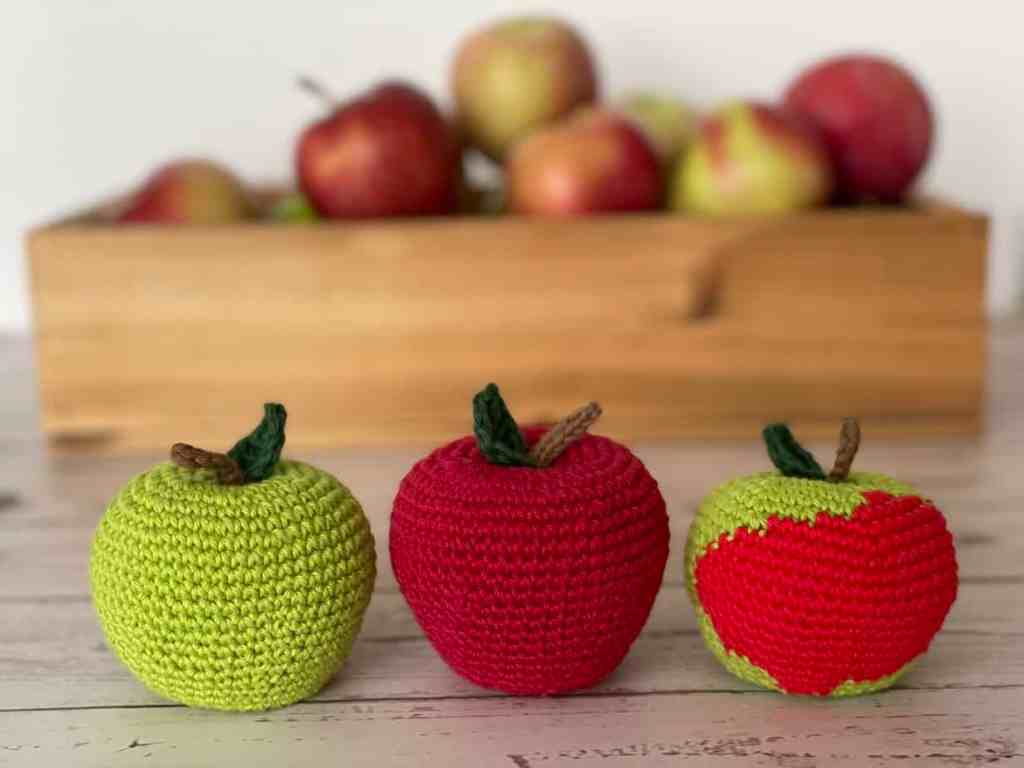
Realistic and charming, these crochet apples will make the perfect, vibrant addition to your little one’s toy food collection or to your crochet fruit and veg centerpiece. The pattern includes the method for crocheting the apple in 2 different color ways – solid green or red, and a combo of green & red like a honeycrisp apple. So, pick your favorite and go for it!
This crochet pattern is reader supported by ads on my blog. If you’d rather print the pattern for some cozy couch crocheting, you can find the ad-free, printable PDF in my shop here.

Crochet Apple Pattern Guide:
Size & Gauge:
Size: 2.5″ tall x 3″ wide
Gauge: N/A
Policies & Disclaimers:
This crochet pattern is for PERSONAL USE ONLY. This pattern or parts of it may not be reproduced, resold, distributed, published, altered, translated, posted or shared without authorization. You can sell your finished items provided that you credit Off the Beaten Hook as the designer using this verbiage, “This pattern was designed by Lindsey Roe and Off the Beaten Hook.” Thank you for your respectfulness!
This post contains affiliate links for materials I use and love. If you purchase something using one of these links I may earn a small commission which in no way affects the cost to you. These partnerships help me support my small business which allows me to provide you with free crochet patterns. Thank you from the bottom of my heart for your support!
What makes this crochet pattern eco-friendly and sustainable?
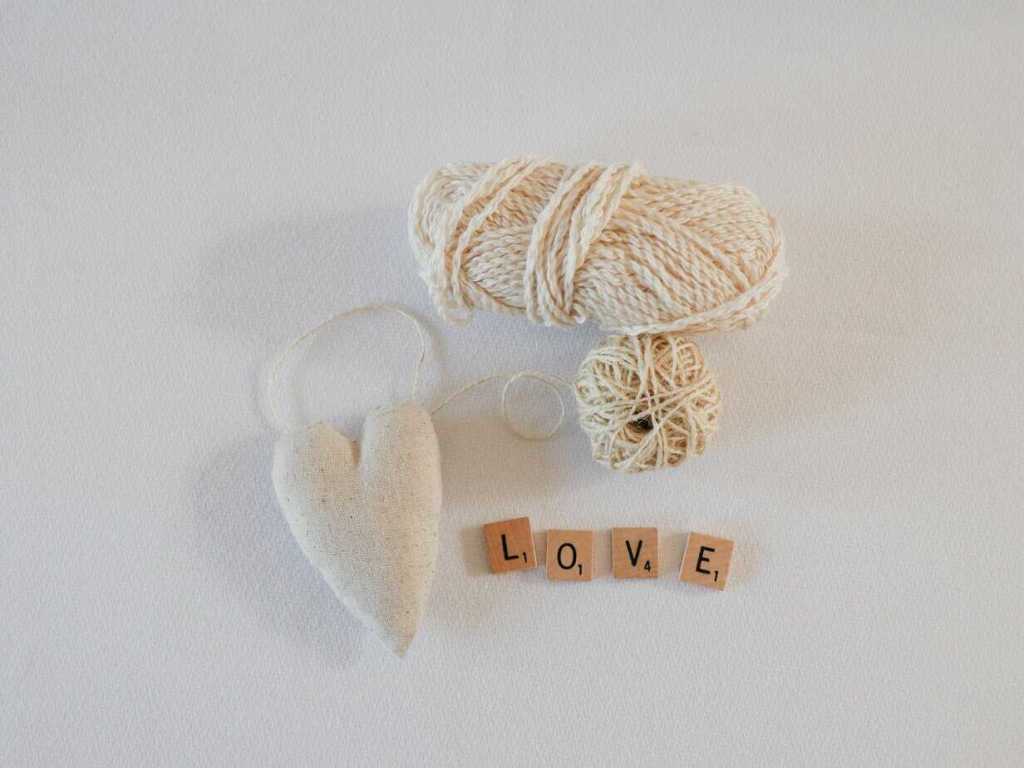
THE YARN: I use only sustainable and eco-friendly yarn that has been ethically grown/raised and processed, putting the people and the planet first. This is why I chose 100% ethical merino wool yarn for this pattern.
THE SLOW YARN MOVEMENT: I’m participating in the Slow Yarn Movement. There’s far too much to talk about here, but please take a few minutes to learn about what this means by reading the article I wrote about the Slow Yarn Movement as part of my 6-part Sustainable Crochet Series.
If you’re interested in learning more about sustainable crochet you can read all about it in the 6-part series I wrote covering everything about Sustainable Crochet and how to implement it into your own crafting starting today!
Materials you will need for the Crochet Apple Pattern:
YARN:
– Stylecraft Naturals 100% Organic Cotton: (DK/light worsted)
–LEAF (green) x1 ball
–POPPY (red) – x1 ball
-Brown leftovers (stem)
-Dark green leftovers (leaf)
OTHER TOOLS & MATERIALS:
– Crochet Hook Size: 3.00 mm crochet hook
– Tapestry Needle (bent tips make all the difference!)
– Stitch Markers
– Scissors
– Stuffing (here’s a great chance to use all those tiny yarn snippets you’ve been saving for stuffing!)
Skills & Abbreviations Used in This Crochet Apple Pattern:
This pattern is written in English, using US terms. If needed, you can find a handy term conversion chart right here in my Resource Library.
- st (stitch)
- sl st (slip stitch)
- hk (hook)
- sc (single crochet)
- hdc (half double crochet)
- dc (double crochet)
- inc (increase)
- dec (decrease)
- (…) x – repeat instructions within parenthesis indicated number of times
- […] – number of stitches in row/round

The Crochet Apple Pattern:
Stem
NOTES:
- The stem is crocheted by making a chain and then crocheting around each side of the chain
Use the brown yarn and leave a starting tail of 4”.
Row 1: ch 8, sc in 2nd ch from hk, sc in next ch, sl st in next 5 ch [7]
Snip, leaving a tail of 4”. Pull tail through final 2 loops and tie the tails together in a knot.
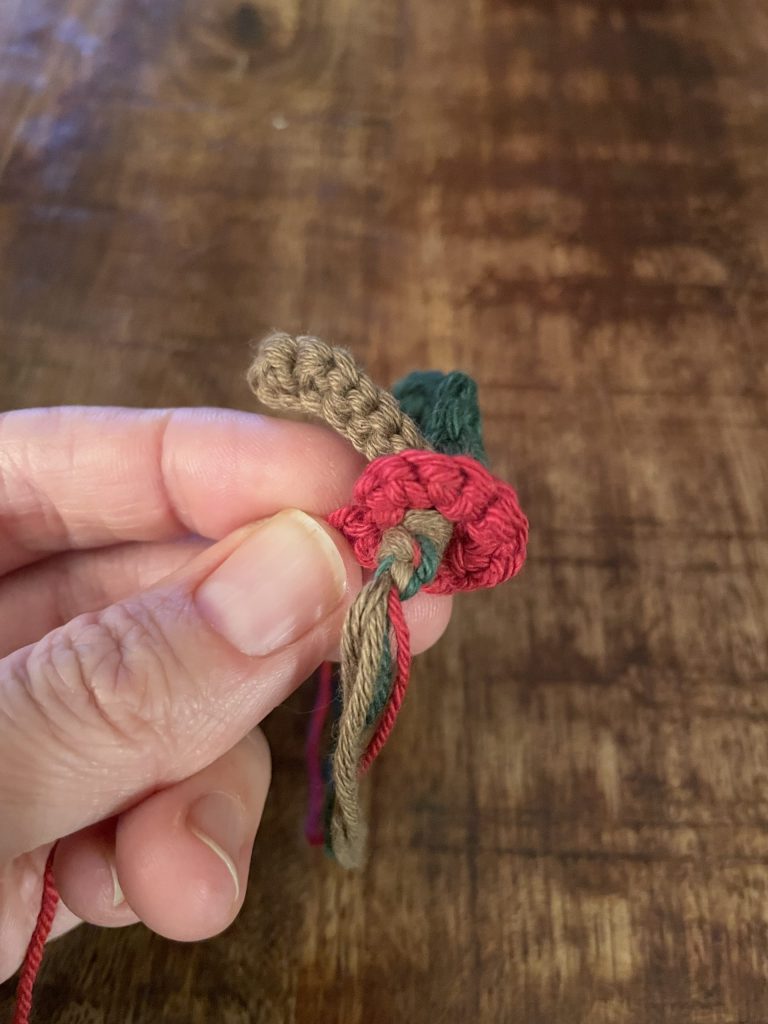
Leaf
NOTES:
- The leaf is crocheted by making a chain and then crocheting around each side of the chain
Use the dark green yarn and leave a starting tail of 4″.
Row 1: ch 7, sc in 2nd ch from hk, hdc in next ch, dc in next 2 ch, hdc in next ch, sc in next ch. Continue on the other side of the chain: sc in next ch, hdc in next ch, dc in next 2 ch, hdc in next ch, sc in next ch
Sl St to first st. Fasten off. Weave in end.
HONEYCRISP APPLE VERSION (multi-colored)
NOTES:
- The apple is worked in continuous rounds – do not join each round
- When the color change section begins on round 6, the colors will be abbreviated as follows: green = G, red = R
- During the color change rounds, you will never have to deter from the standard increase pattern of increasing or decreasing each round by 6 stitches. Also, you will never have to increase or decrease in the middle of a color change. However, some color changes occur immediately before or after an increase or decrease.
- For the color change rounds, the method will be given and the stitch count for each of the colors will be given following the method.
Start with the green yarn
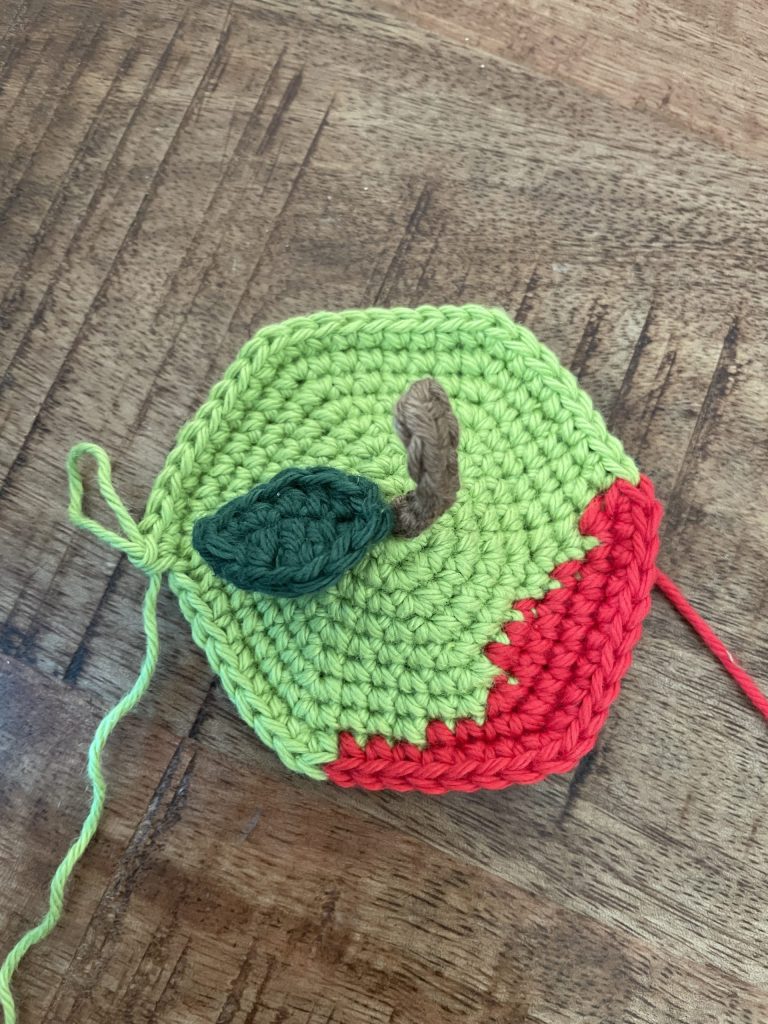
Rnd 1: st 6 in a magic circle [6] Do not close tightly until after you put in the stem and leaf
Rnd 2: inc in each st around [12]
Pull the yarn tails from the stem and leaf through the magic circle from outside to inside. Tighten the magic circle. Tie a knot with the tails from the magic circle, leaf and stem.
Rnd 3: (sc in next st, inc in next st) x6 [18]
Rnd 4: (sc in next 2 st, inc in next st) x6 [24]
Rnd 5: (sc in next 3 st, inc in next st) x6 [30]
Rnd 6: (sc in next 4 st, inc in next st) x6 [36] G: 12, R: 3, G: 21
Rnd 7: (sc in next 5 st, inc in next st) x6 [42] G: 12, R: 7, G: 23
Rnd 8: (sc in next 6 st, inc in next st) x6 [48] G: 11, R: 13, G: 24
Rnd 9: (sc in next 7 st, inc in next st) x6 [54] G: 9, R: 18, G: 29
Rnd 10: sc in each st around [54] G: 7, R: 20, G: 27
Rnd 11: sc in each st around [54] G: 6, R: 21, G: 27
Rnd 12: sc in each st around [54] G: 5, R: 23, G: 26
Rnd 13: sc in each st around [54] G: 4, R: 24, G: 26
Rnd 14: sc in each st around [54] G: 4, R: 24, G: 26
Rnd 15: (sc in next 7 st, dec in next st) x6 [48] G: 4, R: 24, G: 20
Rnd 16: sc in each st around [48] G: 4, R: 20, G: 20
Rnd 17: (sc in next 6 st, dec in next st) x6 [42] G: 6, R: 15, G: 21
Rnd 18: sc in each st around [42] G: 6, R: 14, G: 22
Rnd 19: (sc in next 5 st, dec in next st) x6 [36] G: 7, R: 9, G: 20
Rnd 20: sc in each st around [36] G: 9, R: 4, G: 23
Rnd 21: (sc in next 4 st, dec in next st) x6 [30] G: 8, R: 3, G: 19
The rest of the apple is crocheted in green only
Rnd 22: sc in each st around [30]
Rnd 23: (sc in next 3 st, dec in next st) x6 [24]
Rnd 24: sc in each st around [24]
Rnd 25: (sc in next 2 st, dec in next st) x6 [18]
Rnd 26: sc in each st around [18]
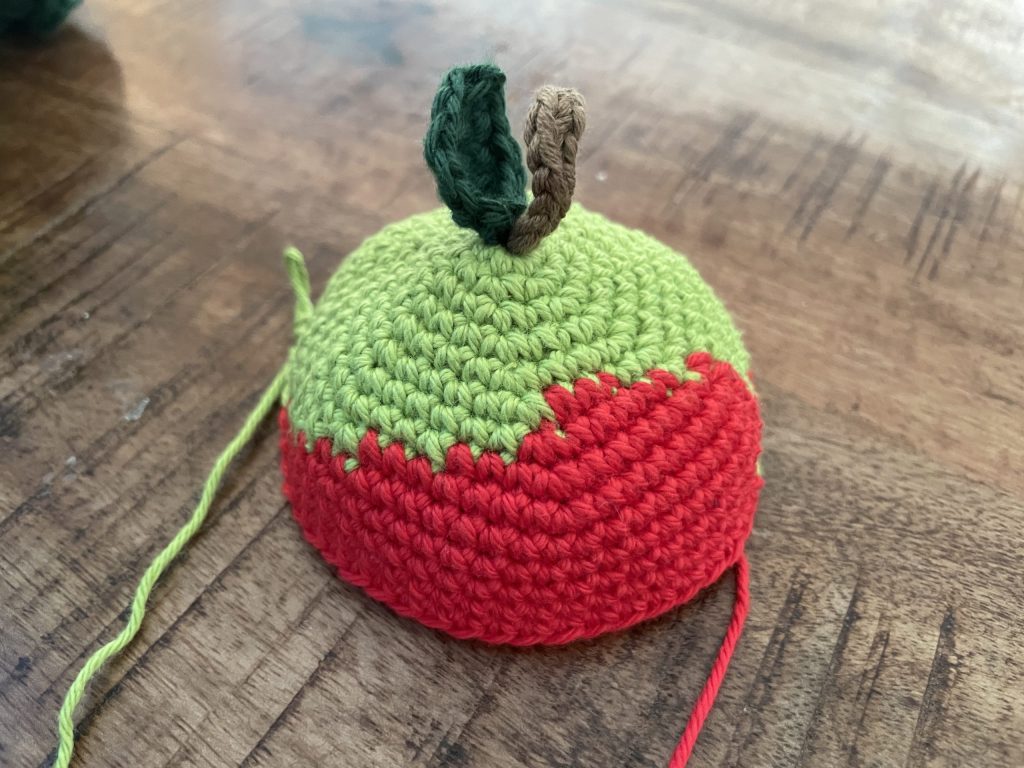
Stuff apple.
Rnd 27: (sc in next st, dec in next st) x6 [12]
Rnd 28: dec in each st around [6]
Snip, leaving a 12” tail. Using a tapestry needle, weave the yarn through the front loop of the remaining 6 stitches and pull tightly to close. Insert the tapestry needle through the center bottom of the apple and up out of the top through the magic circle. Pull to create an indent in the bottom of the apple. Insert the tapestry needle back inside, one stitch to the side of the magic circle and back out the bottom. Pull snugly to create an indent in the top of the apple. Tug and shape as desired. Take a few stitches to secure the yarn, pull it to the inside and outside one of the sides of the apple. Snip yarn against the outside skin of the apple, clean with the surface.

RED or GREEN APPLE VERSION (solid colored)
NOTES:
- The apple is worked in continuous rounds – do not join each round
Use the red or green yarn.
Rnd 1: st 6 in a magic circle [6] Do not close tightly until after you put in the stem and leaf
Rnd 2: inc in each st around [12]
Pull the yarn tails from the stem and leaf through the magic circle from outside to inside. Tighten the magic circle. Tie a knot with the tails from the magic circle, leaf and stem.
Rnd 3: (sc in next st, inc in next st) x6 [18]
Rnd 4: (sc in next 2 st, inc in next st) x6 [24]
Rnd 5: (sc in next 3 st, inc in next st) x6 [30]
Rnd 6: (sc in next 4 st, inc in next st) x6 [36]
Rnd 7: (sc in next 5 st, inc in next st) x6 [42]
Rnd 8: (sc in next 6 st, inc in next st) x6 [48]
Rnd 9: (sc in next 7 st, inc in next st) x6 [54]
Rnd 10-14: sc in each st around [54]
Rnd 15: (sc in next 7 st, dec in next st) x6 [48]
Rnd 16: sc in each st around [48]
Rnd 17: (sc in next 6 st, dec in next st) x6 [42]
Rnd 18: sc in each st around [42]
Rnd 19: (sc in next 5 st, dec in next st) x6 [36]
Rnd 20: sc in each st around [36]
Rnd 21: (sc in next 4 st, dec in next st) x6 [30]
Rnd 22: sc in each st around [30]
Rnd 23: (sc in next 3 st, dec in next st) x6 [24]
Rnd 24: sc in each st around [24]
Rnd 25: (sc in next 2 st, dec in next st) x6 [18]
Rnd 26: sc in each st around [18]
Stuff apple.
Rnd 27: (sc in next st, dec in next st) x6 [12]
Rnd 28: dec in each st around [6]
Snip, leaving a 12” tail. Using a tapestry needle, weave the yarn through the front loop of the remaining 6 stitches and pull tightly to close. Insert the tapestry needle through the center bottom of the apple and up out of the top through the magic circle. Pull to create an indent in the bottom of the apple. Insert the tapestry needle back inside, one stitch to the side of the magic circle and back out the bottom. Pull snugly to create an indent in the top of the apple. Tug and shape as desired. Take a few stitches to secure the yarn, pull it to the inside and outside one of the sides of the apple. Snip yarn against the outside skin of the apple, clean with the surface.
Show Off Your Work! ✨
I can’t wait to see your beautiful KEYWORD/PATTERN NAME! Be sure to tag me on social media @offthebeatenhook or use the hashtag #offthebeatenhook so I can admire your makes. ❤️
Love crochet amigurumi? I have more free food toy patterns! Here’s a couple you might be interested in, but there are MANY more in my free crochet pattern library!
Pin this crochet apple pattern here:

Leave a Reply