
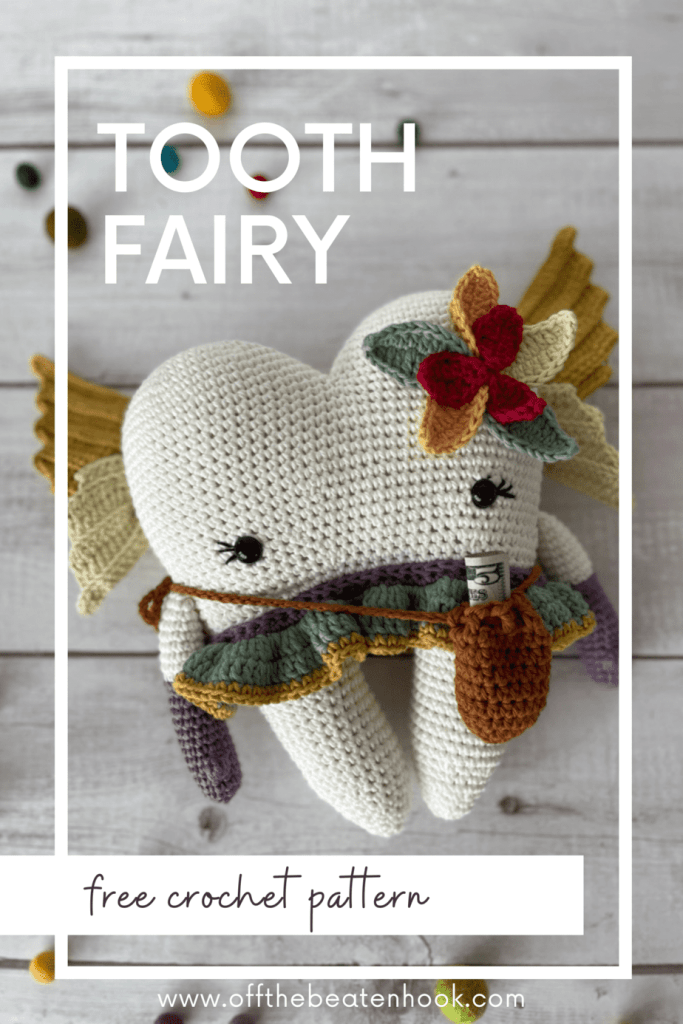
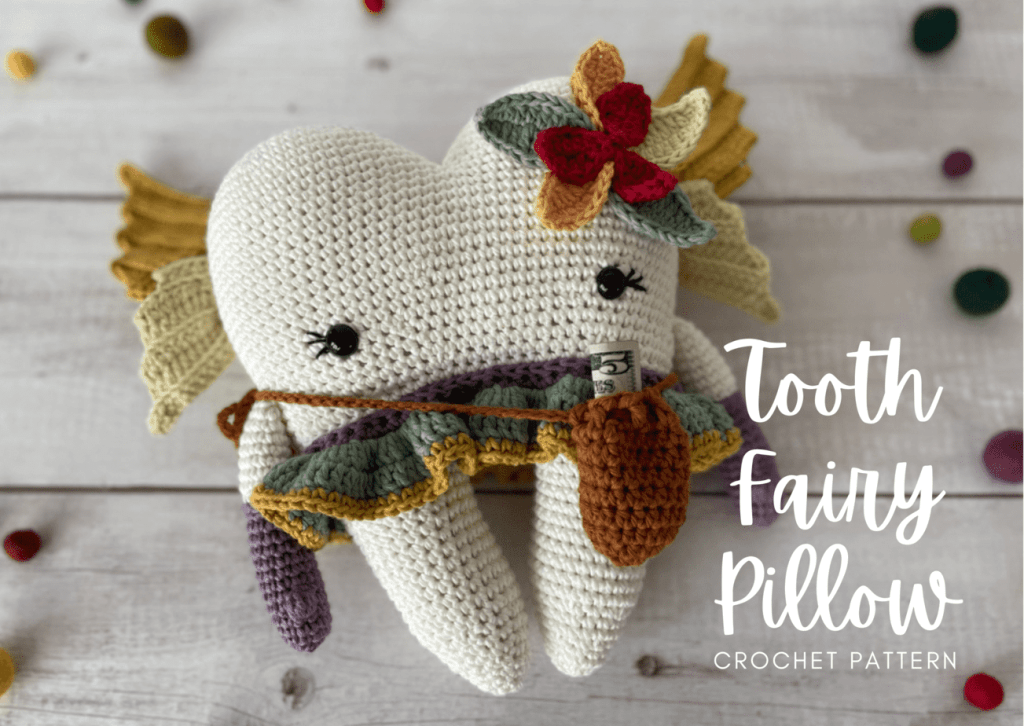
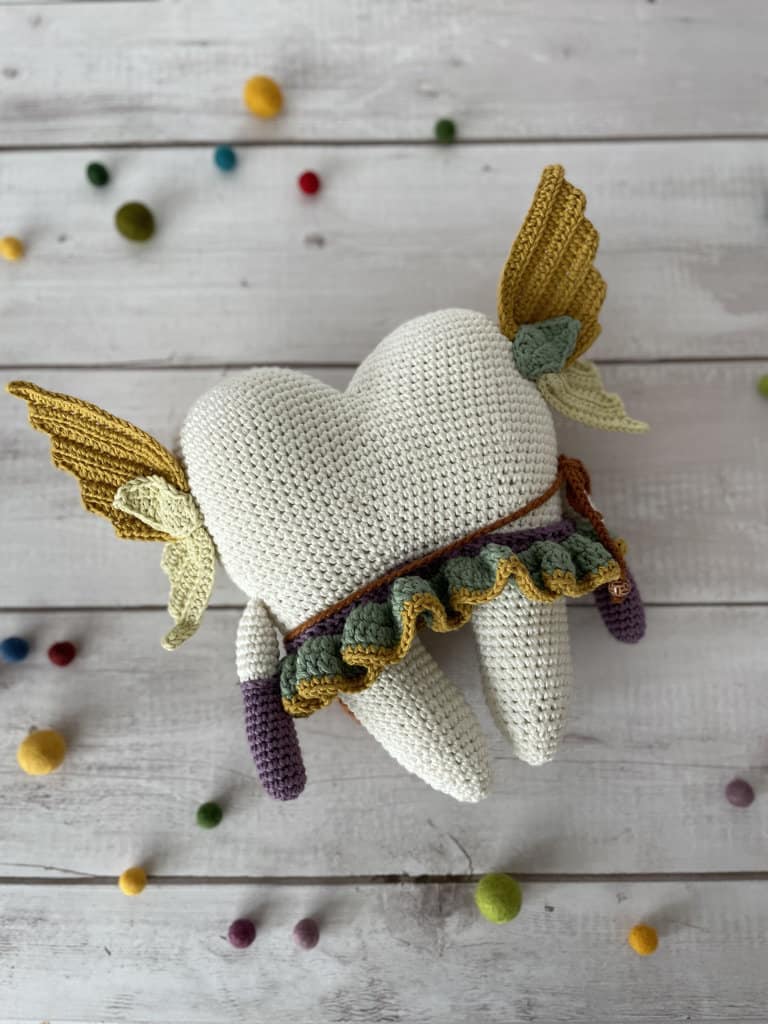
Losing teeth can be scary! Help your kiddo feel comforted AND add a little fun with this crochet tooth fairy pillow pattern. With a functional crossbody satchel, this little fairy will trade a tooth for a treat. Just set near your little one’s pillow at night with their tooth in the satchel and swap the tooth for a treat for your little one to find in the morning! The satchel is removable. Made with 100% organic cotton, this tooth fairy is not only super soft and adorable, it is also sustainable and eco-friendly!
Make the crochet tooth fairy pillow pattern now or PIN it for later here!
A few months ago my son was getting his teeth cleaned when our dentist advised me that he will probably start losing teeth this year! I thought I would try to help ease the discomfort by designing this crochet tooth fairy pillow pattern. I hope this one will be something that both my son and daughter will enjoy using. Maybe it’ll even get passed down to their kids one day!
This free pattern is supported by ads on my blog. You can find the 12-page PDF printable, ad-free pattern of the Tooth Fairy Pillow on my Etsy shop here.

Crochet Tooth Fairy Pillow Pattern Notes & Tips:
This tooth fairy pillow free crochet pattern is written in US terms. If needed, you can find a handy term conversion chart right here in my Resource Library. I recommend giving the pattern a read-through before you begin so you can visualize the big picture and consider any specific notes for help along the way! If you’re more of a visual learner, the printable pattern in my shop comes with over 40 photo tutorials to help you with each step along the way.
Size & Gauge:
Size: the Tooth Fairy will end up being 10″ tall x 11″ wide (inches)
Gauge: 4″x4″ of single crochet = 20 stitches x 22 rows. Ultimately with toys, gauge doesn’t matter. It won’t have to fit someone’s body or a specific space. My patterns will include the size of the finished toy based on the yarn and hook I use. But if you want it smaller or bigger, just use a bigger yarn and hook! Just remember, when crocheting toys, crochet tightly and choose a hook one size smaller than the yarn size recommends in order to avoid holes between each stitch where the stuffing will show through.
Yarn & Stuffing:
Yarn: Take your choice of yarn! Choose colors that bring you joy and fibers that feel good between your fingers. I use 100% organic cotton yarn because I make these toys for my kids and need them to be functional. Cotton is natural, washable, soft, and relatively inflexible so the toys don’t stretch and sag, even after being thrown across the house, down the stairs and adventured through every part of the garden!
It’s very important for me to use only sustainable and eco-friendly yarn so I feel good about the impact I’m making on the environment with my craft. This is why I choose organic cotton versus conventional cotton.
Stuffing: Stuff more than you think you should. Not enough for the stitches to stretch and show holes, but enough to make the toy stiff and able to withstand the rough trials of toy life. The filling will compress a bit over time. I encourage you to use an alternative to poly-fill (unless it’s recycled!). Try using leftover yarn scraps and snippets or old non-donate-able clothes and materials cut into strips.
Policies and Disclaimers:
This crochet tooth fairy pillow pattern is for PERSONAL USE ONLY. This pattern or parts of it may not be reproduced, resold, distributed, published, altered, translated, posted or shared without authorization. You can sell your finished items provided that you credit Off the Beaten Hook as the designer using this verbiage, “This pattern was designed by Lindsey Roe and Off the Beaten Hook.” Thank you for your respectfulness!
This post contains affiliate links for materials I use and love. If you purchase something using one of these links I may earn a small commission which in no way affects the cost to you. These partnerships help me support my small business which allows me to provide you with free crochet patterns. Thank you from the bottom of my heart for your support!
Materials you will need:
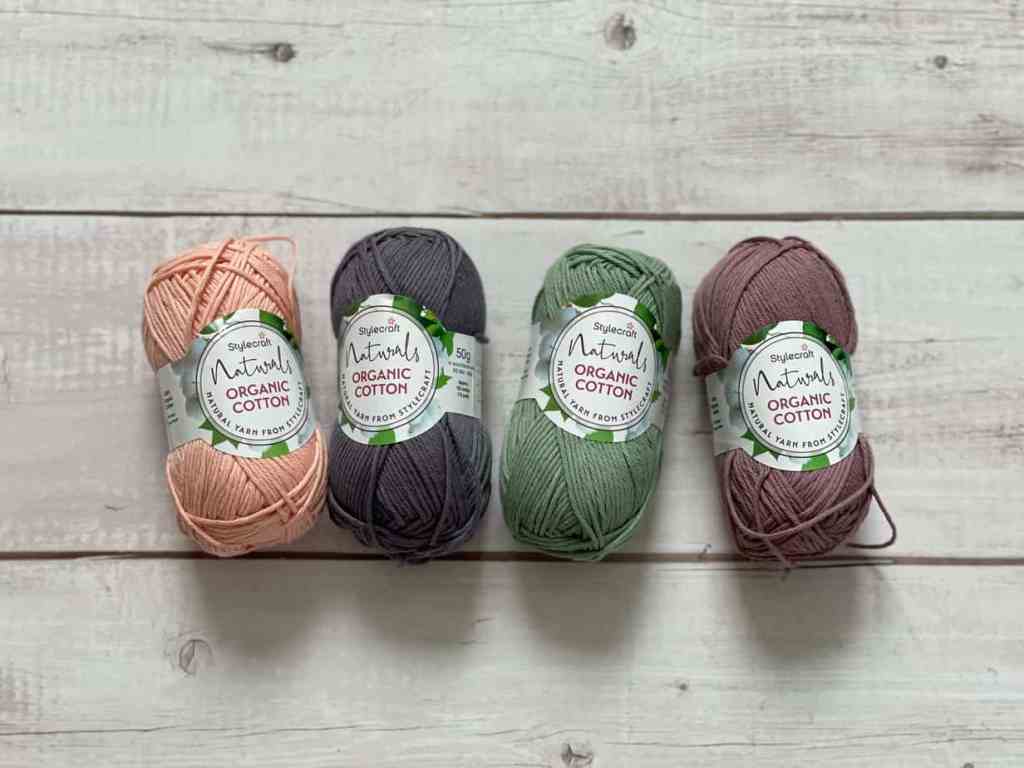
Other than the Rico Essentials Organic Cotton Aran used for the tooth (which is the PERFECT color for a tooth by the way), I was able to shop my own yarn stash for the tooth fairy’s accessories – all of which were 100% cotton DK. Hopefully you can too because this is a great opportunity to use up some of the leftover bits you have. But if not, the colors above will be the perfect match!
- RICO ESSENTIALS ORGANIC COTTON ARAN / 100% Organic Cotton | Weight 4/Aran
- Colors & Number of balls:
- WHITE x2 – tooth
- Colors & Number of balls:
- RICO ESSENTIALS ORGANIC COTTON DK / 100% Organic Cotton | Weight 3/Light Worsted
- NOUGAT – cross body pouch
- LILAC – gloves & skirt waistband
- MUSTARD – wings & skirt hem
- RED – small leaves
- STYLECRAFT NATURALS ORGANIC COTTON DK / 100% Organic Cotton | Weight 3/Light Worsted
- ARTICHOKE – wings, skirt & leaves
- Hook: 4.00 mm & 3.00 mm
- Safety Eyes: 12 mm
- Black embroidery thread (or black DK weight yarn split in half – about 4 strands)
- Tapestry Needle
- Stitch Markers
- Scissors
- Stuffing
- Optional: wooden buttons for crossbody bag tie
Abbreviations used in the Tooth Fairy Pillow free crochet pattern:
ch – chain
st – stitch
hk – hook
sk – skip
sl st – slip stitch
sc – single crochet
fsc – foundation single crochet
hdc – half double crochet
dc – double crochet
tr – treble crochet
4-DcBo – double crochet bobble
inc – increase
dec – decrease
(…) x – repeat indicated number of times
[…] – number of stitches in row/round
The Crochet Tooth Fairy Pillow Pattern
NOTES:
- The tooth is worked in continuous rounds from the top down – do not join after each round.
- You will make two “cups” which will be joined to create the top bumps. Then, you will crochet around them and continuously until you split for the roots which are also crocheted in continuous rounds.
- Use size 4.00mm hook for the tooth
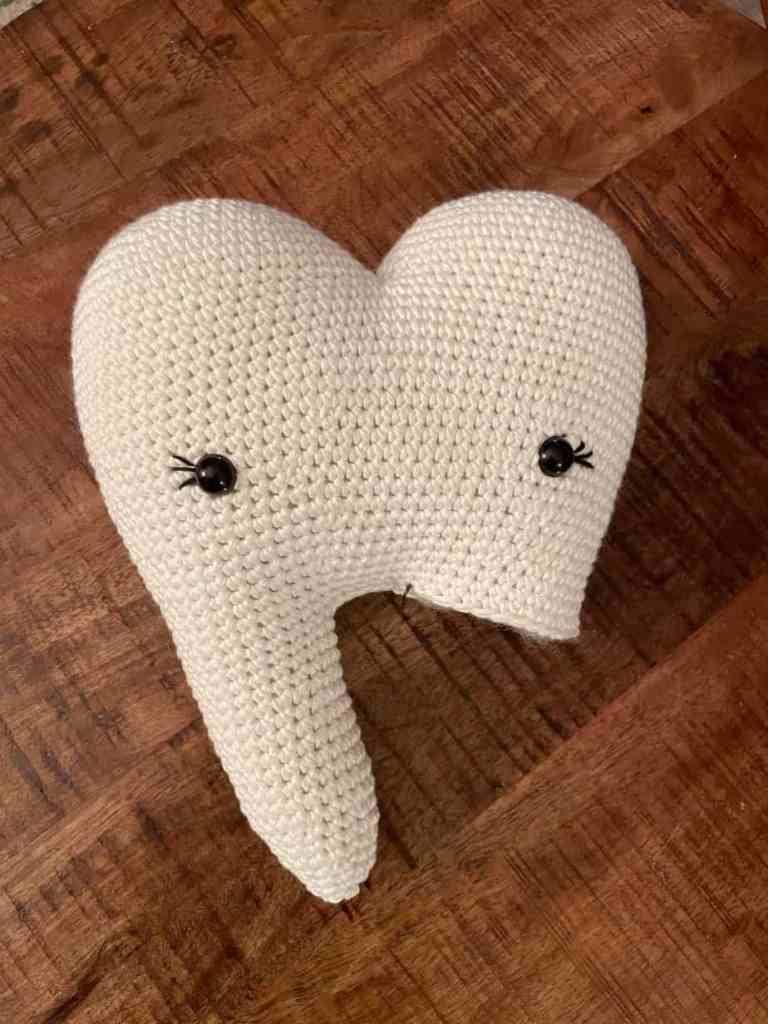
TOOTH:
CUPS – make 2
Rnd 1: st 6 in a magic circle [6]
Rnd 2: inc in each st around [12]
Rnd 3: (sc, inc) x6 [18]
Rnd 4: (sc 2, inc) x6 [24]
Rnd 5: (sc 3, inc) x6 [30]
Rnd 6: (sc 4, inc) x6 [36]
Rnd 7: (sc 5, inc) x6 [42]
Rnd 8: (sc 6, inc) x6 [48]
Rnd 9-13: sc around [48]
Fasten off the first cup. Do not fasten off the second one as you will continue with your working yarn to join the cups and continue on with the rest of the tooth.
JOIN CUPS: Hold the two cups side by side and join by making 6 slip stitches through Rnd 13 of both pieces to join
Begin straight away where you left off with your last sl st?
Rnd 14-22 sc around [84]
Rnd 23: (sc 12, dec) x6 [78]
Rnd 24: sc around [78]
Rnd 25: (sc 11, dec) x6 [72]
Rnd 26-27: sc around [72]
Rnd 28: (sc 10, dec) x6 [66]
Rnd 29-30: sc around [66]
Rnd 31: (sc 9, dec) x6 [60]
Rnd 32-34: sc around [60]
Insert safety eyes between rounds 24 and 25, spaced by 20 stitches. Using a tapestry needle, embroider on eyelashes. Stuff tooth.

ROOTS:
Split your work for the roots:
Each root will have 24 st, and then there will be 12 stitches (6 from front and 6 from back) that will be crocheted closed for the gap between the roots. Use stitch markers to mark these stitches as described.
Give or take a few stitches to be sure your hook is positioned in the stitch just before what’s about to become the gap between the roots. Hold the two sides of the tooth closed – 6 stitches against 6 stitches and slip stitch the two sides together (12 stitches – 6 from front and 6 from back). Then continue straight away into round 35 without fastening.
Rnd 35-46: sc in each st around [24] STUFF
- TIPS:
- A) I suggest placing a stitch marker on your first st of Rnd 35 so you can easily find it as you come back around.
- B) the start of rnd 36 will connect the front to the back, closing the rounds for the first root.
Rnd 47: (sc 2, dec) x6 [18]
Rnd 48-49: sc around [18]
Rnd 50: (sc, dec) x6 [12]
Rnd 51-52: sc around [12] STUFF
Rnd 53: dec around [6]
Snip leaving a long tail and pull through final two loops. Using a tapestry needle and the yarn tail, weave through the front loops of the final 6 stitches and pull tightly to close. Bring to the inside and back out a side wall. Snip cleanly with the surface.
Rejoin yarn on the other side of the 6-slip stitch-gap, and repeat Rounds 35-53 for second root. Fasten off and close as directed for first root above.
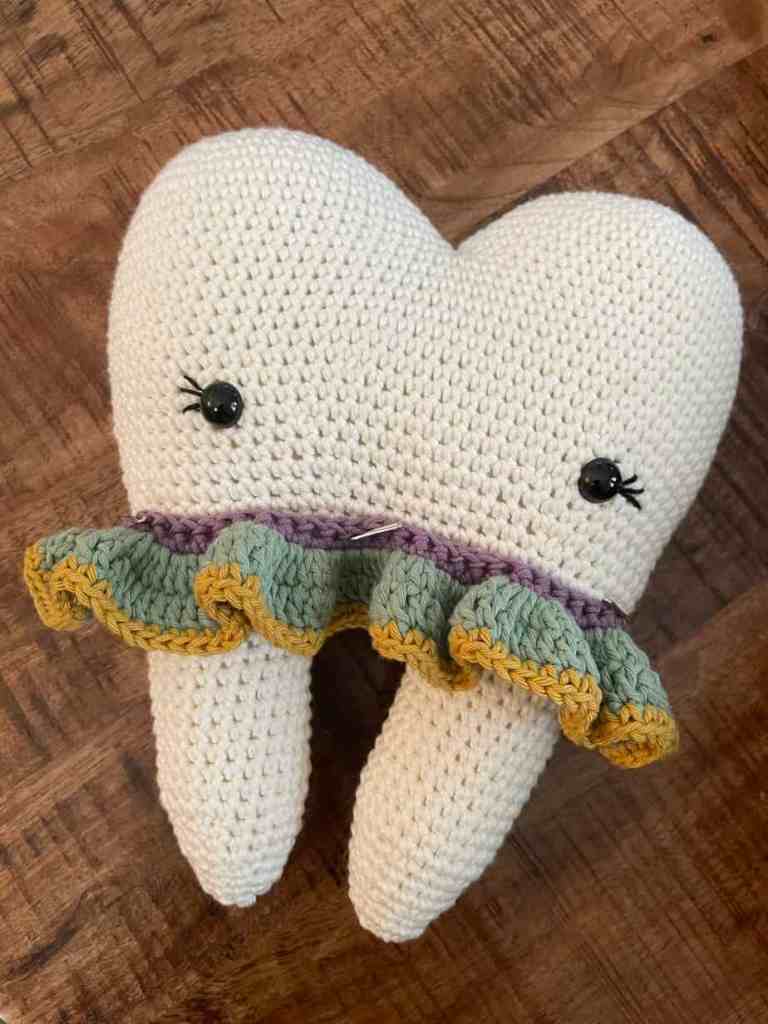
SKIRT:
NOTES:
- The skirt is worked in continuous rounds – do not join after each round
- Use size 3.00mm hook for the skirt
Start with the purple yarn.
Rnd 1: fsc 70 [70]
Rnd 2: sc around [70]
Switch to green yarn.
Rnd 3: make 3 dc in each st around [210]
Rnd 4: dc around [210]
Switch to gold yarn.
Rnd 5: sc around [210]
Fasten off and weave in end. Put skirt on tooth. Using a tapestry needle and a VERY long strand of purple yarn, weave the tapestry needle from front to back in between the first row (purple) of the skirt, several times to secure the skirt to the tooth.
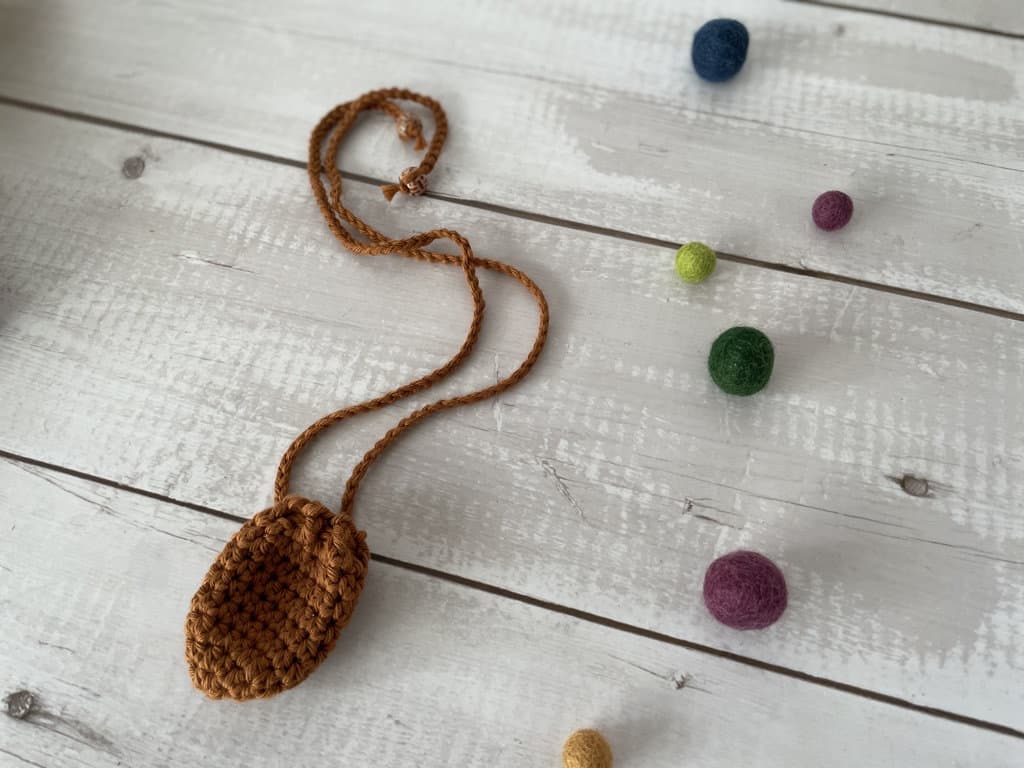
CROSSBODY SATCHEL:
Use the brown yarn & 3.00mm hook
Rnd 1: st 6 hdc in a magic circle [6]
Rnd 2: hdc inc around [12]
Rnd 3: (hdc, hdc inc) x6 [18]
Rnd 4-7: hdc around [18]
Rnd 8: dc around [18]
Fasten off and weave in end.
Make drawstring: chain 150. Knot off ends. Weave in and out of round 8 (dc round) and cinch to close. If you?re using beads for the ends of the drawstring, put those on now.


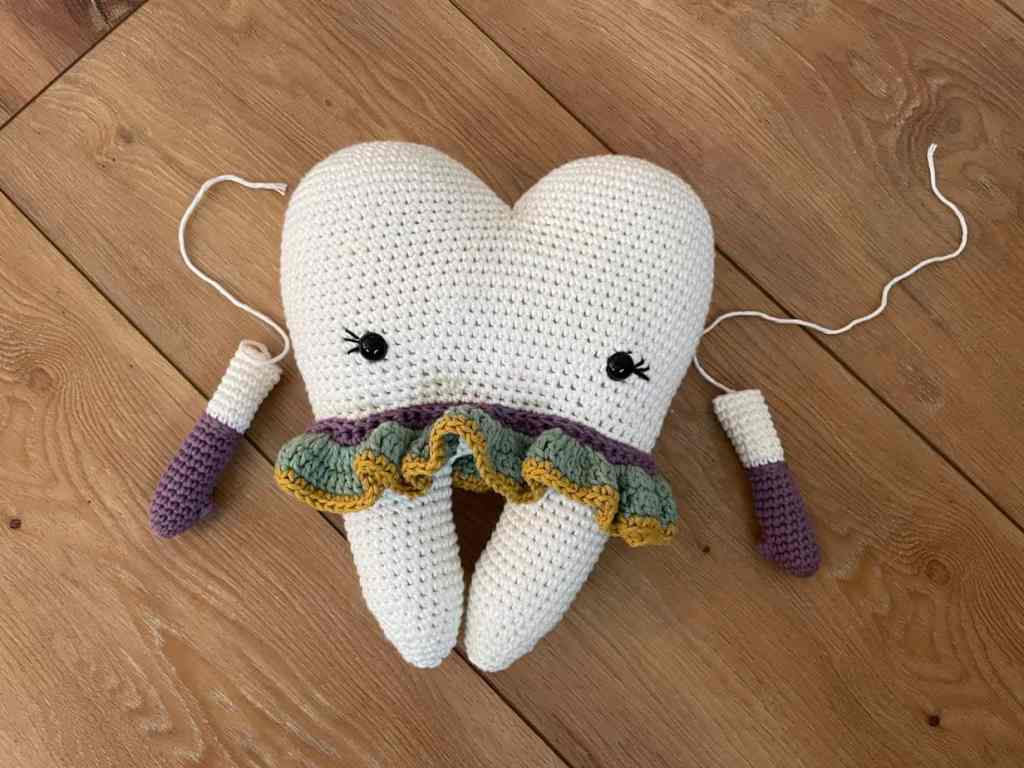
ARMS (make 2):
NOTES:
- The arms are worked in continuous rounds – do not join after each round
- Use size 3.00mm crochet hook
- You will start with the purple yarn for the gloves and switch to the tooth color to complete the arms
Start with purple yarn.
Rnd 1: st 6 in a magic circle [6]
Rnd 2: inc in each st around [12]
Rnd 3-5: sc around [12]
Rnd 6: 4-DcBo in next st, sc in next 11 st [12]
Rnd 7-14: sc around [12]
Rnd 15: sl st around [12]
Complete the glove and color change as follows: Remove your hook from the loop and insert it under the next st from back to front. Snatch your loop and pull it to the back, then switch to white by yarning over with white and pulling it through the purple loop.
Pull on the ends to tighten. After you make a few stitches of Rnd 16, tie those purple and white ends together and stuff them inside. For round 16, you will work in the BLO of the purple from Rnd 14, found just behind the Rnd 15 of slip stitches.
Rnd 16: BLO sc around [12]
Rnd 17-23: sc around [12]
Sl st to fasten off and pull through loop, leaving a long tail for sewing on. Stuff very lightly and sew arms to sides of body over round 25, spaced about 7 stitches away from the eye.
WINGS – LARGE (make 2):
NOTES:
- The wings are made by crocheting turning rows of half double crochet in the BACK LOOP ONLY
- You will work into a magic circle – do not close the magic circle until all the rows are complete as you will need to be making slip stitches into the magic circle
- Chain 1 and turn at the end of every row
- Use the gold yarn
Leaving a long starting tail, begin by making a magic circle and slip knot onto your hook – do not close the magic circle. Then, chain 23.
Row 1: hdc in the 2nd back bump ch from hk and in each back bump ch thereafter, sl st into the magic circle, ch 1, turn [22]
Row 2: BLO hdc in next 19 st, leave final 3 st unworked, ch 1, turn [19]
Row 3: BLO hdc in each st back down to the mc, sl st into the mc, ch 1, turn [19]
Row 4: BLO hdc in next 16 st, leave final 3 st unworked, ch 1, turn [16]
Row 5: BLO hdc in each st back down to the mc, sl st into the mc, ch 1, turn [16]
Row 6: BLO hdc in next 13 st, leave final 3 st unworked, ch 1, turn [13]
Row 7: BLO hdc in each st back down to the mc, sl st into the mc, ch 1, turn [13]
Row 8: BLO hdc in next 10 st, leave final 3 st unworked [10]
Fasten off and weave in end. Pull magic circle tightly to close and cinch the wing.

WINGS – SMALL (make 2):
NOTES:
- Refer to the notes and for “wings: large” as the small wings are made using the same method, just using shorter rows
- Use the light green yarn
Leaving a long starting tail, begin by making a magic circle and slip knot onto your hook – do not close the magic circle. Then, chain 20.
Row 1: hdc in 2nd back bump ch from hk and in each back bump ch thereafter, sl st into the mc, ch 1, turn [19]
Row 2: BLO hdc in next 16 st, leave final 3 st unworked, ch 1, turn [16]
Row 3: BLO hdc in each st back down to the mc, sl st into the mc, ch 1, turn [16]
Row 4: BLO hdc in next 13 st, leave final 3 st unworked, ch 1, turn [13]
Row 5: BLO hdc in each st back down to the mc, sl st into the mc, ch 1, turn [13]
Row 6: BLO hdc in next 10 st, leave final 3 st unworked [10]
Fasten off and weave in end. Pull magic circle tightly to close.

ASSEMBLE AND ATTACH THE WINGS TO YOUR CROCHET TOOTH FAIRY PILLOW:
- Arrange the wings with the large on top and the small beneath – SEE PHOTO
- Lay the small wings over top the large wings so that they have one row overlapping and are angled as shown in the photo –
- Using the tail end of the small wing, sew the wings together (the stitches that show will be covered over with a leaf)
- Sew wings to the back of the tooth over rounds 10-15 using the photos as a guide for placement
LEAVES:
NOTES:
- The leaves are worked by making a chain and crocheting around both sides of it
- You will make 10 leaves – 5 large and 3 small will be used for the leaf flower and 2 will be used as part of the wings on the back – to cover over the stitches that show when sewing the wings together
LARGE LEAVES – make 7 in your choice of color (I made 3 using the dark green yarn, 2 using the light green yarn and 2 using the peach yarn which were leftovers I had on hand):
Begin by chaining 12.
Row 1: sc in 2nd ch from hk, hdc in next ch, dc in next 2 ch, tr in next 3 ch, dc in next 2 ch, hdc in next ch, sc in next ch. Continue onto the other side of the chain, and repeat the pattern for the 2nd side of the leaf.
Sl st to next st and fasten off. Leave a long tail on ONE of the leaves for sewing them all together. On the other leaves, weave in ends.
SMALL LEAVES – make 3, using the red yarn:
Begin by chaining 8.
Row 1: sc in 2nd ch from hk, hdc in next ch, dc in next ch, tr in next ch, dc in next ch, hdc in next ch, sc in next ch. Continue onto the other side of the chain, and repeat the pattern for the 2nd side of the leaf.
Sl st to next st and fasten off. Leave a long tail on ONE of the leaves for sewing them to the leaf flower. On the other leaves, weave in ends.
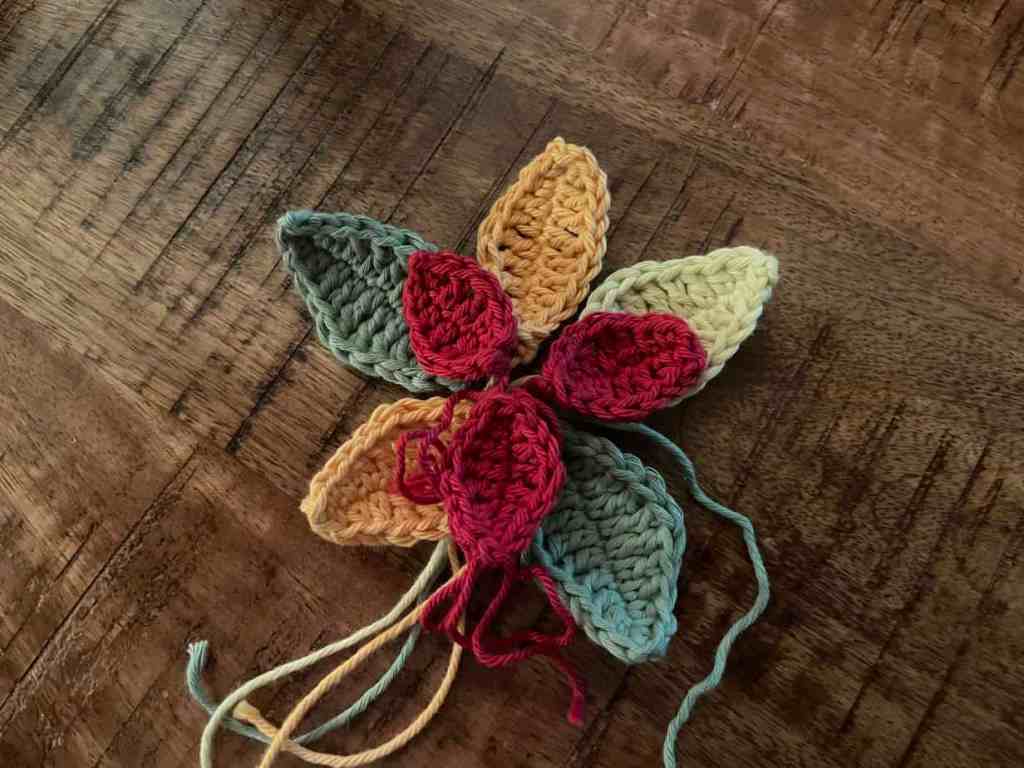
LEAF FLOWER ASSEMBLY:
- Arrange 5 of the large leaves in a flower formation – SEE PHOTO
- Using the long tail from one of the leaves, sew them together
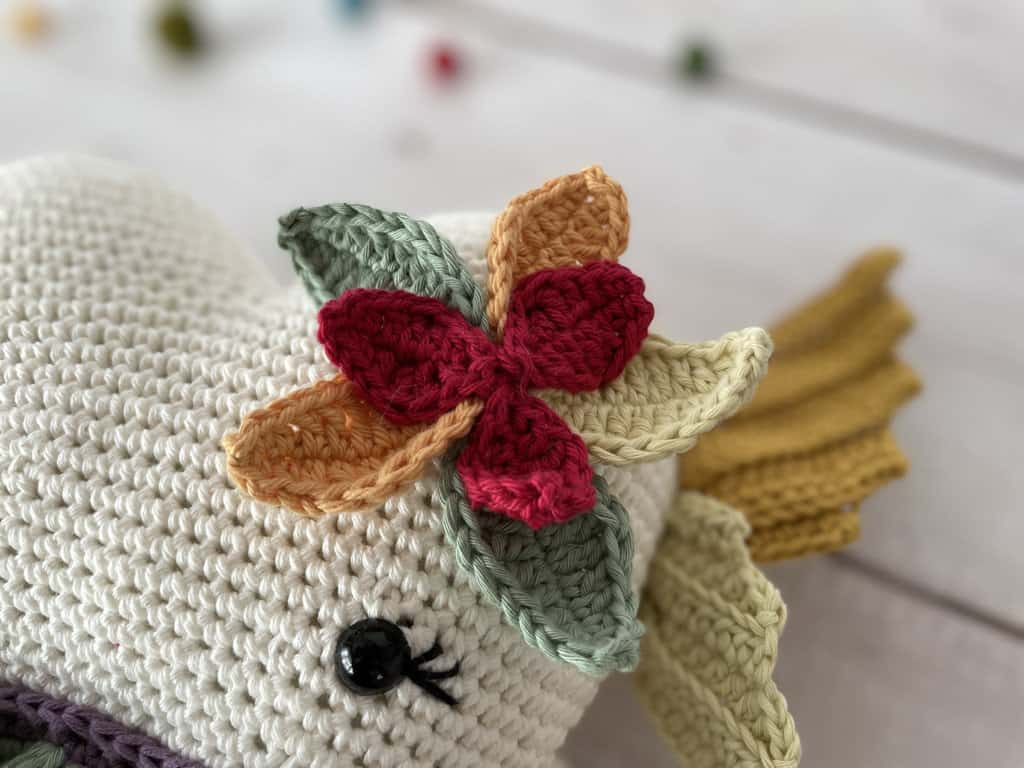
- Arrange the 3 small leaves on top of the large flower and sew them on
- Sew the leaf flower onto the tooth at round 16, centered on the tooth “cup”
- Sew the additional 2 large flowers over the middle of the wings on the back to cover any stitches showing on the wings
Well done! I hope you and your little one will enjoy this tooth fairy pillow so much.
I would love to see your completed pillows!. Please post pictures on instagram @offthebeatenhook and use #offthebeatenhook. Cheers!
PIN FOR LATER!


Did you love this crochet tooth fairy pillow pattern? Want more free amigurumi crochet patterns? Check these out!
- Jag the Jellyfish Free Crochet Pattern
- Minion Free Crochet Pattern
- Cinnamon the Grizzly Teddy Bear Free Crochet Pattern
- Lemon Free Crochet Pattern
Leave a Reply