
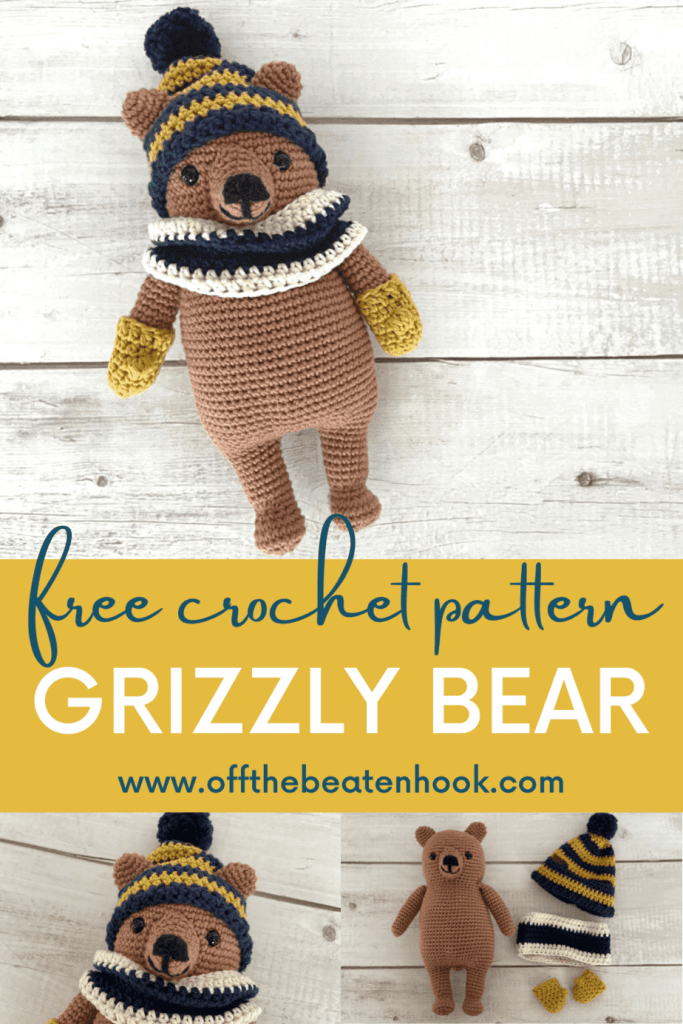
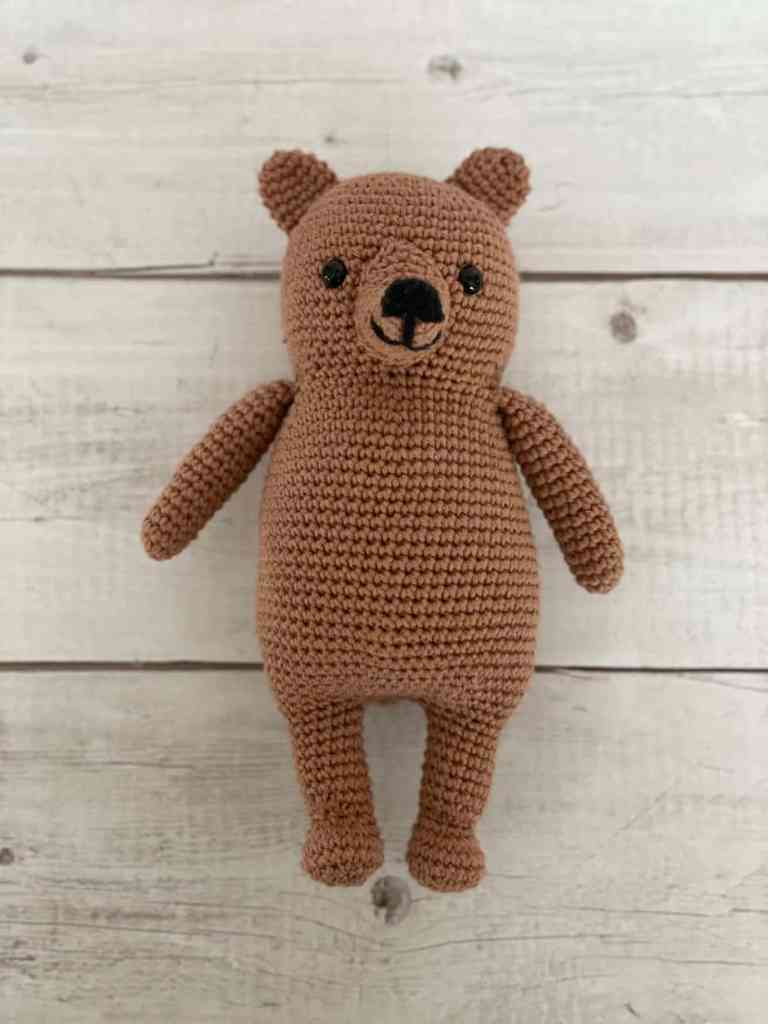
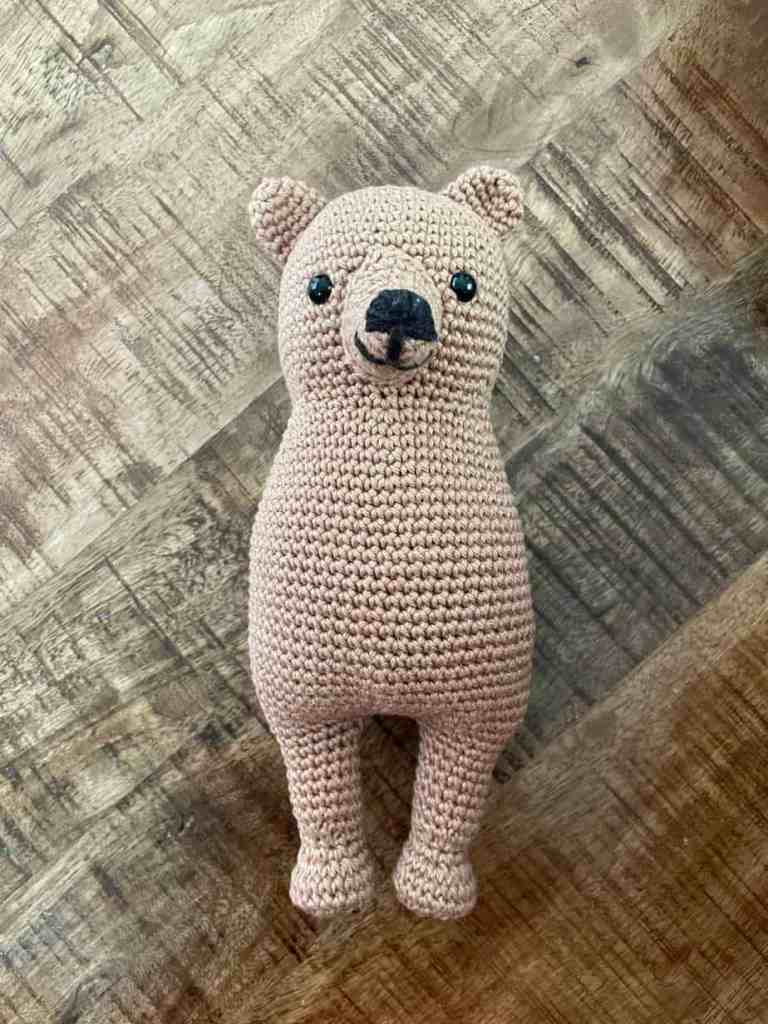
Cinnamon the grizzly bear is the most uncommon and special teddy bear crochet pattern you’ll find! Hailing from the Canadian Rocky Mountains, Cinnamon cozies up in his scarf, mittens and hat to keep him warm before winter comes. Bring him to life in this free teddy bear crochet pattern!
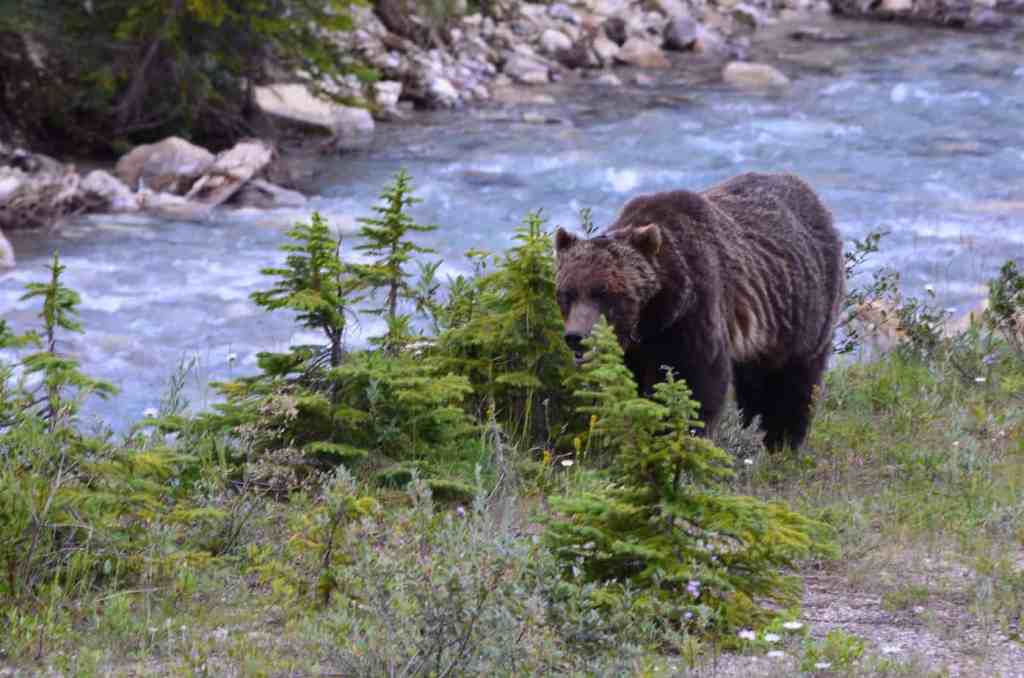
Years back, my husband and I lived for several months in the beautiful Calgary, British Columbia, Canada. During our time there we backpacked over 100 miles in the Canadian Rocky Mountain backcountry just west of Calgary. And I’m telling you first-hand, “lions and tigers and BEARS, OH MY” is REAL…at least the BEARS part. I have never seen so many bears in my life. There was ONE day I counted no less than 8 bears.
But one bear in-particular stands out in my memory – a HUGE male grizzly bear. He was at least 7 feet long. He was the exact color of Cinnamon. And he was gorgeous. Here’s an actual photo of him that we took:
So in honor of this grand and respected creature, Cinnamon the grizzly teddy bear is born. Although he might not be as powerful and intimidating as his real-life counterpart, Cinnamon highlights the cute and cuddly side of these awesome animals.
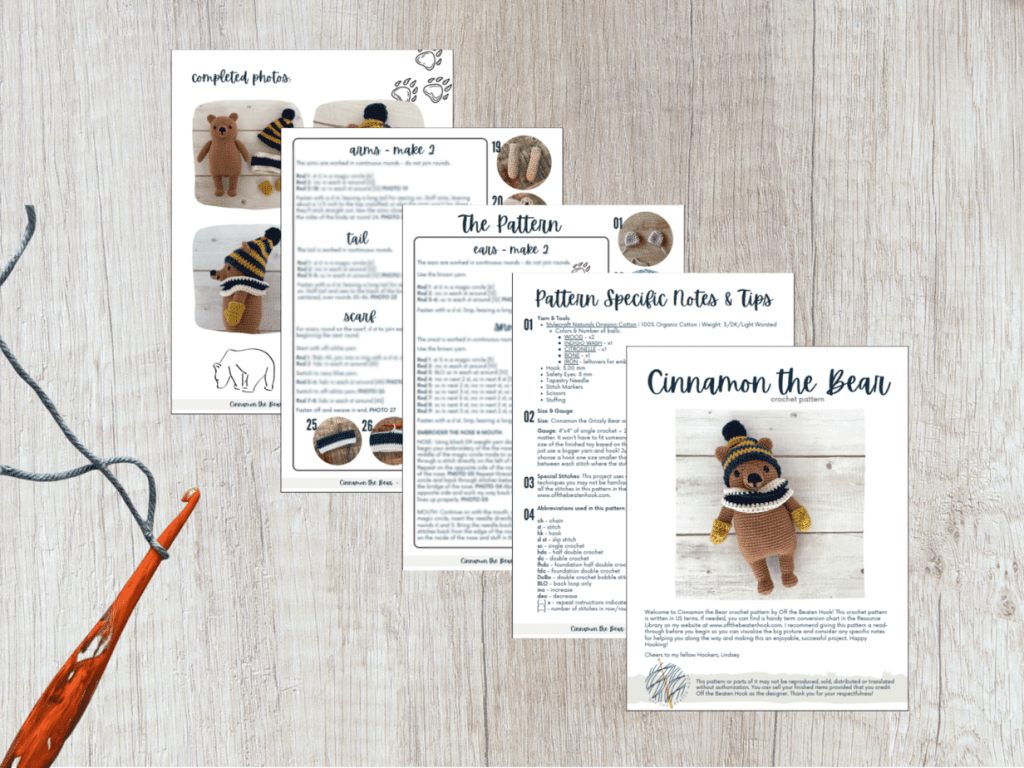
This free pattern is supported by ads on my blog. You can find the 11-page PDF printable, ad-free pattern of Cinnamon the Grizzly on my Etsy shop here.
Teddy Bear Free Crochet Pattern Notes & Tips:
This teddy bear free crochet pattern is written in US terms. If needed, you can find a handy term conversion chart right here in my Resource Library. I recommend giving the pattern a read-through before you begin so you can visualize the big picture and consider any specific notes for help along the way! The printable pattern in my Etsy shop comes with LOTS of in-the-making photos (40 of them!) for each step of the way as well.
Size & Gauge:
Size: Cinnamon will end up being 10″ tall.
Gauge: 4�x4� of single crochet = 28 stitches x 30 rows. Ultimately with toys, gauge doesn’t matter. It won’t have to fit someone’s body or a specific space. My patterns will include the size of the finished toy based on the yarn and hook I use. But if you want it smaller or bigger, just use a bigger yarn and hook! Just remember, when crocheting toys, crochet tightly and choose a hook one size smaller than the yarn size recommends in order to avoid holes between each stitch where the stuffing will show through.
Yarn & Stuffing:
Yarn: Take your choice of yarn! Choose colors that bring you joy and fibers that feel good between your fingers. I use 100% organic cotton yarn because I make these toys for my kids and need them to be functional. Cotton is natural, washable, soft, and relatively inflexible so the toys don�t stretch and sag � even after being thrown across the house, down the stairs and adventured through every part of the garden!
It’s very important for me to use only sustainable and eco-friendly yarn so I feel good about the impact I’m making on the environment with my craft. This is why I choose organic cotton versus conventional cotton.
Stuffing: Stuff more than you think you should. Not enough for the stitches to stretch and show holes, but enough to make the toy stiff and able to withstand the rough trials of toy life. The filling will compress a bit over time. I encourage you to use an alternative to poly-fill (unless it’s recycled!). Try using leftover yarn scraps and snippets or old non-donate-able clothes and materials cut into strips.
The Legal Stuff:
This pattern or parts of it may not be reproduced, sold, distributed or translated without authorization. You can sell your finished items provided that you credit Off the Beaten Hook as the designer. Thank you for your respectfulness!
Materials you will need for this crochet pattern:
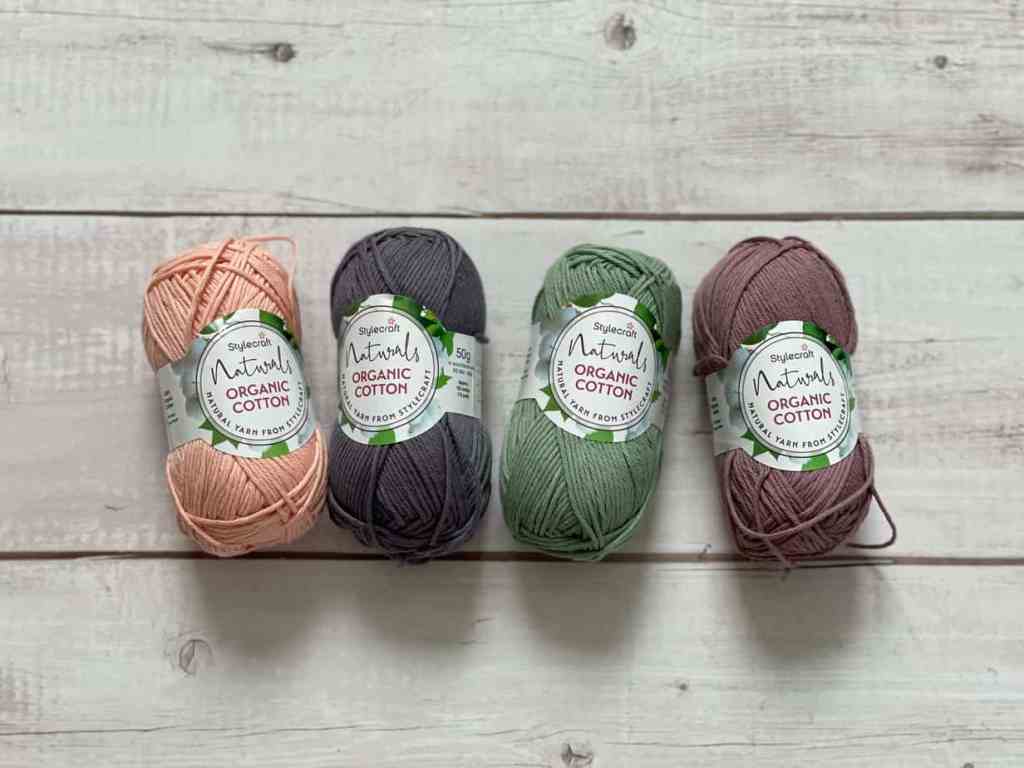
- Stylecraft Naturals Organic Cotton DK (100% Organic Cotton / DK Light Worsted)
- WOOD – 2 balls
- INDIGO WASH – 1 ball
- CITRONELLE – 1 ball
- BONE – 1 ball
- IRON – 1 ball
- Crochet Hook Size: 3.00 mm
- Tapestry Needle
- Stitch Markers
- Scissors
- Safety Eyes – 8 mm
- Stuffing
Abbreviations used in the teddy bear free crochet pattern:
ch – chain
st – stitch
hk – hook
sl st – slip stitch
sc – single crochet
hdc – half double crochet
dc – double crochet
fhdc – foundation half double crochet
fdc – foundation double crochet
DcBo – double crochet bobble stitch
BLO – back loop only
inc – increase
dec – decrease
(…) x – repeat instructions indicated number of times
[…] – number of stitches in row/round
The Teddy Bear Free Crochet Pattern:
Notes:
- Cinnamon and his parts are worked in continuous rounds – do not join after rounds unless otherwise stated
Ears – make 2:
Use the brown yarn.
Rnd 1: st 6 in a magic circle [6]
Rnd 2: inc in each st around [12]
Rnd 3-6: sc in each st around [12]
Fasten with a sl st. Snip, leaving a long tail for sewing on.
Snout:
The snout is worked in continuous rounds – do not join rounds.
Use the brown yarn.
Rnd 1: st 5 in a magic circle [5]
Rnd 2: inc in each st around [10]
Rnd 3: BLO sc in each at around [10]
Rnd 4: inc in next 2 st, sc in next 8 st [12]
Rnd 5: sc in next 2 st, inc in next st, sc in next 9 st [13]
Rnd 6: sc in next 3 st, inc in next st, sc in next 9 st [14]
Rnd 7: sc in next 3 st, inc in next 2 st, sc in next 9 st [16]
Rnd 8: sc in next 4 st, inc in next 2 st, sc in next 10 st [18]
Rnd 9: sc in next 5 st, inc in next 2 st, sc in next 11 st [20]
Fasten with a sl st. Snip, leaving a long tail for sewing on.
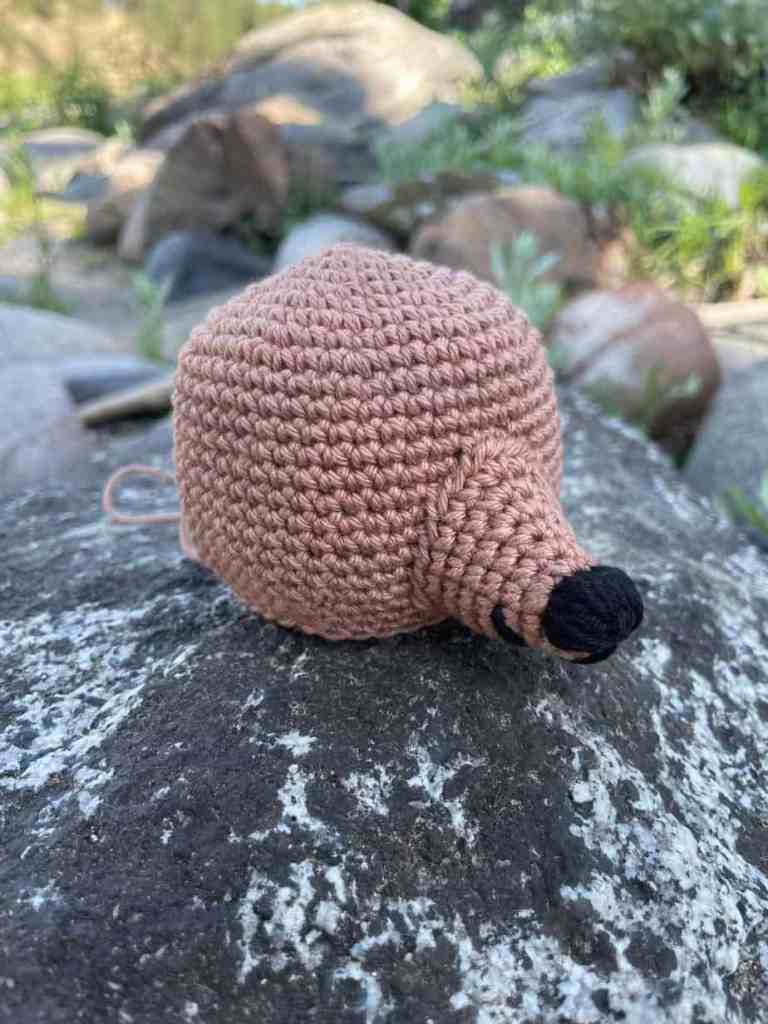
EMBROIDER THE NOSE & MOUTH:
NOSE: Using black DK weight yarn doubled up through a tapestry needle, begin your embroidery of the the nose by inserting your needle through the middle of the magic circle inside to outside. Insert it back to the inside through a stitch directly on the left of the nose between rounds 3 and 4. Repeat on the opposite side of the nose – you now have the bottom edge of the nose. Repeat threading your needle through the magic circle and back through stitches between rounds 3 and 4 all the way over the bridge of the nose. About half way through, switch to the opposite side and work my way back to the middle to be sure everything lines up properly.
MOUTH: Continue on with the mouth; after threading the needle out of the magic circle, insert the needle directly underneath the nose between rounds 4 and 5. Bring the needle back out between rounds 6 and 7 – 2 stitches back from the edge of the nose. Repeat on opposite side. Tie off on the inside of the nose and stuff in the tail ends.

HEAD & BODY:
The head and body are worked in continuous rounds – do not join rounds.
Use the brown yarn.
Rnd 1: st 6 in a magic circle [6]
Rnd 2: inc in each st around [12]
Rnd 3: (sc in next st, inc in next st) x6 [18]
Rnd 4: (sc in next 2 st, inc in next st) x6 [24]
Rnd 5: (sc in next 3 st, inc in next st) x6 [30]
Rnd 6: (sc in next 4 st, inc in next st) x6 [36]
Rnd 7: (sc in next 5 st, inc in next st) x6 [42]
Rnd 8: (sc in next 6 st, inc in next st) x6 [48]
Rnd 9: (sc in next 7 st, inc in next st) x6 [54]
Rnd 10-20: sc in each st around [54]
Rnd 21: (sc in next 7 st, dec in next st) x6 [48]
Rnd 22: (sc in next 6 st, dec in next st) x6 [42]
Rnd 23: (sc in next 5 st, dec in next st) x6 [36]
- Stuff the snout and sew it to the head over rounds 14-22
- Insert the safety eyes to the left and right of the snout between rounds 15 & 16
- Flatten the ears and sew to the head over rounds 4-9 centered over the top of the head, using the snout as your guide for the center of the face
Rnd 24: (sc in next 5 st, inc in next st) x6 [42]
Rnd 25: (sc in next 6 st, inc in next st) x6 [48]
Rnd 26: sc in each st around [48]
Rnd 27: (sc in next 7 st, inc in next st) x6 [54]
Rnd 28-29: sc in each st around [54]
Rnd 30: (sc in next 8 st, inc in next st) x6 [60]
Stuff head.
Rnd 31-45: sc in each st around [60]
Rnd 46: (sc in next 8 st, dec in next st) x6 [54]
Rnd 47: (sc in next 7 st, dec in next st) x6 [48]
Rnd 48: (sc in next 6 st, dec in next st) x6 [42]
Rnd 49: (sc in next 5 st, dec in next st) x6 [36]
Stuff body.
Split your work for the legs: there will be 15 stitches for each leg and 6 stitches in the gap (3 in front and 3 in back). Use stitch markers to mark these stitches, being sure to center them to the face of the bear.
If needed, make or remove a couple of sc to get to your starting point for the left leg. Your starting point will be at the back of the left leg, just to the right of the stitch marker. Join the back to the front by completing a single crochet (this is the first sc of round 50).
LEGS:
LEFT LEG:
Rnd 50-57: sc in each st around [15]
Rnd 58: sc in next 5 st, dec in next st, sc in next 8 st [14]
Rnd 59: sc in next 3 st, dec in next 2 st, sc in next 7 st [12]
Rnd 60: sc in next 2 st, inc in next 4 st, sc in next 6 st [16]
Rnd 61: sc in next 5 st, inc in next 4 st, sc in next 7 st [20]
Rnd 62-63: sc in each st around [20]
Rnd 64: sc in next 2 st, (dec in next st, sc in next st) x6 [14]
Stuff leg & foot.
Rnd 65: dec in each st around [7]
Snip, leaving a tail for closing the circle. Using the yarn tail and a tapestry needle, weave the yarn through the front loop of each remaining 7 stitches and pull tightly to close. Bring the yarn to the inside.
Finish stuffing the body.
RIGHT LEG:
Leaving a long starting tail, slip knot onto your hk and rejoin on the back side in the stitch to the left of the stitch marker, marking the second leg (3 stitches away from the left leg.
Rnd 50: sc in the next 15 st [15]
Rnd 51: join the front and back side by completing a sc, sc in the next 14 st [15]
Rnd 52-57: sc in each st around [15]
Rnd 58: sc in next 9 st, dec in next st, sc in next 4 st [14]
Rnd 59: sc in next 8 st, dec in next 2 st, sc in next 2 st [12]
Rnd 60: sc in next 7 st, inc in next 4 st , sc in next st [16]
Rnd 61: sc in next 9 st, inc in next 4 st, sc in next 3 st [20]
Rnd 62-63: sc in each st around [20]
Rnd 64: sc in next 2 st, (dec in next st, sc in next st) x6 [14]
Stuff leg & foot.
Rnd 65: dec in each st around [7]
Snip, leaving a tail for closing the circle. Using the yarn tail and a tapestry needle, weave the yarn through the front loop of each remaining 7 stitches and pull tightly to close. Bring the yarn to the inside.
Finish stuffing body through the gap between legs. Using the long starting yarn tail from Rnd 50 of right leg, and a tapestry needle, sew closed the gap between the legs. Bring yarn to inside and snip.

ARMS:
The arms are worked in continuous rounds – do not join rounds.
Rnd 1: st 6 in a magic circle [6]
Rnd 2: inc in each st around [12]
Rnd 3-18: sc in each st around [12]
Fasten with a sl st, leaving a long tail for sewing on. Stuff arms, leaving about a 1/2 inch to the top unstuffed, or else the arms won’t lay down – they’ll stick straight out. Sew the arms closed, and sew them to the sides of the body at round 24.
TAIL:
The tail is worked in continuous rounds.
Rnd 1: st 6 in a magic circle [6]
Rnd 2: inc in each st around [12]
Rnd 3-5: sc in each st around [12]
Fasten with a sl st, leaving a long tail for sewing on. Stuff tail and sew to the back of the body, centered, over rounds 43-46.
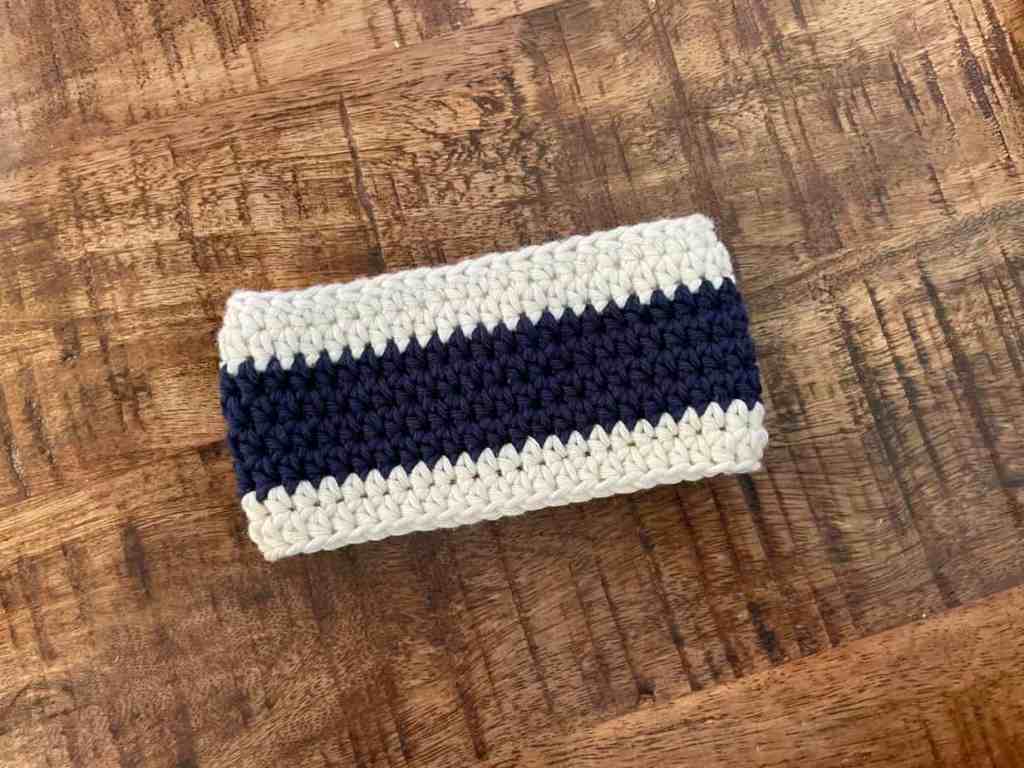
SCARF:
For every round on the scarf, sl st to join each round and ch 1 before beginning the next round.
Start with off-white yarn
Rnd 1: fhdc 45, join into a ring with a sl st, ch 1 [45]
Rnd 2: hdc in each st around [45]
Switch to navy blue yarn.
Rnd 3-6: hdc in each st around [45]
Switch to off-white yarn.
Rnd 7-8: hdc in each st around [45]
Fasten off and weave in end.
Just a couple more accessories and your teddy bear free crochet pattern will be complete!
HAT:
Make a small, 1.5″ pom-pom with the blue yarn. If you need help, you will find a video tutorial on my website on how to make a pom-pom. You don’t need any additional tools, but a pom-pom maker is helpful.
Start with the blue yarn
Rnd 1: fdc 40, ch 1, turn [40]
Rnd 2: (fpdc in next st, bpdc in next st) around [40]
Switch to citronelle yarn
Rnd 3-4: hdc in each st around [40]
Switch to blue yarn
Rnd 5-6: hdc in each st around [40]
Switch to citronelle yarn
Rnd 7: hdc in next 11 st, ch 6, sk next 6 st, hdc in next 6 st, ch 6, sk next 6 st, hdc in next 11 st [40]

Switch to blue yarn
Rnd 8: (hdc in next 6 st, dec hdc in next st) x5 [35]
Rnd 9: hdc in each st around [35]
Switch to citronelle yarn
Rnd 10: (hdc in next 5 st, dec hdc in next st) x5 [30]
Rnd 11: hdc in each st around [30]
Switch to blue yarn
Rnd 12: (hdc in next 4 st, dec hdc in next st) x5 [25]
Rnd 13: hdc in each st around [25]

Switch to citronelle
Rnd 14: (hdc in next 3 st, dec hdc in next st) x5 [20]
Rnd 15: hdc in each st around [20]
Sl st to next st. Snip leaving a long yarn tail. Using a tapestry needle, weave the yarn tail in and out around each of the posts of rnd 15 (front to back under one, back to front under the next, etc, all the way around). Pull tail to close. Bring yarn to inside and fasten off.
Pull the yarn tails of the pom-pom through the center top hold of the hat. Grab hold of the yellow yarn tail from the hat, along with the 2 yarn tails from the pom-pom and knot them tightly on the inside of the hat, as close to the inside tip of the hat as possible. Knot it again.

MITTENS:
Use the citronelle yarn
Rnd 1: st 6 in a magic circle [6]
Rnd 2: hdc inc in each st around [12]
Rnd 3-4: hdc in each st around [12]
Rnd 5: 5-DcBo in next st, hdc in next 11 st [12]
Rnd 6: hdc in each st around, sl st to join rnd, ch 1 [12]
Rnd 7: dc in each st around [12]
Fasten off and weave in ends.

You’re done! Finally, put on his cozy scarf, his hat and his little mittens. Look at Cinnamon! Isn’t he so cozy and cuddly?
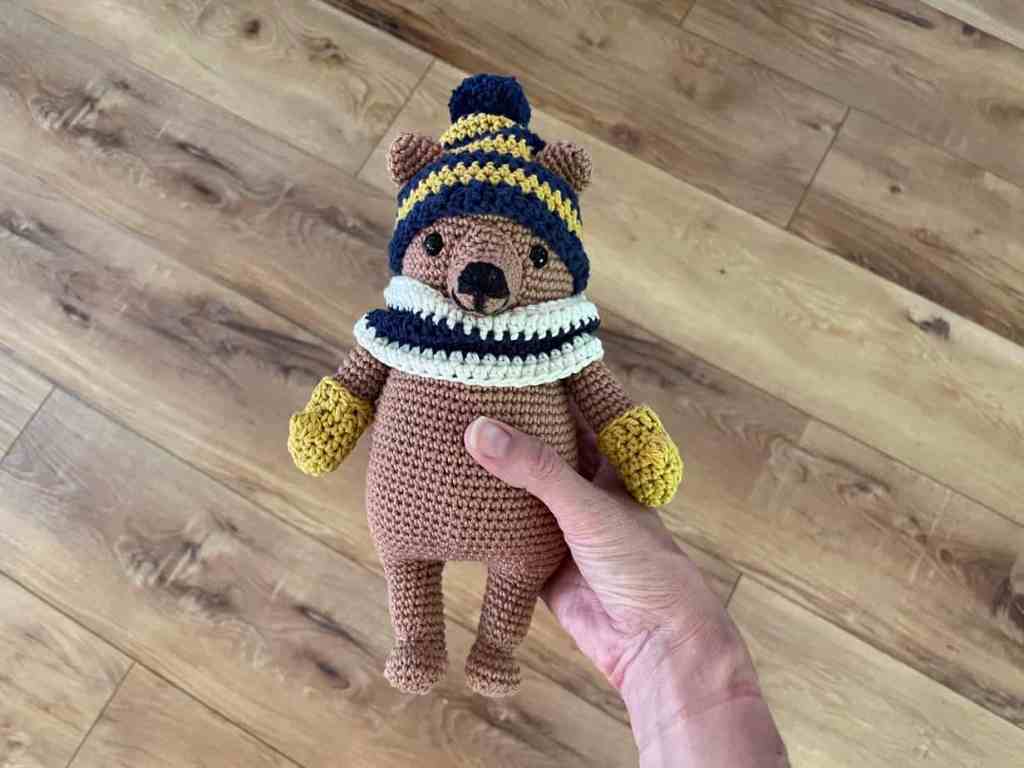
You did it! Stop and admire your little teddy bear crochet masterpiece!
I would love to see your completed Cinnamon bears. Please post pictures on instagram and tag me @offthebeatenhook. Happy hooking!

Did you love this teddy bear free crochet pattern? Want more free amigurumi crochet patterns? Check these out!
- Esteban the Raccoon Free Crochet Pattern
- Leaf Lettuce Free Crochet Pattern
- The Berry Patch Berry Bundle Free Crochet Pattern
- Lemon Free Crochet Pattern
Leave a Reply