
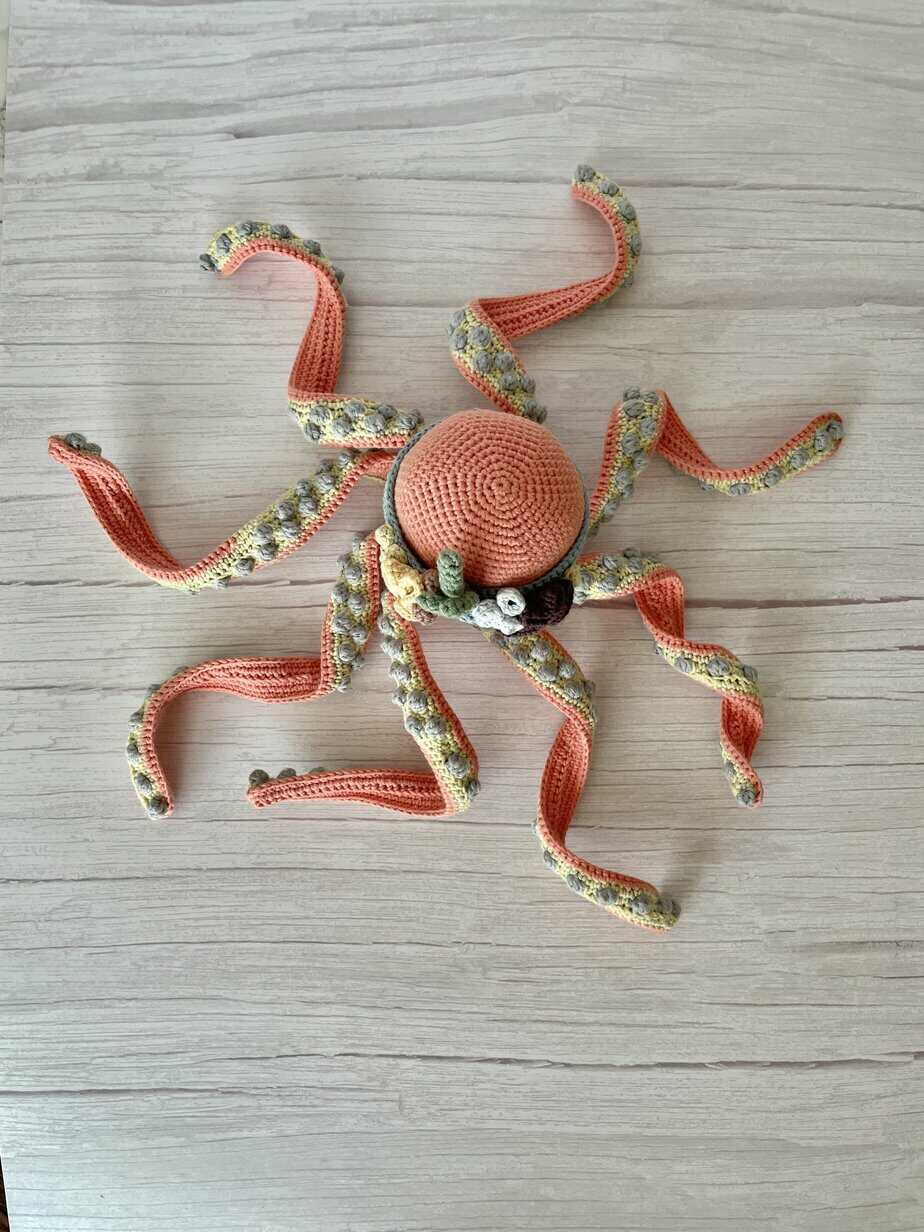
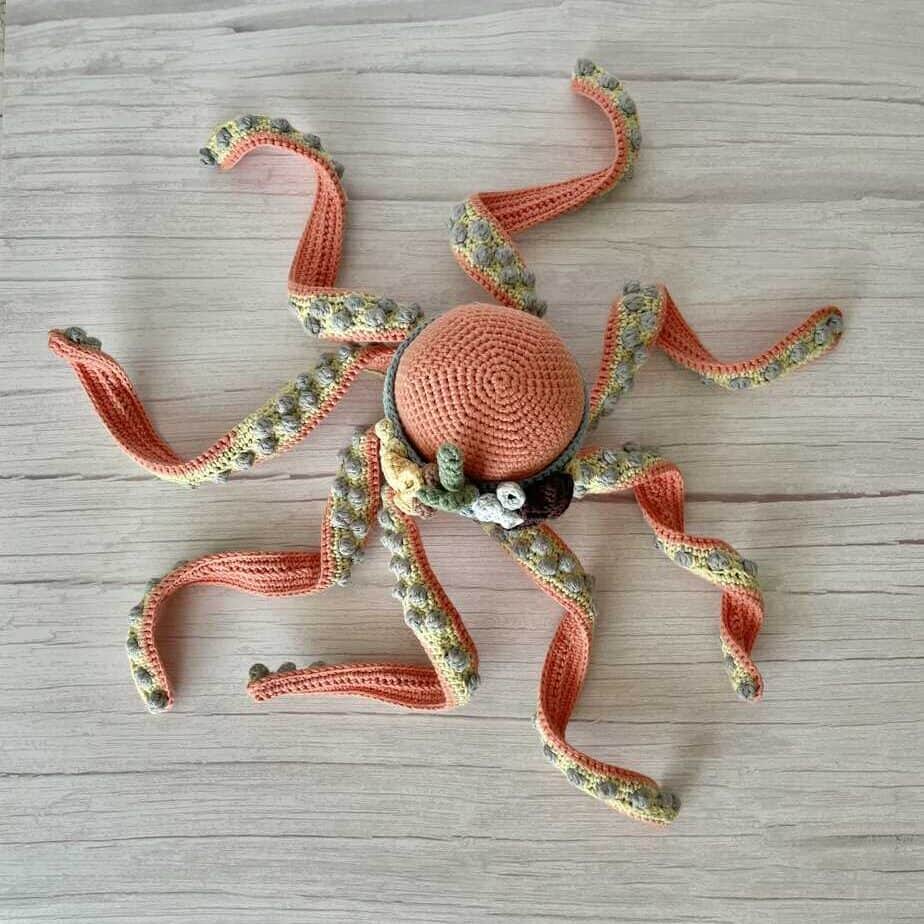
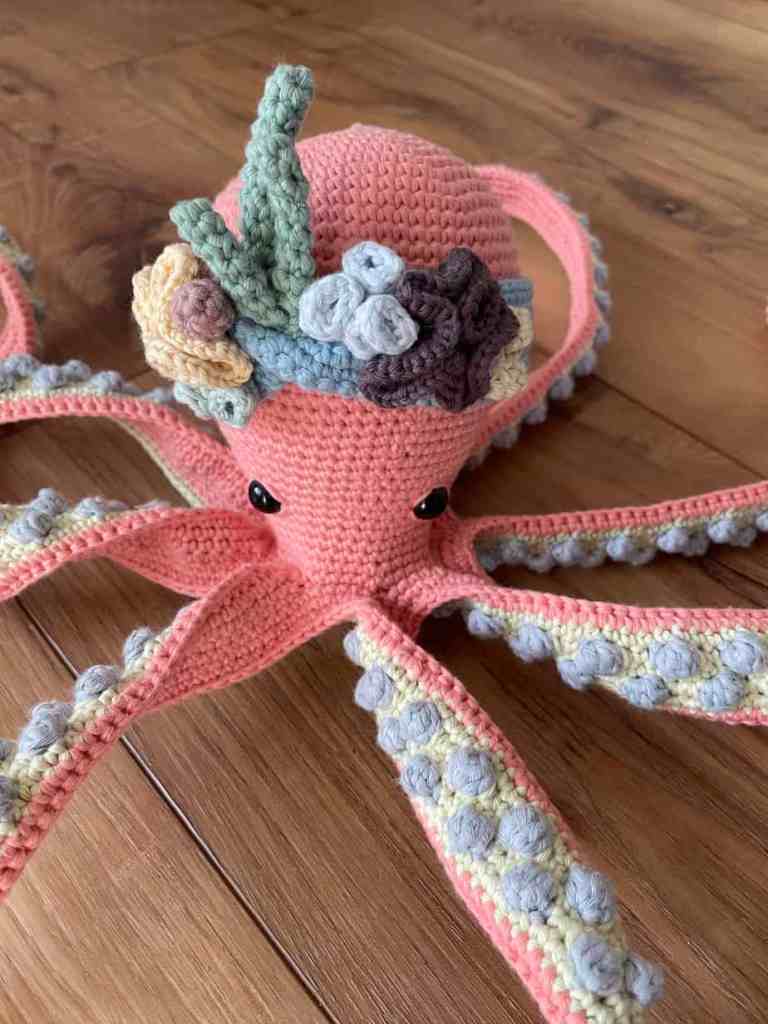
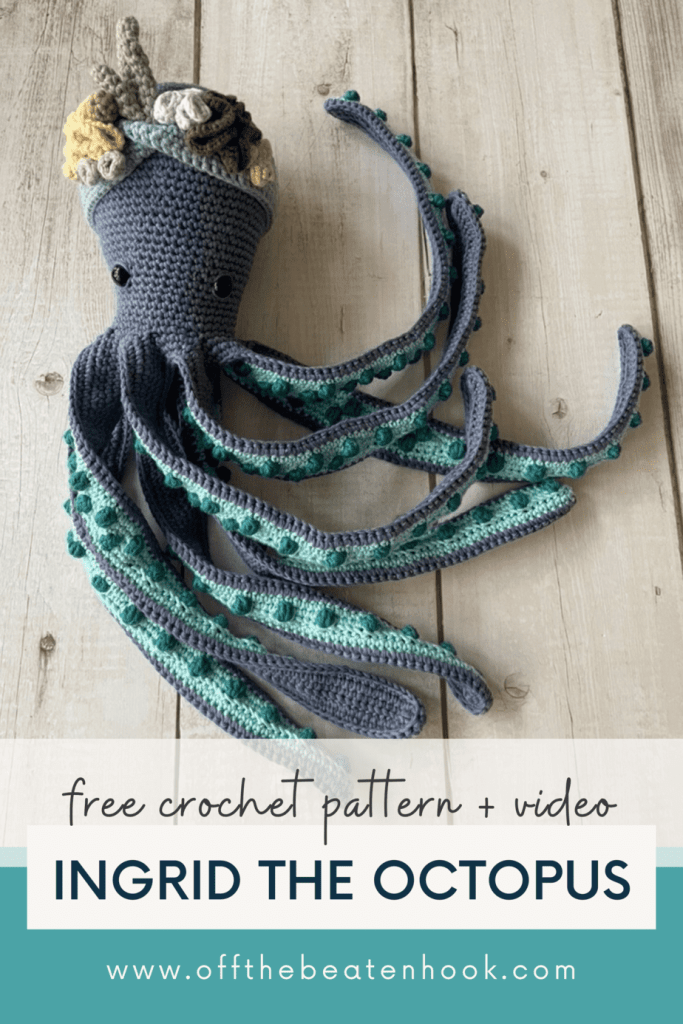
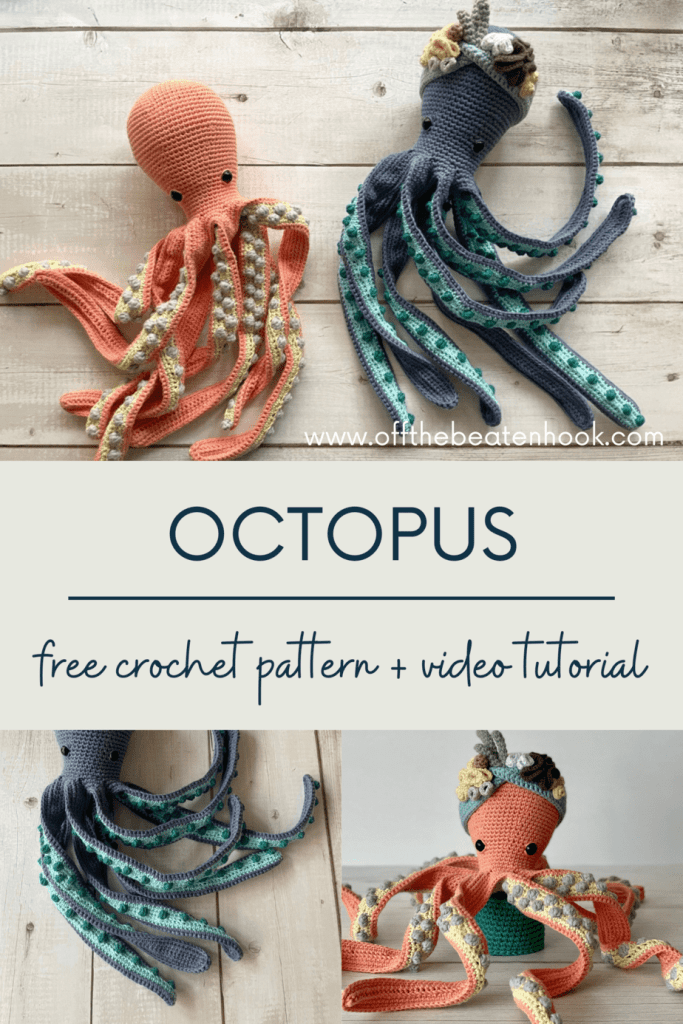
Introducing Ingrid the Octopus! Ingrid is the true head of her tentacled gang of sea beasts – including Axel the Squid and Jag the Jellyfish. There’s just something way too much fun about crocheting dangly arms and suction cups and tentacles! So, here she is, in all her dangly glory. This amigurumi pattern is the perfect balance between realistic + adorable. Accompanied by a video tutorial, this octopus crochet pattern will be a sweet gift for your loved one, or the perfect addition to your amigurumi toy collection!
Jump right into the octopus crochet pattern now or PIN her for later!

My son Benjamin is drawn to the sea. He absolutely LOVES animals, but sea animals are of particular interest to him. I was immediately excited when he asked me to make him an octopus. It was a welcome challenge. I mean – TENTACLES. Gangly, dangly tentacles. Benjamin was especially excited that she actually has a beak underneath where he can feed her! I’m so excited to get to share this octopus free crochet pattern with you. I hope you love her as much as we do!
You can bring her to life in this beautiful and free octopus crochet pattern! This free pattern is supported by ads on my blog. You can find the ad free, printable PDF in my shop here or on Ravelry here. The printable pattern has MANY more photos to help you along the way.
Additionally, further down in this post you’ll find a video tutorial of Ingrid in the making which will help as well!
You can find the printable, AD-FREE version of this crochet pattern here:
I’d like to introduce you to Ingrid:
Her full name is Ingrid, but friends call her Inky,
She’s classy and quick with a color quite pinky.
She’s known for her confident, bold kind of way
But it wasn’t always like that I daresay
For when she was young, she was ruthlessly teased
For the way she would ink when she was displeased
And many would laugh at her big squishy head
She would approach each new day with anguish and dread
But after some time, she happened upon
An old sea turtle off the coast of Taiwan
The turtle took note of Inky’s mind-state
And quickly set out to set all those lies straight
The old wise sea turtle took her time to explain
That the sea-bully ways come from their own pain
They look for a chance to cause all kinds of mayhem
You just have to learn to take pity on them
She said everybody has something to offer
By listening and caring and loving each other
Every creature is valued and worthy
And all are made with honor and beauty
She left there that day with a renewed state of mind
She felt freedom and hope with her life redefined
She vowed she would stand tall and live out her days
Teaching and sharing all the turtle?s wise ways
And all that it took was that one loving soul
That helped her reclaim all that the bullies had stole
So now Inky is proud and holds the belief
That all are welcome on her side of the reef

Octopus Crochet Pattern Guide:
Size & Gauge:
Size: Ingrid will end up being 18″ from top of head to tip of arm
Gauge: N/A. Ultimately with toys, gauge doesn’t matter. It won’t have to fit someone’s body or a specific space. My patterns will include the size of the finished toy based on the yarn and hook I use. But if you want it smaller or bigger, just use a bigger yarn and hook! Just remember, when crocheting toys, crochet tightly and choose a hook one size smaller than the yarn size recommends in order to avoid holes between each stitch where the stuffing will show through.
Yarn & Stuffing:
Yarn: Take your choice of yarn! Choose colors that bring you joy and fibers that feel good between your fingers. I use 100% cotton yarn because I make these toys for my kids and need them to be functional. Cotton is natural, washable, soft, and relatively inflexible so the toys don?t stretch and sag ? even after being thrown across the house, down the stairs and adventured through every part of the garden!
Stuffing: Stuff more than you think you should. Not enough for the stitches to stretch and show holes, but enough to make the toy stiff and able to withstand the rough trials of toy life. The filling will compress a bit over time. I encourage you to use an alternative to poly-fill (unless it’s recycled!). Try using leftover yarn scraps and snippets or old non-donate-able clothes and materials cut into strips. For this octopus free crochet pattern, I used recycled polyester stuffing.
Policies & Disclaimers:
This octopus crochet pattern is for PERSONAL USE ONLY. This pattern or parts of it may not be reproduced, resold, distributed, published, altered, translated, posted or shared without authorization. You can sell your finished items provided that you credit Off the Beaten Hook as the designer using this verbiage, “This pattern was designed by Lindsey Roe and Off the Beaten Hook.” Thank you for your respectfulness!
This post contains affiliate links for materials I use and love. If you purchase something using one of these links I may earn a small commission which in no way affects the cost to you. These partnerships help me support my small business which allows me to provide you with free crochet patterns. Thank you from the bottom of my heart for your support!

What makes this pattern eco-friendly and sustainable?
THE YARN: I use only sustainable and eco-friendly yarn that has been ethically grown/raised and processed, putting the people and the planet first. This is why I chose 100% cotton yarn for this pattern.
THE STUFFING: I used 100% Post-Consumer Recycled Polyester Filling (recycled water bottles) for this squid free crochet pattern. You can also use recycled cotton stuffing, left over yarn snippets (save them all – they add up fast!) or old fiber you’ve cut into strips.
THE SLOW YARN MOVEMENT: I’m participating in the Slow Yarn Movement. There’s far too much to talk about here, but please take a few minutes to learn about what this means by reading the article I wrote about the Slow Yarn Movement as part of my 6-part Sustainable Crochet Series.
I’M MAKING SUSTAINABLE TOYS FOR MY KIDS: This is the reason I learned how to crochet to begin with! I wanted my son to have mostly sustainable toys to play with as I eliminated a huge amount of non-renewable plastics from our home.
If you’re interested in learning more about sustainable crochet you can read all about it in the 6-part series I did covering everything about Sustainable Crochet and how to implement it into your own crafting starting today!
Materials you will need for this octopus crochet pattern:
- Stylecraft Naturals Organic Cotton DK (100% Organic Cotton / DK Light Worsted)
- Color A: BLUSH – 3 balls (you’ll use approximately 115 grams or about 305 yards)
- Color B: ARTICHOKE – 2 balls (you’ll use approximately 52 grams or about 145 yards)
- Color C: MOONLIGHT – 1 ball (you’ll use approximately 30 grams or about 90 yards)
- FOR THE HEADBAND: I used LEFTOVERS for the headband so those yarn brands were a mix and match, although all of them were 100% cotton DK. If you don’t have leftovers or want to get the colors super close, I recommend the following balls in Stylecraft Naturals Organic Cotton: HEADBAND-Sage , KELP-Cardoon, ANEMONES-Artichoke, CORAL-Rosewood, BARNACLES-Faded Denim, BULB-Pink Clay
- Crochet Hook Size: 2.75 mm
- Tapestry Needle
- Stitch Markers
- Scissors
- Safety Eyes – 12 mm
- Stuffing – this is a great chance to use up all those yarn snippets you’ve been saving!
Abbreviations used in this crochet pattern:
ch – chain
st – stitch
hk – hook
mc – magic circle
sl st – slip stitch
sc – single crochet
fsc – foundation single crochet
DcBo – double crochet bobble stitch (this pattern uses a 4-DcBo which you can find a video tutorial for in my resource library here)
BLO – back loop only
inc – increase
dec – decrease
(…) x – repeat instructions indicated number
[…] – number of stitches in row/round
The Octopus Crochet Pattern:
HEAD:
NOTES:
- The head is worked in continuous rounds – do not join rounds as you go
- You will work all the way from the top of the head to the tentacles
- The upper part (head & tentacles) are crocheted using Color A
Rnd 1: st 6 sc in a magic circle [6]
Rnd 2: inc in all 6 st [12]
Rnd 3: (sc in next st, inc in next st) x6 [18]
Rnd 4: (sc in next 2 st, inc in next st) x6 [24]
Rnd 5: (sc in next 3 st, inc in next st) x6 [30]
Rnd 6: (sc in next 4 st, inc in next st) x6 [36]
Rnd 7: (sc in next 5 st, inc in next st) x6 [42]
Rnd 8: (sc in next 6 st, inc in next st) x6 [48]
Rnd 9: (sc in next 7 st, inc in next st) x6 [54]
Rnd 10: (sc in next 8 st, inc in next st) x6 [60]
Rnd 11: (sc in next 9 st, inc in next st) x6 [66]
Rnd 12-20: sc in each st around [66]
Rnd 21: (sc in next 9 st, dec in next st) x6 [60]
Rnd 22-23: sc in each st around [60]
Rnd 24: (sc in next 8 st, dec in next st) x6 [54]
Rnd 25-26: sc in each st around [54]
Rnd 27: (sc in next 7 st, dec in next st) x6 [48]
Rnd 28-29: sc in each st around [48]
Rnd 30: (sc in next 6 st, dec in next st) x6 [42]
Rnd 31: sc in each st around [42]
Rnd 32: (sc in next 5 st, dec in next st) x6 [36]
Rnd 33-37: sc in each st around [36]
Rnd 38: (sc in next 8 st, inc in next st) x4 [40]

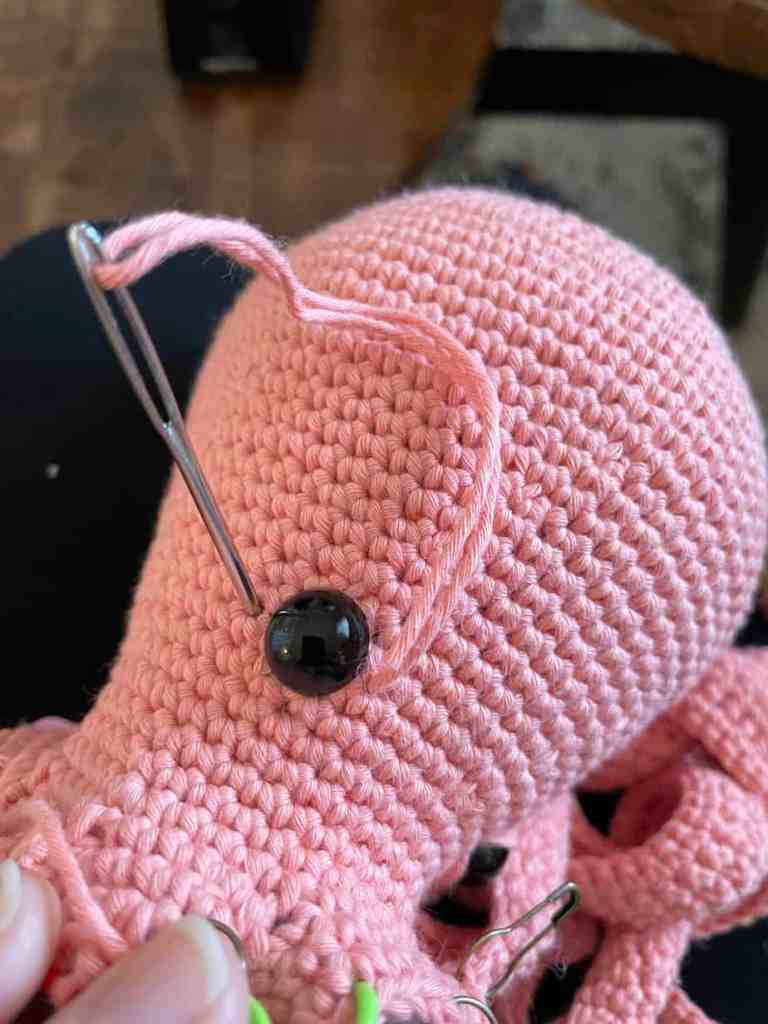
ADDING THE EYES:
ADD THE SAFETY EYES & EYELIDS
Insert safety eyes between rounds 32 and 33, spaced by 10 inches in between. Embroider the eyelids by taking a tapestry needle and yarn and inserting it back to front through the middle stitch on the side of the eye. Bring the yarn over the top of the eye and back in the stitch on the opposite side. Bring the needle back out the stitch you started in and bring it under the eye and back to the inside on the opposite side. Tie off on the inside and repeat with the other eye
UPPER TENTACLES:
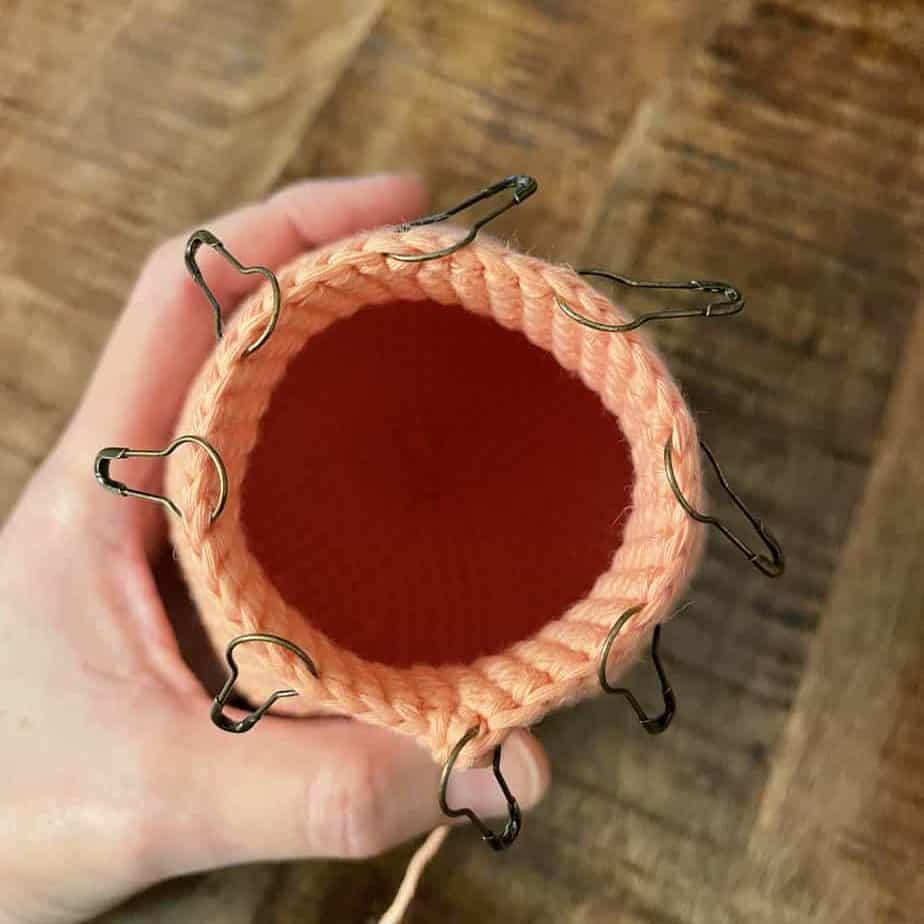
Prepare for round 39 by spitting round 38 into 8 sections – one for each of the 8 tentacles. Beginning with the very next stitch, place a stitch marker in every 5th stitch. In other words, place the stitch marker, skip 4 stitches, place a stitch marker, skip 4 stitches, etc.
The stitch markers represent the stitch where you will place each of your slip stitches for round 39 – where your tentacle chain branches out from.
NOTES & TIPS:
- I highly recommend watching the video tutorial to help you accomplish the tentacles so you can visualize the pattern better. You can find the video further down in this post.
- Rnd 39: sets the round up with stumpy tentacles – PLACE A STITCH MARKER IN THE FIRST SC YOU MAKE WHEN CROCHETING BACK DOWN THE CHAIN.
- Rnd 40: uses 40 fsc stitches off the tip of each of the stumpy tentacles from Rnd 39 to extend them longer – PLACE A STITCH MARKER IN THE CHAIN OF YOUR FIRST FSC WHEN EXTENDING THE TENTACLES – IT’S EASY TO MISS WHEN CROCHETING BACK DOWN.
- When you crochet back down the fsc in Rnd 40, make a sc in the st marker you placed in the first fsc chain you made, and then make your next sc into the marked st at the tip of the tentacle from Rnd 39.
Rnd 39: (sl st in next st, ch 31, sc in the 2nd ch from the hook, and the next 29 ch’s thereafter, sc in next 4 st of body) x8 [280 not counting chains]
Rnd 40: (sc in next 30 st, fsc 40, sc in next 74 st) x8 [1,152]
Rnd 41: (sc in next 140 st, dec twice) x8 [1,136]

BASE
NOTES & TIPS:
- I highly recommend watching the video tutorial to help you accomplish the tentacles so you can visualize the pattern better. You can find the link to the video in the pattern notes.
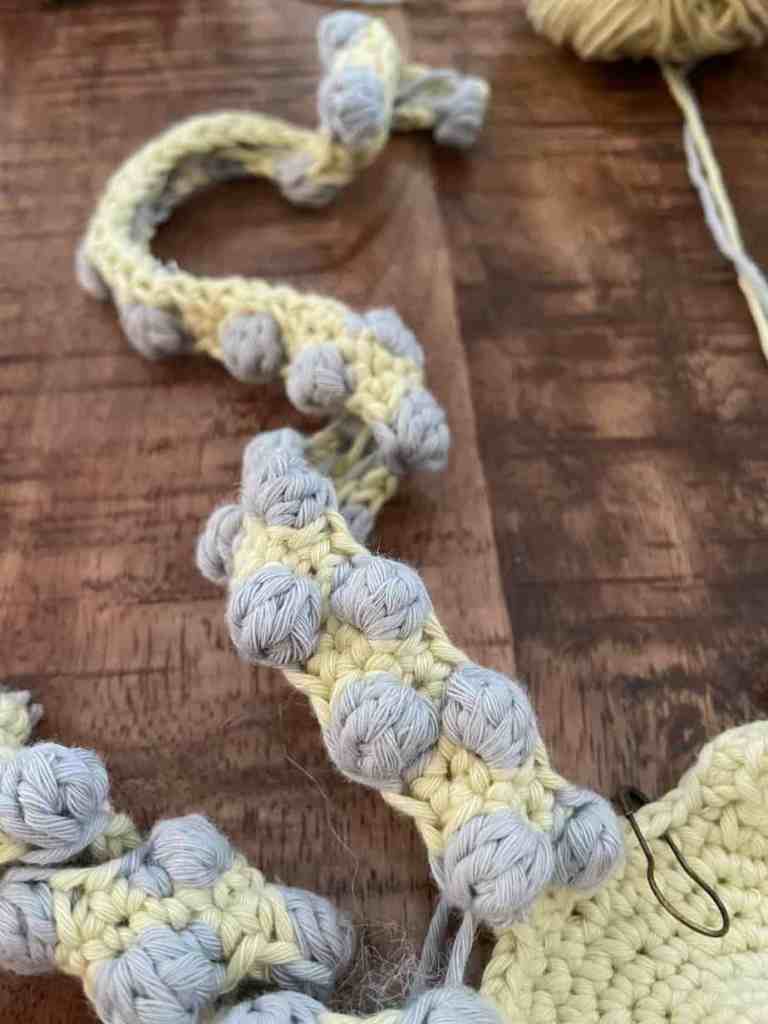
- Remember all the tips learned when crocheting the upper tentacles, as the base tentacles use the same method, with the additional of the bobble suction cups.
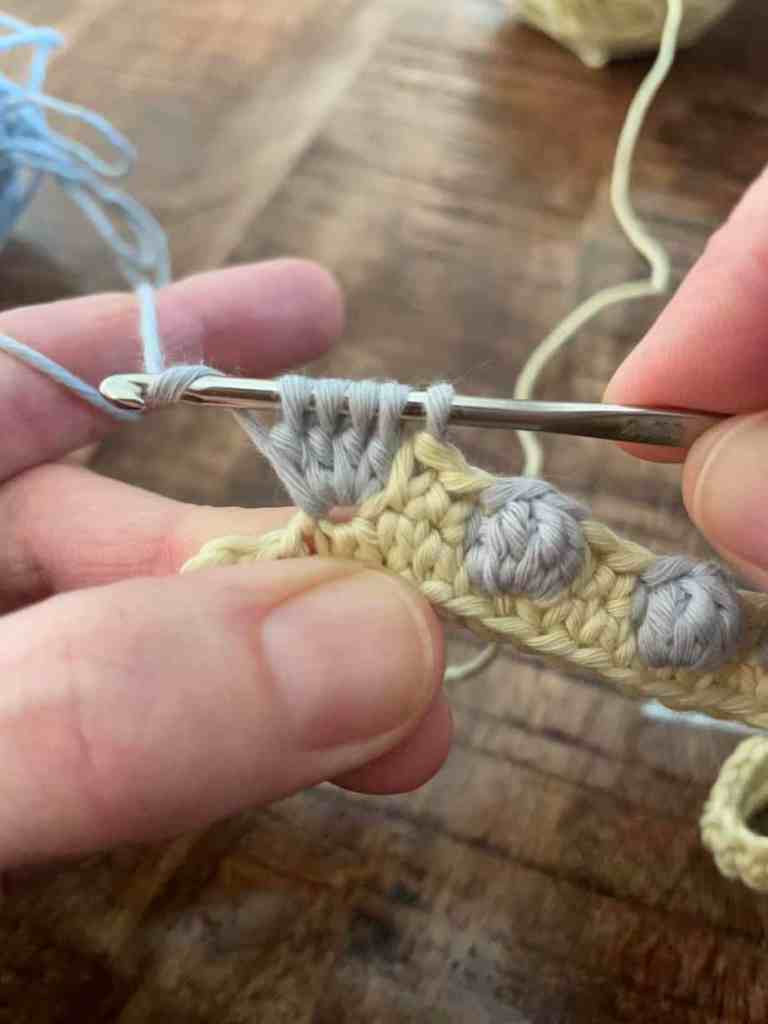
- You will be making the tentacle suction cups by crocheting bobble stitches. If you need a reminder on how to crochet a bobble stitch, you can find my video tutorial in the resource library or refer to the video tutorial.
- The bobble stitches use color C, so remember to change colors appropriately right before that stitch and changing back to color B immediately after. Take a quick reminder on how to properly change colors if needed before you begin.
BEAK:
Start in color B
Rnd 1: st 6 sc in a magic circle [6]
Rnd 2-3: sc around [6]
Rnd 4: inc around [12]
Rnd 5: sc around [12]
Rnd 6: (sc, inc) x6 [18]
Rnd 7: (sc 2, inc) x6 [24]
Rnd 8: (sc 3, inc) x6 [30]
Rnd 9: (sc 2, inc) x10 [40]
Prepare for round 10 by spitting Rnd 9 into 8 sections – one for each of the 8 tentacles. Beginning with the very next stitch, place a stitch marker in every 5th stitch. In other words, place the stitch marker, skip 4 stitches, place a stitch marker, skip 4 stitches, etc.
The stitch markers represent the stitch where you will place each of your slip stitches for Rnd 10 – where your tentacle chain branches out from.
Rnd 10: (sl st in next st, ch 31, sc in the 2nd ch from the hook, and the next 29 ch’s thereafter, sc in next 4 st of body) x8 [280 not counting chains] PHOTO 13
Rnd 11: *sc 5, (DcBo, sc 4) x5, fsc 40, sc 2, (DcBo, sc 4) x13, DcBo, sc 6*, repeat from *to* x8 [1,152]
Rnd 12: (sc in next 140 st, dec twice) x8 [1,136]
Fasten off. Pop the beak to the inside.
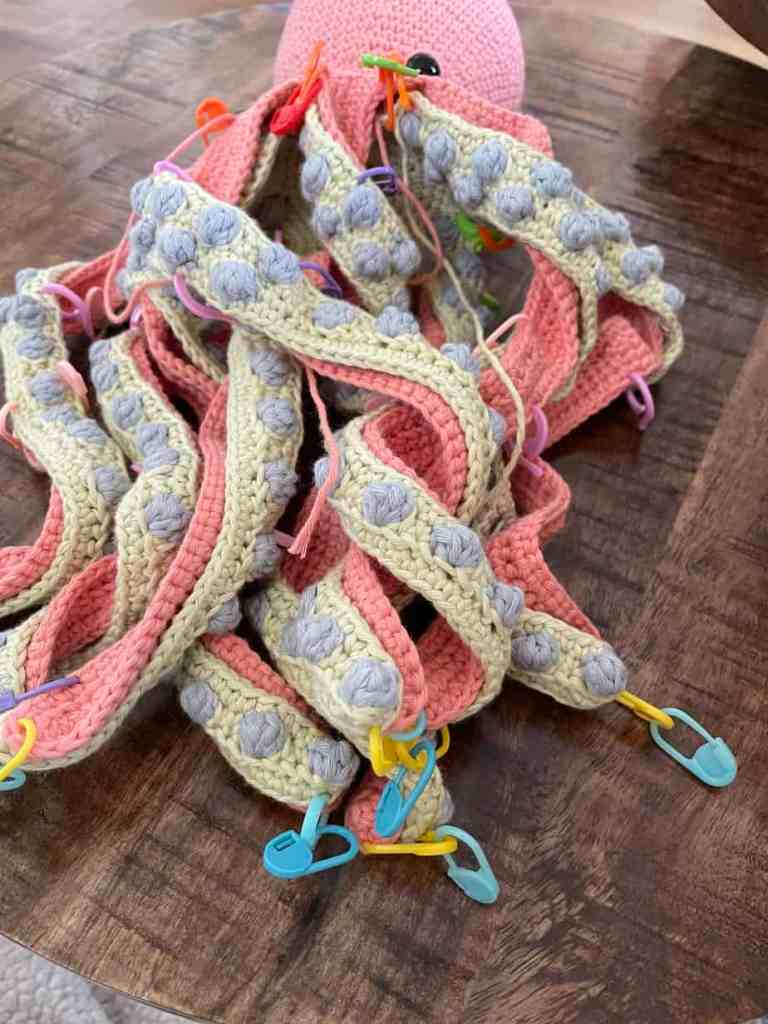
JOINING TOP AND BASE:
Join the upper tentacles to the base tentacles with the right sides facing out. Using several stitch markers, join the two pieces together, tentacle for tentacle. I recommend stitch marking the gaps between the tentacles together so you can correct any stitch count issues as you come around each tentacle.
Pick up where you left off with color A and begin joining:
Holding the upper and base pieces together, insert your hook under both loops from the next st – pushing your hook through the upper and the base layers and complete a single crochet. Repeat this all the way around, through every single stitch – joining the upper and base pieces.
Stop short of the final 3 tentacles and stuff the octopus. Then, pick up where you left off and finish joining. Fasten off and weave in end.
If you realize, as you?re joining the top and base, that your stitch counts are different on each, you can correct it by either working an increase stitch or a decrease stitch in the area where it doesn?t match. REFER TO THE VIDEO TUTORIAL FOR TIPS ON HOW TO CORRECT THIS WITHOUT HAVING TO UNDO ANY OF YOUR WORK!!
CORAL REEF HEADBAND:
HEADBAND:
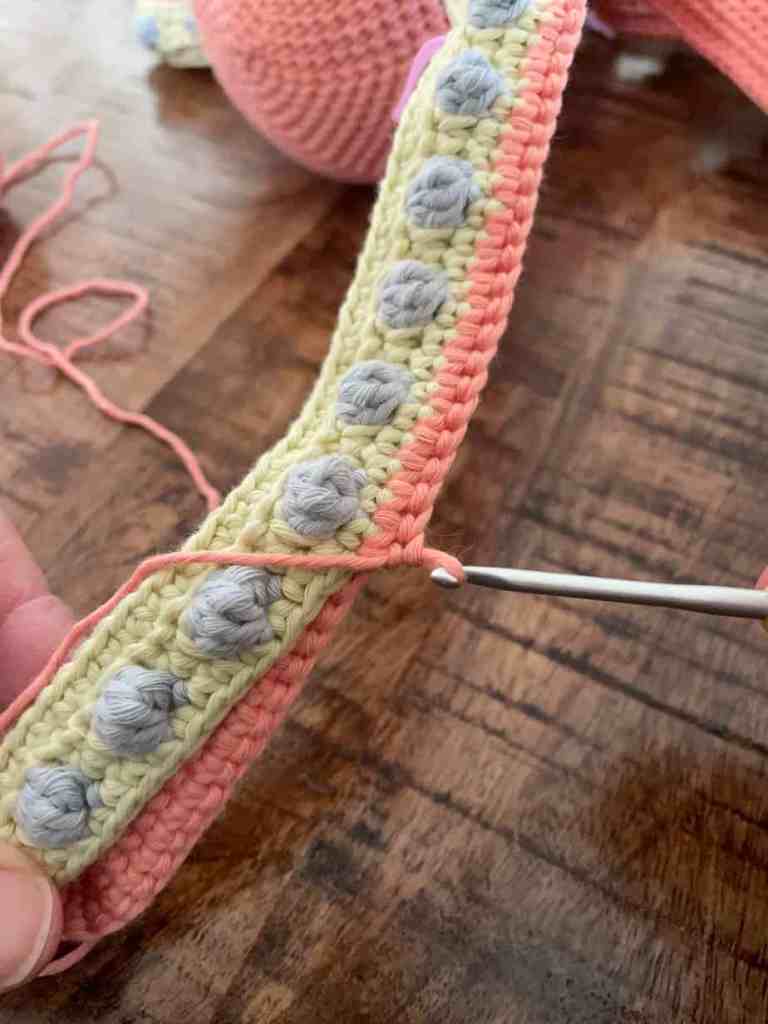
For the headband, you will crochet in rows. Chain 1 and turn at the end of each row as specified.
Rnd 1: fsc 70, ch 1, turn [70]
Rnd 2-8: sc across, ch 1, turn [70]
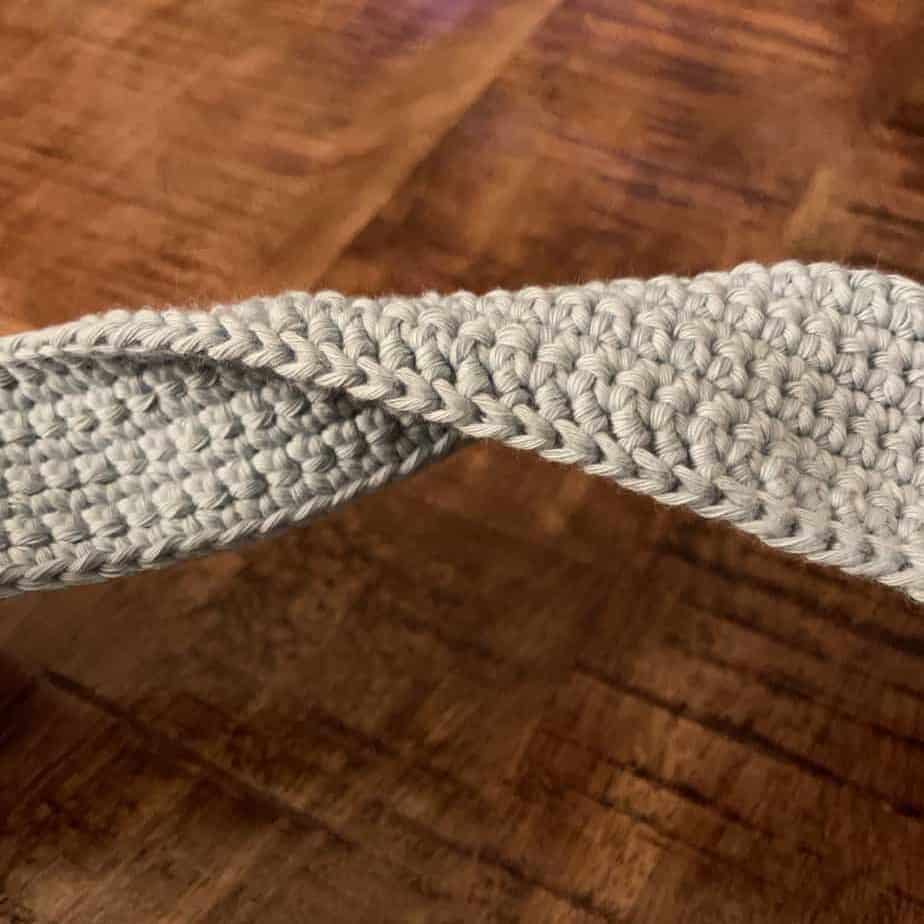
Fasten off. Twist the headband and sew the ends together.
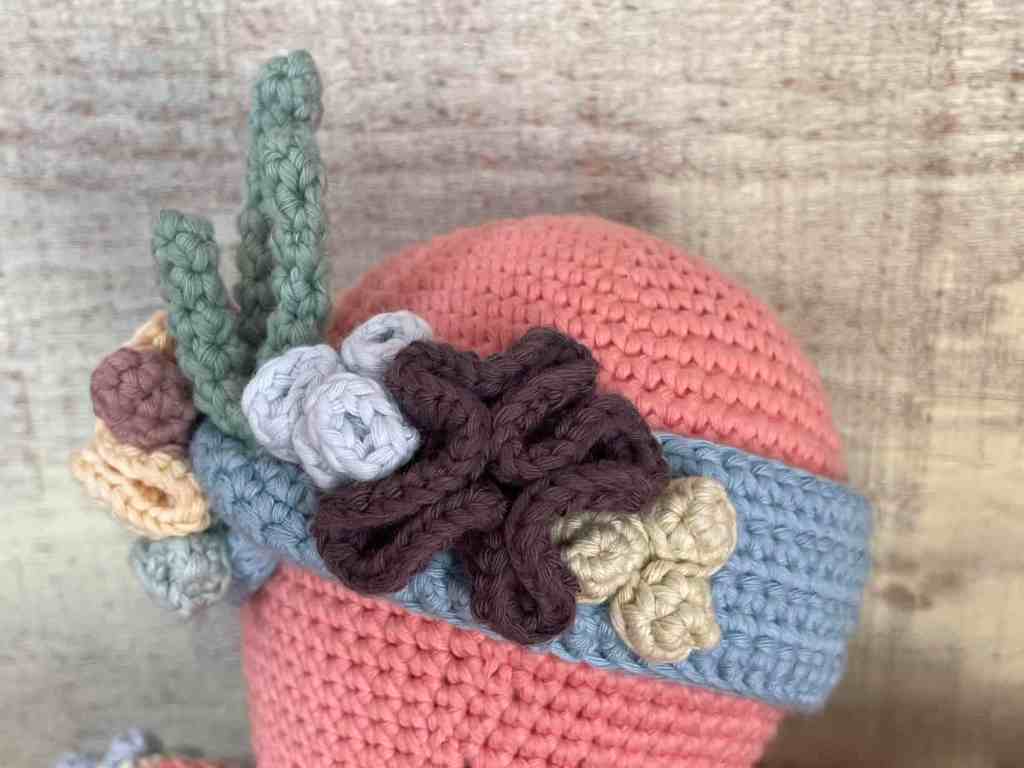
CORAL REEF HEADBAND ACCESSORIES:
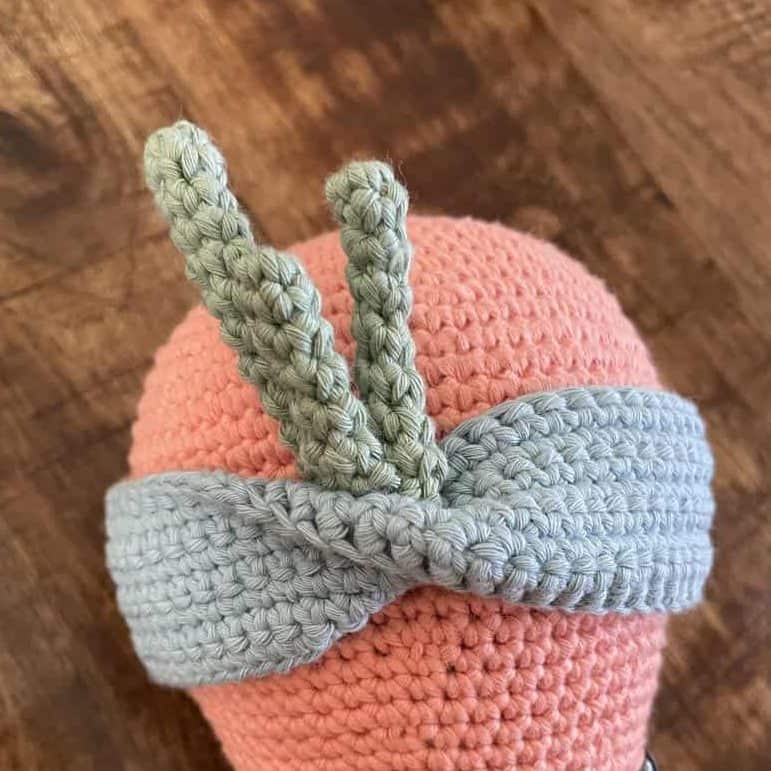
KELP: In green, make 3 different sizes: small(medium, large)
Rnd 1: st 4 in a magic circle [4]
Rnd 2-6(8, 12): sc in each st around [4]
Fasten off, leaving a tail for sewing.
ANEMONES: Make 5 in light blue
Rnd 1: st 4 in a magic circle [4]
Rnd 2: inc in each st around [8]
Rnd 3: BLO sc in each st around [8]
Rnd 4: sl st in each st around [8]
Fasten off, leaving a tail for sewing.
CORAL: Make 2: 1 purple & 1 yellow
Rnd 1: st 4 in a magic circle [4]
Rnd 2-5: inc in each st around [64 st after rnd 5]
Fasten off, leaving a tail for sewing.
BARNACLES: Make 6 in light green
Rnd 1: st 4 in a magic circle [4]
Rnd 2: inc in each st around [8]
Fasten off, leaving a tail for sewing.
BULB: Make 2 in light purple
Rnd 1: st 4 in a magic circle [4]
Rnd 2: inc in each st around [8]
Rnd 3: (sc in next 2, dec in next st) x2 [4]
Rnd 4: sc in each st around [4]
Fasten off, leaving a tail for sewing.
Sew coral reef parts to the headband, beginning with the kelp sewn into the twist of the headband, which allows it to stick straight up:
INGRID THE OCTOPUS CROCHET PATTERN VIDEO TUTORIAL:
You did it! I hope you loved this Ingrid the Octopus crochet pattern. If you’ve made Ingrid, I would love to see your version of her! Please post a photo on instagram using #offthebeatenhook and tag me @offthebeatenhook!
PIN THIS OCTOPUS CROCHET PATTERN HERE!
Love crochet amigurumi? I have more animal and free food toy patterns! Here’s a couple you might be interested in:
- Zebra Crochet Pattern (FIND ON ETSY)
- Elephant Crochet Pattern (FIND ON ETSY)
- Broccoli Crochet Pattern (FREE)
- Radish Crochet Pattern (FREE)
- Artichoke Crochet Pattern (FREE)
Leave a Reply