
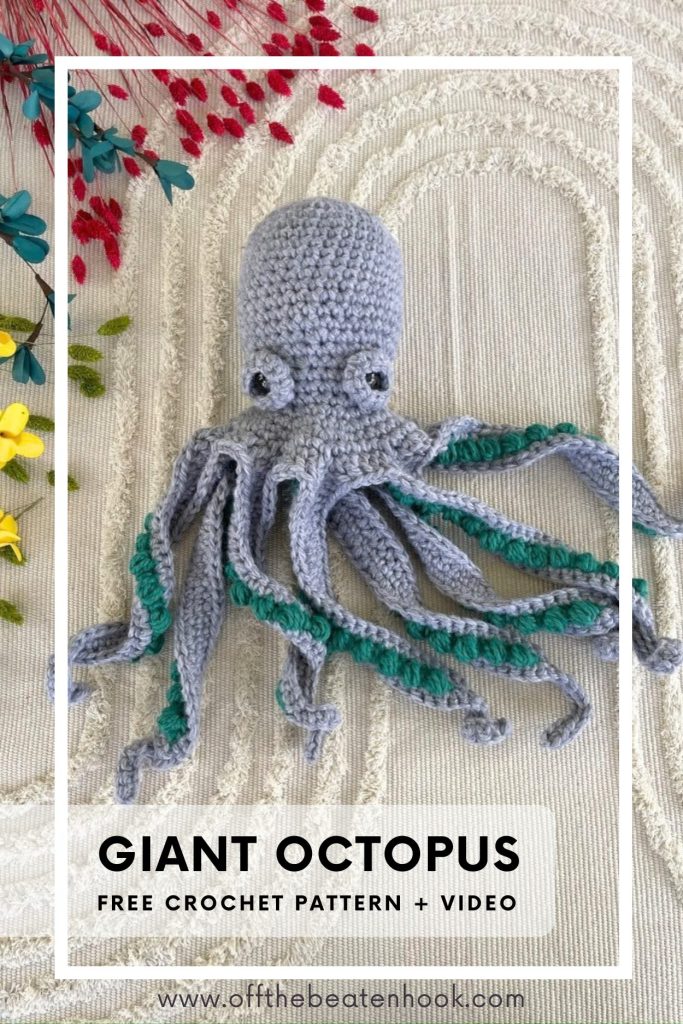
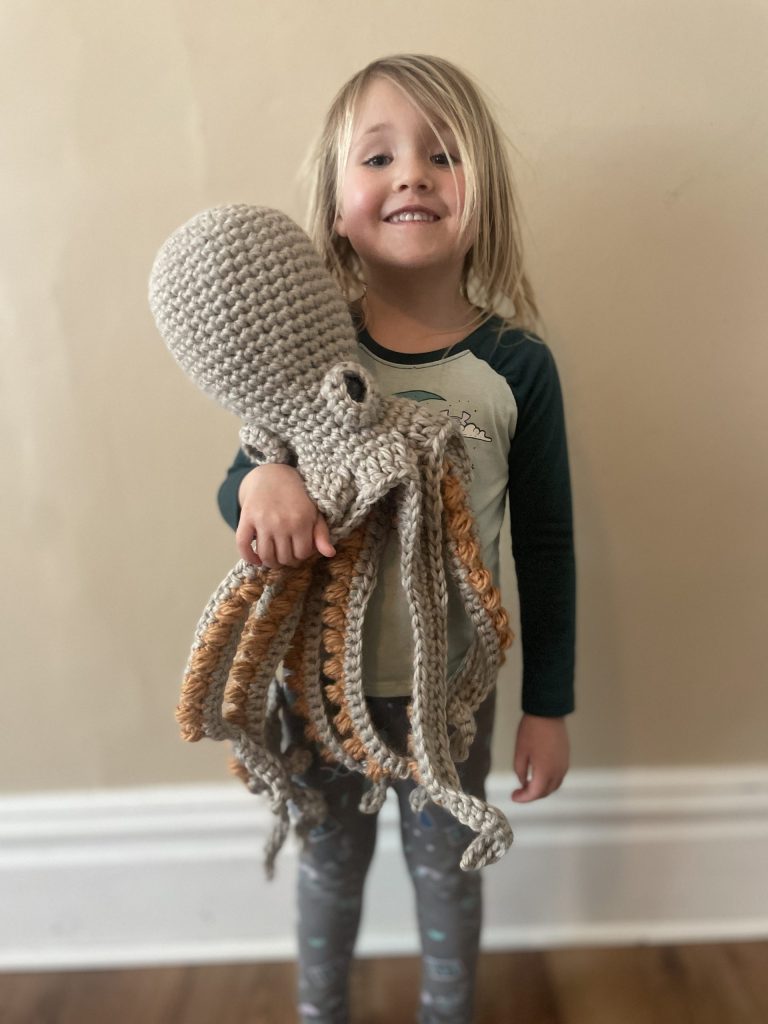
If you’ve been searching for a cozy statement plush to crochet, you’re going to love this giant octopus crochet pattern!
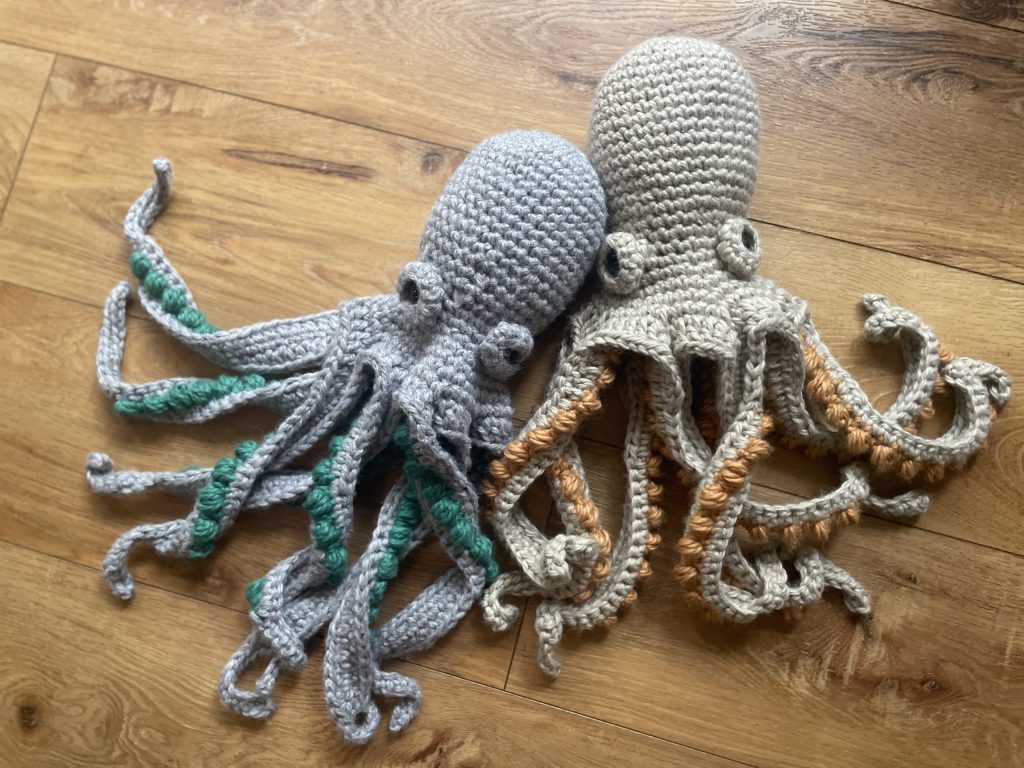
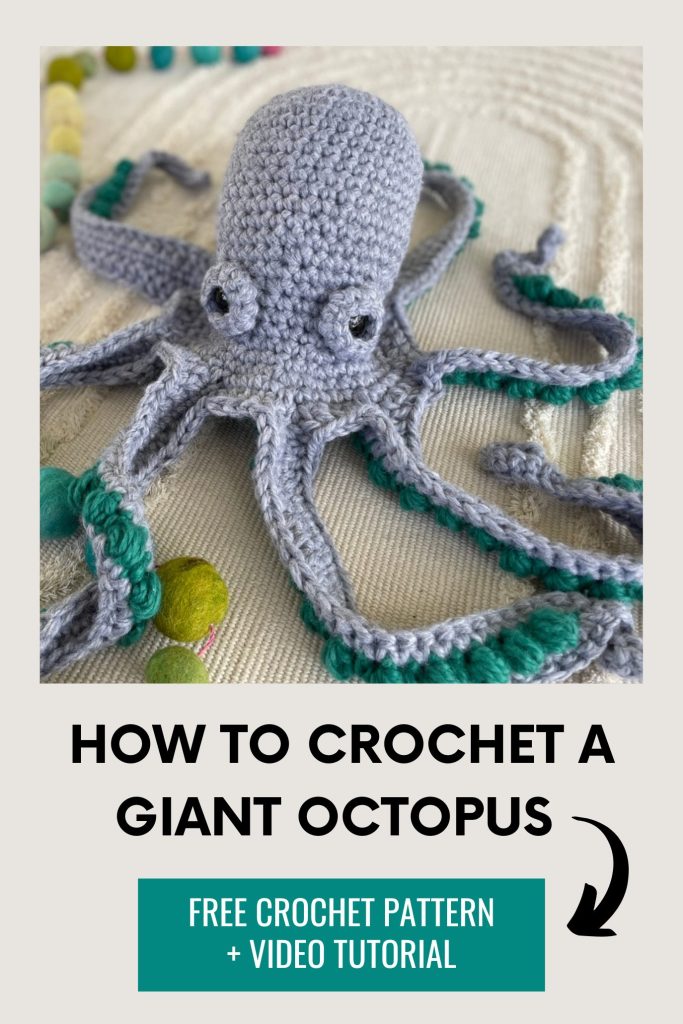
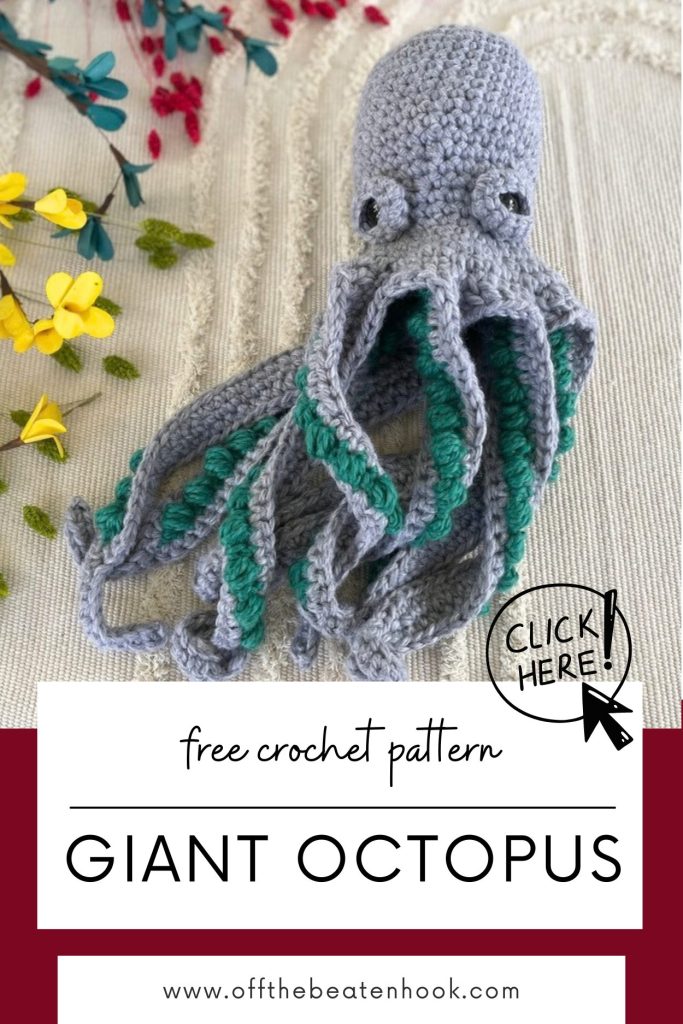
Meet Otto the Giant Octopus — a soft, squishy, oversized ocean friend perfect for cuddles, nursery decor, and handmade gifts. With his long curly tentacles and extra-large body, Otto works up into an impressive plush that’s as fun to make as it is to hug.
This free crochet pattern walks you step-by-step through creating your own giant octopus, and there’s also a full video tutorial to guide you along the way.
Jump into the giant octopus crochet pattern now, or pin it for later here!
Why You’ll Love This Giant Octopus Crochet Pattern
• Creates a large, huggable plush
• Perfect for confident beginners and up
• Uses simple stitches with easy shaping
• Makes a stunning handmade gift
• Great stash-busting project for bulky yarn
Whether you’re making Otto for a child, as a cozy couch companion, or as playful decor, this giant octopus is guaranteed to bring smiles.
I’ve created a helpful video tutorial for this pattern as well. You can find that further down in this post or access it straight away on YouTube here.
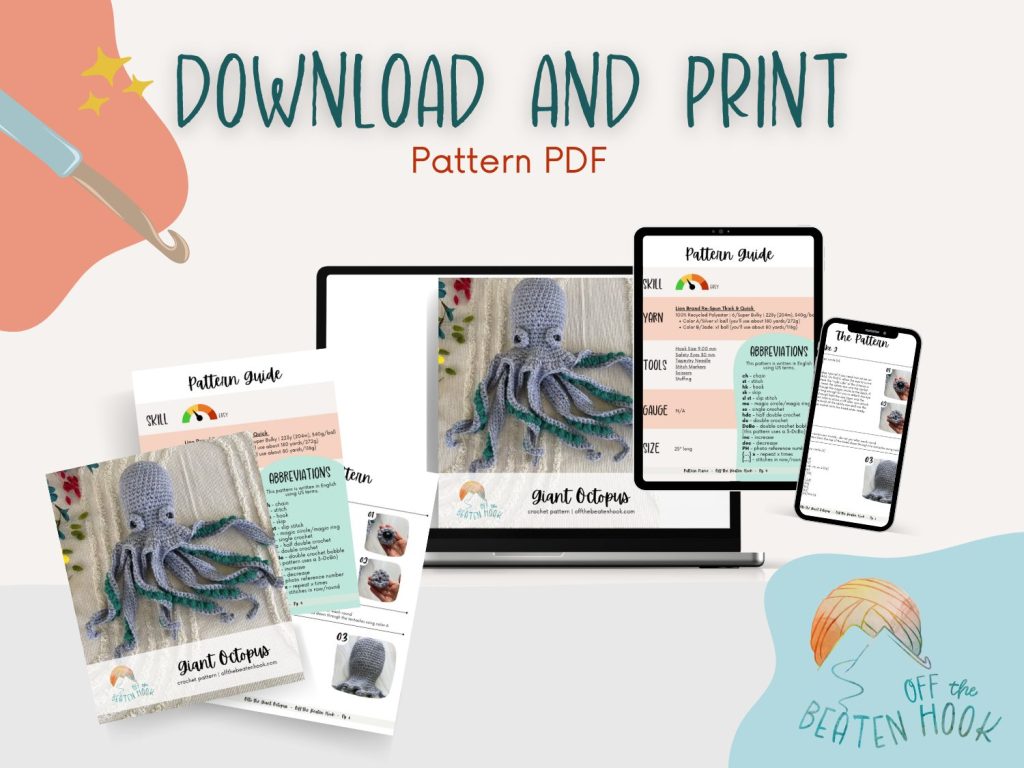
This crochet pattern is reader supported by ads on my blog. If you’d rather print the pattern for some cozy couch crocheting, you can find the ad-free, printable PDF in my shop here or on Ravelry here.
Policies & Disclaimers:
This crochet pattern is for PERSONAL USE ONLY. This pattern or parts of it may not be reproduced, resold, distributed, published, altered, translated, posted or shared without authorization. You can sell your finished items provided that you credit Off the Beaten Hook as the designer using this verbiage, “This pattern was designed by Lindsey Roe and Off the Beaten Hook.” Thank you for your respectfulness!
This post contains affiliate links for materials I use and love. If you purchase something using one of these links I may earn a small commission which in no way affects the cost to you. These partnerships help me support my small business which allows me to provide you with free crochet patterns. Thank you from the bottom of my heart for your support!
🌿 Eco-Friendly Crafting
What makes this crochet pattern eco-friendly and sustainable?
THE YARN: I use only sustainable and eco-friendly yarn that has been ethically grown/raised and processed, putting the people and the planet first. This is why I chose 100% natural yarn for this pattern.
HANDMADE FOR LONGEVITY: Creating your own toys promotes mindful consumption. This durable, handmade giant octopus reduces the need for mass-produced alternatives.
THE SLOW YARN MOVEMENT: I’m participating in the Slow Yarn Movement. There’s far too much to talk about here, but please take a few minutes to learn about what this means by reading the article I wrote about the Slow Yarn Movement as part of my 6-part Sustainable Crochet Series.
If you’re interested in learning more about sustainable crochet you can read all about it in the 6-part series I wrote covering everything about Sustainable Crochet and how to implement it into your own crafting starting today!
Giant Octopus Crochet Pattern Guide:
Size & Gauge:
Size: 24″ (two feet!)
Gauge: N/A
Materials you will need:
Yarn:
Lion Brand Yarn ReSpun Thick & Quick
100% Recycled Polyester | 6/Super Bulky | 223y (204m), 340g/ball
- Color A/Silver x1 ball (you’ll use about 180 yards/272g)
- Color B/Jade: x1 ball (you’ll use about 80 yards/118g)
Other tools and materials needed:
- Crochet Hook Size: 9.00 mm
- Safety Eyes: SIZE (SERIOUSLY, these are the ones with the backs that are easier to put on!)
- Tapestry Needle (bent tips make all the difference!)
- Stitch Markers
- Scissors
- Stuffing
Abbreviations used in the giant octopus crochet pattern:
This pattern is written in English, using US terms. If needed, you can find a handy term conversion chart right here in my Resource Library.
ch – chain
st – stitch
hk – hook
sk – skip
mc – magic circle/magic ring
sl st – slip stitch
sc – single crochet
hdc – half double crochet
dc – double crochet
inc – increase
dec – decrease
DcBo – double crochet bobble stitch (this pattern uses a 3-DcBo as demonstrated in the video tutorial)
rep – repeat
(…) x – repeat instructions indicated number of times
[…] – number of stitches in row/round
PH – photo reference number
Meet Otto the Giant Octopus:
Deep down in the ocean where the tall kelp grew tall,
Lived Otto the Octopus — the biggest of all!
With arms long as ladders and hugs like a net,
He was kind and wiggly and hard to forget.
But Otto had worries (quite heavy, in fact):
“I’m too big,” Otto sighed. “That’s a troublesome fact.
I knock over coral, I block up the reef,
When I swim by the others all scatter in grief.”
So Otto would hide, nice and quiet and small
(Though quiet and small didn’t work much at all).
He folded his arms and he shrank in his head,
“I wish I were tiny,” poor Otto once said.
One day came a rumble, a wobble, a WHAM!
A storm tossed the sea like a giant soup pan.
Little fish panicked—“Oh no! Where do we go?”
The reef cracked and crumbled and rocked to and fro.
So Otto took a breath (all eight arms at the ready),
His heart thumped ka-thump but his grip stayed steady.
He lifted! He twisted! He anchored the sand!
He used every inch of his big, giant span.
He braced the whole reef till the storm passed on by,
Not one little fish even blinked an eye.
When the waters grew calm and the sun shimmered through,
They cheered, “GIANT OTTO! We needed you!”
Otto blinked once… then twice… then grinned wide.
“Maybe big isn’t bad,” Otto said with some pride.
“Maybe strong arms and space-taking ways
Are gifts meant for helping on stormy sea days.”
Now Otto still bumps things (that part’s still true),
But he laughs when he does—and the others do too.
Because being yourself, as big as you are,
Might just make you someone’s lifesaving star. ⭐
The Giant Octopus Crochet Pattern:
Eyes – Make 2
Rnd 1: st 6 sc in a magic circle [6]
Rnd 2: inc around [12]
Rnd 3: sc around [12]
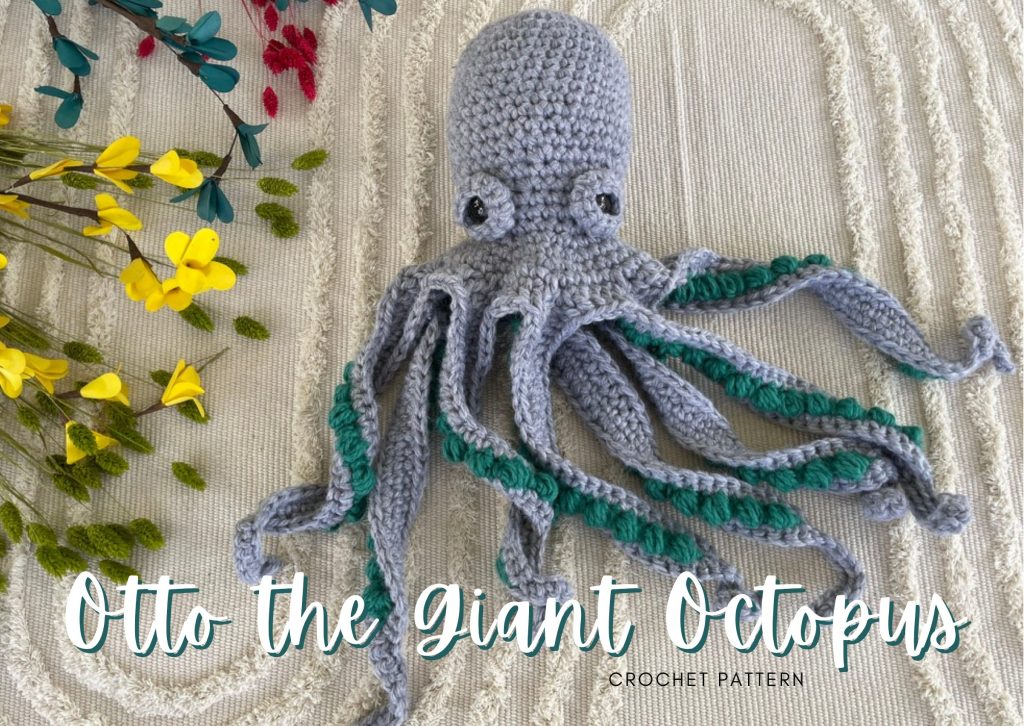
Invisible fasten (see video tutorial if you need instruction on how to fasten off invisibly). On Rnd 3, allow the eye to curve inward toward you, where the “right side” of the stitches is actually on the inside. Insert the safety eye into the socket with the post poking through the magic circle to the back. If your safety eye post is long enough for you to attach the eye directly to the head (through both the eye layer and the head layer of yarn) then wait to close it off after you attach it. Otherwise, close the back of the safety eye and use the yarn tail to sew the eye socket onto the head when ready. PH 01 & 02
Head
NOTES:
- The head is worked in continuous rounds – do not join after each round
- You will work this pattern from the top of the head down through the tentacles using color A
Rnd 1: st 6 sc in a magic circle [6]
Rnd 2: inc around [12]
Rnd 3: (sc, inc) x6 [18]
Rnd 4: (sc 2, inc) x6 [24]
Rnd 5: (sc 3, inc) x6 [30]
Rnd 6: sc 2, (inc, sc 4) x5, inc, sc 2 [36]
Rnd 7-17: sc around [36]
Rnd 18: (sc 4, dec) x6 [30]
Rnd 19: sc around [30]
Rnd 20: (sc 3, dec) x6 [24]
Rnd 21-23: sc around [24]
Rnd 24: (sc 3, inc) x6 [30]
Rnd 25: (sc 4, inc) x6 [36]
Rnd 26: (sc 8, inc) x4 [40] PH 03

Tentacles (upper)
NOTES & TIPS:
- I highly recommend watching the video tutorial to help you accomplish the tentacles so you can visualize the pattern better. You can find the link to the video in the pattern notes.
- Round 26 will be split into 8 sections – one for each of the 8 tentacles. If you’d like, you can prepare the round by putting a stitch marker into every 5th stitch which is where you’ll branch off into a chain to create the tentacle – PH 04.
- When crocheting back down the tentacle chain (after chaining 25), use the back bumps
- When crocheting back down the tentacle chain (after chaining 25), do not skip the first chain as you often do when working with a chain. Begin straight away into the very first back bump
- To ease the joining of the upper and base parts of this octopus, I highly recommend placing a stitch marker at the tip of the tentacles which will be the 1st st as you begin to crochet your way back down the chain. You will align the upper tentacles to the beak section using these st markers – PH 05
Rnd 27: (sc 5 along the head, ch 25, sc in each back bump of the chain) x8 [240] PH 06
Do not fasten off – you will pick back up with this same yarn when you are ready to join the upper (head + tentacles) to the lower (beak + suction cups).
Sew the eyes to the head centered over Rnds 20 & 25, spaced by about 8 stitches. There is no official front or back to the octopus so the side of the head you choose to attach them to is arbitrary.

Beak & Suction Cups
NOTES & TIPS:
- I highly recommend watching the video tutorial to help you accomplish the tentacles so you can visualize the pattern better. You can find the link to the video in the pattern notes.
- You will be making the tentacle suction cups by making double crochet bobble stitches (3-DcBo). If you need a lesson on how to crochet a bobble stitch, refer to the video tutorial.
- When crocheting back down the tentacle chain (after chaining 25), use the back bumps
- When crocheting back down the tentacle chain (after chaining 25), do not skip the first chain as you often do when working with a chain. Begin straight away into the very first back bump
- To ease the joining of the upper and base parts of this octopus, I highly recommend placing a stitch marker at the tip of the tentacles which will be the 1st st as you begin to crochet your way back down the chain. You will align the upper tentacles to the beak section using these st markers – PH 07 (In this photo I actually have the 2 top stitches marked with a stitch marker)
Start in color B
Rnd 1: st 6 sc in a magic circle [6]
Rnd 2: sc around [6]
Rnd 3: (sc 2, inc) x2 [8]
Rnd 4: sc around [8]
Rnd 5: (sc 3, inc) x2 [10]
Rnd 6: sc around [10]
Rnd 7: (sc 4, inc) x2 [12]
Rnd 8: sc around [12]
Rnd 9: (sc, inc) x6 [18]
Rnd 10: (sc 2, inc) x6 [24]
Rnd 11: (sc 3, inc) x6 [30]
Rnd 12: (sc 4, inc) x6 [36]
Rnd 13: (sc 8, inc) x4 [40]
Round 13 will be split into 8 sections – one for each of the 8 tentacles. If you’d like, you can prepare the round by putting a stitch marker into every 5th stitch which is where you’ll branch off into a chain to create the tentacle – just like you did for the top portion – PH 08. (In this photo I actually have the 1st AND 5th stitch marked with a stitch marker.)
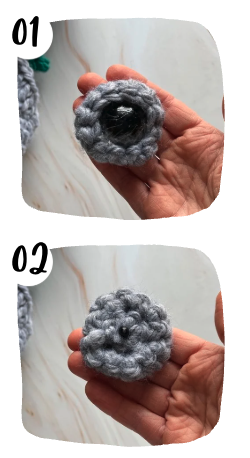
Rnd 14: (sc 5 along the beak, ch 25, making your way back down the chain: (sc, DcBo) x12, sc in final ch) x8 [240] PH 09
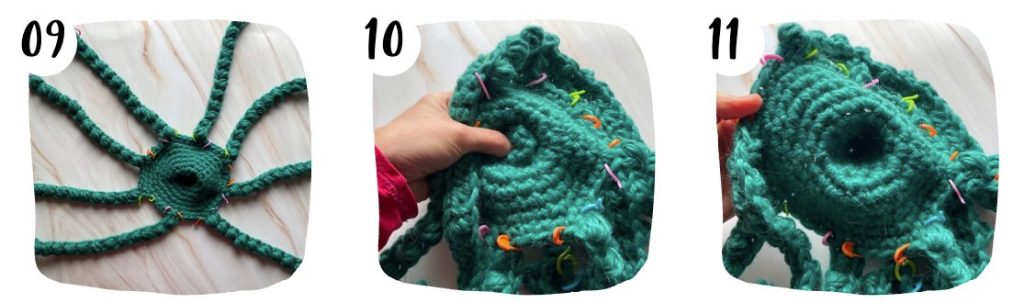
Sl st to next st and fasten off. Pop the beak to the inside – PH 10 & 11.

Joining Upper & Base Beak/Tentacles
Lightly stuff the head – you will stuff it more later. You will now join the upper piece to the lower piece. Line the 2 pieces up and use the stitch markers at the tip of the tentacles to st mark them together. Optionally, place several more stitch markers along the last row of the pieces to hold them together and be sure the stitches align correctly (the first time I made this pattern, I placed stitch markers every 10 stitches just to be sure it aligned perfectly, but you certainly don’t have to do that!)
Pick up the yarn where you left off after you finished the head and upper tentacles and begin the joining round. If you cut your yarn, just rejoin with the top color of yarn at the start of any 5-stitch section between the tentacles. The joining rnd (Rnd 1 below) will be worked through BOTH the upper and lower layers of the tentacles.
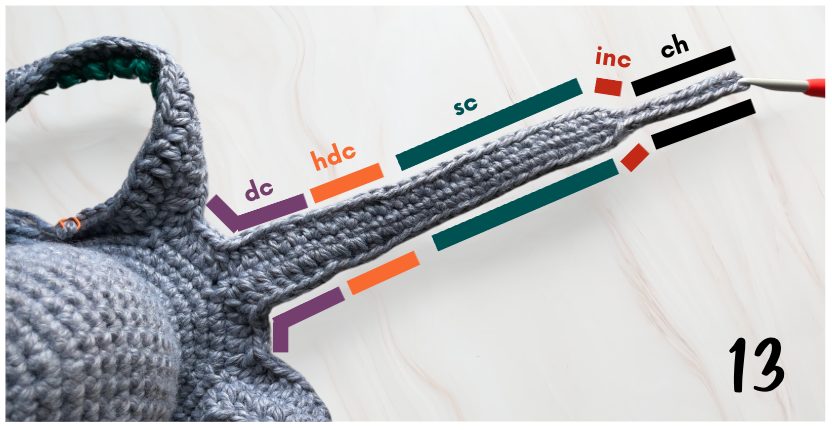
Rnd 1: (10 dc, 5 hdc, 14 sc, sc inc, ch 11, beginning in the 2nd ch from the hk: sc 10 back down ch, sc inc, 14 sc, 5 hdc, 5 dc) x8 [536]
If it’s easier to read Rnd 1 chunk by chunk, here is a more deconstructed version of those instructions as illustrated in PH 13:
5 dc along the last round between the tentacles,
5 dc up tentacle,
5 hdc up tentacle,
14 sc up tentacle.
sc inc in last st of tentacle (prior to the st marker),
ch 11, beginning in the 2nd ch from hk, sc 10 back down ch,
sc inc in next st (this is the stitch where the stitch marker is in the tip),
14 sc down tentacle,
5 hdc down tentacle,
5 dc down tentacle.
Repeat this all the way around – 8 times total. Be sure to fully stuff the head before you close it up all the way! Fasten off and weave in ends.
Giant Octopus Crochet Pattern Video Tutorial:
Show Off Your Work! ✨
I can’t wait to see your beautiful giant octopus! Be sure to tag me on social media @offthebeatenhook or use the hashtag #offthebeatenhook so I can admire your makes. ❤️
🔗 More Crochet Ocean Friends To Check Out:
- Jacque the Manta Ray Crochet Pattern
- Ingrid the Octopus Crochet Pattern
- Axel the Squid Crochet Pattern
- Jag the Jellyfish Crochet Pattern
- Clive the Crab Crochet Pattern
- Kalla the Orca Crochet Pattern
- Yoyo the Seahorse Crochet Pattern
Pin this Giant Octopus Crochet Pattern here:
Leave a Reply