
If you’re new to crochet, the very first skill you’ll need to learn is how to make a crochet slip knot. This simple step is essential because it creates the very first loop on your hook, allowing you to start any crochet project. In this guide, I’ll walk you through the quick and easy process of making a slip knot, plus some helpful tips for beginners.
Pin this crochet slip knot guide for later reference here:

What is a Slip Knot in Crochet?
A slip knot is a loop that tightens when pulled, creating a secure starting point for your crochet chain. It’s adjustable, meaning you can easily tighten or loosen it around your crochet hook before you begin stitching.
I’ll give you written steps describing how to slip knot onto your crochet hook, but it might be quicker to just watch my ONE MINUTE video tutorial which I’ve included below!
Steps:
- Create a Loop: Take your starting yarn and create loop just as if you were making a regular ol’ knot. Rather than pulling the short/loose end of the yarn fully through the loop, leave it dangling through the loop as you tighten the knot.

2. Insert your crochet hook, front to back, through the loop created.
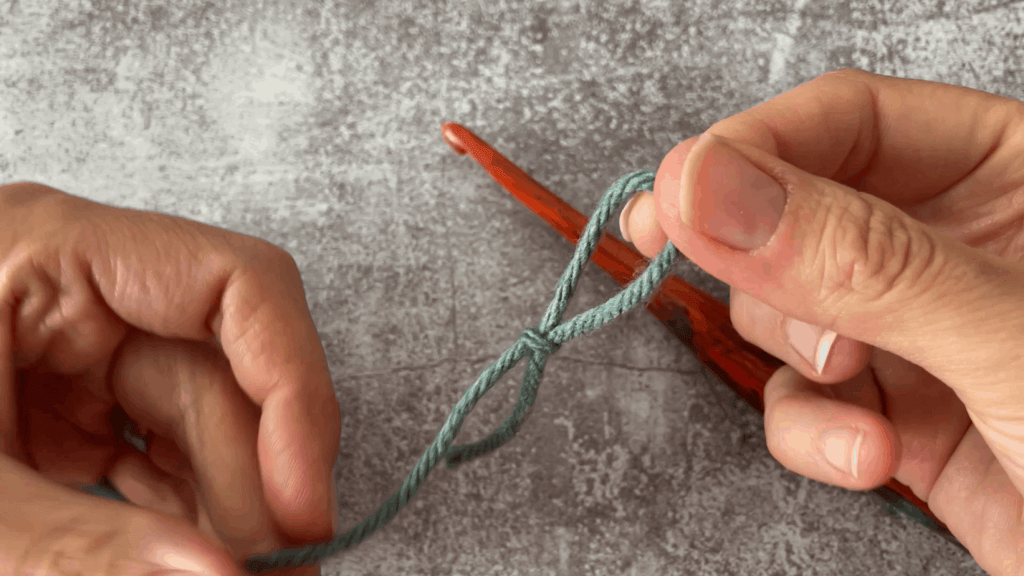
3. Pull on the end of the yarn to secure the knot right up onto your hook.

Tips for Making the Perfect Slip Knot
Practice Makes Perfect: If your slip knot feels too tight or too loose, try again! It gets easier with practice.
Leave a Tail: Make sure to leave a tail of at least 4-6 inches so you can weave in the ends later.
Not Too Tight: The loop should be snug but not too tight, allowing smooth movement on the hook.
How To Make a Crochet Slip Knot Video Tutorial
Next Steps After the Slip Knot
Once your slip knot is on the hook, you’re ready to start your foundation chain. If you’re a beginner, check out my tutorial on how to crochet a chain stitch which is the most traditional way of creating a chain. Alternatively, you can move straight away to learning the revolutionary chainless foundation to continue your learning journey.
Mastering the slip knot is the first step to a fun and rewarding crochet adventure! Now that you know how to make a slip knot, what project are you excited to start? Let me know in the comments!
Pin this crochet stitch guide for later reference here:
Leave a Reply