

You have your yarn and your hook. You know how to hold everything, make a slip knot, crochet a chain, and manage your tension. Now it’s finally time to learn how to single crochet!
Single crochet is one of the simplest and most useful stitches in crochet—and it’s the perfect place to begin building your stitch skills. And in this beginner-friendly lesson, you’ll learn exactly how to single crochet step by step.
LEARN TO crochet
Module 2: Core Crochet Stitches
Lesson 1: How to Single Crochet
This lesson is part of my free Learn to Crochet Course designed to take you from your very first stitch to completing your first projects and beyond.
24 step-by-step lessons with videos.
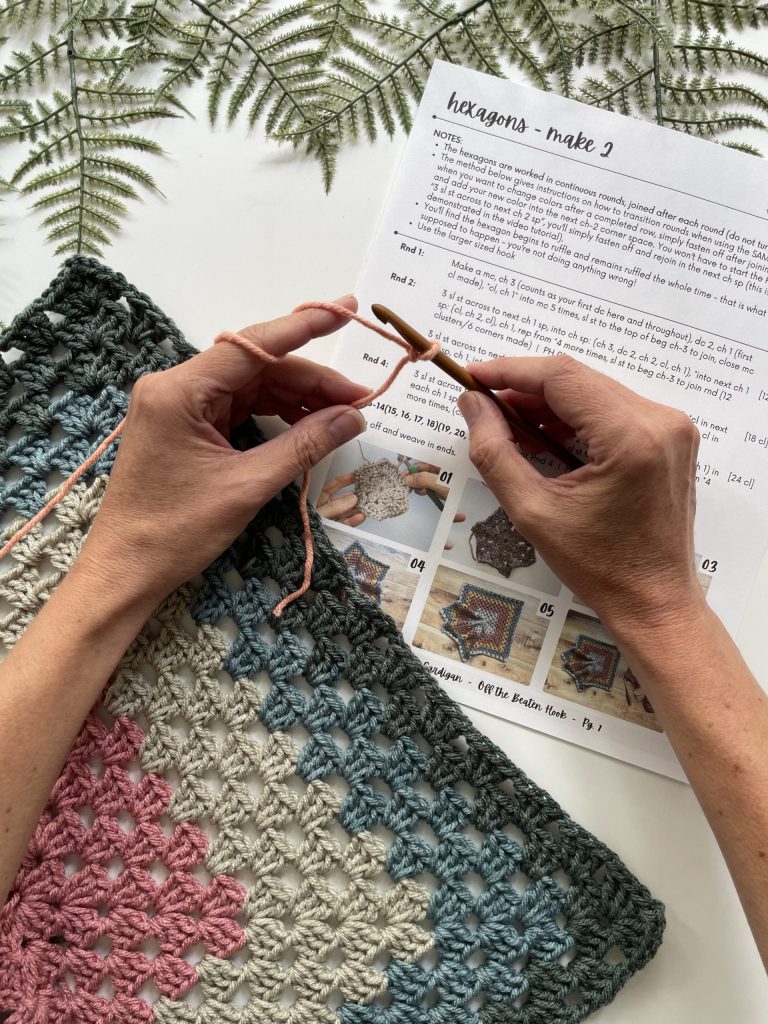

Materials You Will Need For This Lesson
- Worsted (4/Medium) Weight Yarn
- 5.5 mm Crochet Hook (a size 5.0 mm or 6.0 mm will work, if preferred)
- Scissors
- Yarn Needle
- Stitch Markers
A Little Help for Your Crochet Basket
Join and get the free Crochet Pro Essentials PDF Pack, plus gentle course reminders and new lessons in your inbox. These free resources will come in so handy as you learn how to single crochet and launch your crochet journey!
What Is a Single Crochet Stitch?
Single crochet is a short, compact crochet stitch that creates a sturdy fabric with very little space between the stitches. It is one of the most common stitches in crochet and is used in everything from washcloths and blankets to baskets, garments, and amigurumi.
The standard abbreviation for single crochet is sc. When you begin reading crochet patterns, you’ll see “sc” used instead of writing out “single crochet” every time.
The single crochet stitch is made by:
- Inserting your hook into a stitch.
- Pulling up a loop.
- Yarning over.
- Pulling through both loops on your hook.
That’s it. There are a few small details to pay attention to—and we’ll cover all of them—but the stitch itself is wonderfully straightforward.
Once you learn how to single crochet, you’ll also understand the basic rhythm used to make many other crochet stitches. The number of yarn overs and loops may change, but the general idea of inserting your hook, pulling up yarn, and working through the loops will begin to feel familiar.
US and UK Single Crochet Terms
Before we begin, it’s important to know that US and UK crochet terminology use different names for the same stitches.
In this lesson, I’m using US crochet terminology.
A US single crochet is called a double crochet in UK terminology. If you are following a pattern, always check which terminology the designer uses before you begin. Otherwise, you may end up making a very different fabric than intended—and possibly using considerably more yarn.
| US term | US abbreviation | UK term | UK abbreviation |
|---|---|---|---|
| Single crochet | sc | Double crochet | dc |
Throughout the entire Learn to Crochet course, we’ll use standard US crochet terms.

How to Make a Foundation Chain for Single Crochet
To practice single crochet, begin with a slip knot and crochet a foundation chain.
For a small practice swatch:
- Make a slip knot and place it on your hook.
- Chain 21.
Remember that the loop currently on your hook does not count as a chain. Look for the individual V shapes running along the front of your foundation chain and count those instead.
Your foundation chain should be loose enough that you can insert your hook into each chain without struggling. If the chain is very tight, your first row may be difficult to work and the bottom edge of your swatch may pull inward.
If your chains tend to be tight, try consciously relaxing your grip or making the foundation chain with a hook one size larger. You can switch back to your regular hook before beginning the first row.

Where to Insert Your Hook in the Foundation Chain
To make your first row of single crochet, you’ll begin in the second chain from the hook.
Do not count the loop currently on your hook. The first chain is directly below the hook, and the second chain is the next one.
The skipped chain allows your hook and yarn to reach the proper height for the first single crochet stitch. This is sometimes called a turning chain.
For this lesson, the turning chain does not count as a stitch.
You can insert your hook under the top loop of the chain, under the back loop, or into the small bump along the back of the chain. Different patterns may specify a particular method.
When you are first learning, use whichever part of the chain you can see and access most comfortably. The most important thing is to insert your hook consistently into one chain at a time without accidentally skipping any.
Watch the Video Lesson
How to Single Crochet Step by Step
Once you have found the second chain from your hook, you’re ready to make your first single crochet.
- Insert your hook into the second chain from the hook.
- Yarn over. Bring the working yarn over the hook from back to front.
- Pull the yarn through the chain. You will now have two loops on your hook.
- Yarn over again.
- Pull the yarn through both loops on your hook.
You have made your first single crochet stitch!
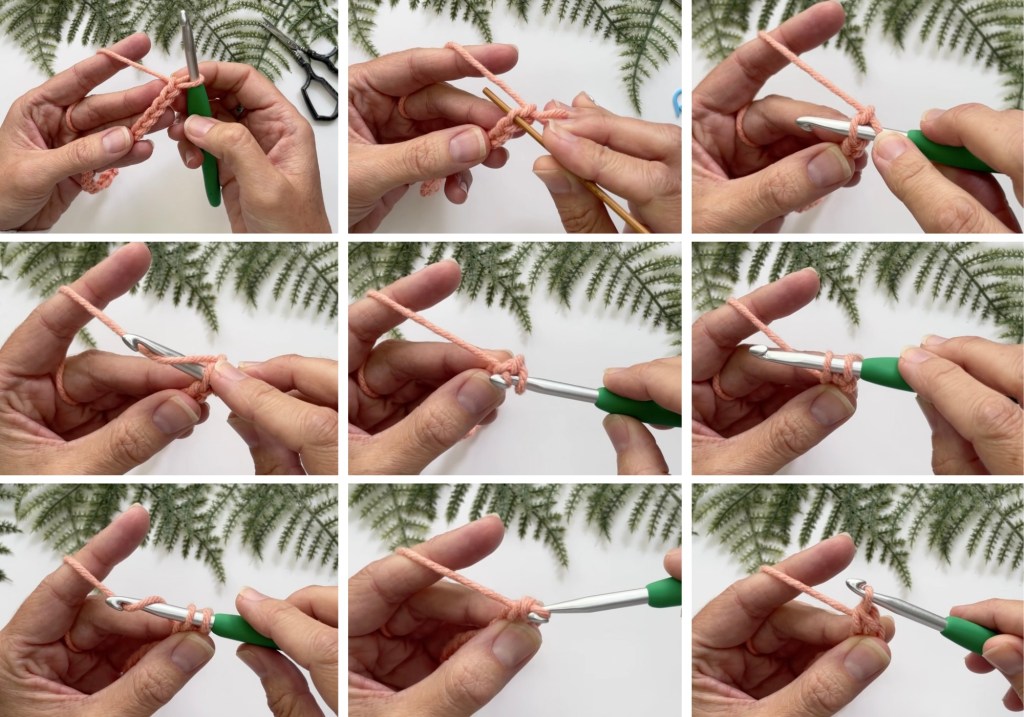
To make the next stitch:
- Insert your hook into the next chain.
- Yarn over.
- Pull up a loop. You should have two loops on your hook.
- Yarn over again.
- Pull through both loops.
Continue making one single crochet in each chain across the foundation chain.
If you began with 21 chains and worked into the second chain from your hook, you should have 20 single crochet stitches at the end of the first row.


How to Recognize a Single Crochet Stitch
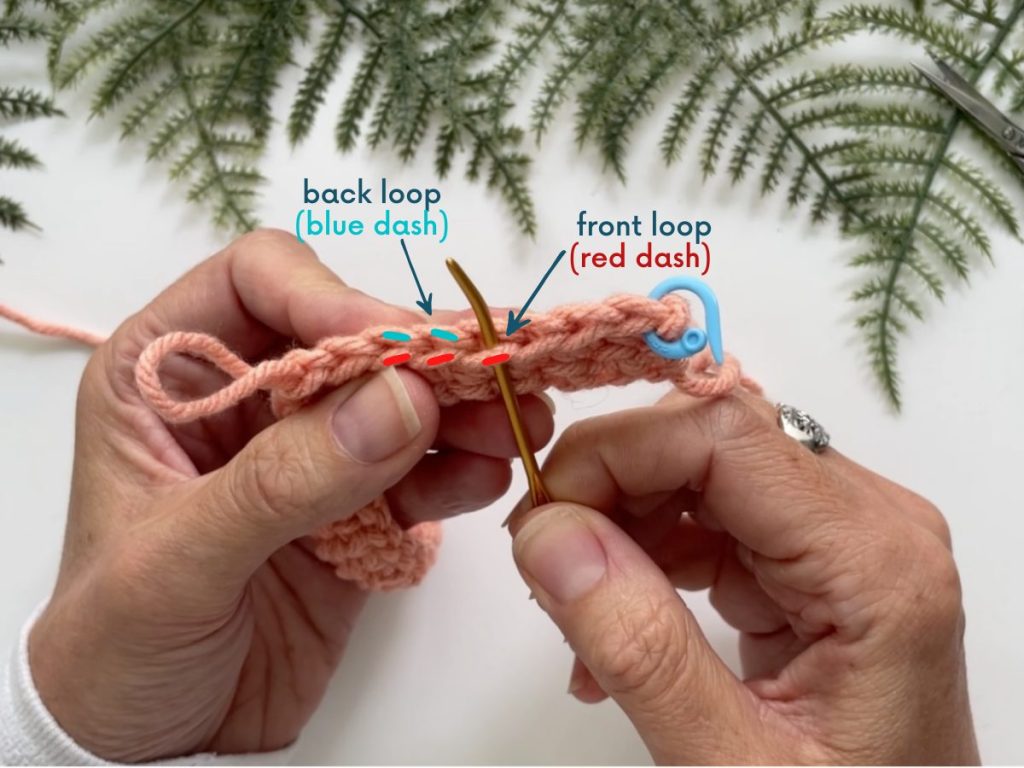
Each completed single crochet has a small V shape across the top. That V is made from two loops:
- The loop closest to you is the front loop.
- The loop farthest from you is the back loop.
Unless a pattern tells you otherwise, insert your hook under both loops of the stitch.
The front of a single crochet stitch has a compact shape that may look a little like a small X or V, depending on your technique and how the yarn twists. The tops of the stitches form a row of clear V shapes along the upper edge of your work.
Learning to recognize those top Vs will make it much easier to find your stitches, count them, and know exactly where to insert your hook in the next row.
How to Turn and Begin the Next Row
Once you reach the end of the first row, you’ll need to turn your work so you can crochet back in the opposite direction.
To begin Row 2:
- Chain 1.
- Turn your work.
- Insert your hook under both loops of the first stitch.
- Make one single crochet.
- Continue making one single crochet in each stitch across.
The chain 1 brings your hook up to the correct height for the new row. In this tutorial, the chain 1 does not count as a stitch.
That means your first single crochet goes into the first actual stitch—the stitch directly at the base of the chain 1. It can be easy to overlook this stitch, especially when you’re learning.
Continue across until you reach the final stitch of the row. Count your stitches to make sure you still have 20.
Then chain 1, turn, and repeat.
Should You Chain 1 Before or After Turning?
You may see crocheters do this in either order:
- Chain 1, then turn.
- Turn, then chain 1.
Both methods work. A crochet pattern may specify one, but most of the time you can use whichever order feels more natural to you.
For this lesson, we’ll chain 1 and then turn so the process remains consistent from row to row.
The important part is that you make the turning chain and correctly identify the first stitch of the new row.

How to Count Single Crochet Stitches
Counting your stitches at the end of each row is one of the best habits you can develop as a beginner.
To count single crochet stitches, look at the top edge of your work. Each V represents one stitch.
If your row should have 20 stitches, count 20 Vs across the top.
Do not count:
- The loop currently on your hook
- The chain 1 at the beginning of the row
- The vertical side of the turning chain
Because the turning chain does not count as a stitch in this tutorial, you should have the same number of actual single crochet stitches in every row.
You can also count the small vertical posts along the front of the row, but counting the top Vs will help you become familiar with exactly where your hook should go.
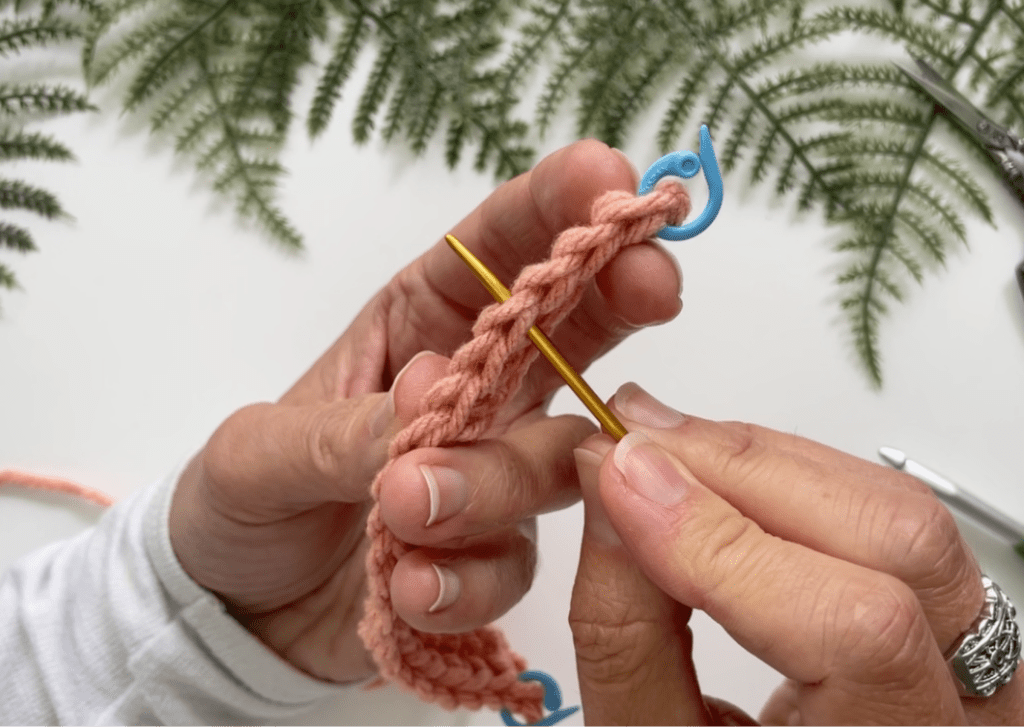
Using Stitch Markers to Keep Your Edges Straight
The first and last stitches of a row are the easiest stitches to miss. If you skip either one, your stitch count will gradually decrease and your practice rectangle may begin turning into a triangle.
A couple of stitch markers can prevent this.
After making the first stitch of a row, place a stitch marker through the top of that stitch. Before you make the final stitch on the other end, identify the marked stitch from the previous row and work into it.
You can then move the marker into the first stitch of your new row.
You do not have to use stitch markers forever, but they are extremely useful while you train your eyes to recognize the edges of your work.
Think of them as tiny, colorful assistants whose only job is to stop your crochet project from quietly shrinking.
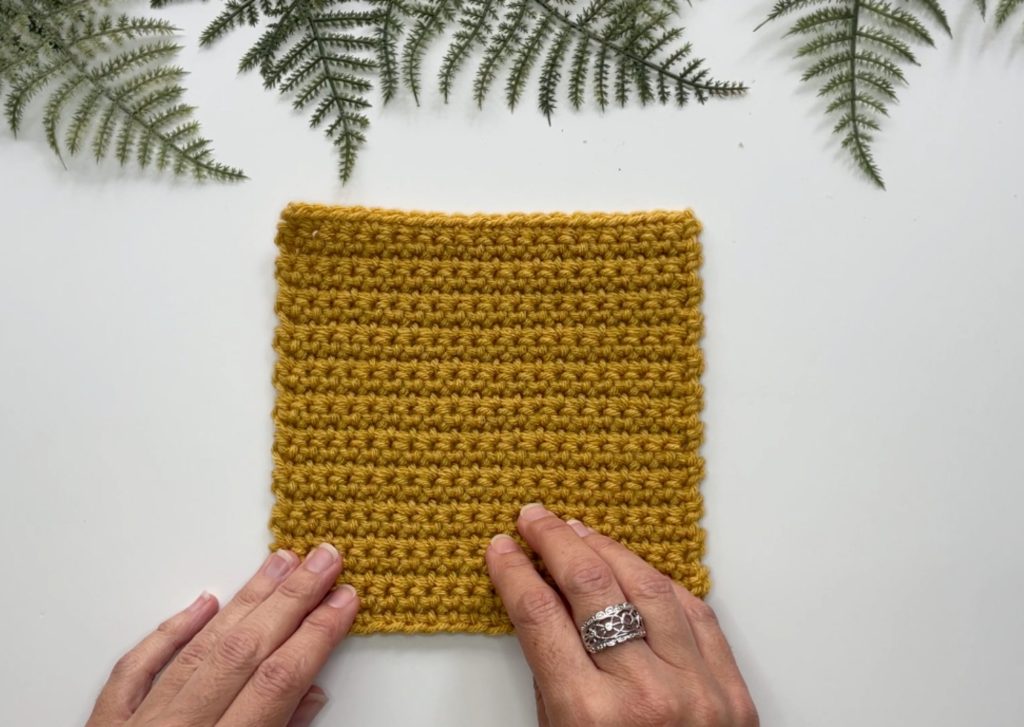
How to Keep Your Single Crochet Edges Straight
Straight edges depend on maintaining the same number of stitches in every row. Our next lesson is devoted completely to this, so we will take a deep dive into how to keep your edges straight when we get there next.
If your swatch is getting narrower, you are probably:
- Skipping the first stitch
- Missing the last stitch
- Accidentally skipping a stitch somewhere in the middle
If your swatch is getting wider, you may be:
- Working into the turning chain
- Placing two stitches into the same stitch
- Working into a space between stitches instead of the top of a stitch
Count your stitches after every row while you practice. If the number has changed, look closely at the first and last stitches before undoing the entire row. The edges are usually where the trouble began.
Our next lesson is devoted completely to this, so we will take a deep dive into how to keep your edges straight when we get there next.
How to Keep Your Single Crochet Stitches Even
Your first few rows may not look perfectly even—and that is completely normal.
Consistent stitches develop through practice. As you crochet, try to:
- Keep your hands and shoulders relaxed.
- Avoid pulling the working yarn tightly after each stitch.
- Hold the yarn the same way throughout the row.
- Pull each loop up to approximately the same height.
- Let the hook shaft determine the size of the loops.
- Use the same hook and yarn while practicing.
If it feels difficult to pull the hook through your stitches, your tension may be too tight. If the stitches are very loose and floppy, you may need slightly more tension on the working yarn.
Aim for stitches that feel controlled but not forced. Your hook should move through them without a wrestling match.
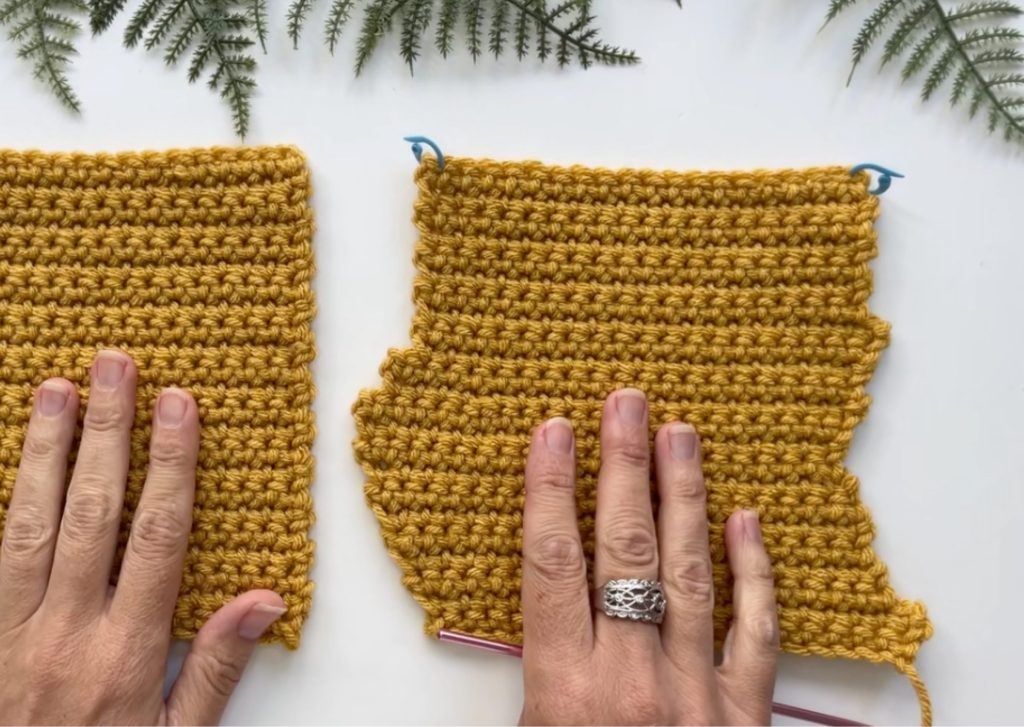
Common Single Crochet Mistakes
Mistakes are a normal part of learning how to single crochet. Most beginners encounter the same few issues, and all of them are fixable.
Inserting the Hook Into the Wrong Place
For a standard single crochet, insert your hook under both loops of the next stitch. Look for the V across the top rather than inserting the hook into the larger gaps between stitches.
Skipping the First Stitch
After chaining 1 and turning, the first stitch can hide directly beneath the turning chain. Marking it can help you find it again on the following row.
Missing the Last Stitch
The final stitch may pull toward the side and be more difficult to recognize. Count your stitches and use a marker in the first stitch of each row so you can easily identify it when you return.
Adding an Extra Stitch
Remember that the turning chain does not count as a stitch in single crochet. Do not work into it at the end of the row.
Making the Foundation Chain Too Tight
A tight chain can make the first row frustrating and cause the bottom edge to curve. Loosen your grip or use a larger hook for the foundation chain.
Splitting the Yarn
Make sure your hook passes cleanly beneath the loops of the stitch instead of going through the individual strands of yarn. Smooth, lightly twisted yarn is usually easiest for beginners to see and work with.
Why Is My Single Crochet Curling?
A small amount of curling is common, especially during the first few rows. Your swatch may relax as you add more rows.
More noticeable curling can happen when:
- Your foundation chain is too tight.
- Your stitches are much tighter than your starting chain.
- Your tension changes between rows.
- You have accidentally added or skipped stitches.
Continue for several rows before deciding something is wrong. A tiny strip of crochet fabric has very little weight to help it lie flat.
If the bottom edge is pulling inward, try remaking the foundation chain more loosely or using a larger hook for the chain.
How to Single Crochet FAQs
Single crochet is one of the easiest and most beginner-friendly crochet stitches. It uses a simple sequence and only requires you to work through two loops on the hook. It is often the first complete stitch taught after the foundation chain.
The standard abbreviation for single crochet is sc. This abbreviation refers to the US single crochet stitch. Using UK terms, this stitch would be called the double crochet.
You can begin with any number of chains required for your project or practice swatch. To make a swatch with 20 single crochet stitches, chain 21 and begin in the second chain from the hook.
In single crochet patterns, the chain 1 turning chain does not count as a stitch. However, always check the pattern instructions because designers may use different methods at their whim.
The chain 1 does not count as a stitch, so you’ll make the first single crochet in the first stitch of the row—the stitch directly at the base of the turning chain.
Unless a pattern instructs you differently, insert your hook under both the front and back loops of the stitch. Some patterns use front-loop-only or back-loop-only stitches to create special textures.
Your stitch count may decrease if you skip the first or last stitch of a row. It may increase if you work into the turning chain or place two stitches into one stitch. Count each row and mark the edge stitches until you can easily recognize them.
Your foundation chain may be too tight. Try remaking it with a more relaxed grip or using a hook one size larger for the chain. Then switch back to your regular hook before beginning the first row.
Yes. Single crochet creates a warm, dense, durable fabric that works well for blankets. Because it is a short stitch, a single crochet blanket will take longer and may require more yarn than one made with taller stitches.
Single crochet can be used to make washcloths, scarves, blankets, baskets, bags, stuffed animals, home décor, and many other projects. It is especially popular for amigurumi because the dense fabric helps keep the stuffing from showing.
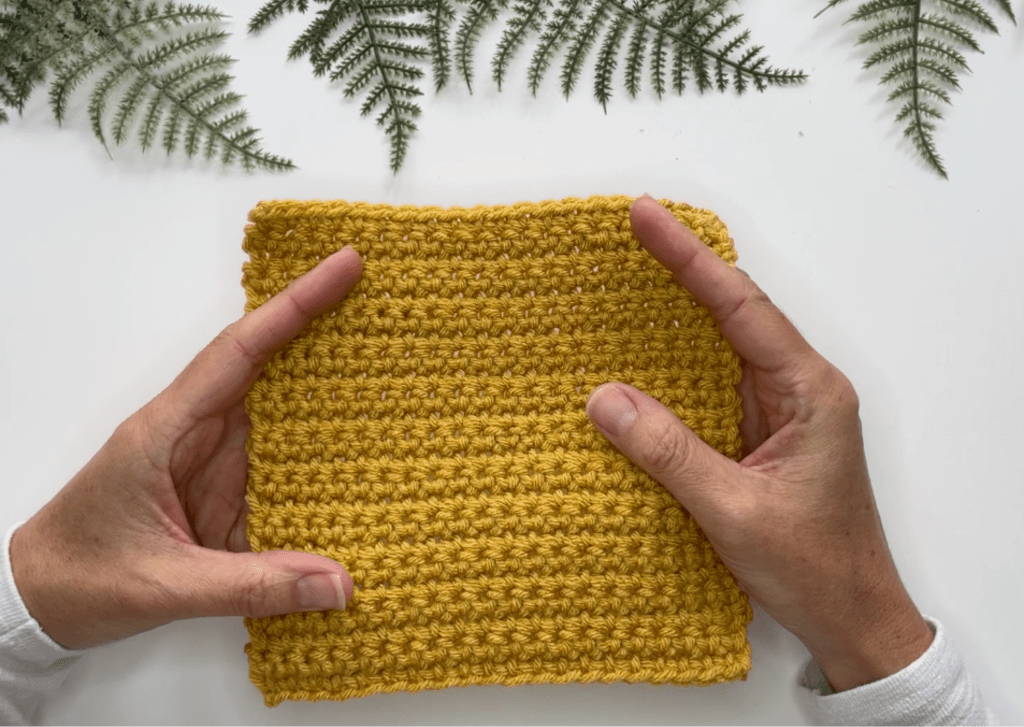
How to Single Crochet Practice Challenge
The best way to learn single crochet is to repeat it until the movement begins to feel natural.
Try making a practice swatch that is 20 stitches wide and at least 10 rows tall. As you work, focus on:
- Finding both loops of every stitch
- Keeping a consistent stitch count
- Recognizing the first and last stitches
- Relaxing your grip
- Creating even loops and stitches
Your practice swatch does not need to become anything useful. Its job is to help your hands learn the movement.
You may notice a big difference between the first row and the tenth row. That visible progress is one of the lovely things about learning crochet: your practice becomes something you can actually hold.

You Learned How to Single Crochet!
You just made your first complete crochet stitch—and that is a big milestone.
You learned how to work single crochet stitches into a foundation chain, turn your work, crochet additional rows, count your stitches, and keep your edges straight. Even if your first swatch looks a little uneven, you are building the hand movements and stitch-recognition skills you’ll use throughout the rest of the course.
Keep your practice swatch nearby because we’ll build on these skills in the next lesson: how to count crochet stitches and rows. We’ll take a closer look at stitch anatomy, turning, and exactly where each stitch begins and ends.
For now, practice a few more rows, loosen your shoulders, and enjoy the fact that you are officially crocheting.
← Previous Lesson: Crochet Tension
SOCIAL MEDIA YOUR THING?
Connect with me on your favorite social network!
Pin This Lesson for Later
Leave a Reply