

Learning how to read crochet patterns can feel a little like learning a new language. The abbreviations, punctuation, numbers, parentheses, and asterisks may look like a mildly aggressive wall of code at first—but every piece has a purpose.
Once you understand how crochet patterns are organized and learn to break the instructions into smaller steps, they become much easier to follow. In this lesson, we’ll walk through the common sections of a written pattern, decode the punctuation and symbols, break down a complete line of instructions, and then follow part of a real crochet pattern together.
In the previous lesson, we covered crochet abbreviations and terms. Now we’re going to put those abbreviations to work and learn how an entire written pattern fits together.
LEARN TO crochet
Module 3: From Stitches to Projects
Lesson 2: How to Read Crochet Patterns
This lesson is part of my free Learn to Crochet Course designed to take you from your very first stitch to completing your first projects and beyond.
24 step-by-step lessons with videos.
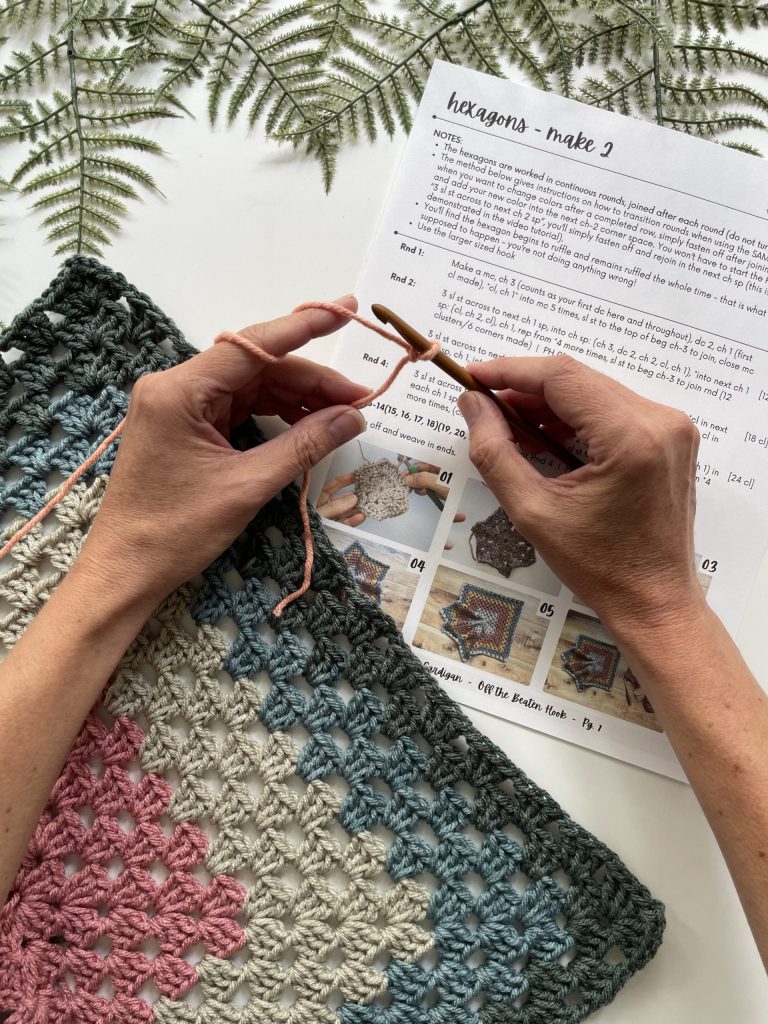
Materials You Will Need For This Lesson
- Worsted (4/Medium) Weight Yarn
- 5.5 mm Crochet Hook (a size 5.0 mm or 6.0 mm will work, if preferred)
- Scissors
- Yarn Needle
- Stitch Markers
A Little Help for Your Crochet Basket
Join and get the free Crochet Pro Essentials PDF Pack, plus gentle course reminders and new lessons in your inbox. These tools will help you in a big way as you start your journey of learning how to read crochet patterns!
What You’ll Learn in This Lesson
By the end of this lesson, you’ll know how to:
- Recognize the common sections of a crochet pattern
- Find the information you need before beginning a project
- Understand commas, asterisks, parentheses, and brackets
- Break one long line of instructions into manageable steps
- Follow stitch repeats without losing your place
- Use stitch counts and photographs to check your work
- Refer back to a pattern confidently as you crochet
You do not need to memorize every abbreviation, symbol, or crochet term. Experienced crocheters use reference guides, reread pattern notes, and look back at instructions constantly. The goal is not memorization; it is knowing how to find and understand the information you need. Learning how to read crochet patterns is going to open up a whole world of crochet project opportunities for you!
Before You Begin: Read the Entire Pattern
One of the best pattern-reading habits is also one of the easiest: read the pattern from beginning to end before picking up your hook.
Designers include information for a reason, so give everything an initial read—even the notes that seem less exciting than getting straight to the yarn. This first pass helps you understand how the project is constructed, which materials and techniques it requires, and whether there are any instructions that need clarification before you begin.
You do not need to remember every detail after reading it once. Even after you’re quite comfortable with how to read crochet patterns, most crocheters continually look back at the pattern, check stitch counts, reread instructions, and confirm that they are still on track. That is not a sign that you are doing it wrong. That is simply how following a pattern works.
The Common Sections of a Crochet Pattern
Every designer formats patterns a little differently, but most well-written crochet patterns contain the same basic information. When learning how to read crochet patterns, knowing where that information usually appears makes it much easier to find what you need.
Project Introduction or Description
Many patterns begin with a short introduction from the designer. This may explain the inspiration behind the design, describe how the finished project is used or worn, or mention something unique about its construction.
This section gives you the big-picture view before you get into the technical details.
Video Tutorial or Additional Help
If a video tutorial is available, the pattern may include a direct link or point you toward the designer’s website or YouTube channel. Some designers also provide photo tutorials, technique guides, or contact information for pattern support.
It is worth finding these resources before you begin. You may not need them, but Future You will be pleased that Present You knows where they are.
Copyright and Usage Information
Most patterns include copyright and usage terms explaining what you may do with the pattern itself and with finished items made from it.
Policies vary by designer. In the US, you cannot be prohibited from selling finished pieces made from a pattern but will probably (almost certainly) be prohibited from copying, redistributing, translating, publishing, or sharing the pattern instructions. Always read the designer’s terms rather than assuming they are the same for every pattern.
Materials
Think of the materials section as your shopping list. It usually includes:
- Yarn weight, fiber, color, and approximate yardage
- Crochet-hook size
- Scissors
- Yarn or tapestry needle
- Stitch markers
- Buttons, zippers, stuffing, or other project-specific supplies
Gather everything before beginning so you do not discover halfway through that the project requires a supply you do not own. Crochet is exciting enough without an emergency button hunt.
Crochet Abbreviations and Symbols
Most patterns list the abbreviations and special symbols used in that specific design. This is one reason you do not need to memorize every crochet abbreviation ever invented: the pattern should give you a reference.
If an abbreviation list is not included, keep a reliable crochet-abbreviation guide nearby. Also check whether the pattern uses US or UK crochet terminology, because the same stitch name can mean different things in the two systems.
Skill Level
A pattern may be labeled beginner, easy, intermediate, or advanced. The skill level helps you decide whether the project is a comfortable fit for your current experience.
Treat the label as guidance rather than a strict rule. It is also helpful to scan the actual techniques required. A beginner pattern that includes one unfamiliar skill may still be a wonderful learning project—especially when photos or a video tutorial are available.
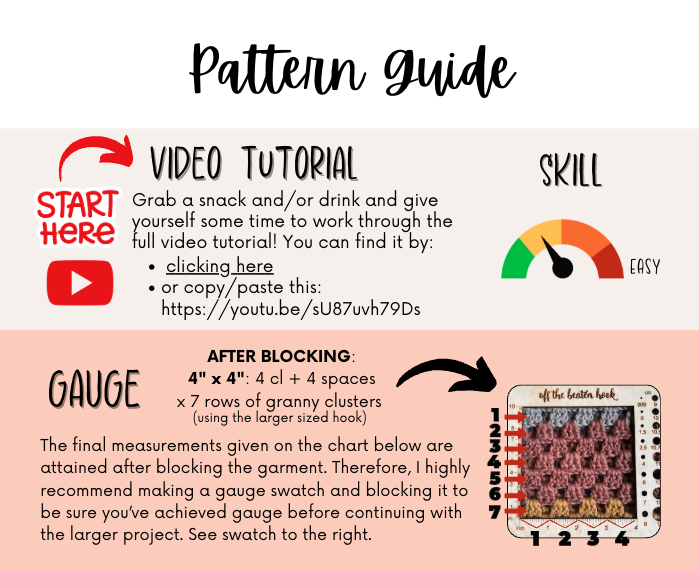
Gauge
Gauge tells you how many stitches and rows should fit within a specific measurement when you use the suggested yarn and hook.
Gauge is especially important for projects where size matters, such as garments, hats, and fitted accessories. If your stitches are larger or smaller than the designer’s, your finished item will also be larger or smaller. We’ll cover gauge in much more detail later in this course; for now, know that it is not decorative information that the designer added for ambiance.
Sizes and Finished Measurements
If a pattern includes multiple sizes, look for a size chart or finished-measurements section. This helps you:
- Choose the correct size to make
- Understand how the item is intended to fit
- Know the expected dimensions of the finished project
- Follow the correct stitch counts for your chosen size
Before beginning, identify where your size appears in every list of numbers. If the sizes are presented in the order XS (S, M, L, XL), your instructions and stitch counts will remain in that order throughout the pattern.
Highlighting or circling the numbers for your size can make a garment pattern much easier to follow.
Pattern Notes
Seriously: read the notes. Then consider reading them again.
Pattern notes often explain:
- Whether you will work in rows, joined rounds, or continuous rounds
- Whether you should turn after each row or round
- How turning or beginning chains are counted
- Special stitch definitions
- Construction and assembly details
- Color changes or stripe sequences
- Sizing information
- What size hook to use for that section (if the pattern uses more than one size)
- Anything unusual that you should expect from the fabric
In the video tutorial, for example, the hexagon is worked in joined rounds without turning, and the notes explain that the piece will begin to ruffle and should continue ruffling. Without reading that note, a crocheter might assume something had gone terribly wrong and begin undoing perfectly good work.
Many questions that arise during a project are answered in the notes. Before sending up the crochet distress signal, check there first.
Written Pattern Instructions
The written instructions are the step-by-step roadmap that takes you from the first stitch to the finished project. They may be divided into rows, rounds, panels, sections, assembly steps, or finishing instructions.
Read one row or round at a time. When a line looks overwhelming, break it into individual actions instead of trying to hold the entire sentence in your head.
Photos, Diagrams, and Charts
Many patterns include photographs, stitch diagrams, construction drawings, schematics, or crochet charts. These visual aids are especially useful for:
- Confirming stitch placement
- Comparing the shape of your project with the example
- Understanding assembly
- Seeing where colors change
- Checking how a completed row or round should look
Use these tools together with the written instructions. A photo can confirm the general shape, but the written stitch count tells you whether the structure is correct.
How to Read Crochet Patterns Video Lesson
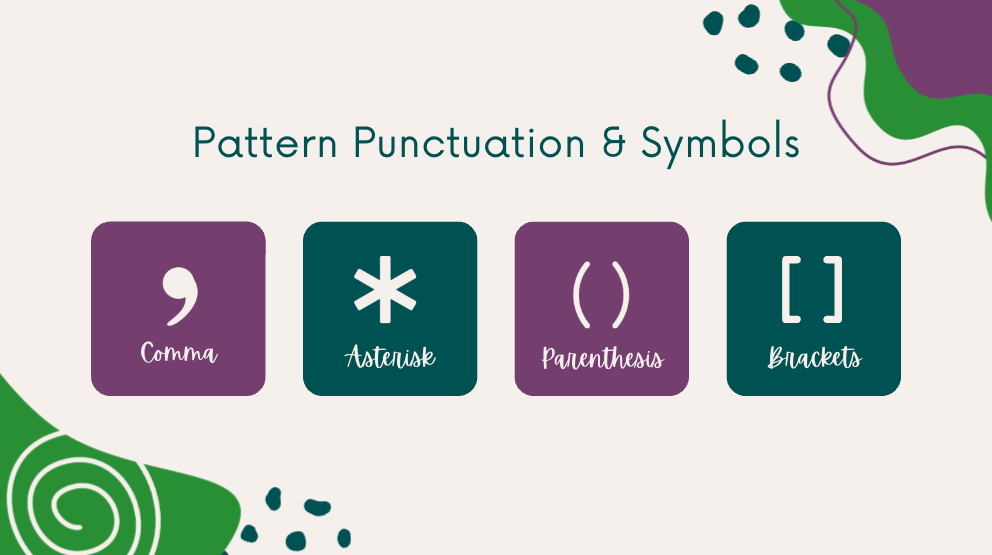
How Crochet Patterns Use Punctuation and Symbols
Crochet patterns use punctuation to keep instructions shorter, cleaner, and easier to follow. Once you understand what each symbol is doing, the instructions begin to look much less intimidating. And after you learn how to read crochet patterns, understanding what these symbols are directing you to do will become second nature.
Always check the pattern notes or symbol key, because individual designers may format repeats slightly differently.
Commas
A comma acts like a small pause or yield sign. Complete the instruction before the comma, then move to the next instruction.
For example:
Ch 1, sc in next st, dc in next st.
Read it as three separate actions:
- Chain 1.
- Make one single crochet in the next stitch.
- Make one double crochet in the next stitch.
Asterisks
Asterisks mark the beginning—and sometimes the end—of a sequence that must be repeated.
With a single asterisk, the pattern may say:
*Sc in next st, ch 1; repeat from * across.
Begin at the asterisk and repeat everything after it as directed.
Parentheses
Parentheses can serve several purposes, so use the surrounding words to determine what they mean.
1. Work several stitches into the same place
(2 dc, ch 2, 2 dc) in next ch-2 sp
Everything inside the parentheses is worked into the same chain-2 space.
2. Repeat a short sequence
(Sc in next st, inc in next st) x3
Make one single crochet, then one increase. Repeat that entire combination three times.
3. Show the final stitch count
(24 sts) or simply(24)
When parentheses appear at the end of a row or round, they commonly tell you how many stitches you should have after completing it.
4. Give instructions for multiple sizes
Row 1: sc in next 62 (68, 76, 82, 90)
Each number corresponds to a size in the order established by the pattern. Once you choose your size, follow the number in that same position throughout the instructions.
5. Add information or clarification
Ch 3 (counts as a dc here and throughout).
Here, the parentheses clarify how the beginning chain should be treated when working and counting stitches.
Brackets
Brackets may function similarly to parentheses, but they are especially helpful when one repeat contains another group of stitches.
For example:
[(Cluster, ch 2, cluster) in next ch-2 sp, ch 1, dc across to next ch-2 sp] x4
The parentheses group the stitches worked into the same chain space. The brackets show the larger sequence that must be repeated four times.
Patterns may also use brackets to show a stitch count or contain a secondary set of instructions. Refer to the pattern’s notes whenever its formatting differs from what you have seen before.
How to Break Down a Full Line of Crochet Instructions
A complete line of crochet instructions may contain abbreviations, numbers, commas, parentheses, and a repeat all at once. Do not try to absorb it as one giant instruction. Translate it one piece at a time.
Consider this example:
(Cluster, ch 2, cluster, ch 1) in next ch-2 sp, *cluster in next ch-1 sp, ch 1; repeat from * 4 more times, sl st to top of beginning ch 3 to join. (12 clusters, 6 corners)
Break it down like this:
- Find the next chain-2 space.
- Work everything inside the first parentheses into that same space: one cluster, chain 2, another cluster, and chain 1
- Find the asterisk. This marks the beginning of the repeated sequence.
- Make a cluster in the next chain-1 space.
- Chain 1.
- Repeat from the asterisk the stated number of additional times.
- Slip stitch to the top of the beginning chain 3 to join the round.
- Count your work and compare it with the stitch-and-corner total in the final parentheses.
The original sentence has not changed; you have simply turned it into a checklist. This is one of the most useful things you can do whenever a pattern line feels overwhelming.
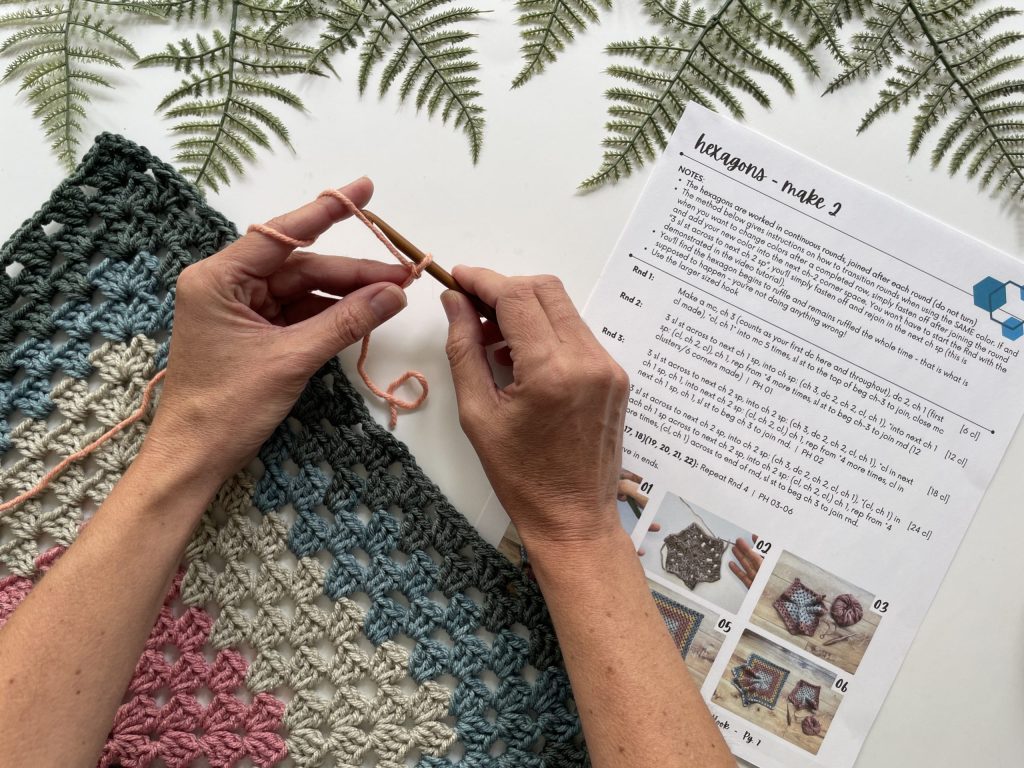
How to Follow a Crochet Pattern Step by Step
In the video, we apply all of these ideas while crocheting the beginning rounds of a hexagon. The pattern is more detailed than I would recommend as your very first independent beginner project, but it is useful for demonstrating abbreviations, punctuation, stitch groups, repeats, joined rounds, and stitch counts in a real pattern.
Here is the process we follow:
- Read the notes first. We confirm that the hexagon is worked in joined rounds, that we do not turn after each round, and that the fabric is expected to ruffle.
- Confirm the materials and hook size. The pattern gives more than one hook option, so we select the correct hook for the section being made.
- Review special stitch definitions. In this pattern, a cluster is defined as a group of three double crochets.
- Begin Round 1 with a magic ring. The beginning chain 3 counts as the first double crochet, just as the pattern notes explain.
- Identify the repeat. The asterisk shows where the repeated cluster-and-chain sequence begins.
- Join the round exactly as directed. We slip stitch to the top of the beginning chain 3 and close the magic ring.
- Check the stitch count. The finished round should contain six clusters, so we count six groups of three double crochets before continuing.
- Move into the correct chain space. At the beginning of later rounds, slip stitches carry the hook across to the next specified chain space.
- Use parentheses to determine stitch placement. When several stitches appear inside parentheses followed by “in the same space,” every stitch in that group belongs in that one space.
- Use chain spaces to recognize corners and sides. The chain-2 spaces form the hexagon’s corners, while chain-1 spaces separate clusters along the sides.
- Follow the repeat around the hexagon. Instead of guessing from the shape, return to the asterisk and repeat the exact sequence the stated number of times.
- Compare the finished round with the pattern. Count the clusters and corners, then use the pattern photograph to confirm that the piece has the expected shape.
- Follow size-specific round counts. When the pattern lists different ending rounds for different sizes, use the number that appears in the same position as your chosen size.
This is what reading a crochet pattern looks like in practice: work one instruction, check your placement, return to the pattern, and continue. You are not expected to read the whole round once and then crochet it from memory.

Helpful Pattern-Reading Habits
- Keep the pattern open beside you while you work.
- Mark or highlight the size you are making.
- Place a check mark beside completed rows or rounds.
- Use a row counter for long repeats.
- Put stitch markers in the first stitch, corners, repeats, or other important locations.
- Count at the end of each row or round instead of waiting until the project looks suspicious.
- Read the notes again when something unexpected happens.
- Compare your work with progress photos, but verify it with the written stitch count.
- Look up unfamiliar stitches or techniques before improvising.
- Take breaks. Crochet instructions do not become easier when stared at with increasing hostility.
Common Crochet Pattern-Reading Mistakes
Skipping the notes: You may miss information about turning, joining, beginning chains, construction, or an expected change in the fabric.
Following the wrong number in a multi-size pattern: Choose the number for your size and stay in that same position throughout the pattern.
Missing part of a repeat: Locate the asterisk or bracket that marks both the beginning and the end of the repeated sequence.
Working grouped stitches into separate stitches: If a group in parentheses is followed by “in the same stitch” or “in the next space,” work the entire group into that one location.
Ignoring the stitch count: Counts catch mistakes while they are still small and relatively polite.
Trying to memorize the pattern: Keep looking back. That is what the pattern is for.
How to Read Crochet Patterns FAQs
No. Most patterns include an abbreviation list, and experienced crocheters use reference guides regularly. Focus on learning how to locate the definition and apply it within the instruction.
US and UK patterns use some of the same stitch names for different stitches. For example, a US single crochet is called a double crochet in UK terminology. Always determine which terminology the designer uses before beginning.
An asterisk marks the beginning of a sequence that should be repeated. The pattern will tell you how many times to repeat it or whether to continue until the end of the row or round.
Parentheses may group stitches that belong in the same location, show a sequence to repeat, provide stitch counts, list values for multiple sizes, or add clarification. Read the words immediately before and after the parentheses to determine their purpose.
Brackets often group a larger repeated sequence, particularly when that sequence already contains stitches in parentheses. Designers may use them differently, so check the pattern notes or symbol key.
Check your stitch count at the end of each row or round, confirm that your stitches are placed in the correct spaces, and compare the shape of your work with any progress photos or diagrams.
Stop and divide the sentence at its commas, parentheses, brackets, and repeat markers. Rewrite it as individual steps if necessary, then complete one action at a time.
Yes. Begin with a clearly written beginner pattern that uses familiar stitches and preferably includes photos or a video tutorial. Pattern reading becomes more natural through practice, just like making the stitches themselves.
Practice Challenge
Choose a beginner-friendly crochet pattern—either one you already own or a free pattern you would like to make.
Before picking up your hook, see how many of these items you can identify:
- Materials and hook size
- Yarn weight and yardage
- Skill level
- Gauge information
- Finished measurements
- Crochet abbreviations
- Pattern notes
- Whether the pattern uses US or UK terminology
- Instructions for rows or rounds
- Asterisks, parentheses, or brackets
- Stitch counts
- Photos, charts, or diagrams
Then choose one line of instructions and rewrite it as a numbered checklist in plain language. You do not need to memorize anything. Your goal is simply to practice finding and interpreting the information.
Milestone – You Can Read a Crochet Pattern!
Learning how to read crochet patterns is not about memorizing an entire language before you are allowed to begin. It is about knowing where to find the information, understanding how the instructions are organized, and taking the pattern one step at a time.
Keep your reference guides nearby. Reread the notes. Check your stitch counts. Look back at the pattern as often as you need to. With each project, the abbreviations and symbols will become more familiar—and eventually that intimidating wall of text will begin to look like a perfectly manageable roadmap.
In the next lesson, we’ll look at the difference between working in rows and rounds and learn how to begin crocheting in the round with a magic ring.
← Previous Lesson: Crochet Abbreviations
SOCIAL MEDIA YOUR THING?
Connect with me on your favorite social network!
How to Read Crochet Patterns: Pin This Lesson for Later
Leave a Reply