
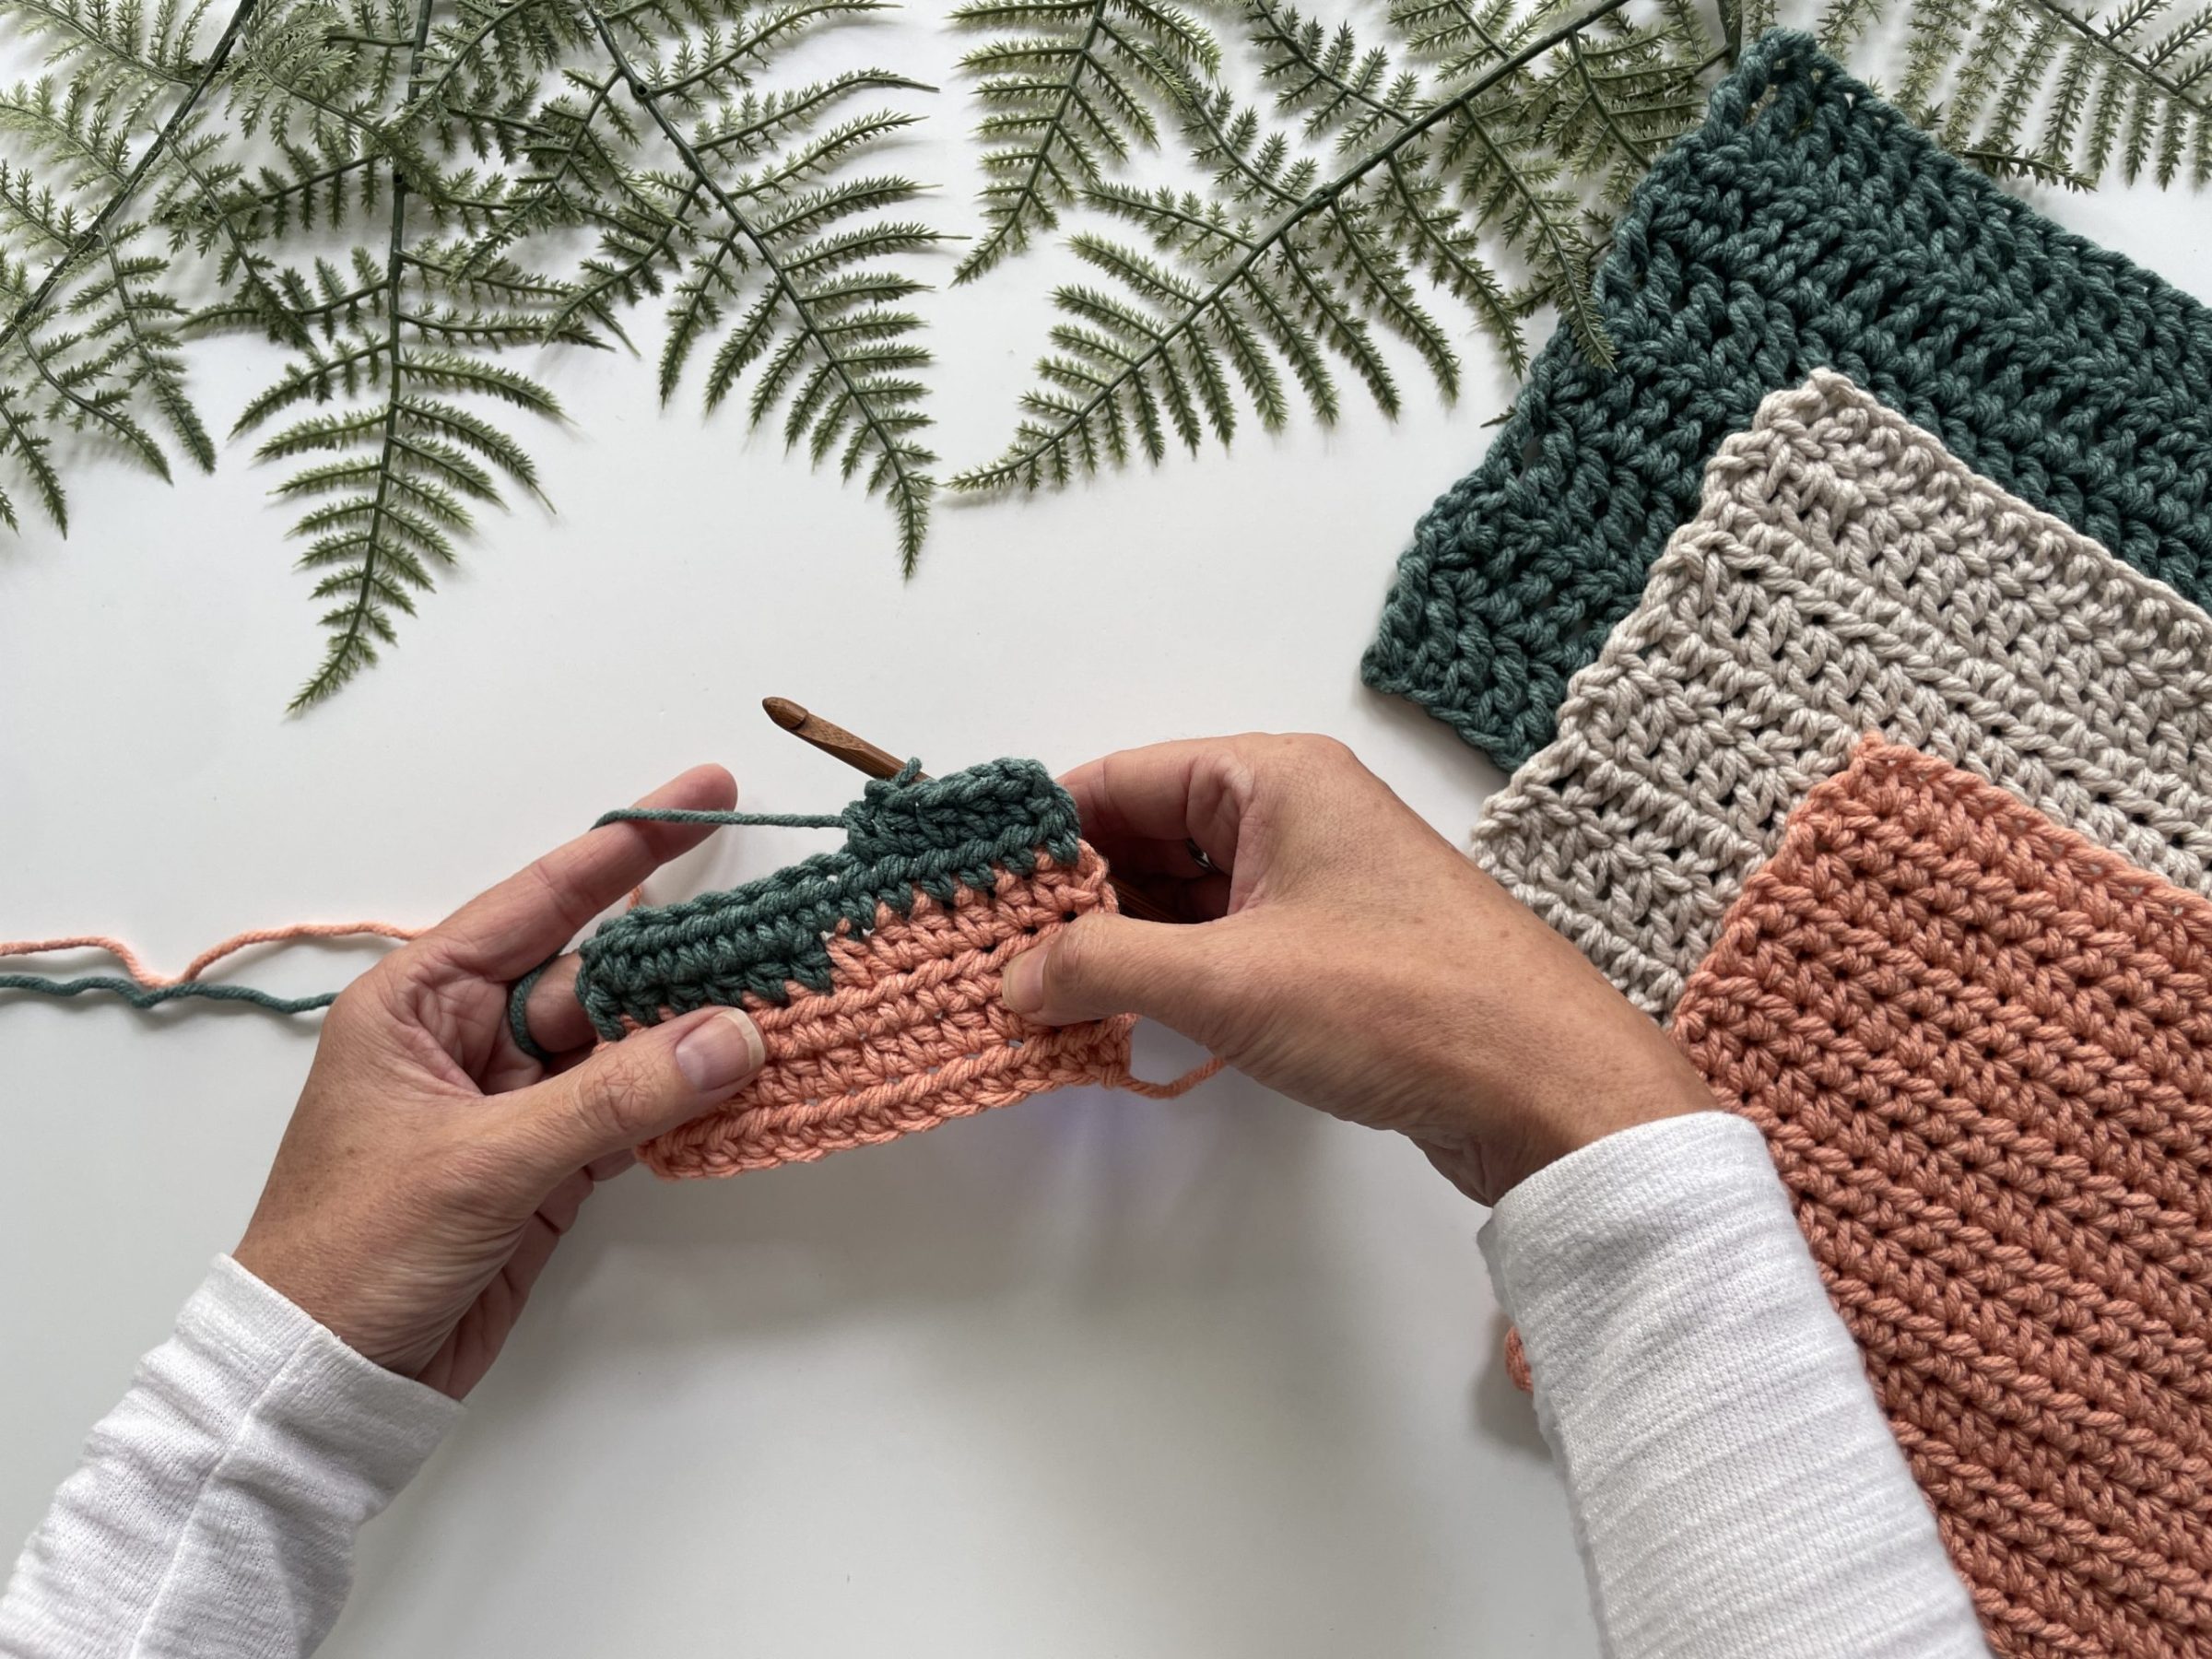
Learning how to change colors in crochet opens up an entirely new corner of the crochet world. Stripes, colorwork, granny squares, bold borders, and all those little amigurumi details suddenly become possible—and thankfully, the technique is much easier than the finished projects make it look.
The very same method is also used when you need to join a fresh ball of yarn in the middle of a project. You can bring in a completely different color or continue with another ball of the exact same yarn. Either way, you will begin the stitch with the old yarn and complete its final step with the new yarn.
In this beginner-friendly lesson, I’ll show you exactly when to make the switch, how to change yarn in single crochet, half double crochet, and double crochet, and what to do with those loose ends afterward. We’ll also cover color changes in rows and rounds, common mistakes, and a few ways to keep your transitions looking neat.
LEARN TO crochet
Module 3: From Stitches to Projects
Lesson 5: How to Change Colors in Crochet (and Join New Yarn)
This lesson is part of my free Learn to Crochet Course designed to take you from your very first stitch to completing your first projects and beyond.
24 step-by-step lessons with videos.
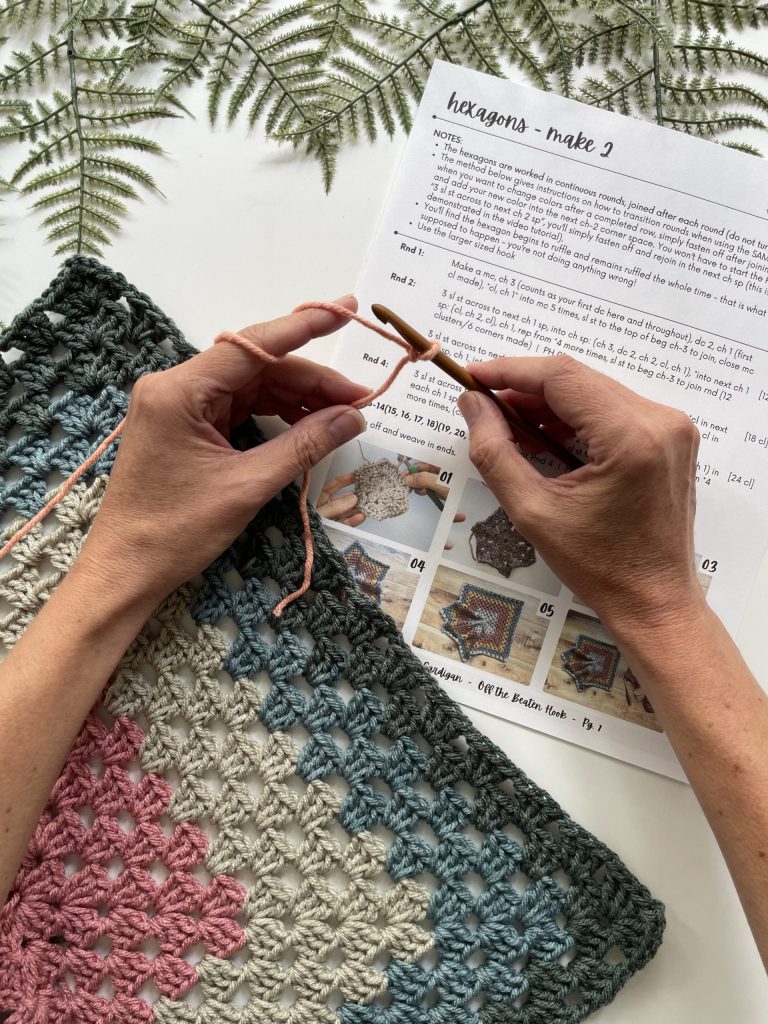
Materials You Will Need For This Lesson
- Worsted (4/Medium) Weight Yarn
- 5.5 mm Crochet Hook (a size 5.0 mm or 6.0 mm will work, if preferred)
- Scissors
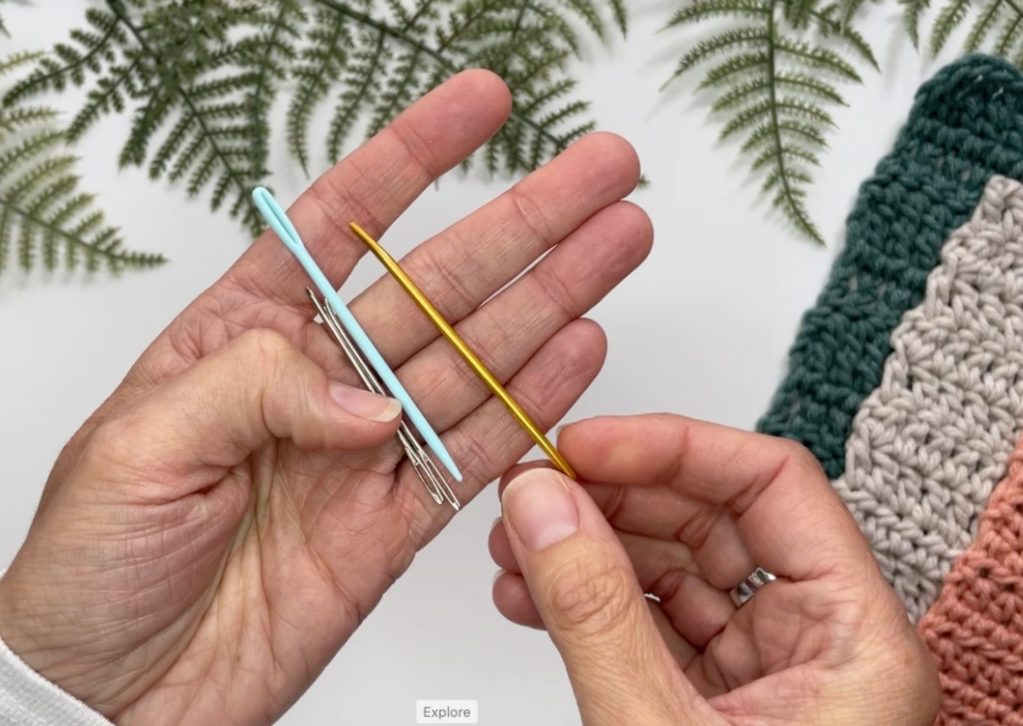
- Yarn Needle
A Little Help for Your Crochet Basket
Join and get the free Crochet Pro Essentials PDF Pack, plus gentle course reminders and new lessons in your inbox.
Is Changing Colors the Same as Joining New Yarn?
Yes—the technique is the same.
If you are changing colors, your new strand comes from a ball of yarn in a different color. If you have run out of yarn, your new strand comes from another ball of the same yarn. In both cases, you attach the new yarn during the final step of the stitch immediately before the new yarn is needed.
That means you do not finish a stitch completely and then try to attach the new yarn between stitches. Instead, you pause before the last yarn over and pull-through, use the new yarn to complete that step, and continue crocheting with it.
The result is a much cleaner transition, with the new color ready on your hook before you begin the next stitch.
The One Rule to Remember
If you remember only one thing from this lesson, make it this:
Begin the stitch with the old yarn and complete the final yarn over with the new yarn.
The exact number of loops on your hook will depend on which stitch you are making, but the timing remains the same. Stop when you reach the final pull-through of the stitch, bring in the new yarn, and use it to pull through the remaining loops.
It may feel as if the new yarn is completing the old stitch—and technically, it is. This is what places the top loops of that stitch in the new color and gives you a clean transition into the following stitch.
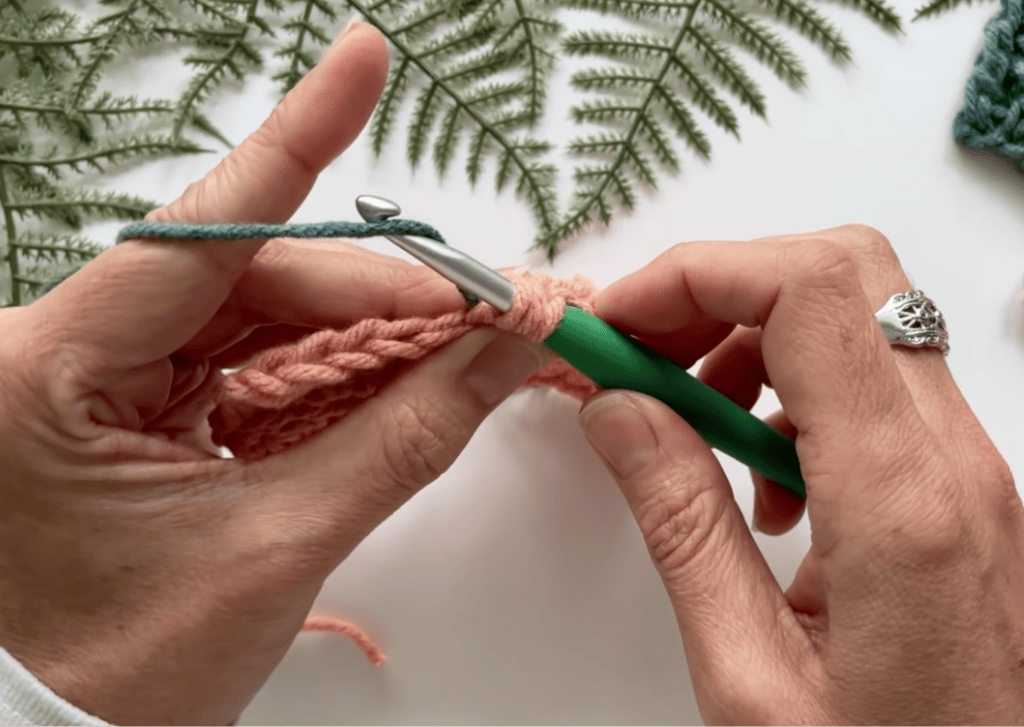
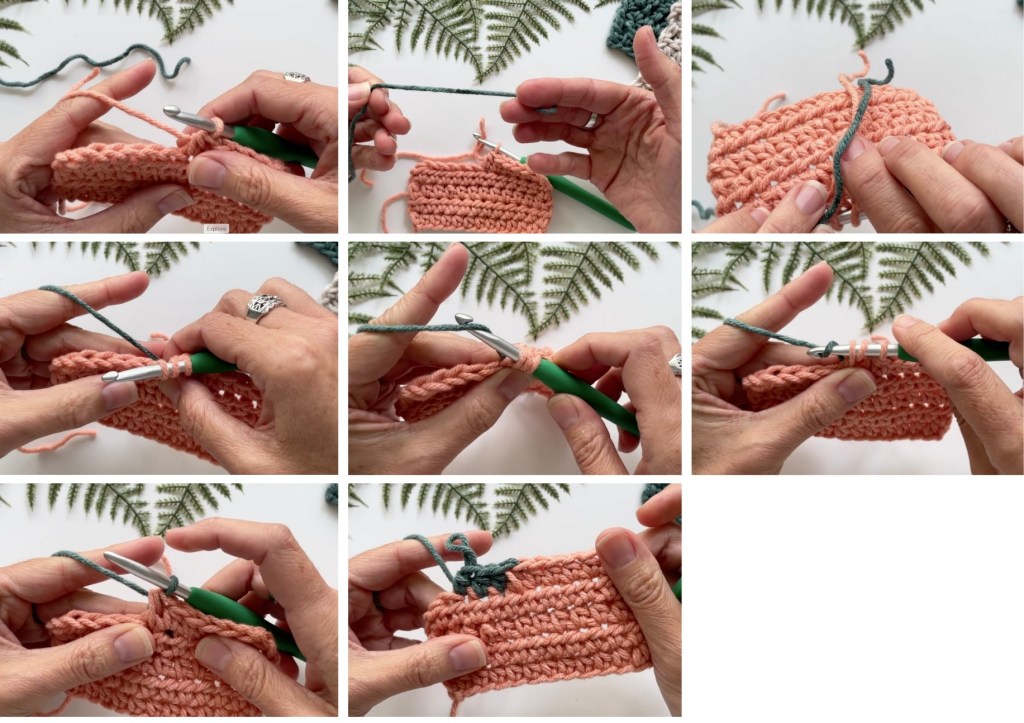
How to Change Colors in Crochet
The basic method works with nearly every standard crochet stitch:
- Crochet with the old color until you reach the stitch immediately before the color change.
- Begin that stitch normally with the old color.
- Stop before the final yarn over and pull-through that would complete the stitch.
- Leave a tail of approximately 6 inches from the new color.
- Place the new yarn over your hook.
- Pull the new color through all loops that remain on the hook, completing the stitch.
- Gently tighten both strands so the transition is secure but not puckered.
- Continue crocheting with the new color.
You do not need to make a knot. The new strand will feel a little loose at first, and that is normal. Hold the tails out of the way as you work the next few stitches. They will be secured properly when you weave them in later.
How to Change Colors in Crochet Video Lesson
How to Change Colors in Single Crochet
A single crochet is completed by pulling the yarn through the two loops on your hook. To change colors, use the new color for that final pull-through.
Single crochet color change step by step
- Insert your hook into the next stitch using the old color.
- Yarn over with the old color and pull up a loop. You now have two loops on your hook.
- Drop the old color, leaving it on the wrong side of your work.
- Leave a 6-inch tail of the new color and yarn over with the new color.
- Pull the new color through both loops on the hook.
- Work the next single crochet with the new color.
The completed single crochet sits in the old-color section, but its top loops are now the new color. This prepares the following stitch to look fully and cleanly worked in the new color.
How to Change Colors in Half Double Crochet
A half double crochet is completed by pulling through all three loops on your hook. This final pull-through is where the color change happens.
Half double crochet color change step by step
- Yarn over with the old color.
- Insert your hook into the next stitch.
- Yarn over with the old color and pull up a loop. You now have three loops on your hook.
- Drop the old color.
- Yarn over with the new color, leaving a 6-inch tail.
- Pull the new color through all three loops on your hook.
- Continue the next half double crochet with the new color.
How to Change Colors in Double Crochet
A double crochet has two pull-through steps. Complete the first with the old color, then use the new color for the second and final pull-through.
Double crochet color change step by step
- Yarn over with the old color.
- Insert your hook into the next stitch.
- Yarn over with the old color and pull up a loop. You now have three loops on your hook.
- Yarn over with the old color and pull through two loops. Two loops remain on your hook.
- Drop the old color.
- Yarn over with the new color, leaving a 6-inch tail.
- Pull the new color through the final two loops.
- Continue the next double crochet with the new color.
The same principle applies to taller stitches: complete every step except the final yarn over and pull-through with the old yarn, then finish the stitch with the new yarn.
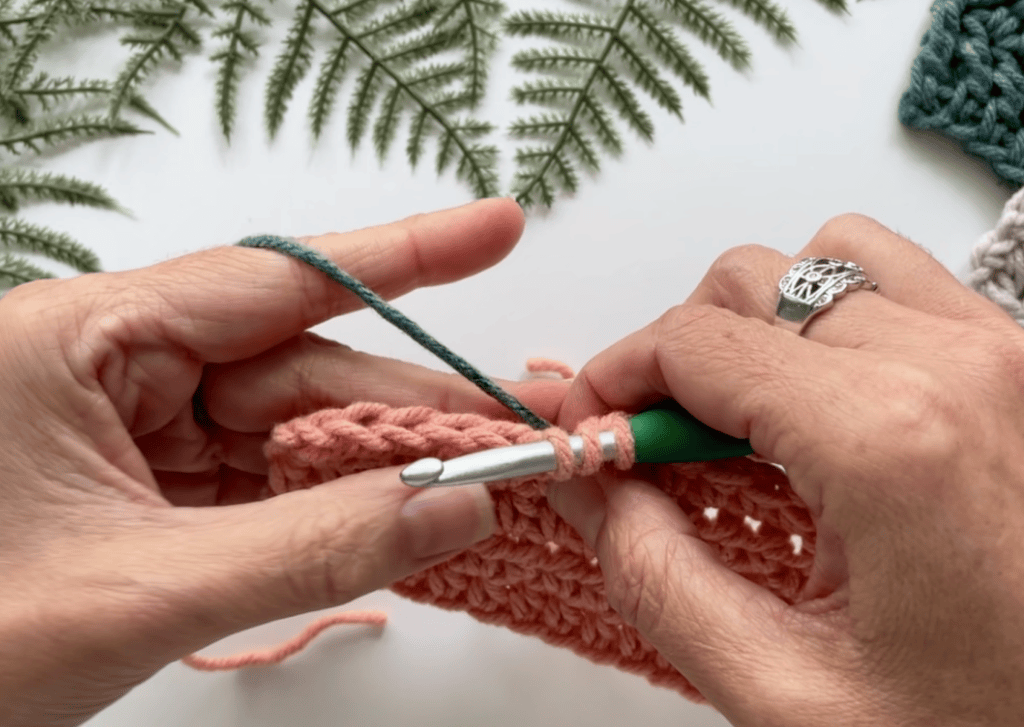
How to Change Colors at the End of a Crochet Row
When a pattern tells you to begin the next row in a new color, make the color change while completing the last stitch of the current row.
- Work across the row with the old color until one stitch remains.
- Begin the final stitch with the old color.
- Complete the final yarn over and pull-through with the new color.
- Make the turning chain with the new color.
- Turn your work and begin the next row.
Changing the yarn before making the turning chain keeps both the turning chain and the new row in the correct color.
For example, if you are working rows of single crochet, work the last single crochet until two loops remain on the hook. Pull the new color through those two loops, chain 1 with the new color, and turn.
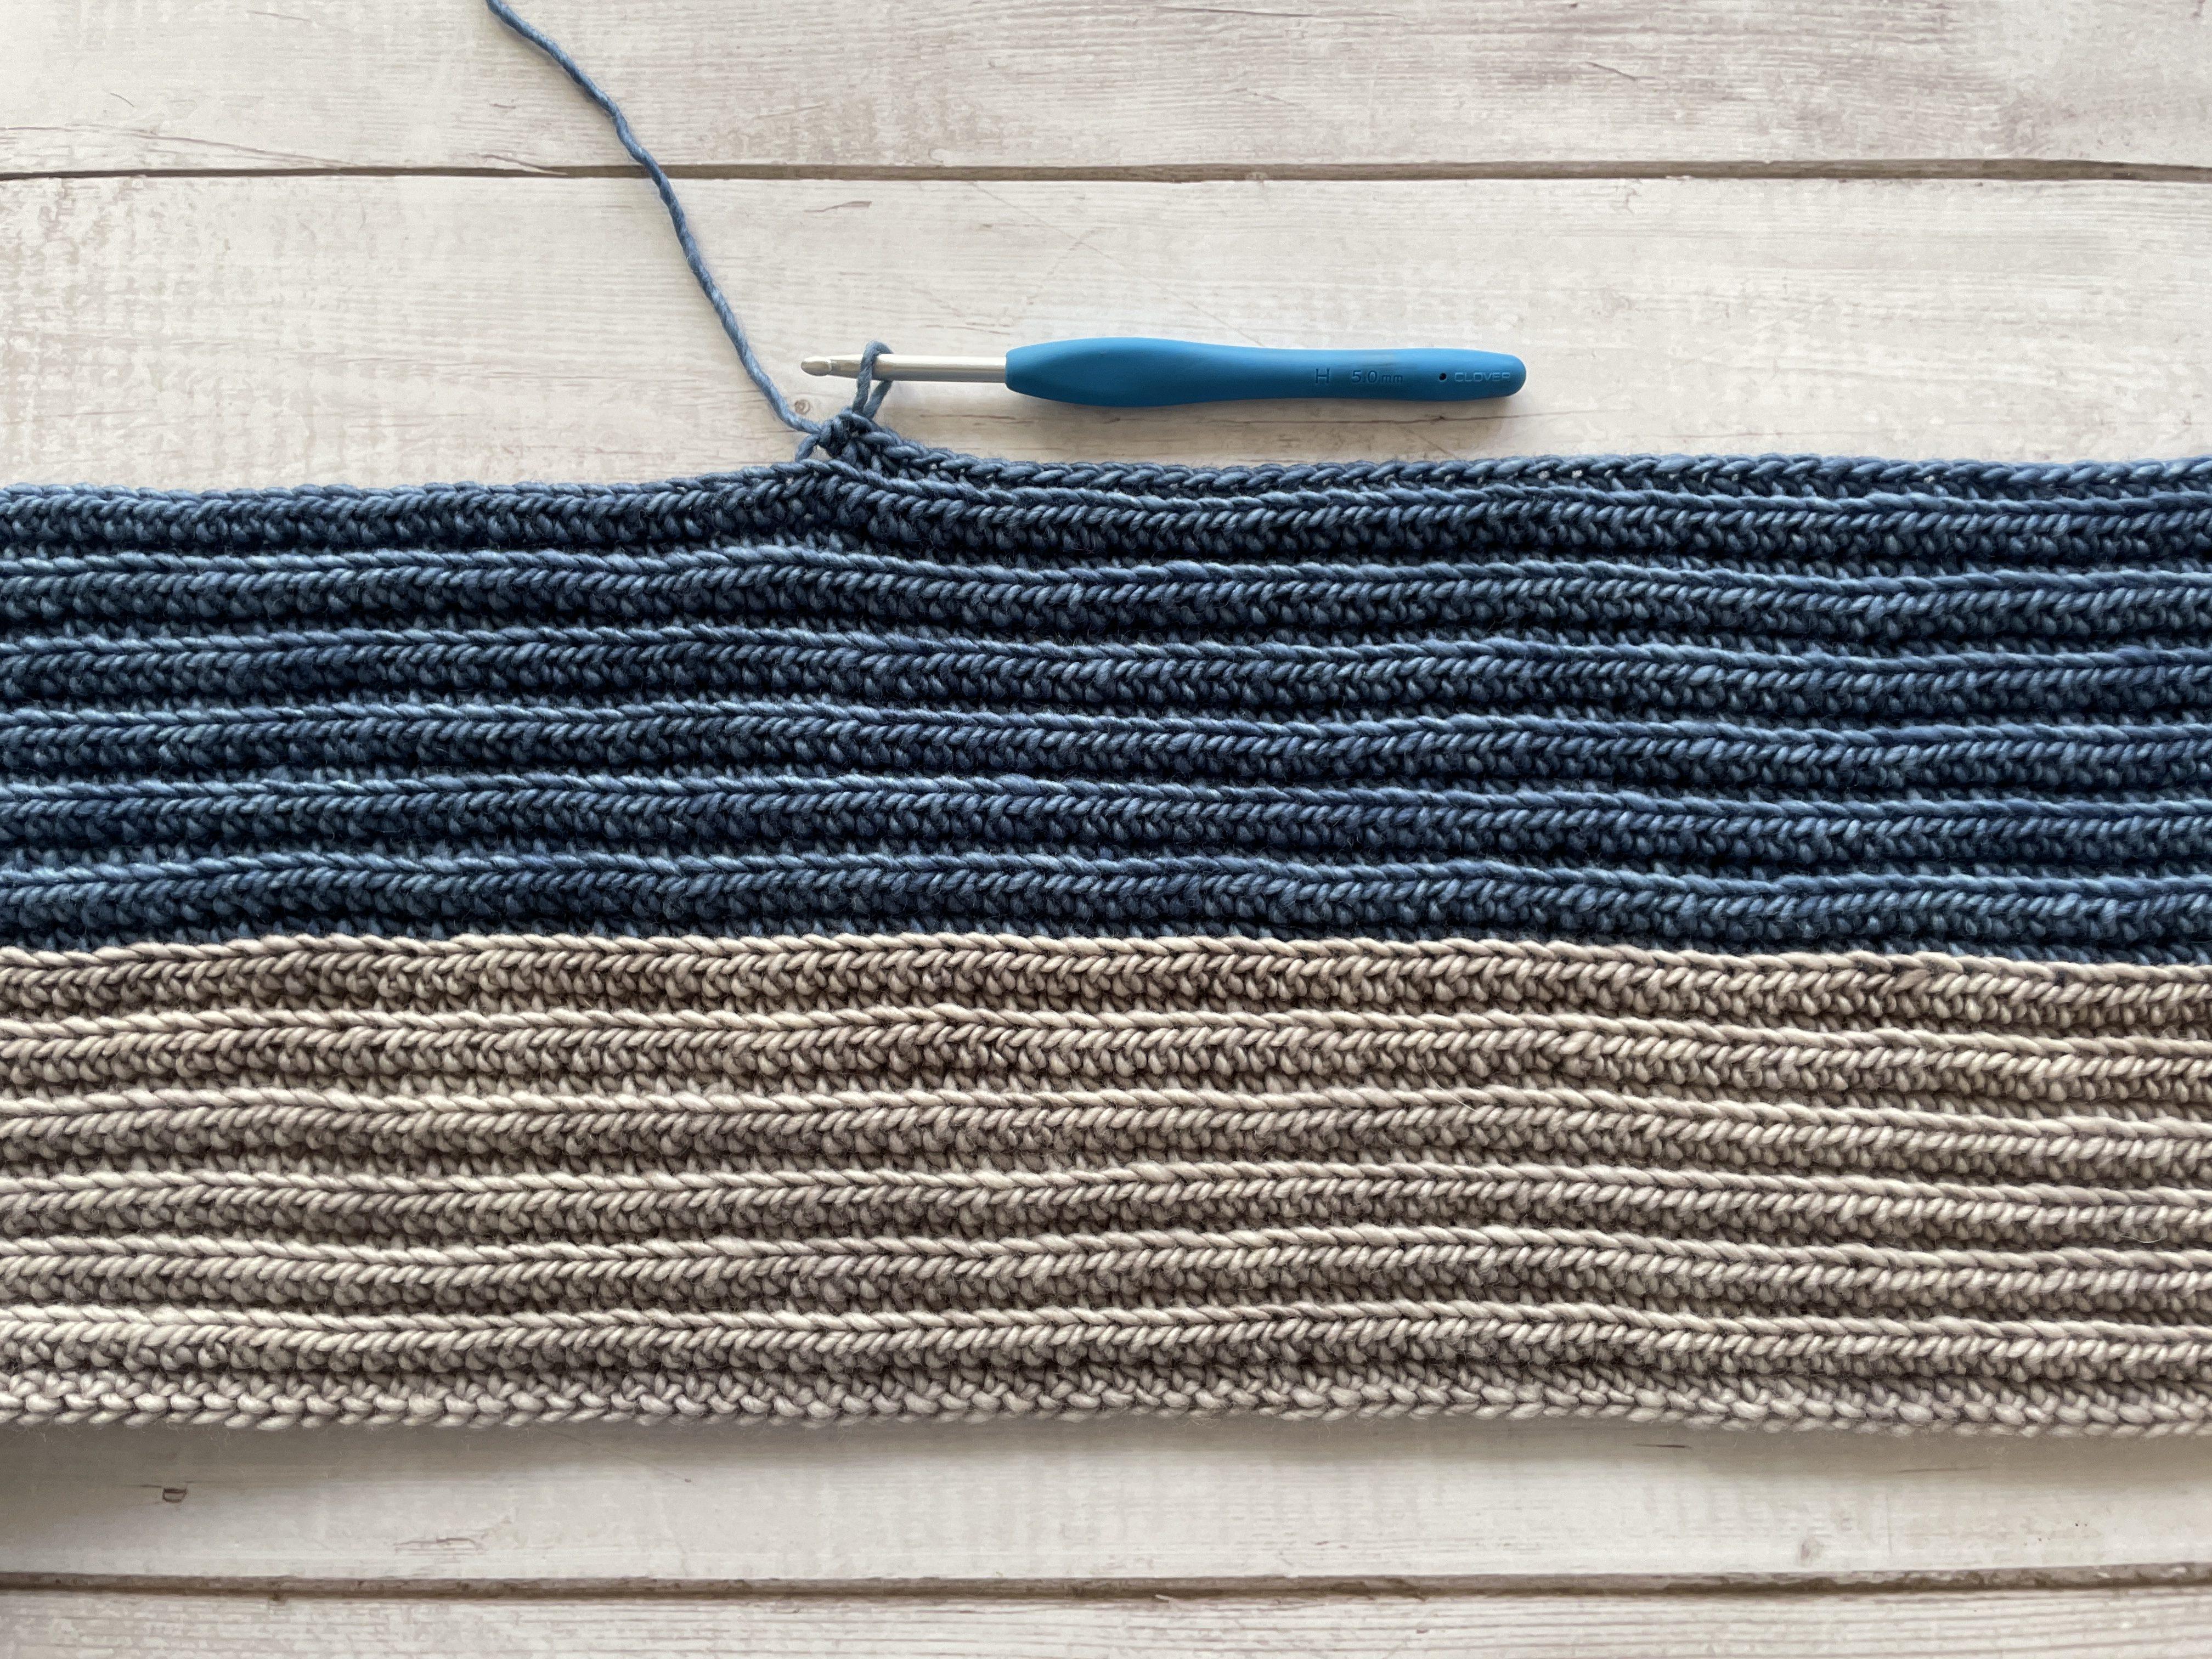
How to Change Colors in Crochet Rounds
The right method depends on whether you are working in joined rounds or continuous rounds. Always follow the instructions in your pattern, because designers may specify where the color change should occur.
Changing colors in joined rounds
When a round ends with a slip stitch join, a common method is:
- Complete the final stitch of the round with the old color.
- Insert your hook into the stitch indicated for the join.
- Place the new color over the hook, leaving a 6-inch tail.
- Pull the new color through the joining stitch and the loop already on your hook to complete the slip stitch.
- Begin the next round with the new color.
This places the new color on your hook at the join. If your pattern specifically tells you to change color during the final stitch instead, follow the pattern.
Changing colors in continuous rounds
In continuous rounds, change color during the final pull-through of the stitch immediately before the new color is meant to begin. Place a stitch marker in the first stitch of the new round so you do not lose track of the round boundary.
A standard color change in a spiral may create a small step where the colors meet. This is normal. More advanced jogless techniques can disguise that step, but they are not necessary for understanding the basic yarn change.
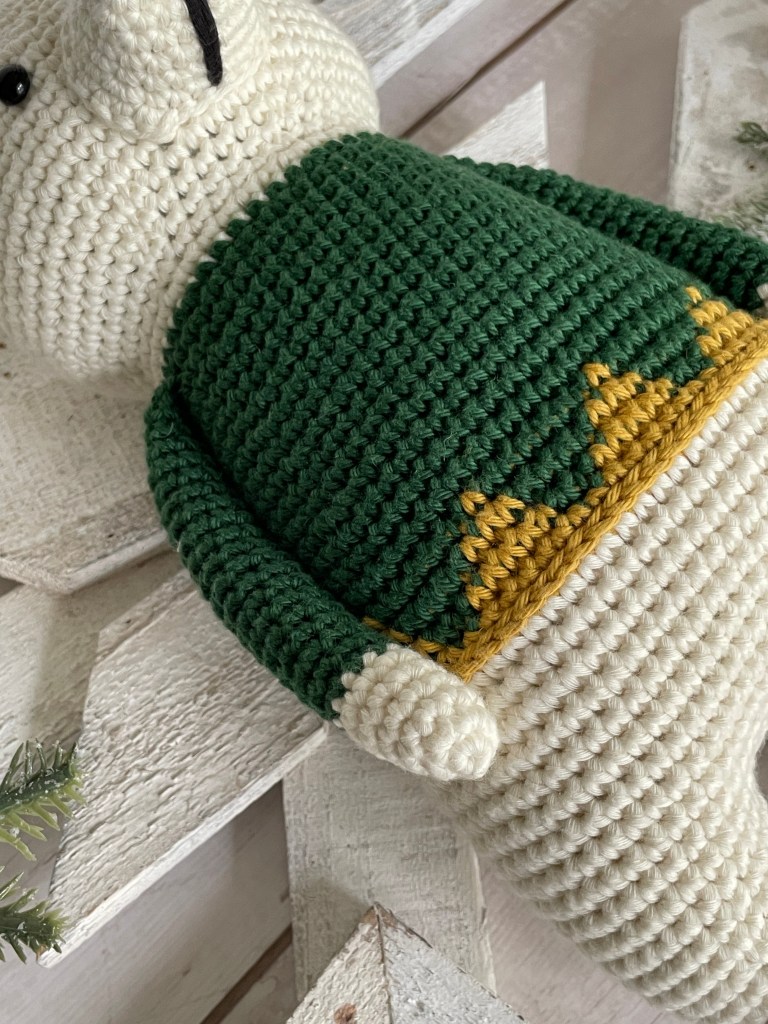
How to Join New Yarn in Crochet
Knowing how to join new yarn in crochet is useful even when your project contains only one color. Yarn balls are finite, despite their occasional attempt to convince us otherwise.
When the current ball is getting low:
- Stop before you run completely out, leaving a tail of approximately 6 inches.
- Begin the next stitch with the old yarn.
- Pause before the final yarn over and pull-through.
- Leave a 6-inch tail from the new ball.
- Yarn over with the new strand.
- Pull the new yarn through the remaining loops to complete the stitch.
- Continue crocheting with the new ball.
- Weave in both tails securely when the project is finished.
There is no need to tie the two strands together. A knot can create a hard bump, work its way to the front of the fabric, or come loose over time. Properly woven ends create a smoother and more reliable finish.
A note about dye lots
If you are joining another ball of the same color, check the dye-lot number on the yarn label when possible. Balls from different dye lots can have subtle color differences that become more obvious in the finished fabric.
If you must use two slightly different dye lots, alternating between the two balls for a few rows or rounds may help blend the transition. Whether this is practical depends on the project and stitch pattern.
Optional Joining Method: How to Make a Magic Knot in Crochet
A magic knot is another way to connect the end of one yarn ball to the beginning of another. Instead of attaching the new yarn during a stitch and weaving in two tails, you tie the two strands together with a compact knot and continue crocheting.
This method is best suited to joining two balls of the same color and yarn because the knot can be tucked discreetly into the fabric. It is quick, uses very little yarn, and leaves no long ends to weave in—which is presumably how it earned the word “magic.”
How to tie a magic knot step by step
- Lay the old yarn and new yarn beside each other with the ends pointing in opposite directions. Allow the two strands to overlap by several inches.
- Take the tail of the old yarn and wrap it around the new yarn strand.
- Tie a simple overhand knot around the new yarn. Pull the knot snug, but do not trim the tail yet.
- Take the tail of the new yarn and wrap it around the old yarn strand.
- Tie another overhand knot around the old yarn and pull it snug.
- Hold the two working strands—not the short tails—and pull them firmly in opposite directions. The two small knots will slide toward each other and lock together.
- Give both working strands a firm tug to test the join from several angles.
- Once you are confident that the knot is secure, trim both short tails close to the knot.
- Continue crocheting with the new ball of yarn. As you reach the join, position the knot toward the wrong side or inside of the project whenever possible.
PHOTO NOTE: Show the two strands overlapping, each individual overhand knot, the knots sliding together, and the completed knot after the tails are trimmed.
When should you use a magic knot?
A magic knot can be a convenient option when:
- You are joining another ball of the same yarn and color
- The yarn has enough texture or grip to hold a knot securely
- A tiny knot will disappear within the stitch pattern
- You would prefer not to weave in two additional ends
When should you avoid a magic knot?
The magic knot is not the best choice for every yarn or project. Avoid it when:
- The yarn is very smooth or slippery and may allow the knot to slide
- The yarn is fragile, loosely spun, or prone to breaking when pulled
- You are using chenille or velvet yarn, which can shed or strip away from its core
- The project will experience a lot of stretching, pulling, or hard wear
- Even a small knot would be visible or uncomfortable
- You are not completely confident that the knot has passed a firm tug test
The biggest tradeoff is that the tails are trimmed close to the knot. If the knot fails later, there is very little yarn available for a repair. For an heirloom project—or anytime you are uncertain about the yarn—the standard final-pull-through method with securely woven ends remains the safer choice.
BEGINNER TIP: Practice the magic knot with two scrap pieces first. Pull hard on both strands before trusting it inside a project. If the yarn slips, frays, or breaks during the test, use the standard joining method instead.

Should You Cut or Carry the Old Color?
If you plan to use the old color again soon, you may be able to carry it instead of cutting it. The best option depends on the project.
Carry the yarn up the side when:
- You are making narrow stripes in rows
- The same colors repeat every one or two rows
- The carried strand will be hidden by a border or seam
- Carrying it does not pull or distort the edge
Leave the unused strand relaxed along the edge as you work. When it is time to use that color again, pick it up during the final pull-through of the stitch before the change. Do not pull the carried strand tightly, or the edge may pucker.
Carry the yarn inside the stitches when:
- You are making frequent color changes within a row or round
- The pattern instructs you to crochet over the unused color
- The hidden yarn does not show through the fabric
Lay the unused strand across the tops of the stitches being worked into and crochet around it. Check the back and front of the fabric occasionally to be sure the carried color is not peeking through.
Cut the yarn when:
- The color will not be used again for several rows or rounds
- Carrying it would create a long, loose float
- The carried strand would show through
- The project needs a clean edge without extra bulk
Cutting creates more ends to weave in, but it often produces a neater result. There is no universal winner here—just a small negotiation between tidy fabric and Future You’s willingness to weave in ends.
What to Do With the Yarn Tails
Leave at least 6 inches of each yarn tail so you have enough to weave it in securely. Do not trim the tails immediately after changing yarn, even if the join seems stable.
You have two basic options:
Crochet over the tails
You can lay the yarn tails across the top of the row and crochet around them for several stitches. This holds them in place temporarily and can reduce some of the weaving later.
However, crocheting over a tail once is not always enough to secure it permanently—especially in a slippery yarn or an item that will be washed and used often. Leave enough of the tail accessible to weave it back in another direction with a yarn needle.
Weave in the tails
Thread one tail onto a yarn needle and weave it through several stitches on the wrong side of the work. Change direction at least once so the tail is less likely to work free. Weave the second tail separately, ideally in the opposite direction.
Whenever possible, weave each tail through stitches of the same color. This keeps contrasting yarn from showing through on the front of the project.
For the full finishing process, revisit How to Fasten Off and Weave in Ends in Crochet.
How to Keep Crochet Color Changes Neat
Change during the final pull-through
Waiting until the stitch is completely finished can leave a spot of the old color at the top of the new section. Make the change during the final pull-through instead.
Keep the tails on the wrong side
Before you continue, move the dropped yarn and new tail toward the back or wrong side of the fabric. This makes it easier to keep them hidden.
Adjust the loops gently
After the color change, lightly tug the old working yarn and the new tail to settle the loops. Do not pull so tightly that the fabric puckers or the new loop becomes too small to work into.
Maintain even tension
New strands often feel loose for the first stitch or two. Hold the tail against the work until the new yarn is established, then continue with your normal tension.
Leave long enough tails
A tiny tail may look efficient in the moment, but it is difficult to weave securely. Leave approximately 6 inches and trim only after the end is woven in.
Check both sides of the fabric
Pause after a few stitches to look at the front and back. It is much easier to correct a tangled tail or overly tight carried strand now than several rows later.
Common Crochet Color-Change Mistakes
Finishing the stitch with the old color
If you complete the entire stitch and then add the new yarn, the top of the stitch remains in the old color. Undo the final pull-through and complete it again with the new yarn.
Changing one stitch too late
The switch happens in the stitch before the first stitch that should appear in the new color. Look ahead in the pattern and pause before completing that preceding stitch.
Cutting the tails too short
Short tails are difficult to thread and may pull free. Leave about 6 inches for secure weaving.
Tying a bulky knot
Knots can create lumps and may not remain secure through use and washing. Use the final-pull-through method and weave in the ends instead.
Pulling the new yarn too tightly
Overtightening can shrink the stitch, distort the edge, and make the next stitch difficult to enter. Adjust the join until its tension matches the surrounding stitches.
Leaving the new yarn too loose
The first new stitch may stretch if the tail is not supported. Hold the new tail for the next few stitches and gently adjust the loop before continuing.
Carrying yarn across too much fabric
A long carried strand can snag, show through, or pull the fabric out of shape. If the color will not be used again soon, cut it and rejoin it later.
Forgetting the dye lot
Two balls with the same color name may not be visually identical. Check the labels before joining a fresh ball, especially in a large solid-color project.

How to Change Colors in Crochet FAQs
Begin the stitch before the color change with the old color, then complete its final yarn over and pull-through with the new color. This puts the new color on your hook and creates a clean transition into the next stitch.
Yes. The technique is the same whether the new strand is a different color or another ball of the same yarn. Complete the final step of the current stitch with the new strand, then continue crocheting.
No. Leave tails of approximately 6 inches, use the new yarn for the final pull-through of the stitch, and weave both ends in securely. Knots can create an unwanted bump and are not a substitute for properly woven ends.
Change color during the final yarn over and pull-through of the stitch immediately before the new color is needed. The number of remaining loops depends on the stitch: two loops for single crochet, three for half double crochet, and two for the final step of double crochet.
Make the change while completing the final stitch of the previous row. Then make the turning chain with the new color, turn the work, and begin the new row.
Insert the hook and pull up a loop with the old color. When two loops remain on the hook, yarn over with the new color and pull it through both loops. Continue the next stitch with the new color.
Work the double crochet with the old color until two loops remain on the hook. Yarn over with the new color and pull it through those final two loops, then begin the next double crochet with the new color.
Yes. Join the new yarn during the final pull-through of any solid stitch. When possible, an edge or seam may be easier to hide, but a secure mid-row join is perfectly acceptable when you leave adequate tails and weave them in well.
You can crochet over the tails for several stitches to hold them in place, but it is wise to leave enough length to weave them back in another direction. This is especially important for slippery yarn or projects that will be washed frequently.
Not necessarily. If the old color will be used again within a row or two, you may carry it up the side or inside the stitches. Cut it when carrying would create a long float, add bulk, show through the fabric, or distort the edge.
The most common causes are completing the stitch with the old color, changing one stitch too late, leaving the new loop too loose, pulling the yarn too tightly, or allowing the tails to fall toward the front. Undo the join, make the switch during the final pull-through, and adjust the strands gently.
Leave approximately 6 inches for each tail. Very bulky or slippery yarn may benefit from a little extra length so the end can be woven securely.
Use the final-pull-through method with the same yarn and dye lot, keep the tension consistent, and weave each tail through matching-color stitches on the wrong side. Joining at an edge or seam can make the transition even easier to hide.
Practice Challenge: Make a Simple Striped Swatch
Let’s practice both a color change and a same-color yarn join without the pressure of a full project.
Part 1: Change colors at the end of a row
- With Color A, chain 21.
- Single crochet in the second chain from the hook and in each chain across. You should have 20 stitches.
- Chain 1, turn, and single crochet across for three more rows.
- On the final single crochet of Row 4, stop when two loops remain on the hook.
- Yarn over with Color B and pull it through both loops.
- Chain 1 with Color B, turn, and single crochet across.
- Work three additional rows with Color B.
Look closely at the transition. The top loops of the final Color A stitch should be Color B, and your turning chain should also be Color B.
Part 2: Practice joining a new ball
Cut Color B, leaving a 6-inch tail. Use a separate strand of Color B as if you were joining a new ball:
- Begin the next single crochet with the current strand of Color B.
- Stop when two loops remain on the hook.
- Complete the stitch with the new strand of Color B.
- Continue crocheting across the row.
The second join should nearly disappear because both strands are the same color. Finish by weaving in the tails securely.
Extra challenge
Make a third stripe and change colors in the middle of a row. Work 10 single crochet stitches in Color A and 10 in Color B, remembering to introduce Color B during the final pull-through of stitch 10. Count the stitches in each section and check both sides of your work.

You’ve Completed Module 3, Lesson 5!
You now know how to change yarn colors, join a new ball of yarn, keep your transitions neat, and decide when to carry or cut an unused strand. That is a lot of colorful possibility from one very small move.
In our next lesson, we are putting your new skills to work with your first complete crochet projects—one worked in rows and one worked in the round. This is where all those individual techniques begin turning into something you can actually use, wear, gift, or proudly place somewhere everyone is required to notice it.
← Previous Lesson: How to Decrease & Increase in Crochet
SOCIAL MEDIA YOUR THING?
Connect with me on your favorite social network!
Pin This Lesson for Later
Leave a Reply