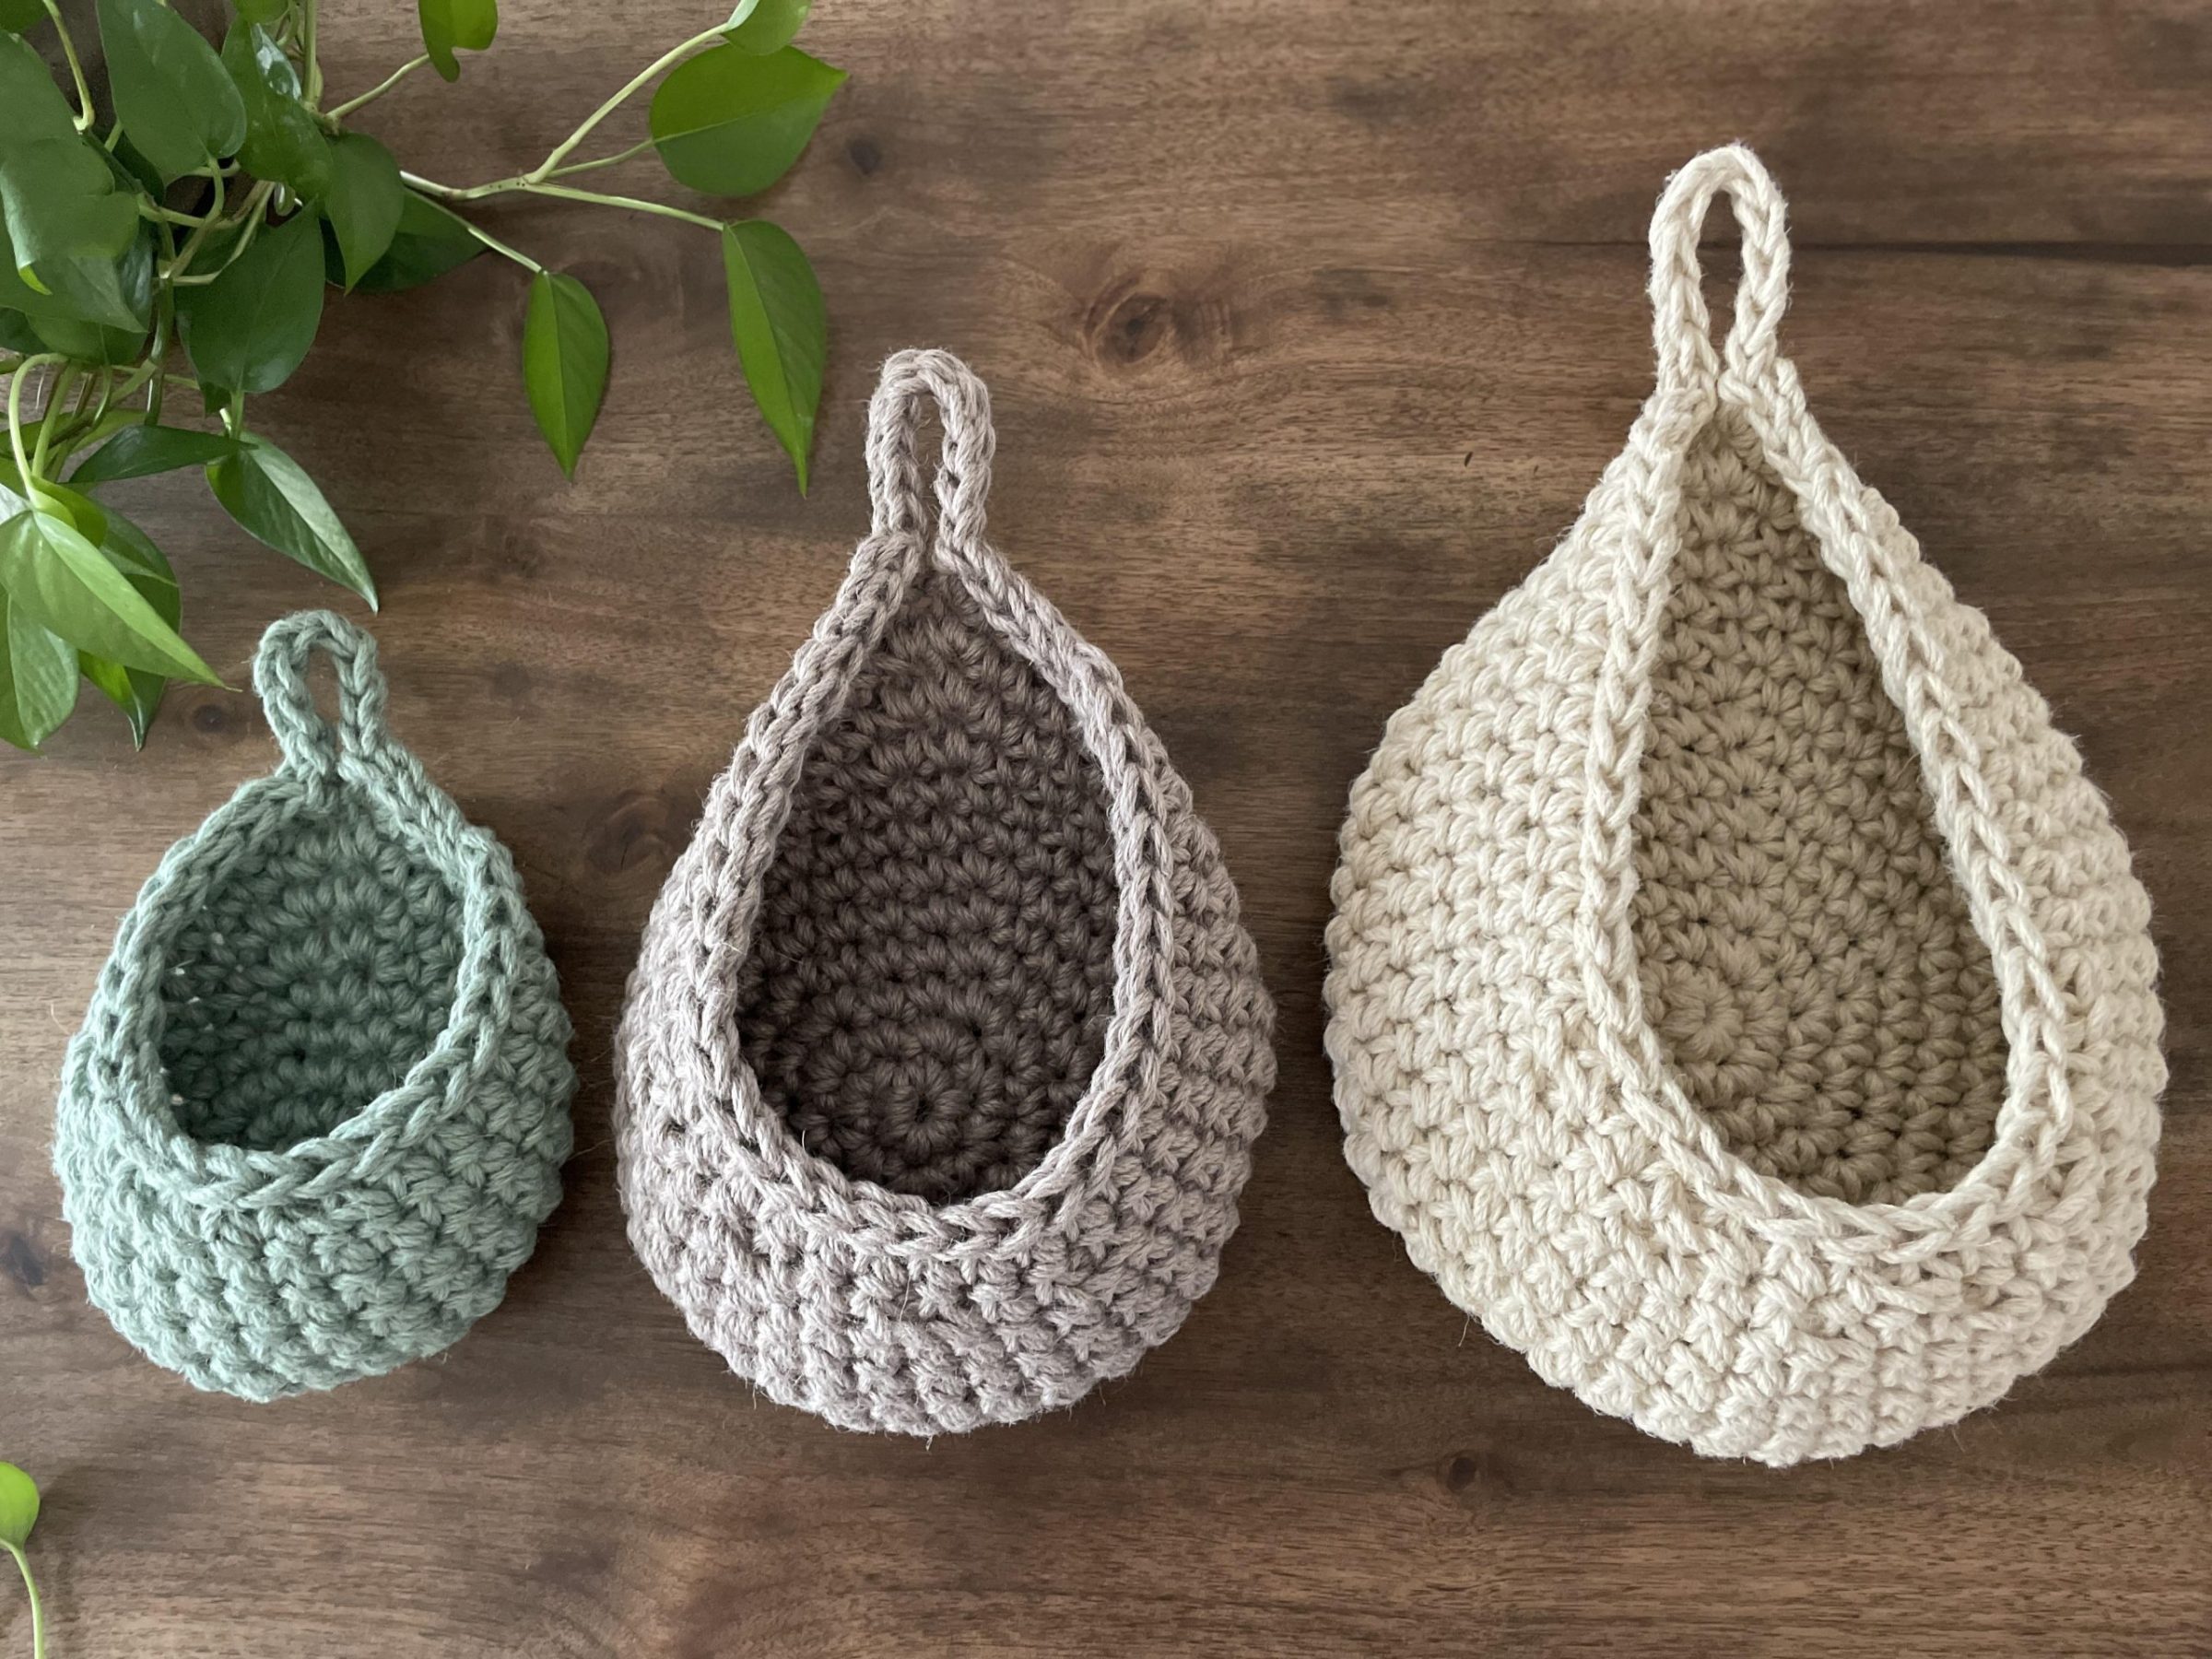
Looking to add a touch of charm and handmade personality to your home decor? Look no further than this hanging basket free crochet pattern! These DIY crochet teardrop baskets come together super quick and easy, making them approachable for the rookie crocheter too. Even better – this pattern includes instructions for 3 different sizes.
Experience the reward of making your own functional piece of home decor. In this blog post I’ll walk you through step by step how to crochet these baskets and give you ideas on how to incorporate them into your home so you can showcase them proudly. Get inspired to transform your space with handmade crochet hanging baskets!
I’ve also created a full video tutorial to accompany this crochet pattern. You can find that further down in this post, or straight away on YouTube here.
Jump into the hanging basket free crochet pattern now, or PIN it for later here:

Welcome to the Dewdrop Hanging Basket crochet pattern by Off the Beaten Hook!
I recommend giving this pattern a read-through before you begin so you can visualize the big picture and consider any specific notes for helping you along the way and making this an enjoyable, successful project.
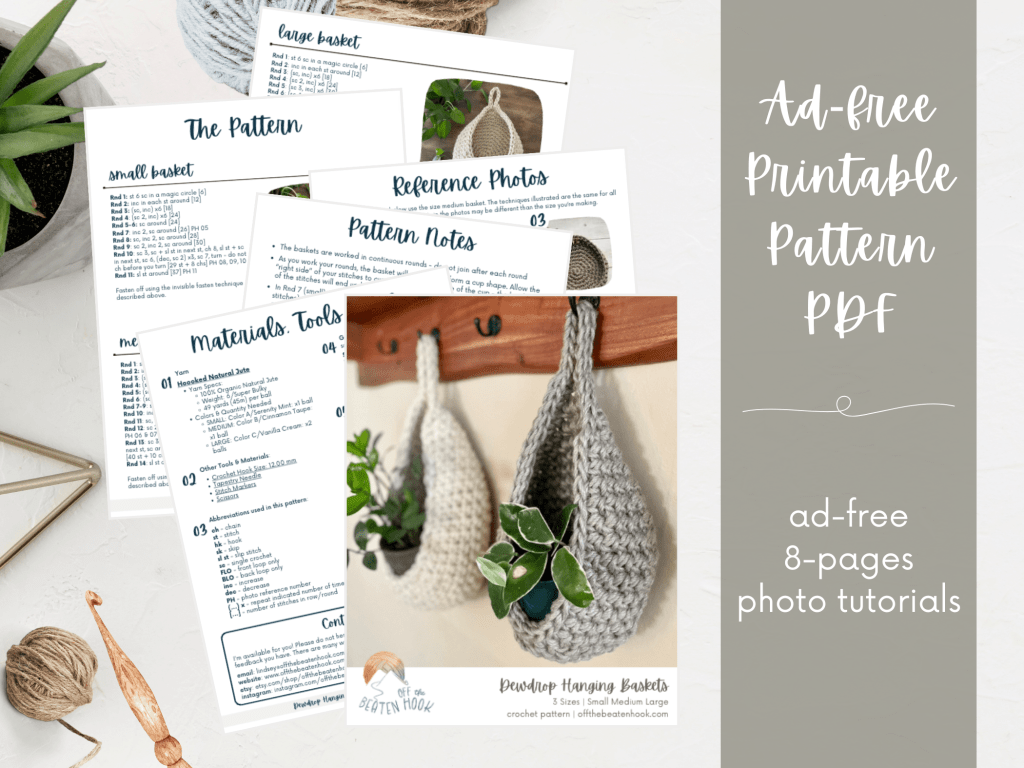
This hanging basket pattern is reader supported by ads on my blog. If you’re looking for a PDF printable version of this pattern, you can find the 8-page PDF in my shop here or on Ravelry here.
This crochet pattern is written in US terms. If needed, you can find a handy term conversion chart right here in my Resource Library.
Hanging Basket Free Crochet Pattern Notes & Tips:
Size & Gauge:
Size:
This pattern is written in 3 sizes (small, medium, large):
- Small measures: 7″ wide x 11″ tall
- Medium measures: 10″ wide x 15″ tall
- Large measures: 13″ wide x 19″ tall
Gauge:
4?x4? = 6 stitches x 6 rows of sc
It is my belief, with this pattern, that gauge isn?t critical. If you use the recommended yarn weight and hook size, the baskets are going to be close enough to the pattern measurements! I do provide it here, but I wouldn?t stress if it doesn?t match perfectly on this one.
Yarn:
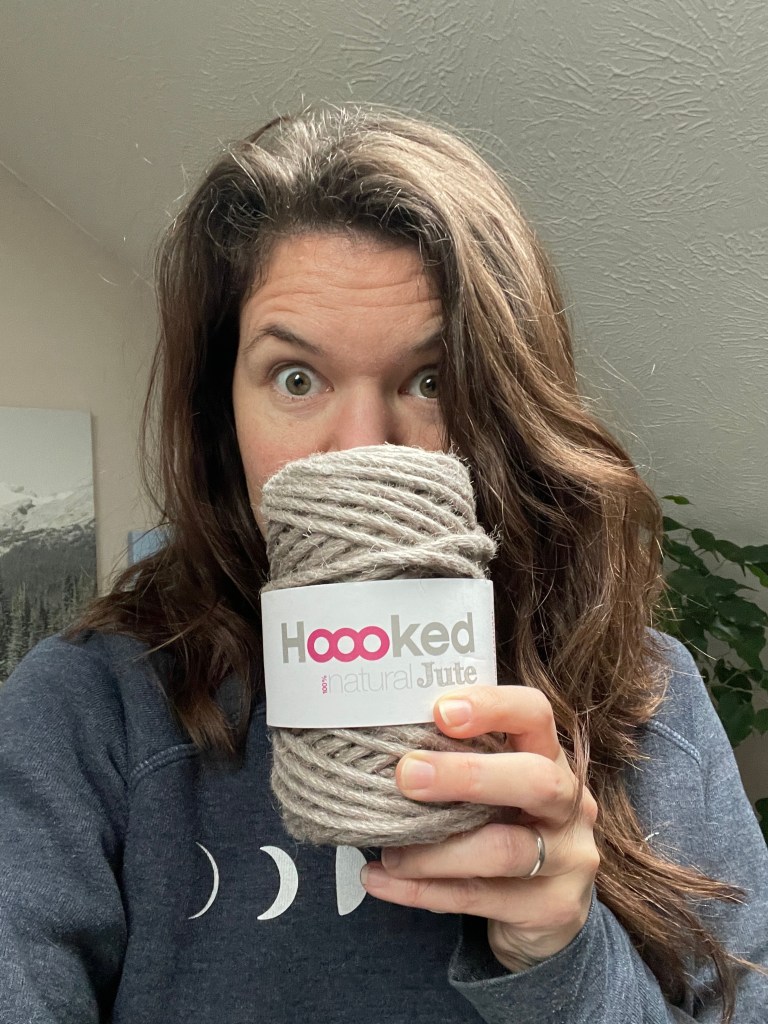
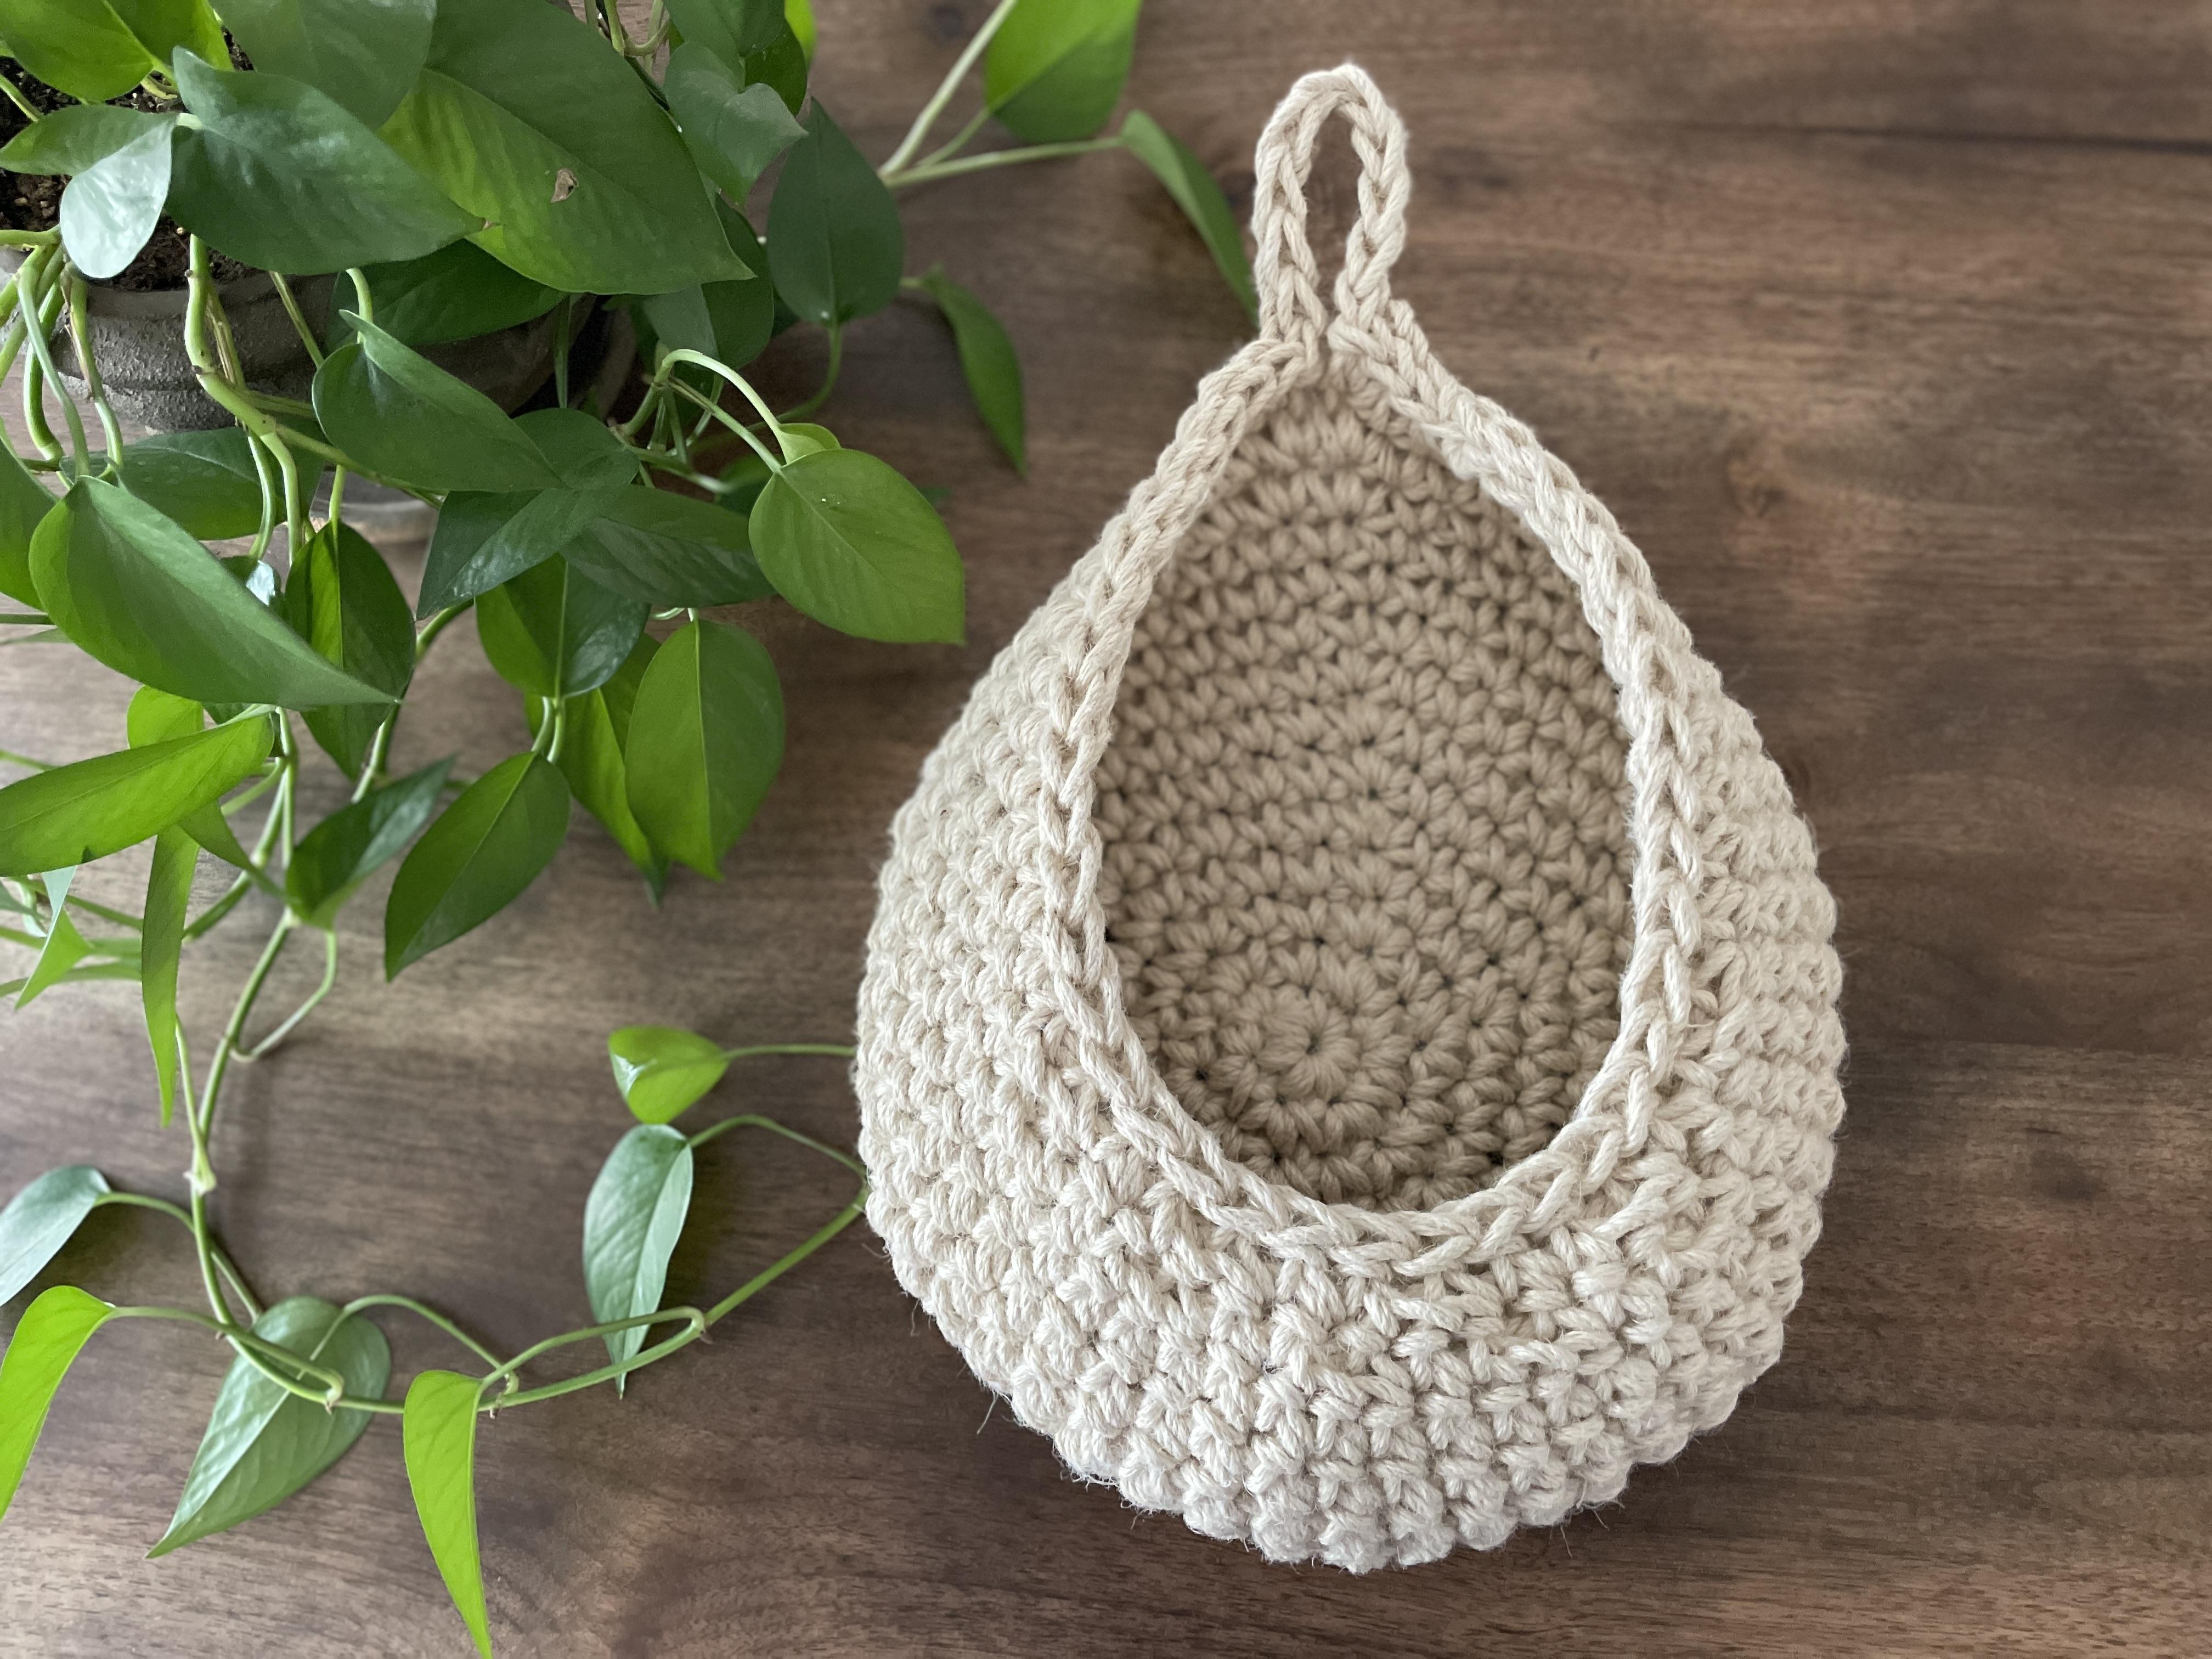
Yarn: Take your choice of yarn! Choose colors that bring you joy and fibers that feel good between your fingers. I used 100% natural jute yarn by Hoooked because I wanted these baskets to be super sturdy and functional for all kinds of different purposes. Macrame or another thick cotton yarn would work as well! Just be sure to pick a yarn that isn’t stretchy so your baskets don’t end up saggy with gaps.
Policies & Disclaimers:
This pattern is for PERSONAL USE ONLY. This pattern or parts of it may not be reproduced, resold, distributed, published, altered, translated, posted or shared without authorization. You can sell your finished items provided that you credit Off the Beaten Hook as the designer using this verbiage, “This pattern was designed by Lindsey Roe and Off the Beaten Hook.” Thank you for your respectfulness!
This post contains affiliate links for materials I use and love. If you purchase something using one of these links I may earn a small commission which in no way affects the cost to you. These partnerships help me support my small business which allows me to provide you with free crochet patterns. Thank you from the bottom of my heart for your support!
What makes this pattern eco -friendly and sustainable?
THE YARN: I use only sustainable and eco-friendly yarn that has been ethically grown/raised and processed, putting the people and the planet first. I also place an emphasis on sourcing yarn from transparent companies that implement environmentally sustainable practices and who put the people, animals and planet first.
THE SLOW YARN MOVEMENT: I’m participating in the Slow Yarn Movement. There’s far too much to talk about here, but please take a few minutes to learn about what this means by reading the article I wrote about the Slow Yarn Movement as part of my 6-part Sustainable Crochet Series.
If you’re interested in learning more about sustainable crochet you can read all about it in the 6-part series I did covering everything about Sustainable Crochet and how to implement it into your own crafting starting today!

Materials you will need for this hanging basket free crochet pattern:
Let’s take a look at what you’ll need to get started.
YARN:
- Yarn Specs:
- 100% Organic Natural Jute
- Weight: 6/Super Bulky
- 49 yards (45m) per ball
- Colors & Quantity Needed
- SMALL: Color A/Serenity Mint: x1 ball
- MEDIUM: Color B/Cinnamon Taupe: x1 ball
- LARGE: Color C/Vanilla Cream: x2 balls
OTHER TOOLS & MATERIALS:
Abbreviations used in this hanging basket free crochet pattern:
ch – chain
st – stitch
hk – hook
sl st – slip stitch
sk – skip
mc – magic circle
sc – single crochet
FLO – front loop only
BLO – back loop only
inc – increase
dec – decrease
(…) x – repeat instructions indicated number of times
[…] – number of stitches in row/round
PH – photo for reference
You can find the printable, AD-FREE version of this pattern here:

The Dewdrop Hanging Basket Free Crochet Pattern:

PATTERN NOTES:
- The baskets are worked in continuous rounds – do not join after each round
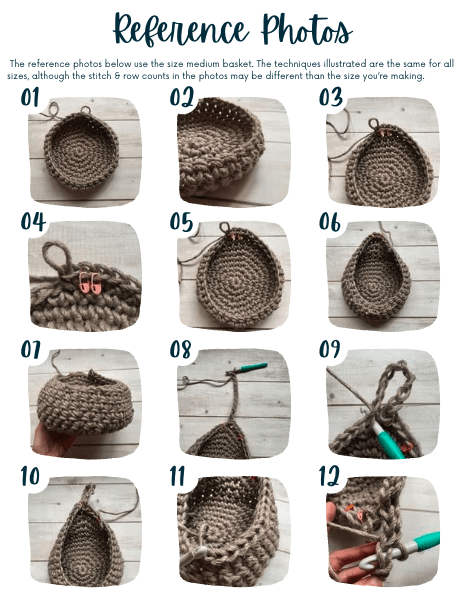
- As you work your rounds, the basket will will start to form a cup shape. Allow the ?right side? of your stitches to curve towards the inside of the cup – the back side of the stitches will end up being on the outside of the basket. PHOTOS 01 & 02
- In Rnd 7 (small), Rnd 10 (medium), Rnd 13 (large) you will make 2 increases (4 stitches) on the top of the basket where your handle will ultimately go. Place stitch markers in the middle of the 4 stitches so you can easily identify where your increases will fall in subsequent rounds. PHOTOS 03 & 04 As you work your way around, move the stitch markers to the middle of the 4 increases you?ll make in each round.
- The final round of each basket is a slip stitch round. When you work the handle, be sure to place your slip stitches under both loops of the chain PHOTO 12
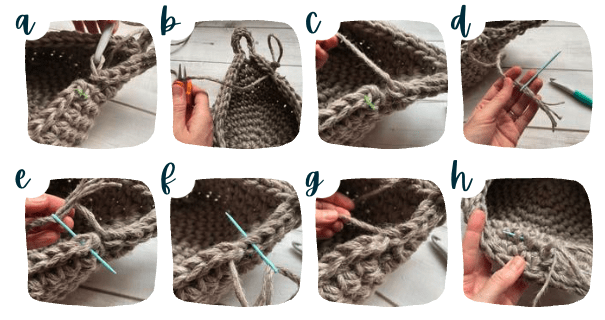
- INVISIBLE FASTEN INSTRUCTIONS – refer to photos A through G below: Take your hook off the loop (A). Leaving a long tail, snip the yarn (B) and pull it through the loops of your final stitch (C). Then, thread the yarn end onto a tapestry needle (D). Insert the needle from inside to outside (back to front) under both loops of next stitch (E) and pull yarn tail through, then bring the yarn back under the BLO of the previous stitch (F) and pull to the inside of the basket, pull tightly (G). Tie off and weave in on the inside of the basket (H).
REFERENCE PHOTOS:
SMALL BASKET:
Rnd 1: st 6 sc in a magic circle [6]
Rnd 2: inc in each st around [12]
Rnd 3: (sc, inc) x6 [18]
Rnd 4: (sc 2, inc) x6 [24]
Rnd 5-6: sc around [24]
Rnd 7: inc 2, sc around [26] PH 05
Rnd 8: sc, inc 2, sc around [28]
Rnd 9: sc 2, inc 2, sc around [30]
Rnd 10: sc 3, sc + sl st in next st, ch 8, sl st + sc in next st, sc 6, (dec, sc 2) x3, sc 7, turn – do not ch before you turn [29 st + 8 chs] PH 08, 09, 10
Rnd 11: sl st around [37] PH 11
Fasten off using the invisible fasten technique described above.

MEDIUM BASKET:
Rnd 1: st 6 sc in a magic circle [6]
Rnd 2: inc in each st around [12]
Rnd 3: (sc, inc) x6 [18]
Rnd 4: (sc 2, inc) x6 [24]
Rnd 5: (sc 3, inc) x6 [30]
Rnd 6: (sc 4, inc) x6 [36]
Rnd 7-9: sc around [36]
Rnd 10: inc 2, sc around [38] PH 05
Rnd 11: sc, inc 2, sc around [40]
Rnd 12: sc 2, inc 2, sc 10, (dec, sc 2) x4, sc 10 [38] PH 06 & 07
Rnd 13: sc 3, sc + sl st in next st, ch 10, sl st + sc in next st, sc around, turn – do not ch before you turn [40 st + 10 chs] PH 08, 09, 10
Rnd 14: sl st around [48] PH 11
Fasten off using the invisible fasten technique described above

LARGE BASKET:
Rnd 1: st 6 sc in a magic circle [6]
Rnd 2: inc in each st around [12]
Rnd 3: (sc, inc) x6 [18]
Rnd 4: (sc 2, inc) x6 [24]
Rnd 5: (sc 3, inc) x6 [30]
Rnd 6: (sc 4, inc) x6 [36]
Rnd 7: (sc 5, inc) x6 [42]
Rnd 8: (sc 6, inc) x6 [48]
Rnd 9-12: sc around [48]
Rnd 13: inc 2, sc around [50] PH 05
Rnd 14: sc, inc 2, sc 14, (dec, sc 2) x5, sc 13 [47] PH 06 & 07
Rnd 15: sc 2, sc + sl st in next st, ch 10, sl st + sc in next st, sc 13, (dec, sc 2) x5, sc 10, turn – do not ch before you turn [44 st + 10 chs] PH 08, 09, 10
Rnd 16: sl st around [54] PH 11
Fasten off using the invisible fasten technique described above.
HANGING BASKET FREE CROCHET PATTERN VIDEO TUTORIAL
NEED A LITTLE INSPIRATION ON DECOR IDEAS?
The best part about crochet baskets is that they are a FUNCTIONAL project that is rewarding to make and display. Here are just a handful of the ways you can use these:
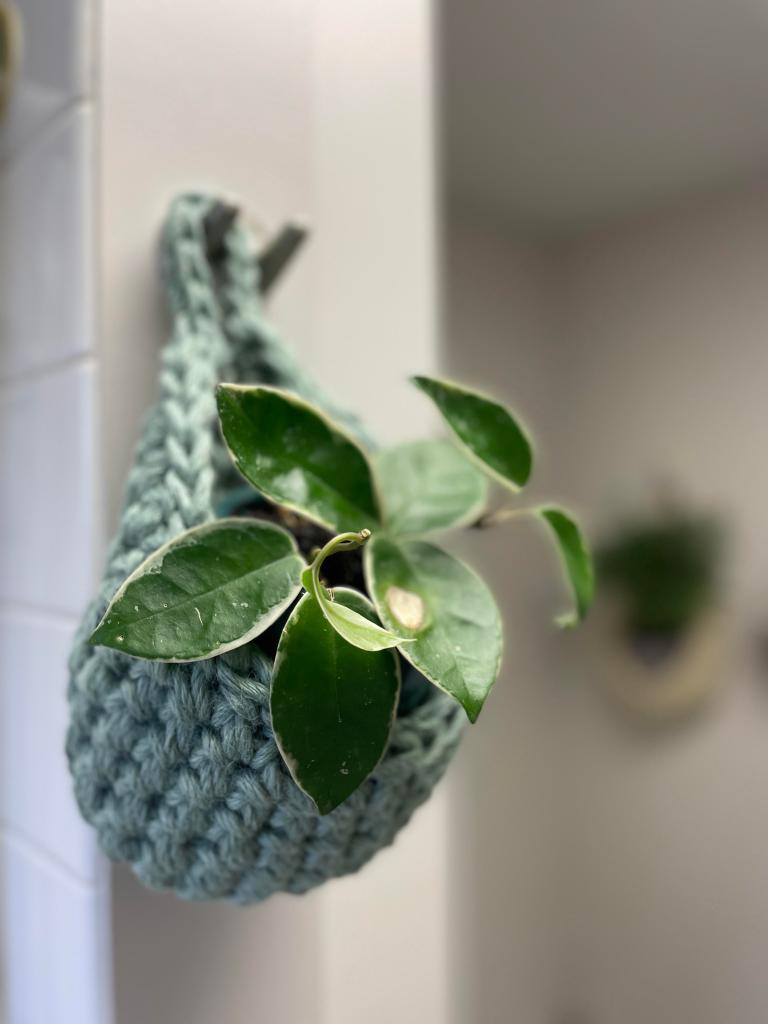
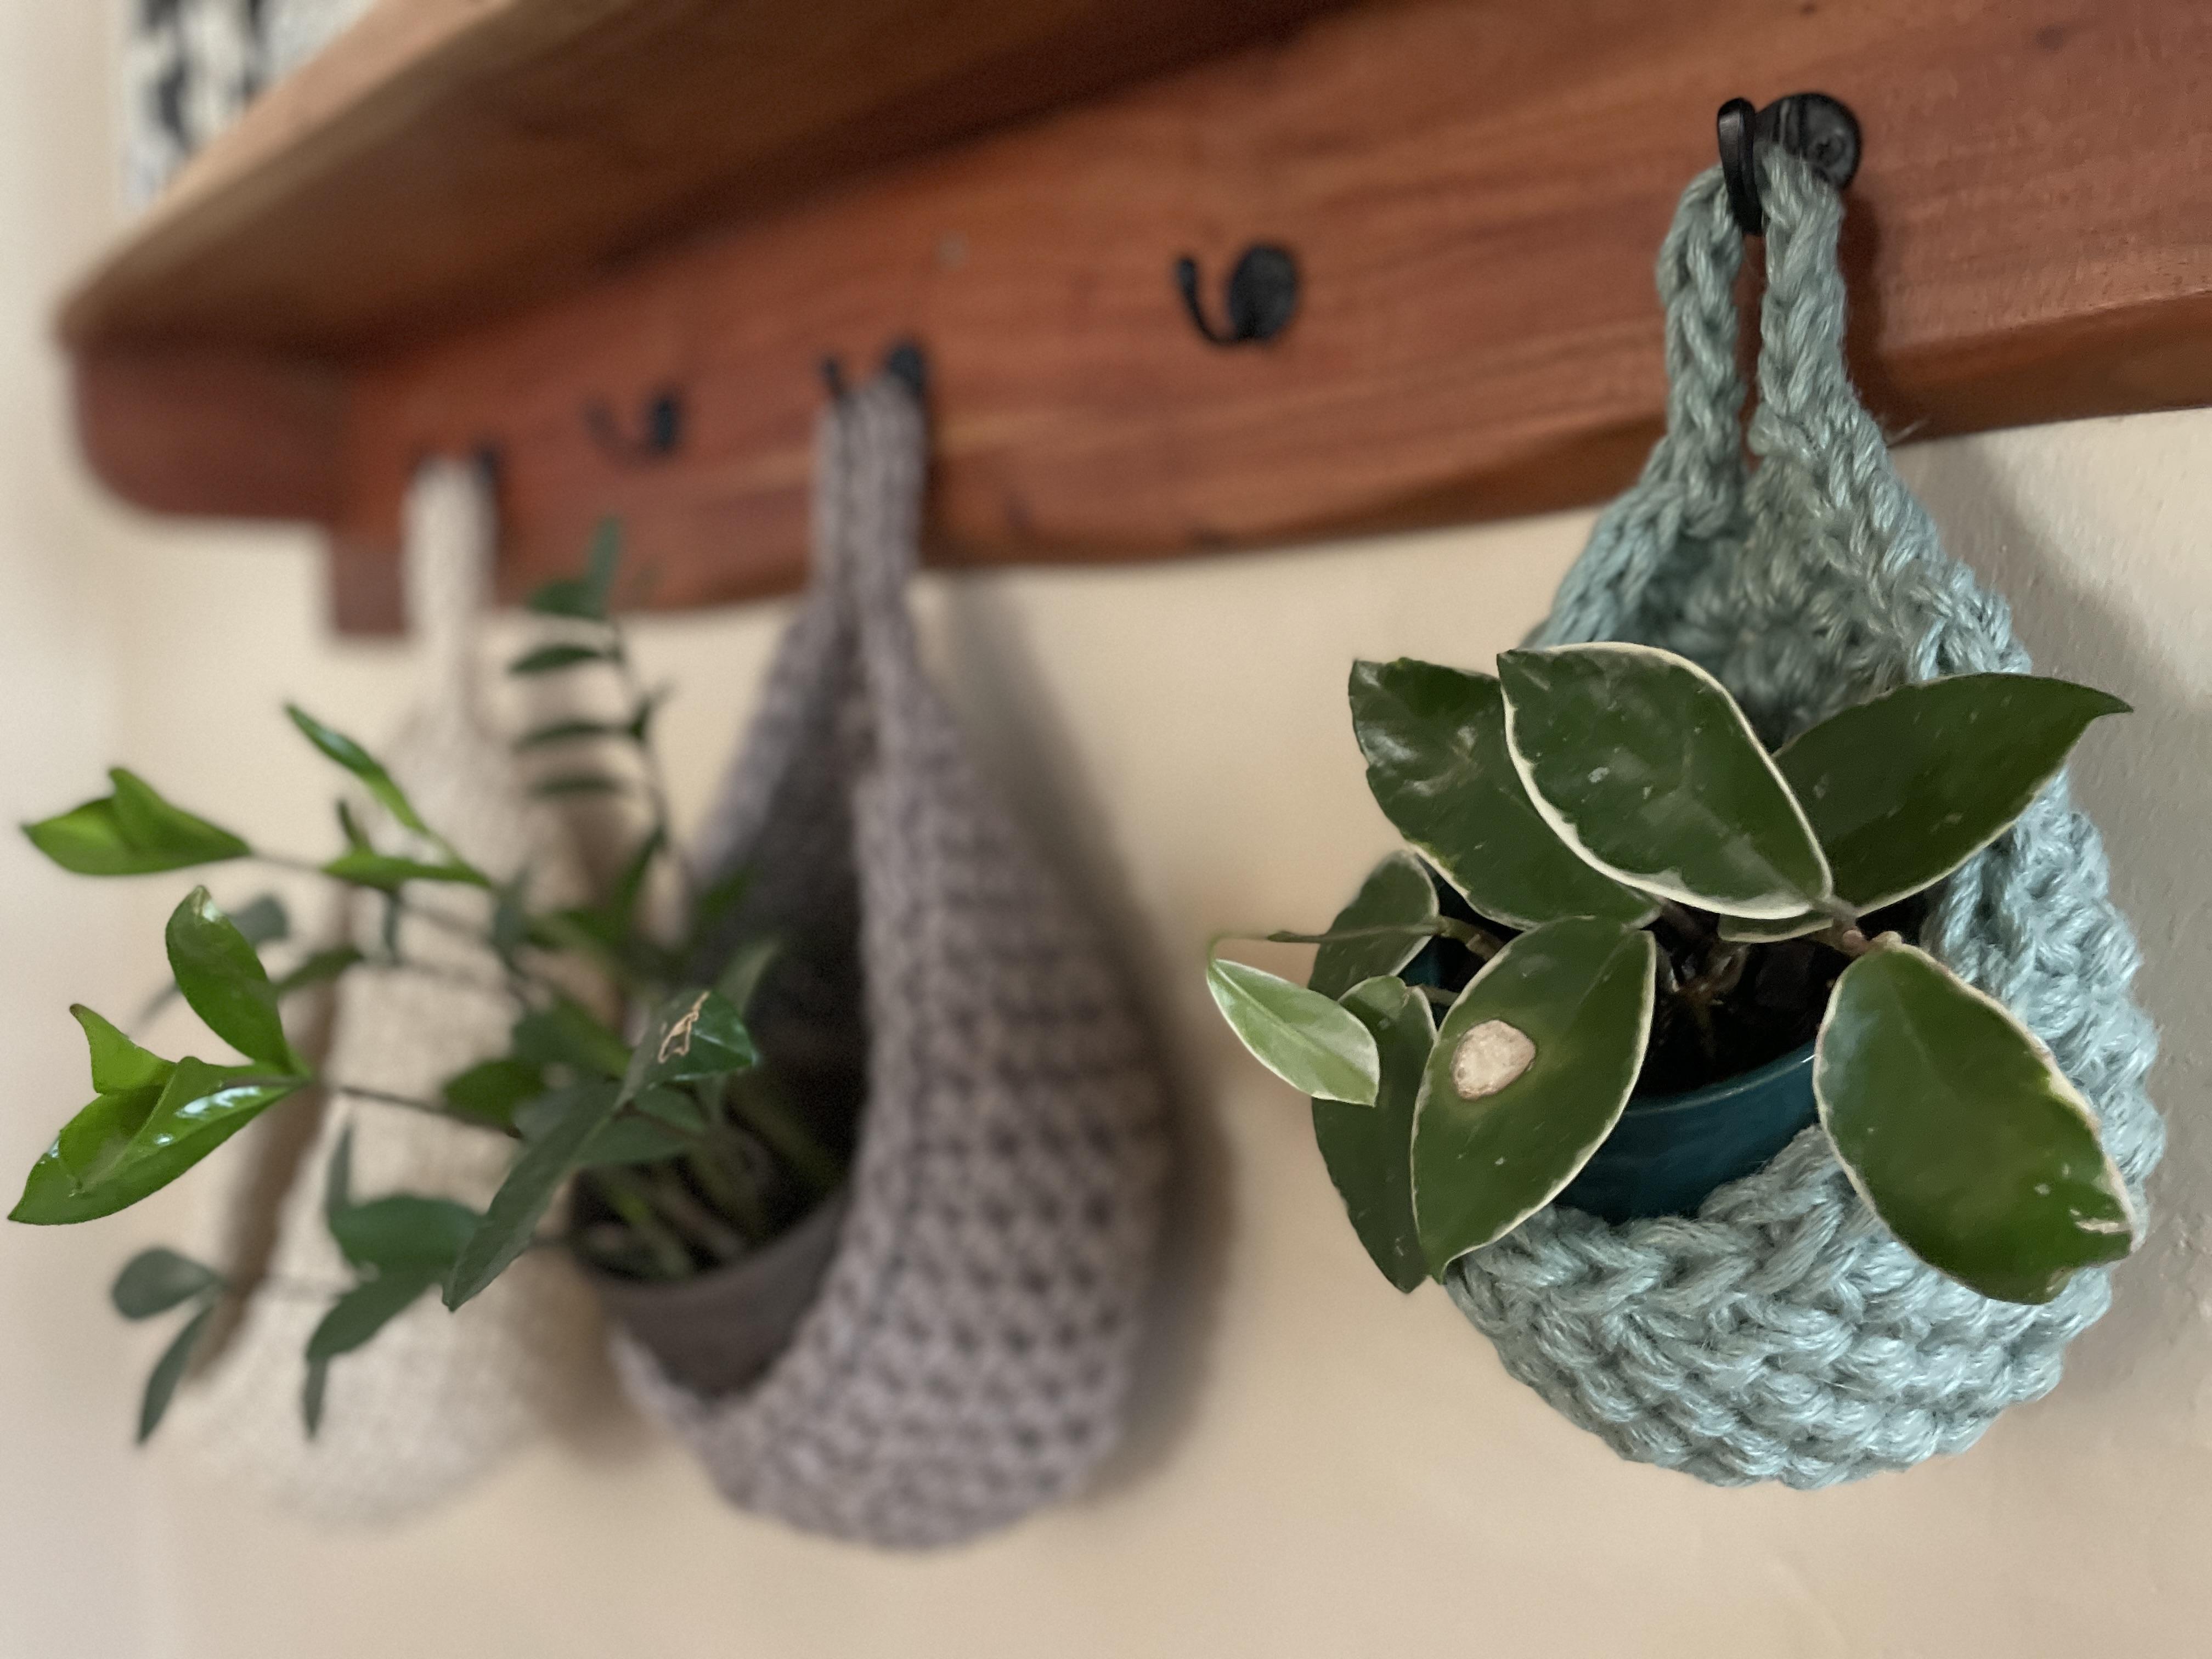
- Plant hangers (this is how I’m using mine right now)
- Nursery: diapers, wipes, toys, socks, pail liners
- Play Room/Kids Room: toys, toys, toys off the floor!!, craft supplies, matchbox cars, play-doh, everything!
- Bedroom: socks, undies, lingerie
- Laundry Room: soap tabs, dryer sheets, lint holder, plastic bag holder, laundry supplies
- Kitchen: dishwasher soap tabs, clean kitchen towels, fruit & veggie basket, coffee corner supplies
- Bathroom: clean hand towels, bath toys, soap bars, TP, kleenex
- Mud Room/Entryway: hats, gloves, keys & wallet, mail, small kids shoes
Unleash your inner artist, embrace the therapeutic rhythm of the hook, and create a functional and attractive piece that transcends the limits of hook and thread.
I would love to see your completed Dewdrop Baskets! Please post pictures on instagram and tag me @offthebeatenhook and use #offthebeatenhook. Cheers!
PIN THIS HANGING BASKET FREE CROCHET PATTERN FOR LATER!


Leave a Reply