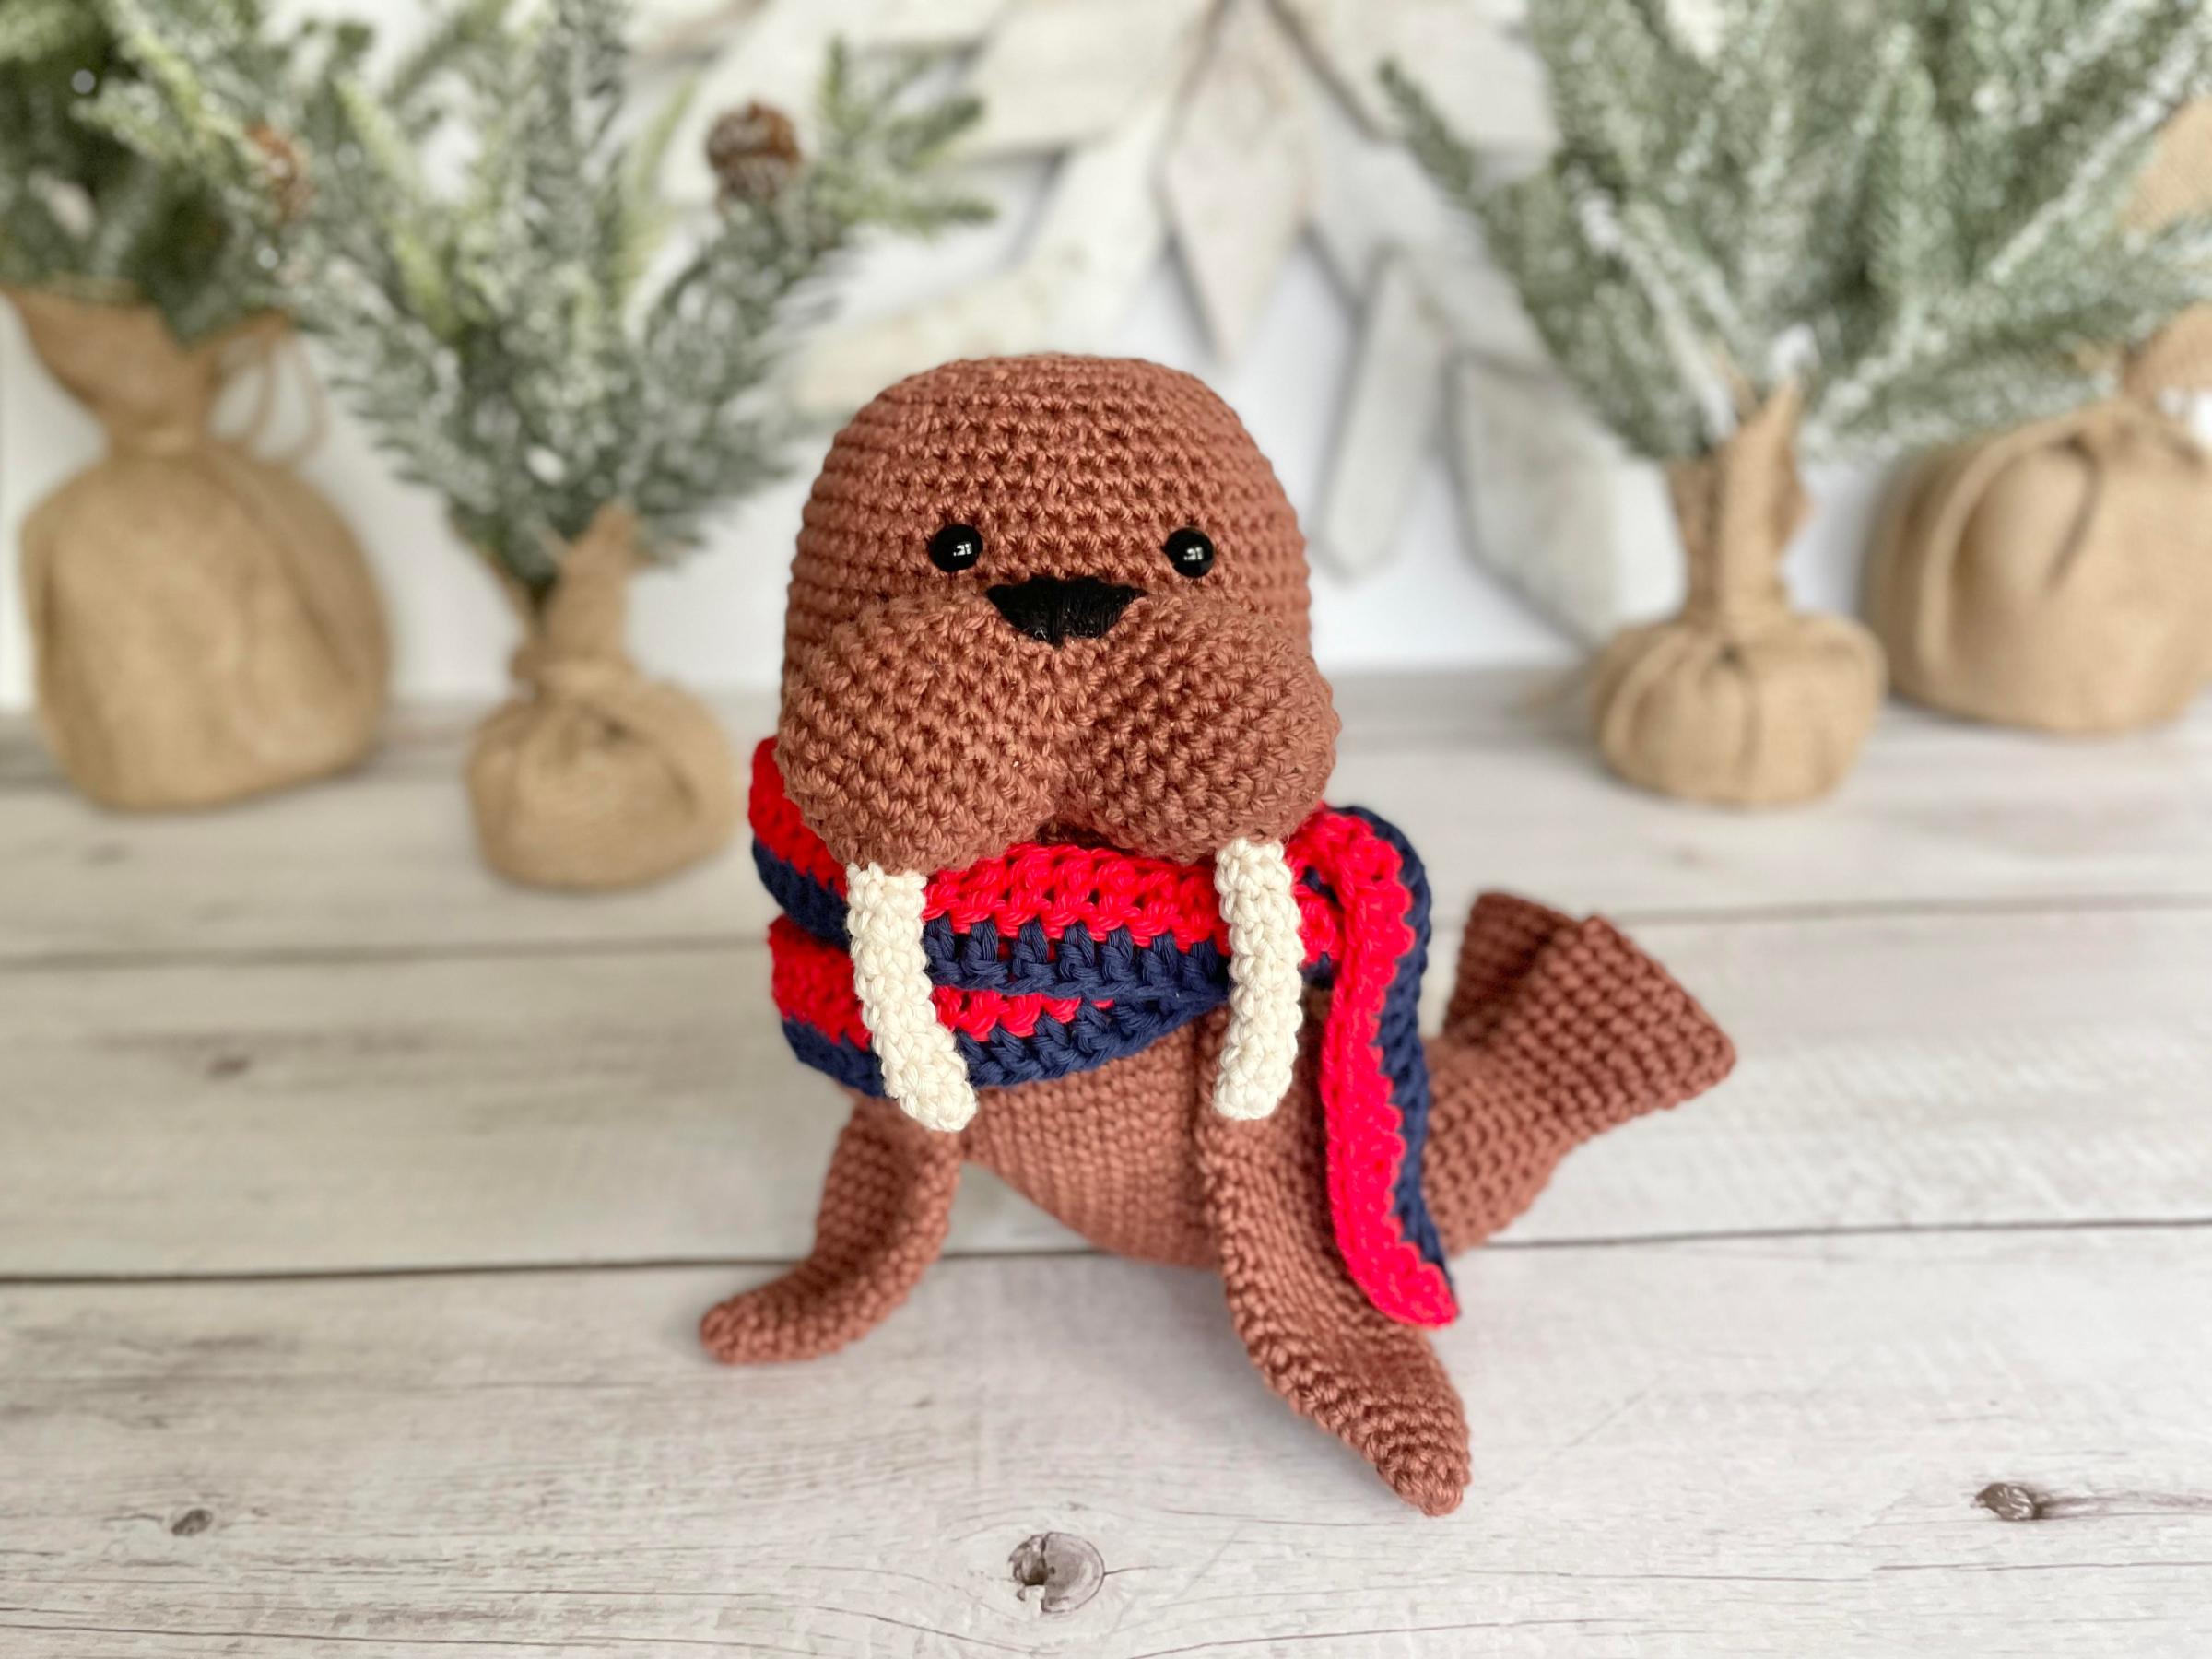
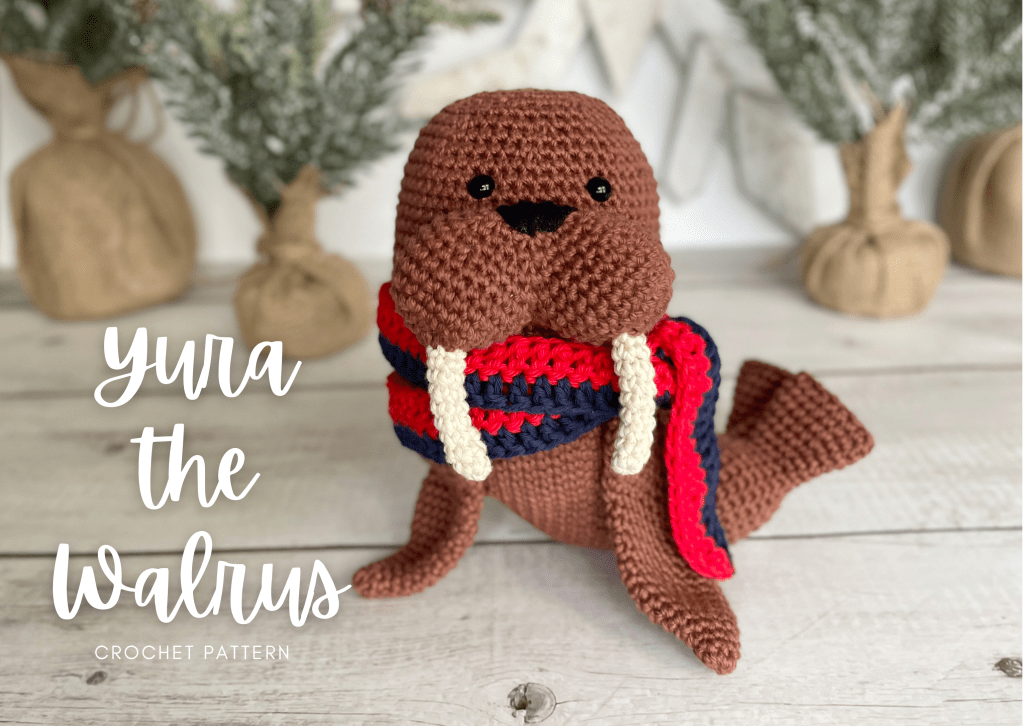
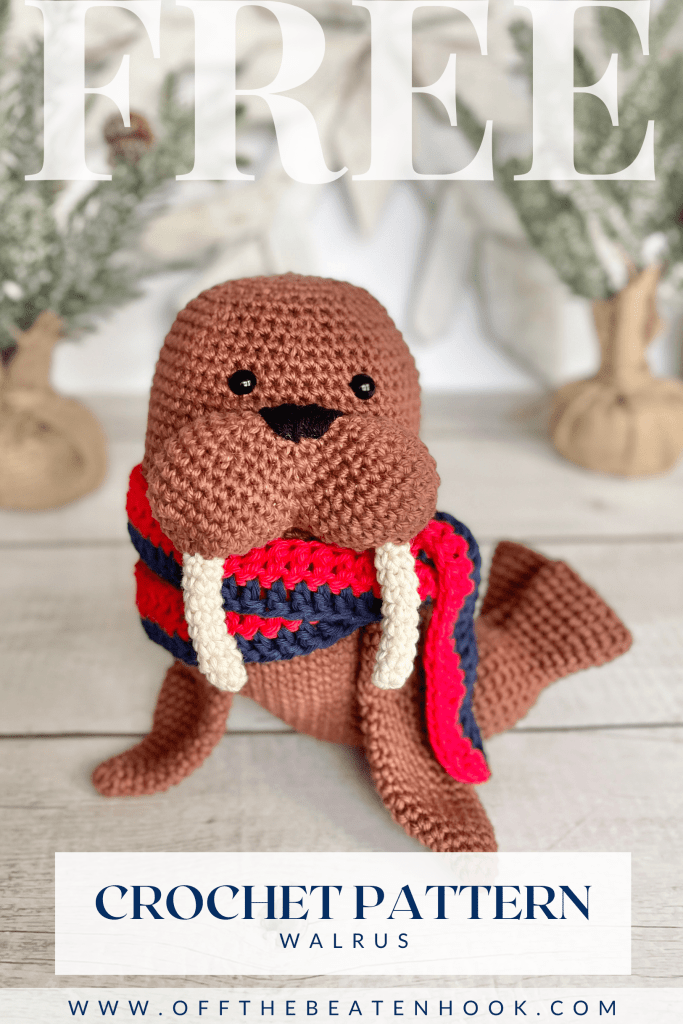
Introducing Yura the Walrus! A while back, I designed Nanook the Polar Bear and knew right away that he needed an arctic buddy (Yura makes an appearance in his story!). So, here she is. This amigurumi pattern is the perfect balance between realistic + adorable. Accompanied by a video tutorial, this walrus crochet pattern will be a sweet gift for your loved one, or the perfect addition to your amigurumi toy collection!
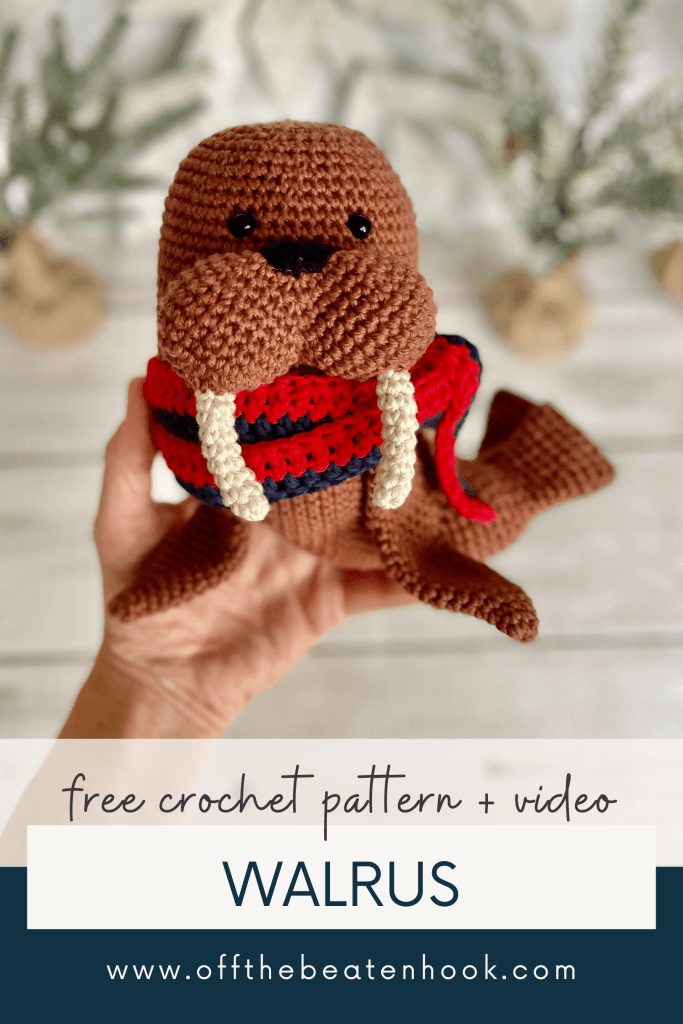
Jump into the walrus crochet pattern now, or PIN it for later here!
I’ve created a helpful video tutorial for this pattern as well. You can find that further down in this post or access it straight away on YouTube here.
This walrus crochet pattern is supported by ads on my blog. If you’d rather print the pattern for some cozy couch crocheting, you can find the 14-page ad-free, printable PDF in my shop here or on Ravelry here.
This pattern is written in US terms. If needed, you can find a handy term conversion chart right here in my Resource Library.
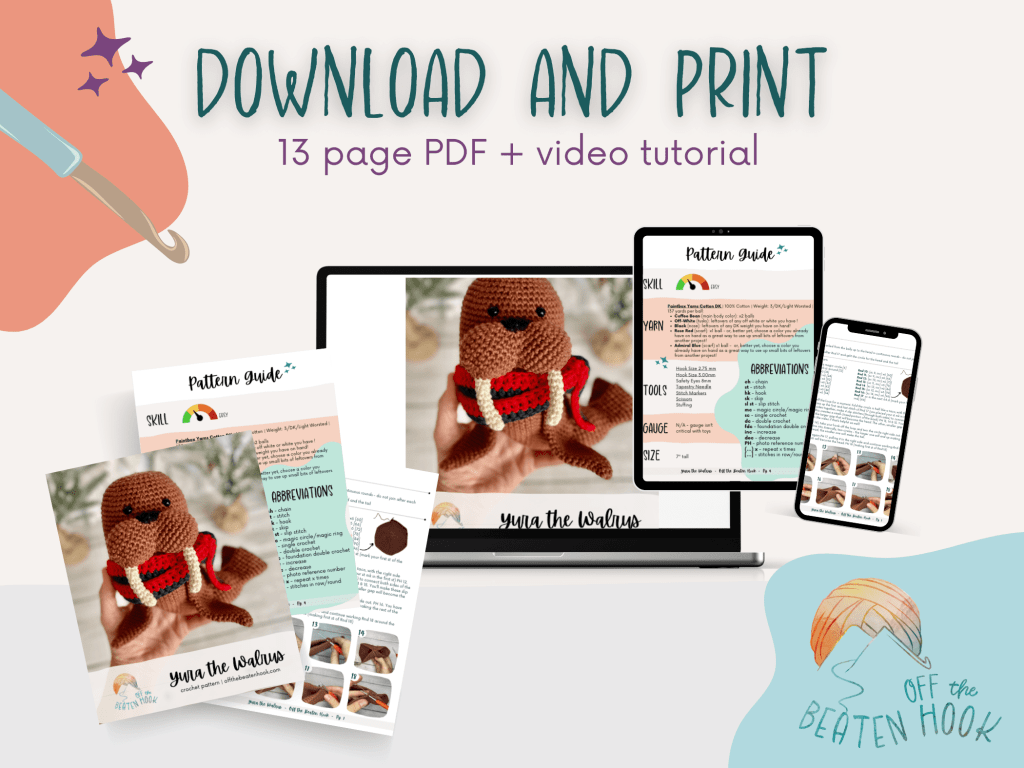
You can find the printable, AD-FREE version of this crochet pattern here:
Walrus Crochet Pattern Guide:
Size & Gauge:
Size: 7″ tall
Gauge: N/A. Ultimately with toys, gauge doesn’t matter. It won’t have to fit someone’s body or a specific space. My patterns will include the size of the finished toy based on the yarn and hook I use. But if you want it smaller or bigger, just use a bigger yarn and hook! Just remember, when crocheting toys, crochet tightly and choose a hook one size smaller than the yarn size recommends in order to avoid holes between each stitch where the stuffing will show through.
Yarn & Stuffing:
Yarn: Take your choice of yarn! Choose colors that bring you joy and fibers that feel good between your fingers. I use 100% cotton yarn because I make these toys for my kids and need them to be functional. Cotton is natural, washable, soft, and relatively inflexible so the toys don’t stretch and sag, even after being thrown across the house, down the stairs and adventured through every part of the garden!
Stuffing: Stuff more than you think you should. Not enough for the stitches to stretch and show holes, but enough to make the toy stiff and able to withstand the rough trials of toy life. The filling will compress a bit over time. I encourage you to use an alternative to poly-fill (unless it’s recycled!). Try using leftover yarn scraps and snippets or old non-donate-able clothes and materials cut into strips. For this walrus crochet pattern, I used recycled polyester stuffing.
Policies & Disclaimers:
This walrus crochet pattern is for PERSONAL USE ONLY. This pattern or parts of it may not be reproduced, resold, distributed, published, altered, translated, posted or shared without authorization. You can sell your finished items provided that you credit Off the Beaten Hook as the designer using this verbiage, “This pattern was designed by Lindsey Roe and Off the Beaten Hook.” Thank you for your respectfulness!
This post contains affiliate links for materials I use and love. If you purchase something using one of these links I may earn a small commission which in no way affects the cost to you. These partnerships help me support my small business which allows me to provide you with free crochet patterns. Thank you from the bottom of my heart for your support!
What makes this pattern eco-friendly and sustainable?
THE YARN: I use only sustainable and eco-friendly yarn that has been ethically grown/raised and processed, putting the people and the planet first. This is why I chose 100% cotton yarn for this pattern.
THE STUFFING: I used 100% Post-Consumer Recycled Polyester Filling (recycled water bottles) for this walrus crochet pattern. You can also use recycled cotton stuffing, left over yarn snippets (save them all – they add up fast!) or old fiber you’ve cut into strips.
THE SLOW YARN MOVEMENT: I’m participating in the Slow Yarn Movement. There’s far too much to talk about here, but please take a few minutes to learn about what this means by reading the article I wrote about the Slow Yarn Movement as part of my 6-part Sustainable Crochet Series.
I’M MAKING SUSTAINABLE TOYS FOR MY KIDS: This is the reason I learned how to crochet to begin with! I wanted my son to have mostly sustainable toys to play with as I eliminated a huge amount of non-renewable plastics from our home.
If you’re interested in learning more about sustainable crochet you can read all about it in the 6-part series I did covering everything about Sustainable Crochet and how to implement it into your own crafting starting today!
Materials you will need for this walrus crochet pattern:
YARN:
Paintbox Yarns Cotton DK | 100% Cotton | Weight: 3/DK/Light Worsted | 137 yards per ball:
- Coffee Bean (main body color): x2 balls
- Off-White (tusks): leftovers of any off white or white you have !
- Black (nose): leftovers of any DK weight you have on hand!
- Rose Red (scarf): x1 ball – or, better yet, choose a color you already have on hand as a great way to use up small bits of leftovers from another project!
- Admiral Blue (scarf) x1 ball – again, better yet, choose a color you already have on hand as a great way to use up small bits of leftovers from another project!
YARN SUBSTITUTION OPTIONS:
If you can’t access the recommended yarn, want to explore other colors, or would just prefer to use a different yarn for this cauliflower free crochet pattern, here are some others that will work well! All of these are DK weight:
100% Cotton Options:
- Deramores Studio Organic Cotton DK
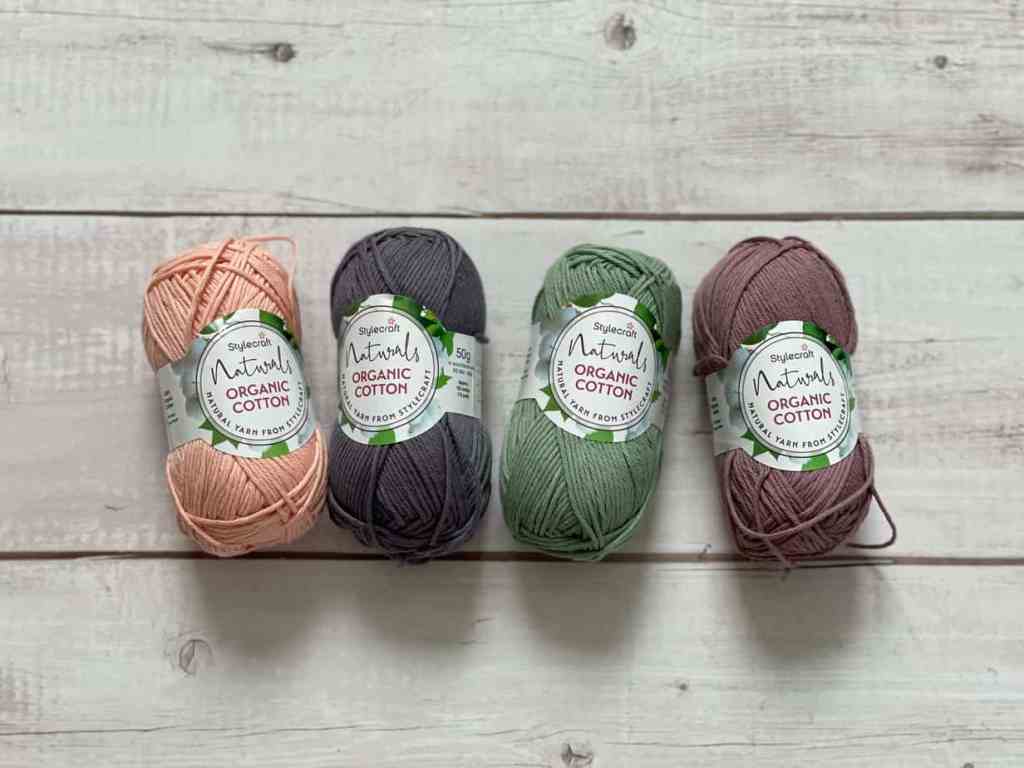
- Stylecraft Naturals Organic Cotton
- Rico Essentials Organic Cotton DK
- Paintbox Yarns Cotton DK
- Rowan Handknit Cotton
- Debbie Bliss Cotton DK
Cotton Blend & Other Fiber Options:
- Scheepjes Linen Soft (Cotton/Linen/Acrylic)
- Paintbox Yarns Simply DK (Acrylic)
- Stylecraft Bamboo & Cotton Blend
- Sirdar Stories DK (Cotton/Acrylic)
- Valley Yarns Haydenville DK (Wool/Acrylic)
OTHER TOOLS & MATERIALS:
- Crochet Hook Size: 3.00 mm
- Crochet Hook Size: 2.75 mm
- Pair of safety eyes: 8 mm
- Tapestry Needle
- Stitch Markers
- Scissors
- Stuffing
Abbreviations used in the walrus crochet pattern:
ch – chain
st – stitch
hk – hook
sl st – slip stitch
mc – magic circle
sc – single crochet
dc – double crochet
fdc – foundation double crochet
inc – increase
dec – decrease
(…) x – repeat instructions indicated number of times
[…] – number of stitches in row/round
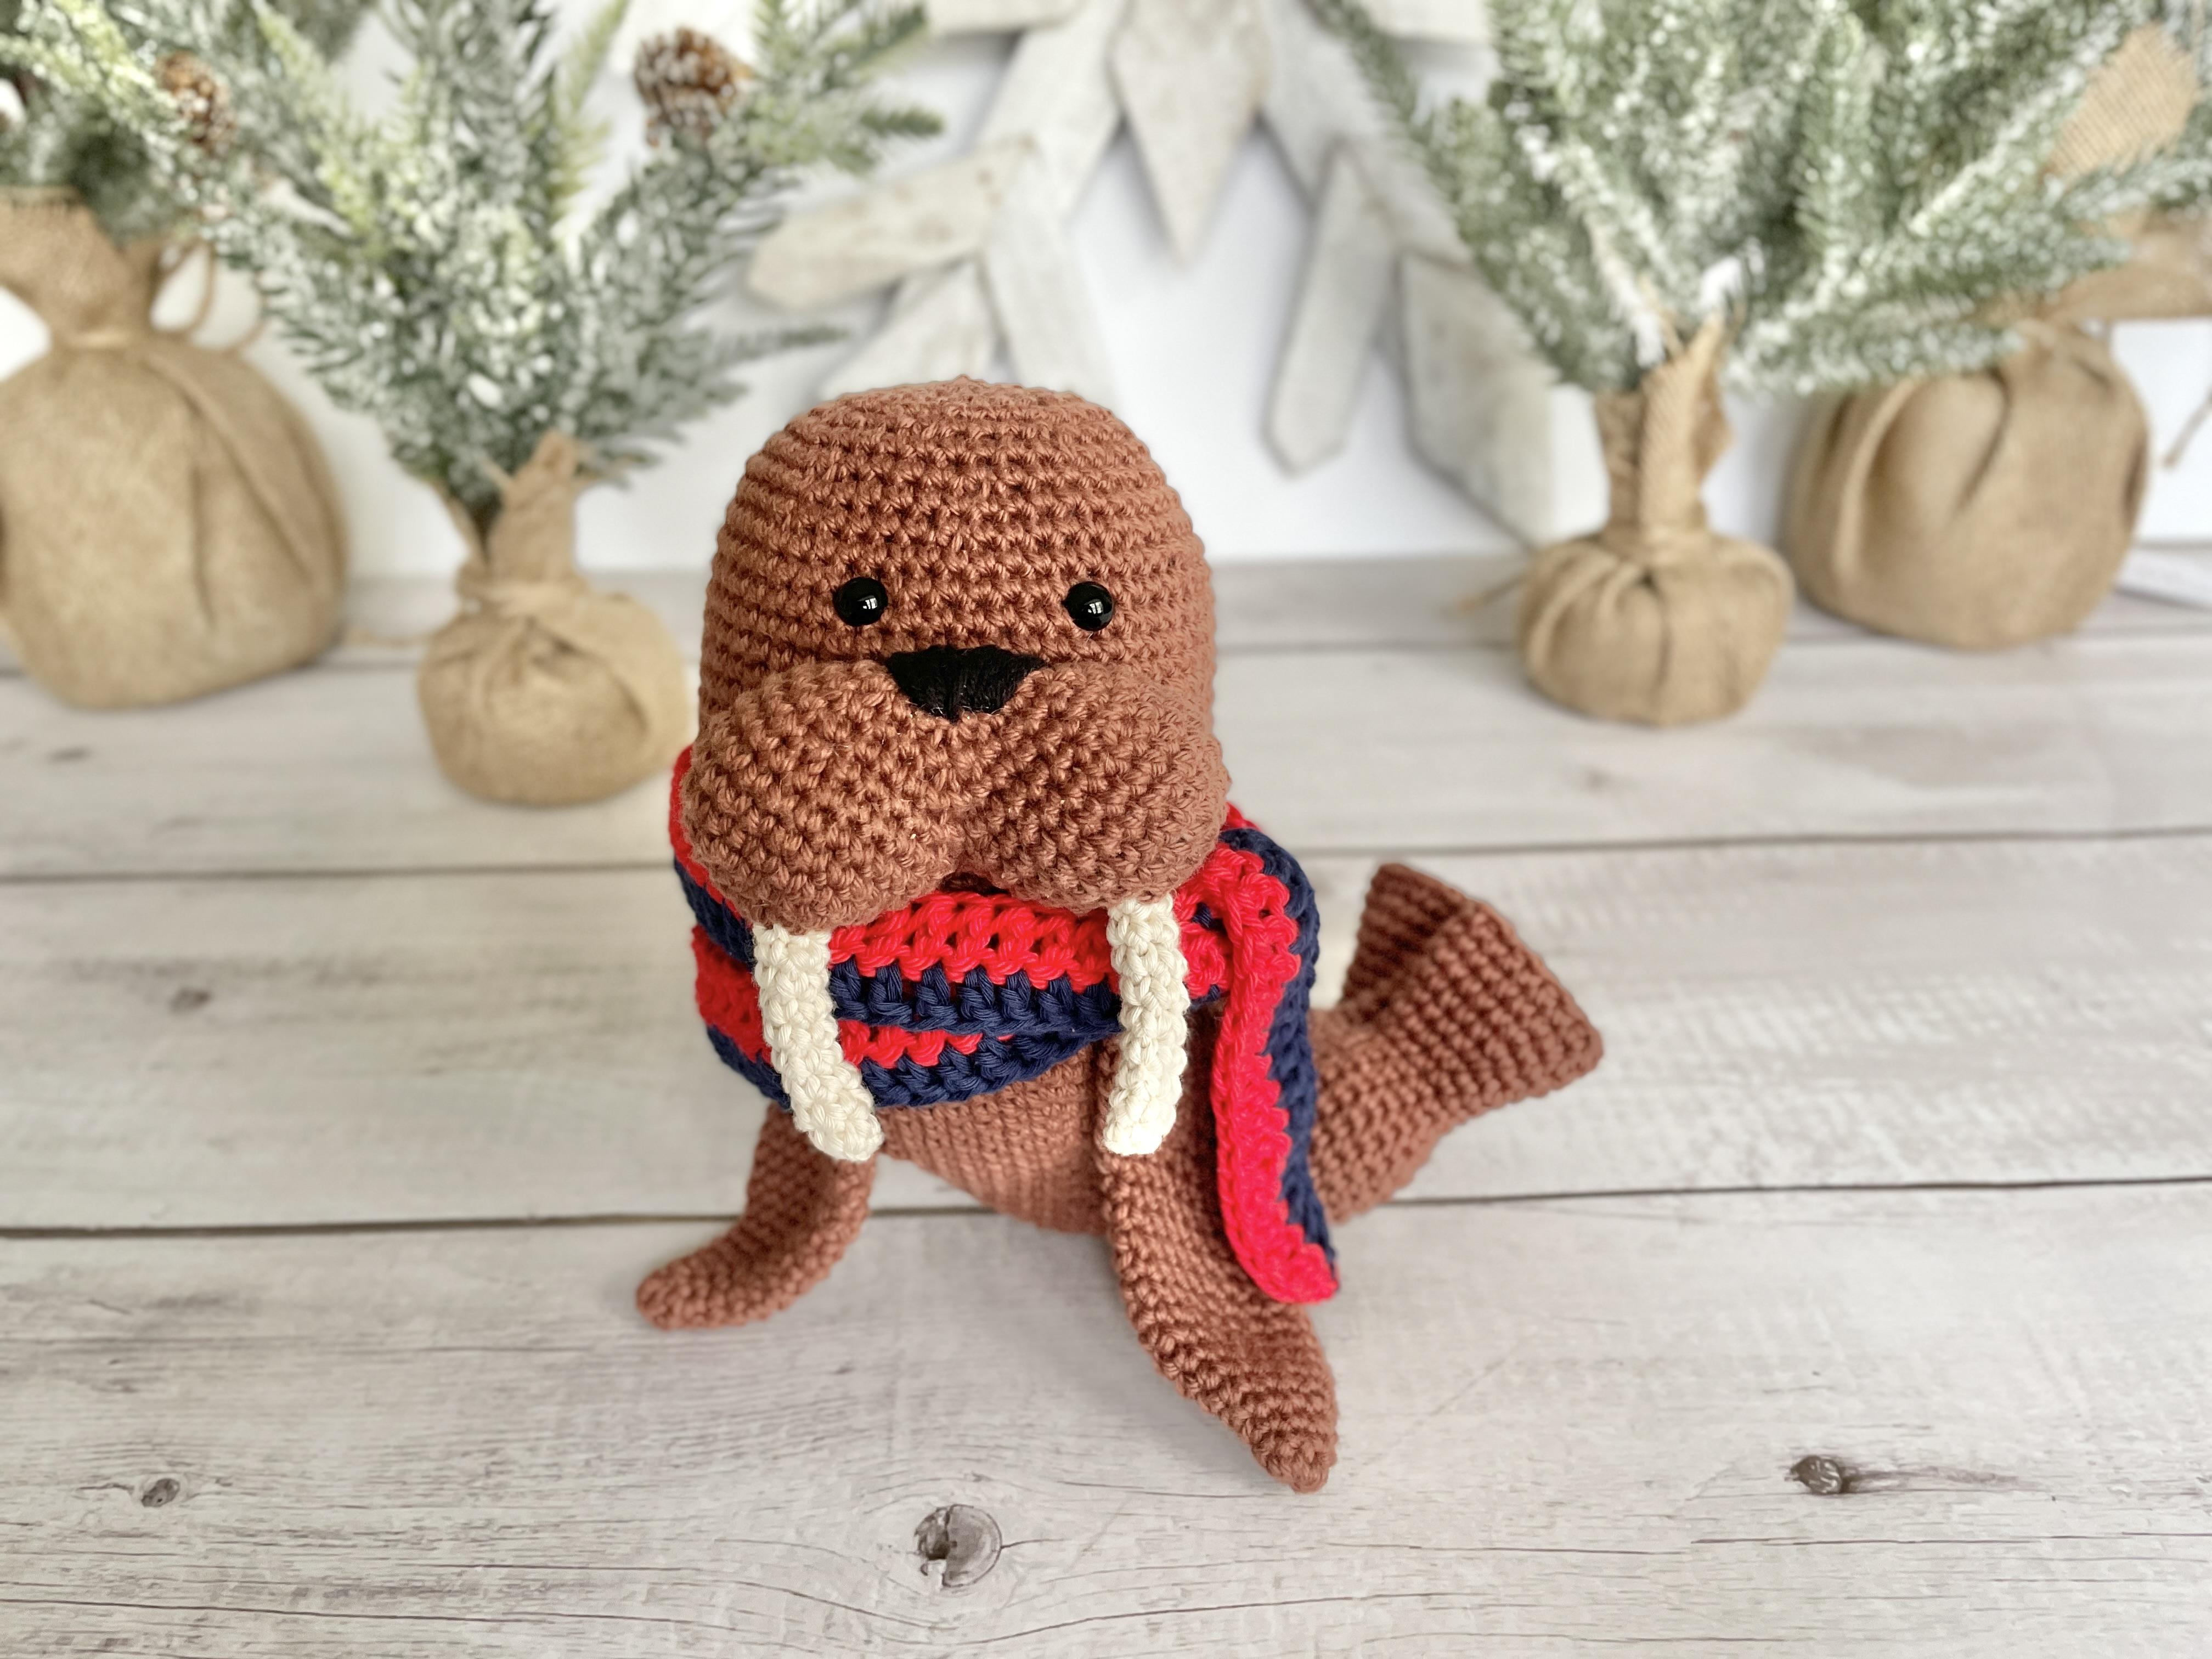
MEET YURA the WALRUS:
In the chilly Arctic, where icebergs gleam,
Lived a Walrus, alone, in a watery dream.
She felt a pang, a lonely woe,
for she had no friends to laugh and row.
Her whiskers drooped, her eyes grew sad,
as she pondered moments she’d never had.
Then one frosty night, as she floated along,
She spotted a figure, big and strong.
With fur as white as the winter scene,
It was a Polar Bear – rude and mean.
She knew she had to make this stop,
So, brave she went with a splash and a flop.
“Hey there, Dear Bear”, she said to him,
“why are you treating others so dim?
Do you know there is a kinder way
to treat others and not push them away?”
This caught the bear off his guard,
Now this he could not disregard
He didn’t know he had the choice
to spread love – not fear – with his voice
So he changed his ways and made amends,
and he and the walrus became best of friends
No longer lonely, the Walrus smiled,
two unlikely friends in the Arctic wild.
For in friendship’s embrace, she’d finally found,
a treasure more precious than riches abound.
So remember this tale, so brave and true,
for in every lonely soul, there’s a friend for you.
The Walrus Crochet Pattern
SNOUT:
NOTES:
- The snout and tusks are worked in continuous rounds – do not join after each round
- The entire walrus is made using the 3.00mm hook EXCEPT FOR THE TUSKS, which uses 2.75mm.
- I cover parts of the making of the snout in the video tutorial
Use the brown yarn
Rnd 1: sc 6 st in a magic circle [6]
Rnd 2: inc x6 [12]
Rnd 3: (sc, inc) x6 [18]
Rnd 4: (sc 2, inc) x6 [24]
Rnd 5-7: sc around [24]
Sl st to next st, snip and fasten off. Cup #1 complete.
Repeat Rnds 1-7 to make Cup #2, but do not fasten off.
Join circles: Picking up where you left off after Rnd 7 of Cup #2, make a sc anywhere along Rnd 7 of the first cup. This sc is the first sc of Rnd 8.
Rnd 8: sc all the way around both cups, joining them into one [48]
Rnd 9: (dec, sc 5, dec, sc 6, dec, sc 5, dec) x2 [40]
Rnd 10: dec, (sc 4, dec) x3, dec, (sc 4, dec) x3 [32]
Rnd 11: (dec, sc 3, dec, sc 2, dec, sc 3, dec) x2 [24]
Rnd 12: (dec, sc, dec, sc 2, dec, sc, dec) x2 [16]
Stuff snout prior to closing.
Rnd 13: dec x8 [8]
Sl st in the next st and snip, leaving a long tail. Pull the tail through the final 2 loops. Using the yarn end and a tapestry needle, thread the yarn through the front loop only of the remaining 5 stitches and pull tightly to close. Bring the yarn to the inside and back out one of the side walls. Snip cleanly with the surface. If you have a small hole between the two cups of the snout, take a strand of yarn and close it as well!
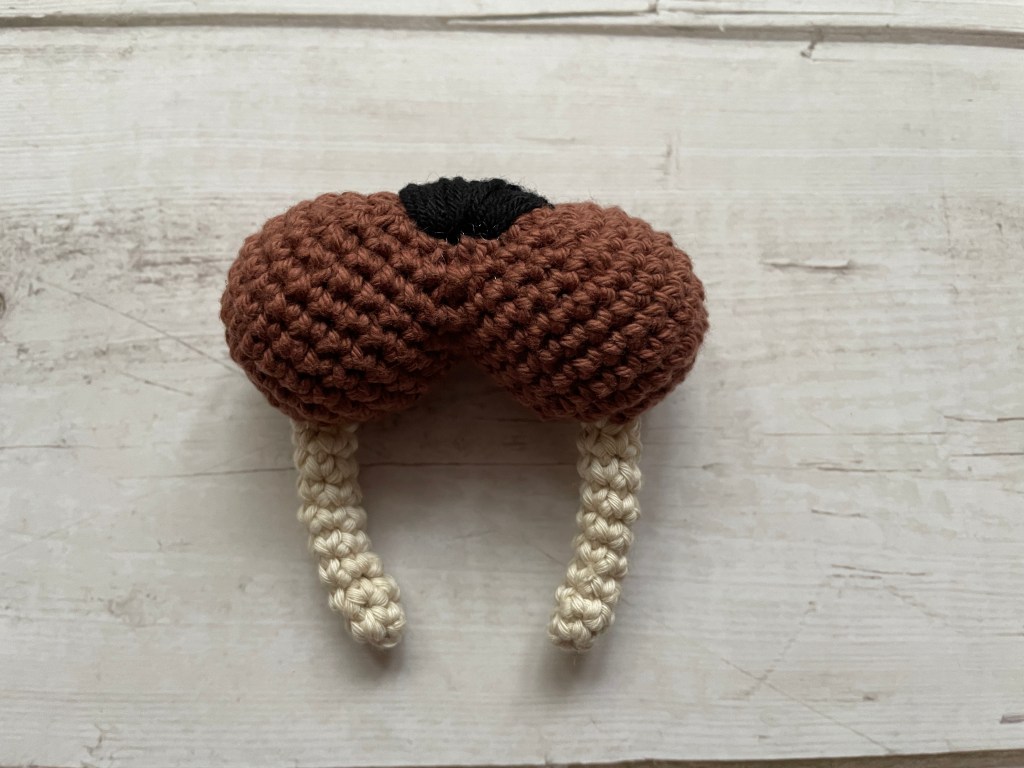
TUSKS – make 2:
Use off-white yarn and the 2.75 mm hook
Rnd 1: st 5 sc in a magic circle [5]
Rnd 2-8: sc around [5]
Fasten with a sl st. Snip, leaving a tail for sewing onto the snout. PH 06
Sew tusks to the rounded tips of the snout over Rnds 2 – 3.
Embroider the black nose:
Using a long length of black yarn threaded through a tapestry needle, bring the needle back and forth over the top of the snout, using two stitches from the front and 6-8 stitches from the back creating somewhat of a flat triangle shape. Refer to the photos and video tutorial for help if needed!
BODY:
NOTES:
- The body is worked from the belly up to the head in continuous rounds – do not join after each round
- You will stop after Rnd 17 and split the circle for the head and the tail
- You will stop at Rnd 40 to make the tail and add the facial features. Adding the tail at this point (before finishing the head/face), allows you to more accurately place the facial features to be sure they?re centered.
Rnd 1: st 6 sc in a magic circle [6]
Rnd 2: inc in each st around [12]
Rnd 3: (sc, inc) x6 [18]
Rnd 4: (sc 2, inc) x6 [24]
Rnd 5: (sc 3, inc) x6 [30]
Rnd 6: (sc 4, inc) x6 [36]
Rnd 7: (sc 5, inc) x6 [42]
Rnd 8: (sc 6, inc) x6 [48]
Rnd 9: (sc 7, inc) x6 [54]
Rnd 10: (sc 8, inc) x6 [60]
Rnd 11: (sc 9, inc) x6 [66]
Rnd 12: (sc 10, inc) x6 [72]
Rnd 13: (sc 11, inc) x6 [78]
Rnd 14: (sc 12, inc) x6 [84]
Rnd 15: (sc 13, inc) x6 [90]
Rnd 16: (sc 14, inc) x6 [96]
Rnd 17: sc in the next 64 st (mark your first st of the rnd) [64]
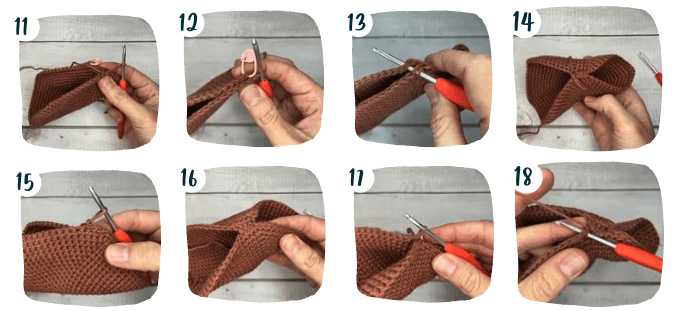
Take your hook off the loop for a moment. Fold the circle in half like a taco, with the right side facing IN. PH 11 Line up the first and last stitch of Rnd 17 (you placed your st mk in the first st) PH 12. And, holding the sides together, make 4 slip stitches (through both sides) to connect both sides of the circle together (this creates a small closed portion of the back) PH 13, 14 & 15. You?ll make these slip stitches towards the larger gap that will become the head. The other, smaller gap will become the tail. See all this in the video if that?s helpful as well!
Then, chain 1 (PH 14), take your hook off the loop and turn the circle right side out. PH 16. You have now split the walrus into, basically, two circles – the larger one will end up making the rest of the main body and head; the smaller one will make the tail.
Pick up the loop again PH 17, pulling it to the right side and continue working Rnd 18 around the larger circle which will become the head. PH 18 (making first st of Rnd 18)
Rnd 18-37: sc around [56] PH 19
Rnd 38: (sc 5, dec) x8 [48]
Rnd 39: sc around [48]
Rnd 40: (sc 4, dec) x8 [40]

Stuff as you go along…
Rnd 41: sc around [40]
Rnd 42: (sc 3, dec) x8 [32]
Rnd 43: sc around [32]
Rnd 44: (sc 2, dec) x8 [24]
Rnd 45: sc around [24]
Rnd 46: (sc, dec) x8 [16]
Rnd 47: dec around [8]
Sl st in the next st and snip, leaving a long tail. Pull the yarn tail through the 2 loops of your final stitch. Using the yarn end and a tapestry needle, thread the yarn through the front loop only of the remaining 8 stitches and pull tightly to close. Bring the yarn to the inside and back out one of the side walls. Snip cleanly with the surface.
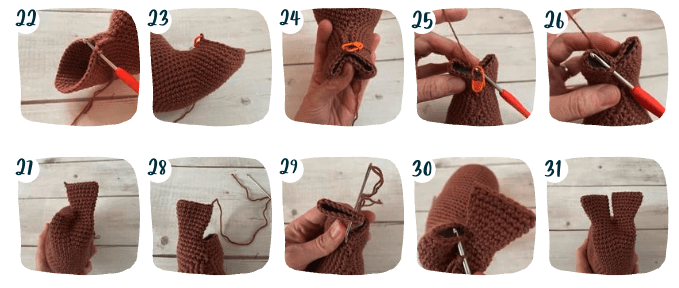
TAIL:
Rejoin brown yarn at corner of the back seam on the tail end. PH 22
Rnd 1: sc around [32]
Rnd 2: (sc 6, dec) x4 [28]
Rnd 3: (sc 5, dec) x4 [24] PH 23
You will now split the tail for the two back flippers – each flipper will begin with 12 stitches around.
Rnd 4: sc in next 12, marking the 1st st [12]
Rnd 5: hold both sides of the circle closed and make a sc in the first st from Rnd 4 (where you placed your st mk) – this is the first st of Rnd 5. Sc around [12] PH 24, 25, 26
Rnd 6: (sc 3, inc) x3 [15]
Rnd 7-8: sc around [15]
Rnd 9: (sc 4, inc) x3 [18]
Rnd 10-12: sc around [18] PH 27
Snip, leaving a tail for closing PH 28. Flatten the circle and, using the yarn tail and a tapestry needle, weave the yarn through both loops of both sides, back and forth, to close the circle PH 29. Weave in end.
Rejoin yarn on the back side of the remaining gap on the tail, PH 30, and repeat Rnds 4-12 for the second flipper. PH 31
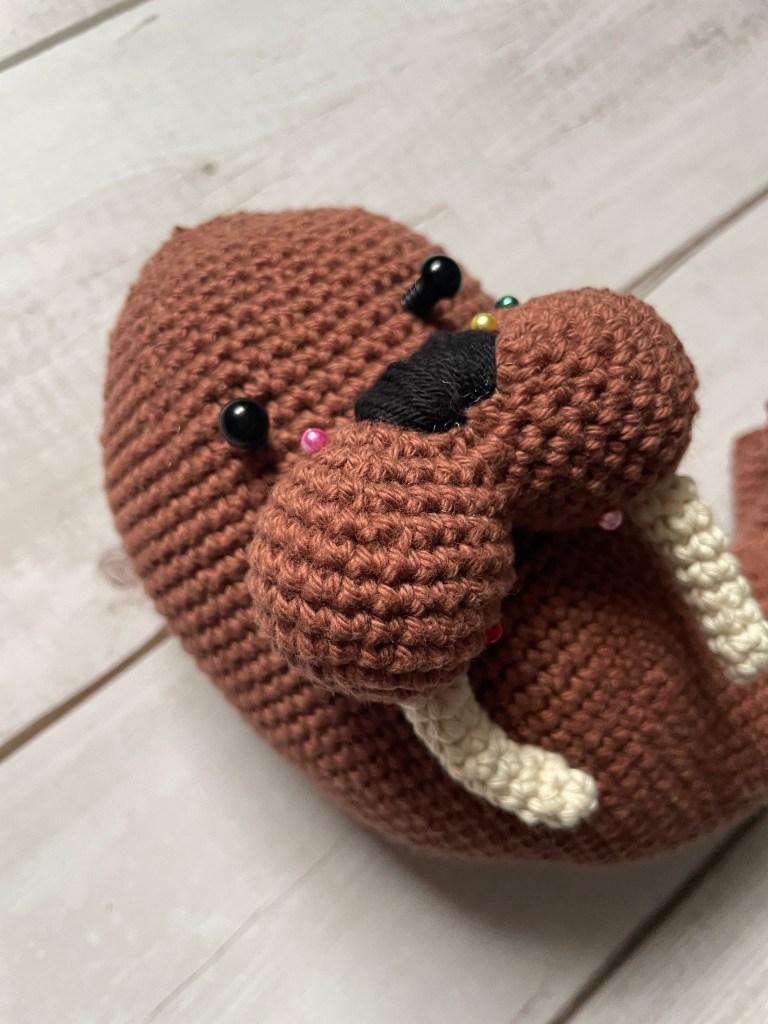
APPLY FACIAL FEATURES:
Apply the facial features – refer to the video tutorial for help with this!
- Insert the safety eyes above the nose between rounds 35 & 36, spaced by 7 stitches.
- Sew the snout to the body with the top of the nose lined up at Rnd 34. Hold the snout against the body and bring your tapestry needle (with brown thread) back and forth from the inside of the body through the snout several times to secure well.
Now, return to the body section at Rnd 41 and complete the head.
FLIPPERS – make 2
NOTES:
- The flippers are worked in continuous rounds – do not join after each round
- Do not stuff the flippers
Rnd 1: st 6 sc in a magic circle [6]
Rnd 2: sc in each st around [6]
Rnd 3: (sc 2, inc) x2 [8]
Rnd 4: (sc 3, inc) x2 [10]
Rnd 5: inc in next st, sc in next 8 st, inc in next st [12]
Rnd 6: inc in next st, sc in next 10 st, inc in next st [14]
Rnd 7: inc in next st, sc in next 12 st, inc in next st [16]
Rnd 8: sc in each st around [16]
Rnd 9: inc in next st, sc in next 14 st, inc in next st [18]
Rnd 10: sc in each st around [18]
Rnd 11: inc in next st, sc in next 7 st, dec in next st, sc in next 7 st, inc in next st [19]
Rnd 12: sc in each st around [19]
Rnd 13: inc in next st, sc in next 8 st, dec in next st, sc in next 7 st, inc in next st [20]
Rnd 14: sc in each st around [20]
Rnd 15-21: inc in next st, sc in next 7 st, dec in next 2 st, sc in next 7 st, inc in next st [20]
Rnd 22: sc in next 8 st, dec in next 2 st, sc in next 8 st [18]
Rnd 23: sc in next 7 st, dec in next 2 st, sc in next 7 st [16]
Rnd 24: sc in next 6 st, dec in next 2 st, sc in next 6 st [14]
Snip, leaving a tail for closing and sewing on. Flatten the circle and, using the yarn tail and a tapestry needle, weave the yarn through both loops of both sides, back and forth, to close the open end.
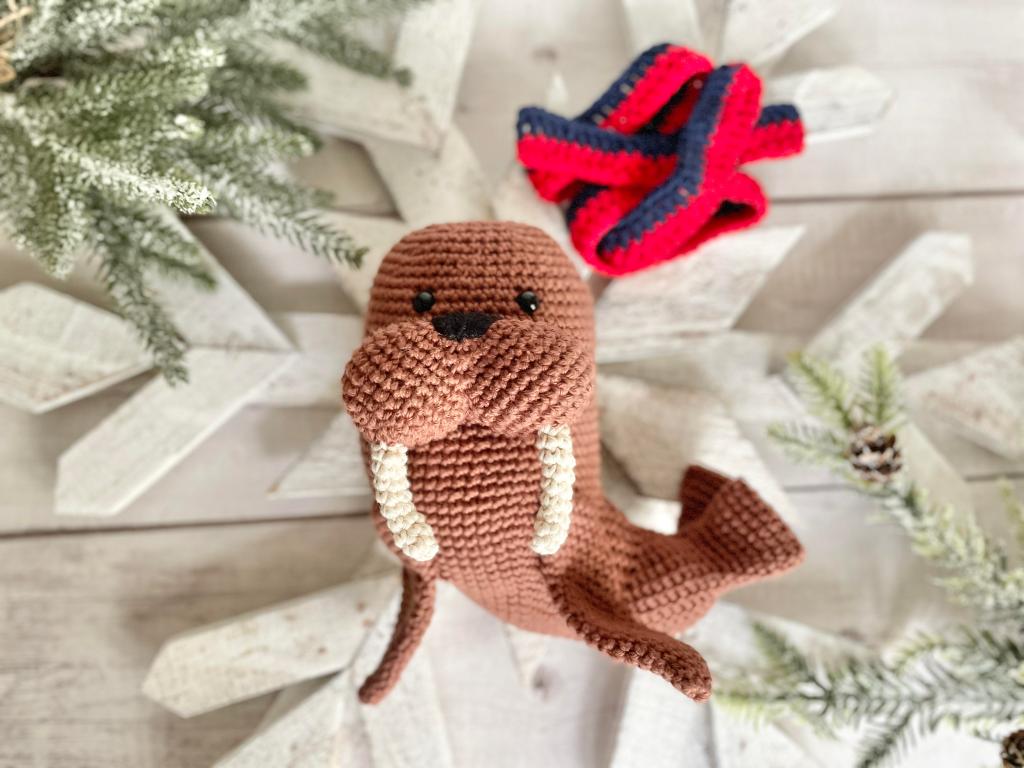
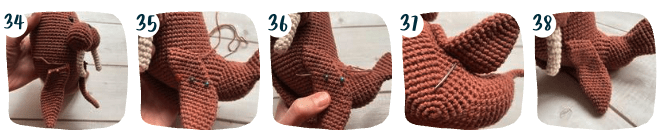
Pin and sew the flippers to the body, angled downwards and backwards, over Rnds 18-20, spaced by 13 stitches across the front of the belly. PH 34-38.
Additionally, secure the top 6 rows of the flippers to the body to be sure they will lay flat against the body at the top and then fold and flare out towards the bottom. You can do this by using the yarn tail you sew the flippers onto the body with and continue bringing it back and for through the body and flipper several times to secure on the flipper. Also, I cover this in detail in the video tutorial!
SCARF:
NOTES:
- The scarf is worked with two rows of dc – two colors
- The ch 2 at the end of row 1 does NOT count as a stitch
Start with red yarn (or choice color)
Row 1: fdc 85, ch 2, turn [85]
Switch to blue yarn (or choice color)
Row 2: dc across [85]
Fasten off and weave in end.
Wrap the scarf around the walrus? neck and admire your masterpiece!

WALRUS CROCHET PATTERN VIDEO TUTORIAL:
You did it! Well done!
I would love to see your version of Yura the Walrus. Please post pictures on instagram and tag me @offthebeatenhook and use #offthebeatenhook. Cheers!
PIN THIS WALRUS CROCHET PATTERN FOR LATER!

Leave a Reply