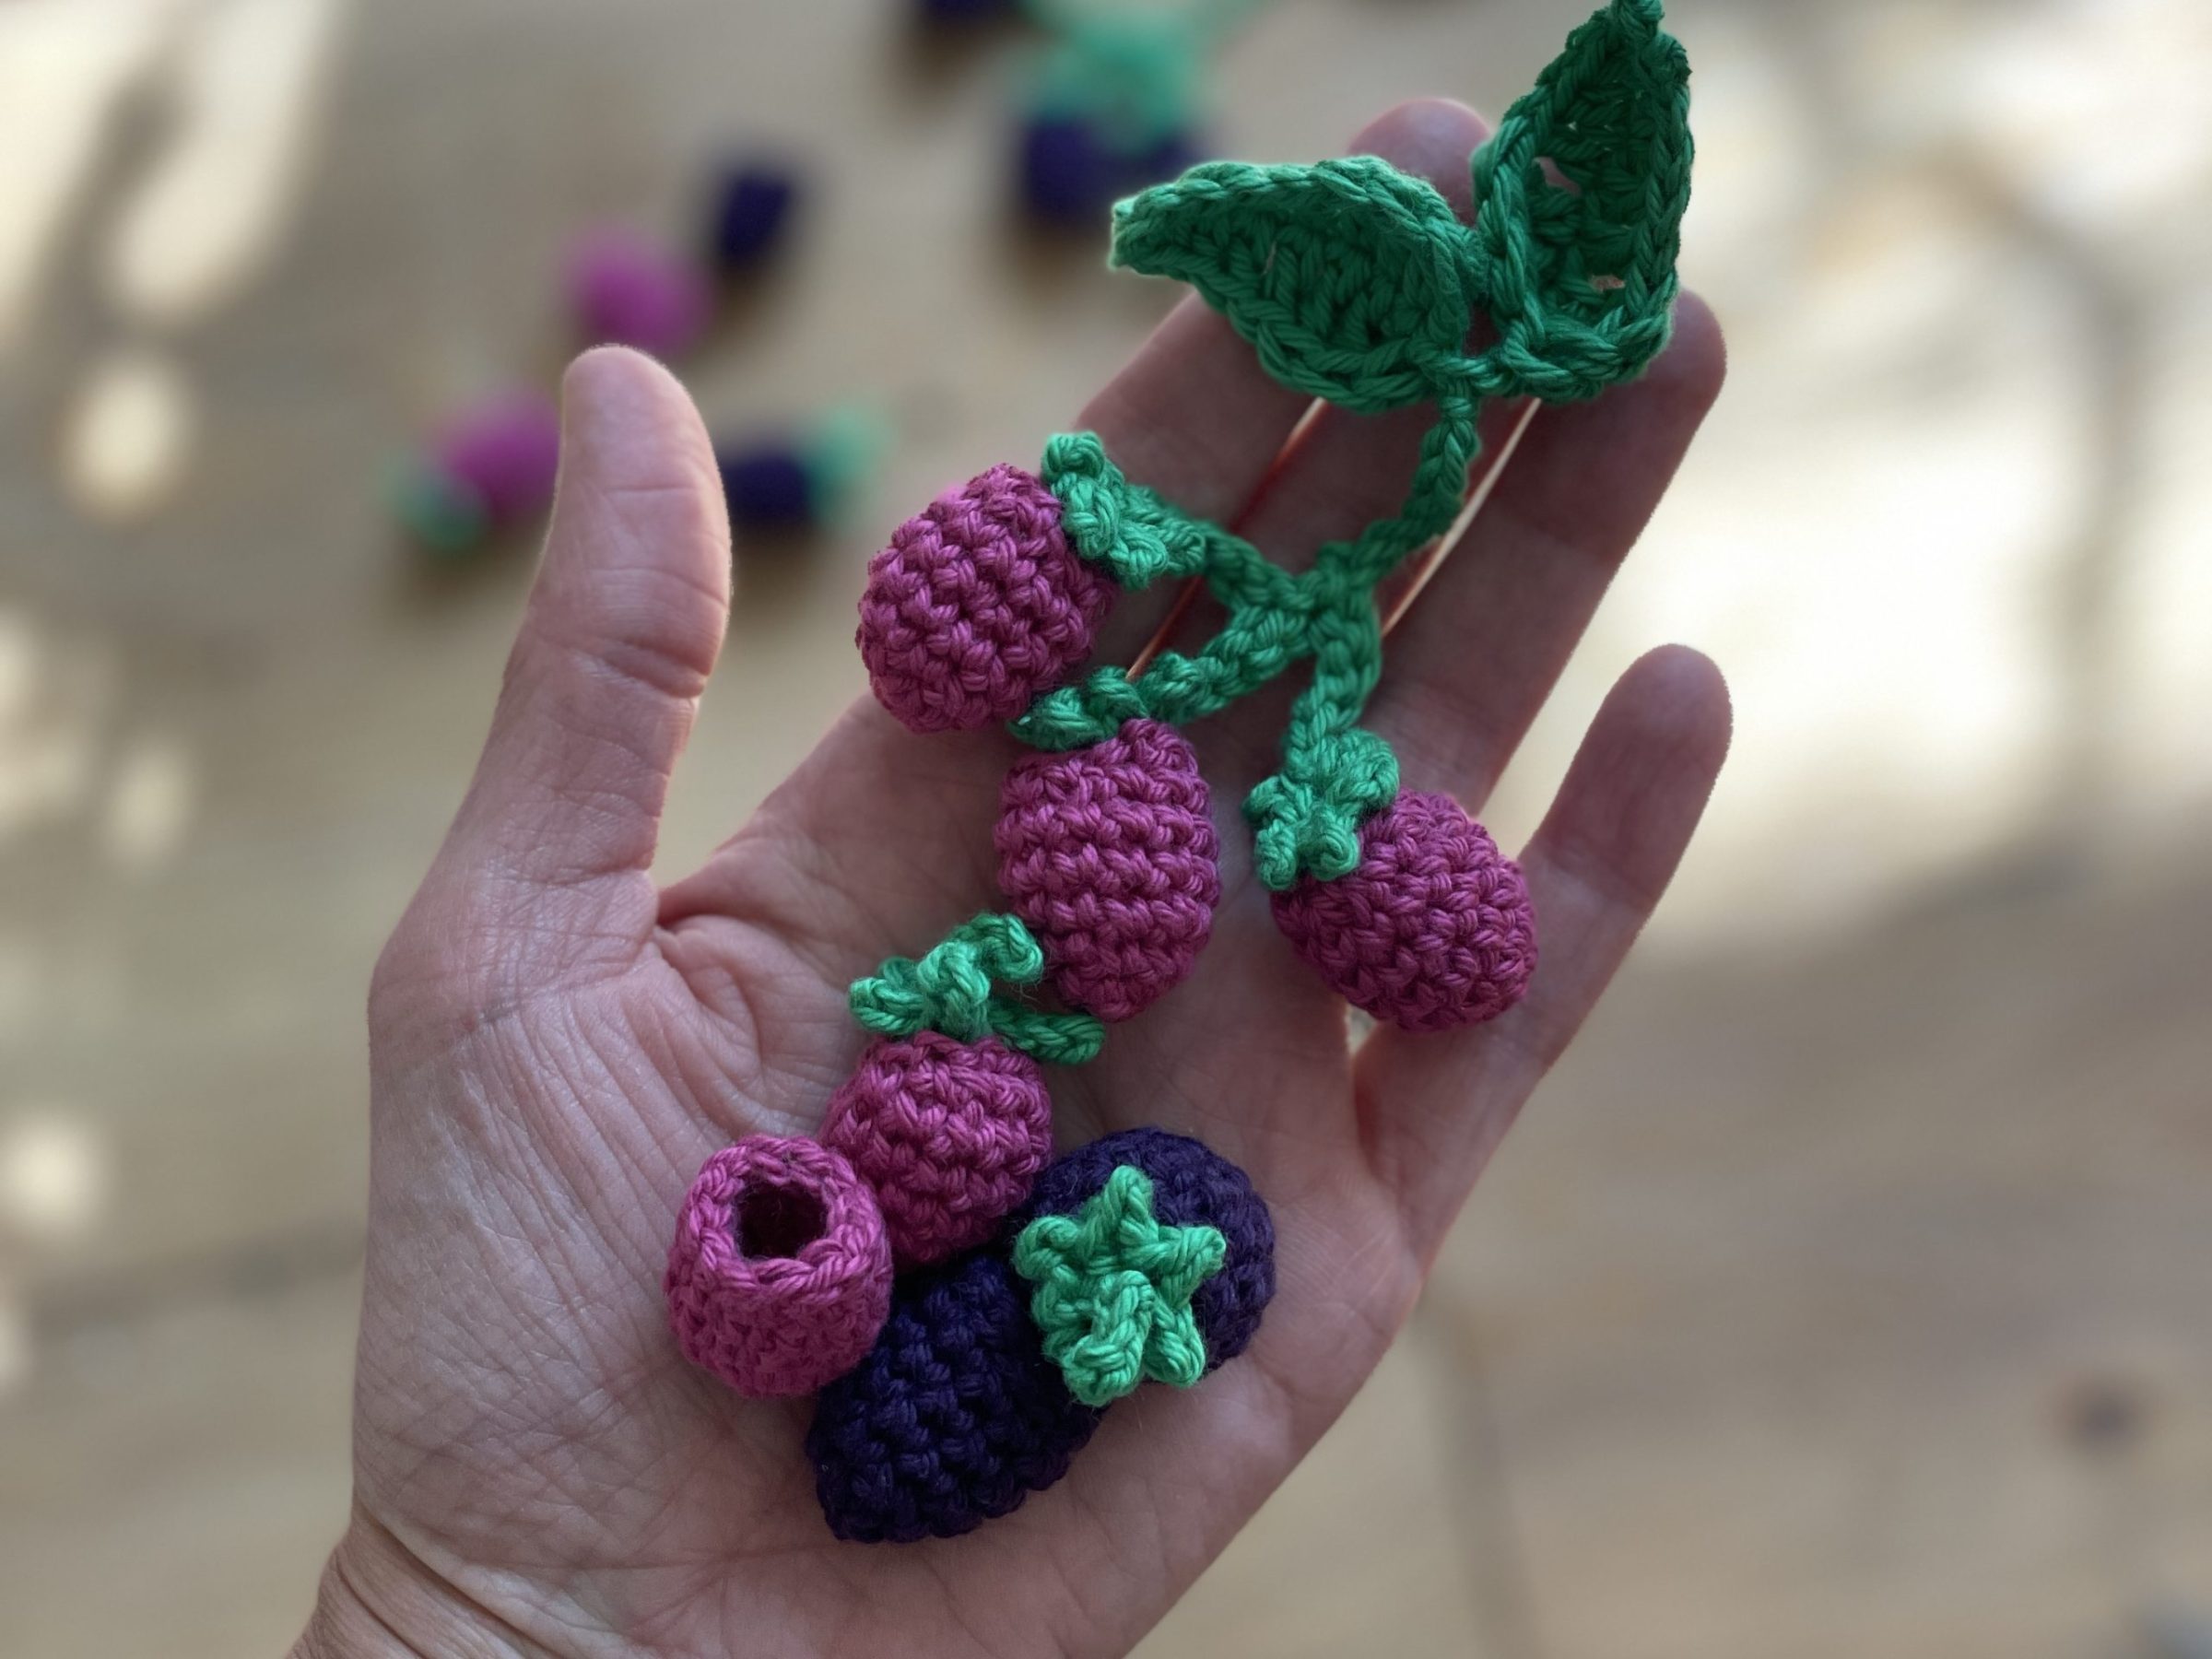
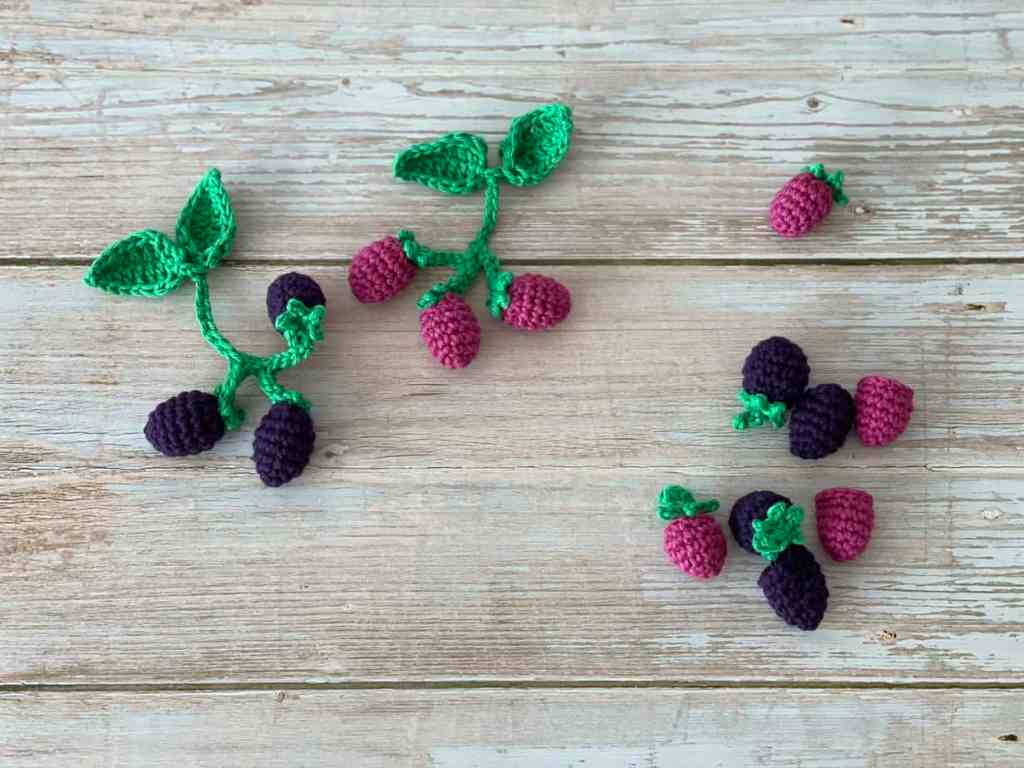
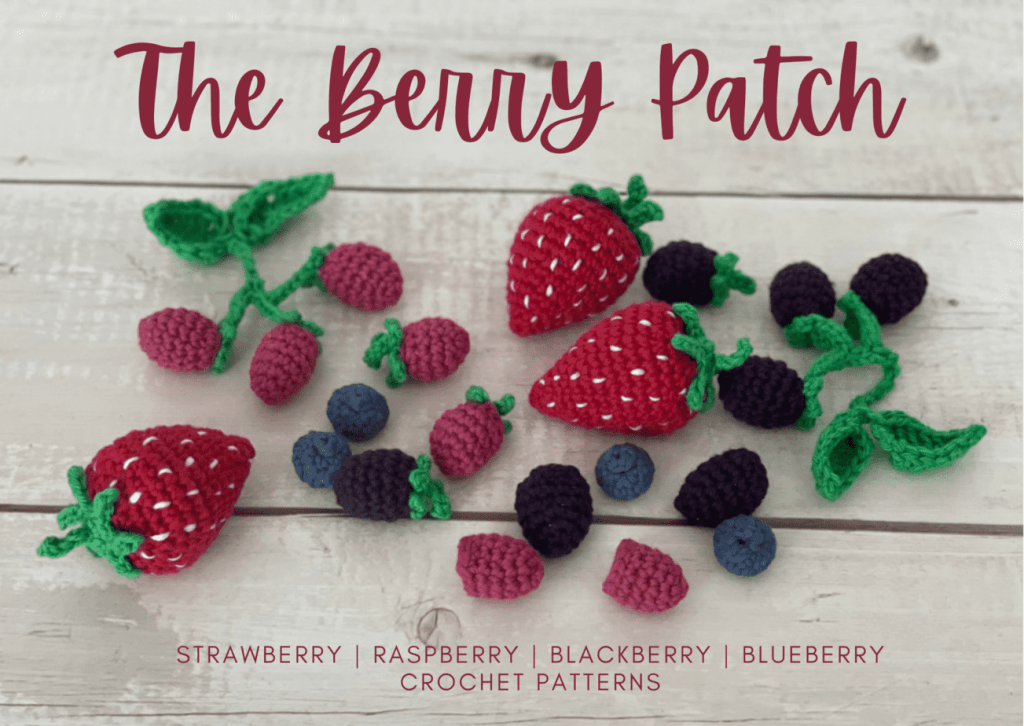
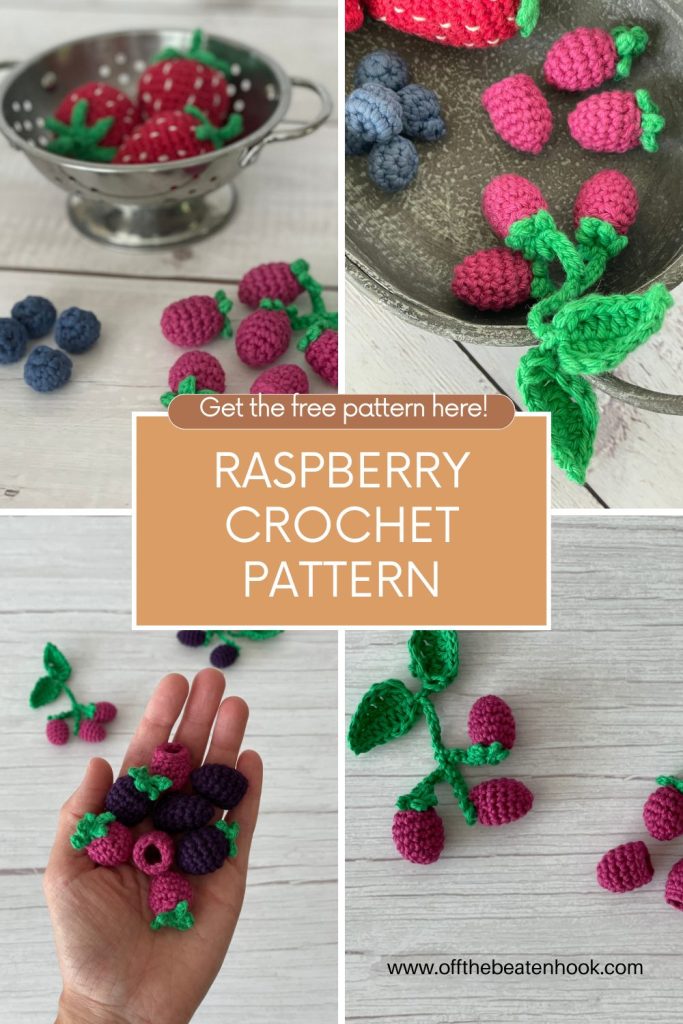
If you’re craving a sweet and simple project, this crochet raspberry pattern is the perfect pick! Whether you’re adding a fruity touch to your amigurumi collection, creating play food for little ones, or just love charming, quick makes — this pattern will have you hooked in no time. This crochet raspberry pattern includes the methods for crocheting these little berries 3 different ways: in clusters of 3 berries with the stem, an individual berry with the stem, and the berry without the stem (as if picked straight off the bush).
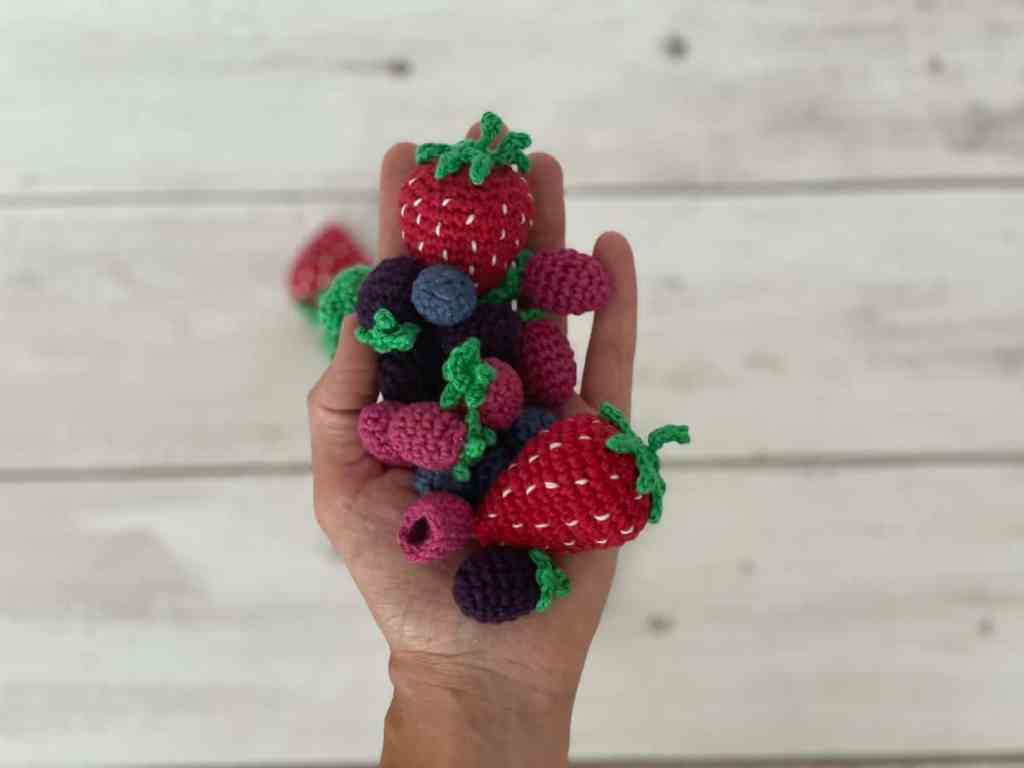
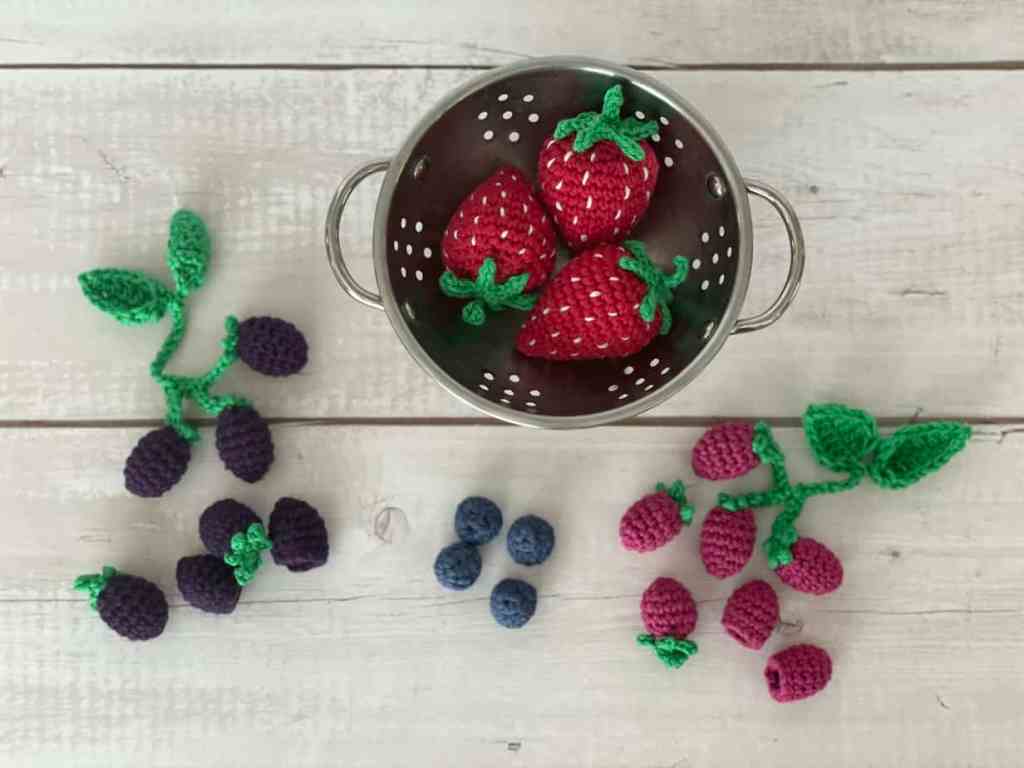
This berry wants a buddy! I designed this raspberry crochet pattern to be a part of the Berry Patch Bundle which also includes strawberries, blackberries and blueberries! You can snag the ad-free PDF of all 4 berries in one bundle from my shop here.
Jump into the crochet raspberry pattern now, or pin it for later here!

This little crochet raspberry works up quickly with just a small amount of yarn, making it a great stash-buster. The pattern includes step-by-step instructions and helpful tips to ensure your strawberry looks plump, adorable, and full of personality.
You can use these crochet raspberries as keychains, market bag charms, or even string them together for a summer garland. However you use them, they’re sure to add a burst of handmade joy to your day!
Ready to start stitching? Scroll down for the free crochet raspberry pattern and get your hooks ready for a little fruity fun.
This crochet pattern is reader supported by ads on my blog. If you’d rather print the pattern for some cozy couch crocheting, you can find the ad-free, printable PDF in my shop here.

Policies & Disclaimers:
This crochet pattern is for PERSONAL USE ONLY. This pattern or parts of it may not be reproduced, resold, distributed, published, altered, translated, posted or shared without authorization. You can sell your finished items provided that you credit Off the Beaten Hook as the designer using this verbiage, “This pattern was designed by Lindsey Roe and Off the Beaten Hook.” Thank you for your respectfulness!
This post contains affiliate links for materials I use and love. If you purchase something using one of these links I may earn a small commission which in no way affects the cost to you. These partnerships help me support my small business which allows me to provide you with free crochet patterns. Thank you from the bottom of my heart for your support!

🌿 Eco-Friendly Crafting
What makes this crochet pattern eco-friendly and sustainable?
THE YARN: I use only sustainable and eco-friendly yarn that has been ethically grown/raised and processed, putting the people and the planet first. This is why I chose 100% natural yarn for this pattern.
THE STUFFING: Little projects like this are perfect for stuffing with all those yarn ends and scraps you’ve been keeping! Or, you can use fiber strips from old napkins and rags you’re about to throw out. Alternatively, try using recycled polyester or recycled cotton!
HANDMADE FOR LONGEVITY: Creating your own raspberries promotes mindful consumption. This durable, handmade squishy berry reduces the need for mass-produced alternatives.
THE SLOW YARN MOVEMENT: I’m participating in the Slow Yarn Movement. There’s far too much to talk about here, but please take a few minutes to learn about what this means by reading the article I wrote about the Slow Yarn Movement as part of my 6-part Sustainable Crochet Series.
If you’re interested in learning more about sustainable crochet you can read all about it in the 6-part series I wrote covering everything about Sustainable Crochet and how to implement it into your own crafting starting today!

Crochet Raspberry Pattern Guide:
Size & Gauge:
Size:
Drupelet without stem: 1″ x 3/4″
Drupelet with stem: 1 1/2″ x 3/4″
Berry cluster with stem & leaves: 3″ x 4 1/2″
Gauge: N/A
Materials you will need:
DK/light worsted weight yarn in 100% cotton or organic cotton is the way to go with these little toys. Cotton is hypoallergenic and washable! Also, the stitch definition is unbeatable.
Stylecraft Naturals Organic Cotton or Paintbox Yarns DK Cotton
3.00 mm crochet hook (any size between 2.50 mm and 3.75 mm should work fine too if that’s what you have!)
Tapestry Needle (bent tips make all the difference!)
Scissors
Stitch Markers
Stuffing (here’s a great chance to use all those tiny yarn snippets you’ve been saving for stuffing!)
Abbreviations used in the crochet raspberry pattern:
This pattern is written in English, using US terms. If needed, you can find a handy term conversion chart right here in my Resource Library.
ch – chain
st – stitch
hk – hook
mc – magic circle/magic ring
sl st – slip stitch
sc – single crochet
hdc – half double crochet
dc – double crochet
tr – treble crochet
inc – increase
dec – decrease
rep – repeat
(…) x – repeat instructions indicated number of times
[…] – number of stitches in row/round
PH – photo reference number
The Crochet Raspberry Pattern:
Drupelets Only
The berry is worked in continuous rounds – do not join after each round
Rnd 1: st 4 sc in a magic circle [4]
Rnd 2: inc in each st around [8]
Rnd 3: (sc in next st, inc in next st) x4 [12]
Rnd 4-6: sc in each st around [12]
Rnd 7: sl st in each st around [12]
Invisible fasten: Do not fasten off yet. Snip yarn, leaving 4 inches. Remove hook and insert it inside to outside underneath the first slip stitch of rnd 7. Pull the loop to the inside of the berry and fasten off by pulling the yarn end through the loop on the inside. Weave in end.

Drupelets With Stem
The leaves, stem and berry are all worked separately and then stitched together.
BERRY:
Rnd 1: st 4 in a magic circle [4]
Rnd 2: inc in each st around [8]
Rnd 3: (sc in next st, inc in next st) x4 [12]
Rnd 4-6: sc in each st around [12]
Rnd 7: (sc in next st, dec in next st) x4 [8]
Sl st to next st. Snip yarn, leaving a 5 inch tail for sewing on the stem. Stuff berry.
STEM:
Use green yarn. Leave a 4 inch tail before your slip knot.
Rnd 1: ch 3, sl st in 2nd ch from hook, sl st in 3rd ch from hook
Fasten off and cut yarn, leaving a 4 inch tail.
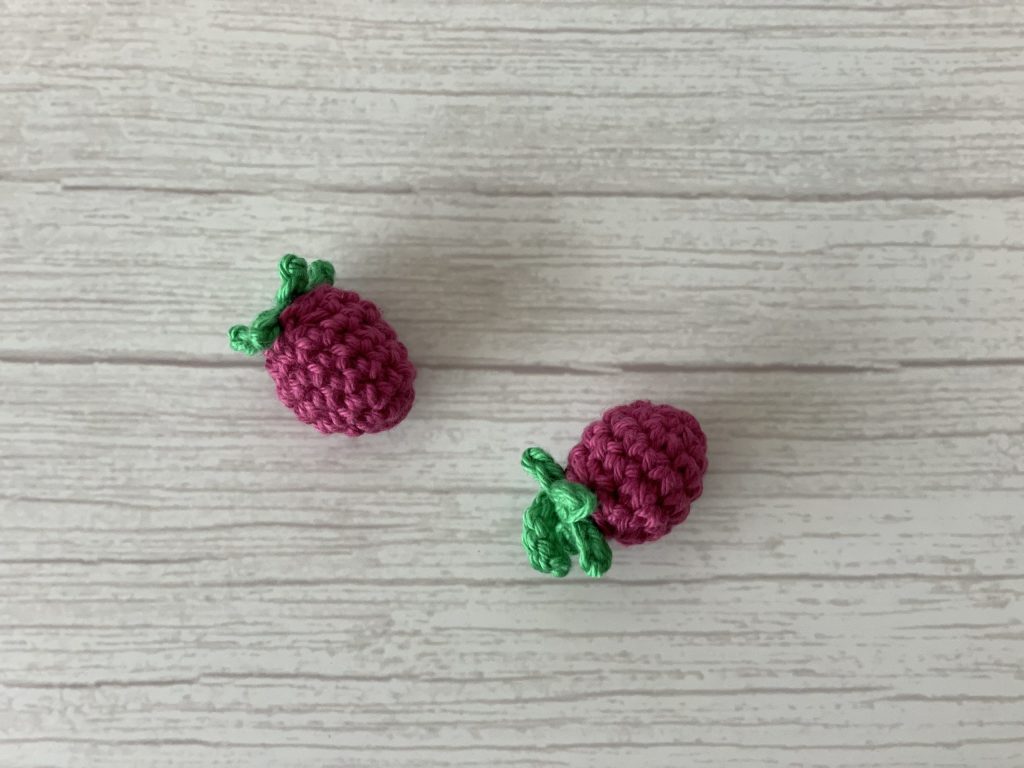
LEAVES:
Rnd 1: (ch 2, sl st in the 1st ch from hook, sl st in 2nd ch from hook) x5
Close the circle of leaves by placing a sl st under the first chain of the first leaf.
ASSEMBLY: Insert your hook bottom to top, through the middle of the circle of leaves and pull through the yarn ends of the stem. Gather all loose ends and make a knot with all of them, tightly against the underside and snip to about 1/2″. Using a tapestry needle, use the yarn tail of the berry to sew the stem onto the top of the berry. Sew through one loop under the leaf, and then only through the back loop of round 7 on the berry – all the way around. Pull yarn to the inside and snip.
Clusters of 3 Berries with Stem:
NOTES:
- Make 3 berries per the “berry with stem” above – but only the berries, not the stem or leaves. Lightly stuff.
LEAVES:
Leaf #1:
Begin by making making a chain of 9
Row 1: tr in the 2nd back bump from the hk, tr in the next 2 ch, dc in the next 2 ch, hdc in the next ch, sc in the next ch, sl st in the last ch from the hk. Continuing on the other side of the ch, sl st in the first ch, sc in the next ch, hdc in the next ch, dc in the next 2 ch, tr in the next 3 ch, sl st in the turning chain of your first tr from row 1. Ch 11.
Leaf #2: (leaf 2 is similar to leaf 1 but in reverse order)
Row 1: Sl st in the first ch from the hook, sc in the next ch, hdc in the next ch, dc in the next 2 ch, tr in the next 3 ch, sl st in the next ch. Continuing on the other side of the ch, tr in the next 3 ch, dc in the next 2 ch, hdc in the next ch, sc in the next ch, sl st in the next ch.
Fasten off and weave in ends.

STEMS:
Slip knot onto your hk and rejoin the yarn by, inserting the hk into the stitch between the leaves and completing a single crochet
Chain 14
Stem #1:
Row 1: (sl st in the first bump from the hk, and the second bump, ch 2) x5
You will have 5 little leaves. Close the circle of leaves by making a sl st through two loops of the next available ch, directly before the first little leaf. Sl st in next 5 chains, ch 7.
Stem #2
Row 1: repeat leaves as with row 1 of stem #1, close the circle with a sl st. Sl st in the next 4 chains, ch 7.
Stem #3
Row 1: repeat leaves as with row 1 of stem #1, close the circle with a sl st. Sl st in the next 8 chains.
Fasten off. Weave in all ends.
Attach the berries: using a tapestry needle and the yarn tail of the berry, sew the berries onto the 3 leaves. Sew through one loop under the leaf, and then only through the back loop of round 7 on the berry – all the way around. Pull yarn to the inside and snip.

Show Off Your Work! ✨
I can’t wait to see your beautiful raspberries! Be sure to tag me on social media @offthebeatenhook or use the hashtag #offthebeatenhook so I can admire your makes. ❤️
🔗 Other Berry Patterns To Check Out:
Pin this Raspberry Crochet Pattern Here:

Leave a Reply