
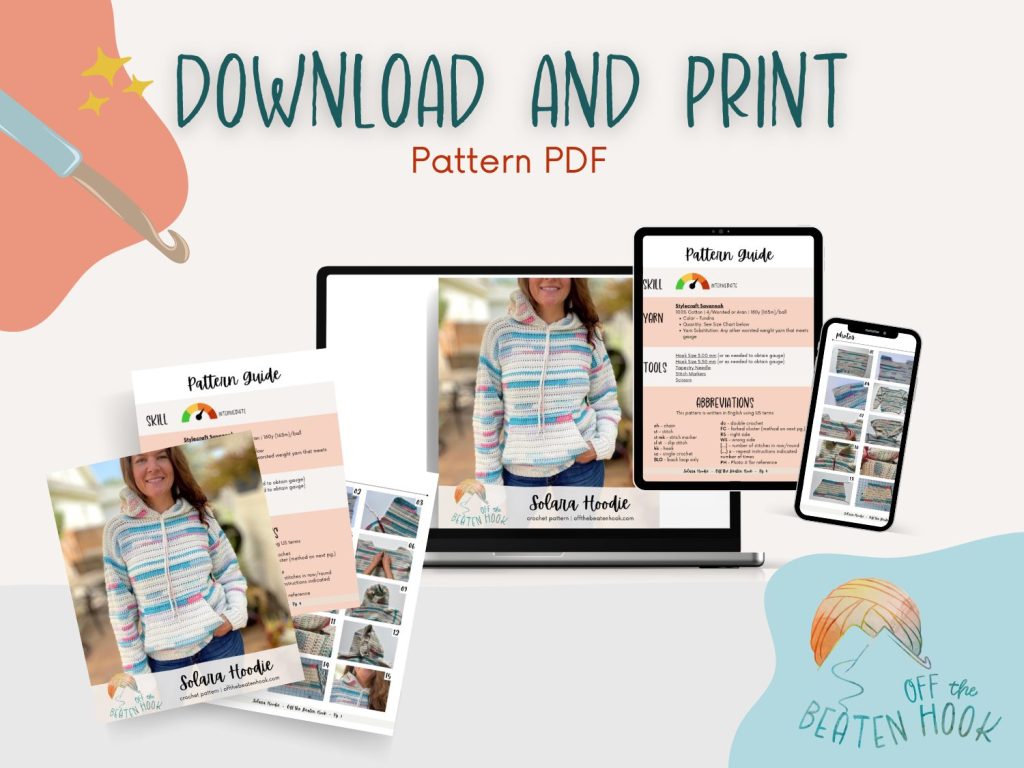
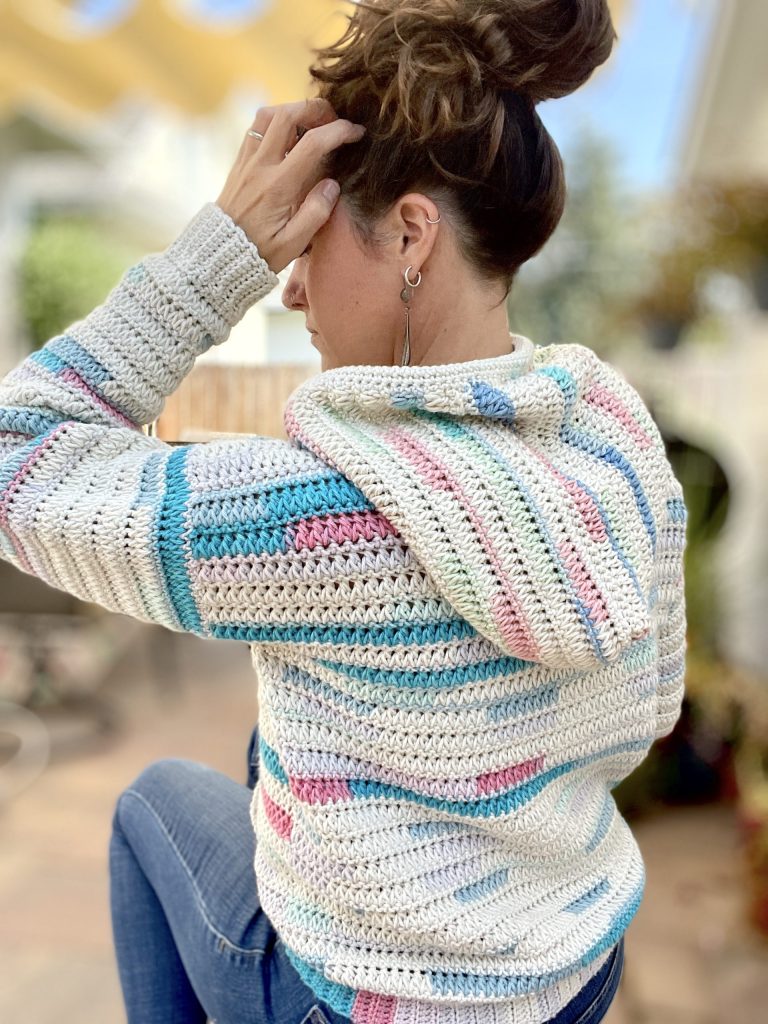
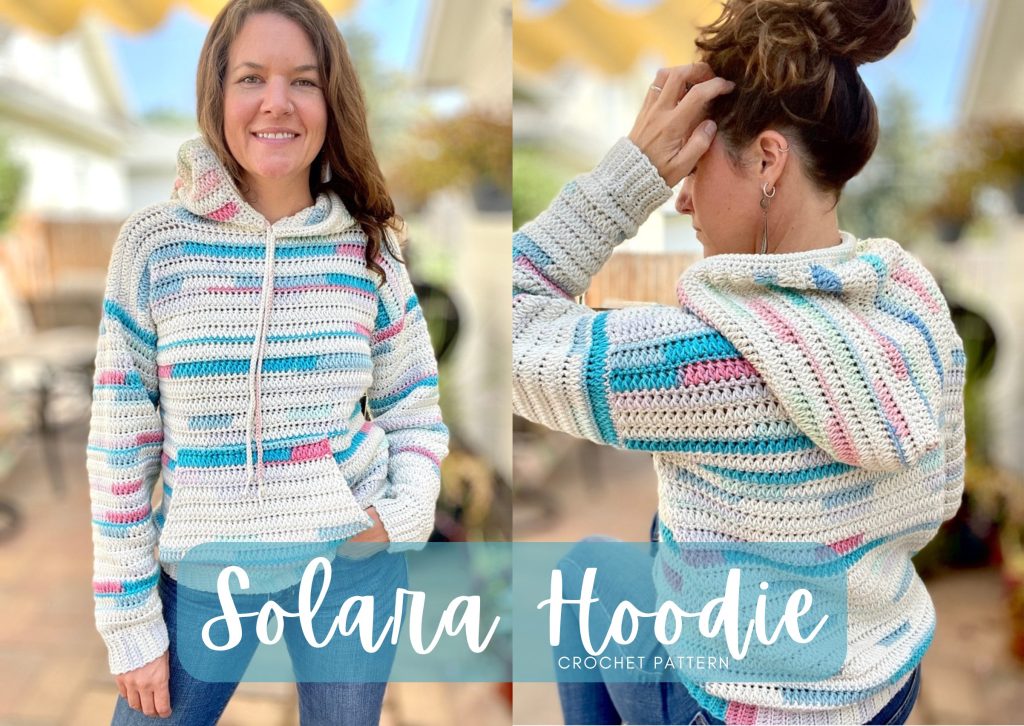
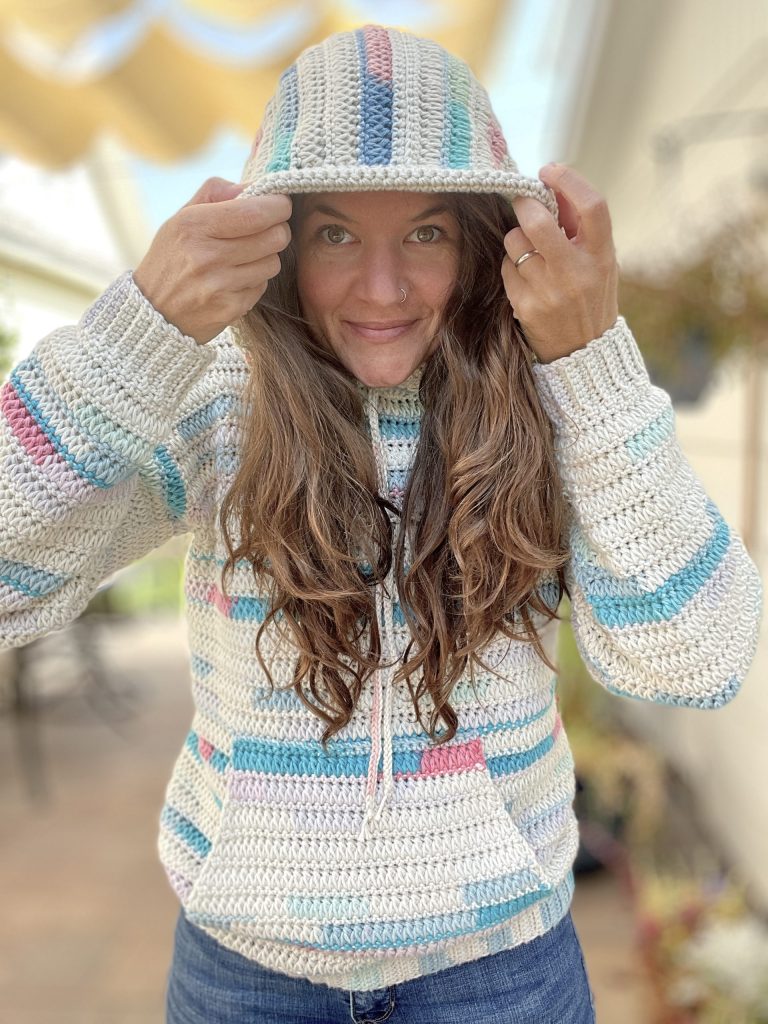
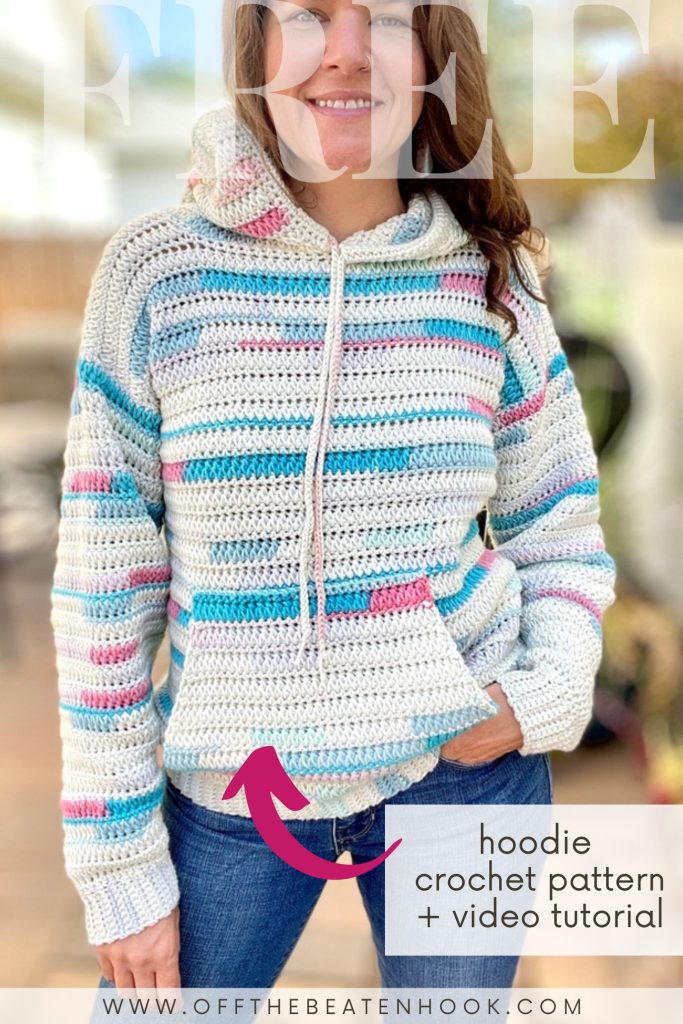
If you’ve been searching for the perfect cozy layering piece, meet your new favorite make — the Solara Hoodie, a free crochet hoodie pattern that’s as practical as it is stylish.
This design was inspired by the kind of days when you want to feel wrapped in comfort — whether you’re lounging at home, taking a cool morning walk, or heading out for coffee. The Solara Hoodie delivers warmth, texture, and that handmade coziness only crochet can offer.
Jump into the crochet hoodie pattern now, or pin it for later here!

About the Design
This crochet hoodie pattern is worked bottom up in a tube, using a 2-row repeat of turning rounds. This method creates a body with clean lines and a relaxed fit. The textured forked cluster stitch pattern forms a thick, cozy fabric that feels soft yet structured — just right for fall through spring wear.
Why You’ll Love the Solara Crochet Hoodie Pattern
- Timeless Design: The textured stitch used in this pattern creates a unique, thick fabric – making the perfect layering piece for cooler seasons.
- Easy to Style: Whether you’re lounging at home or needing a stylish layering piece for going to work or out to coffee, this versatile hoodie can handle it all.
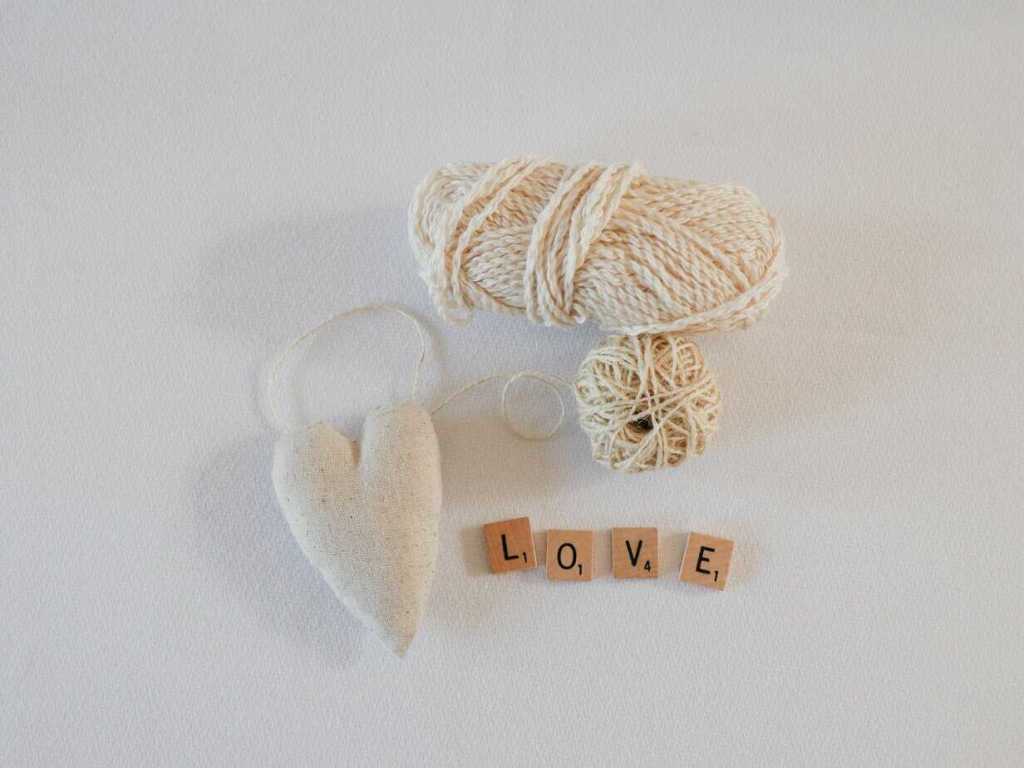
- Gift-Giving: This hoodie sweater makes a great gift. Who doesn’t love a cozy hoodie!? If you’re making this as a gift, don’t forget to attach one of these crochet care tags so it’ll be taken care of properly!
I’ve created a helpful video tutorial for this crochet hoodie pattern as well. You can find that further down in this post or access it straight away on YouTube here.
This crochet pattern is reader supported by ads on my blog. If you’d rather print the pattern for some cozy couch crocheting, you can find the ad-free, printable PDF in my shop here or on Ravelry here.
Policies & Disclaimers:
This crochet hoodie pattern is for PERSONAL USE ONLY. This pattern or parts of it may not be reproduced, resold, distributed, published, altered, translated, posted or shared without authorization. You can sell your finished items provided that you credit Off the Beaten Hook as the designer using this verbiage, “This pattern was designed by Lindsey Roe and Off the Beaten Hook.” Thank you for your respectfulness!
This post contains affiliate links for materials I use and love. If you purchase something using one of these links I may earn a small commission which in no way affects the cost to you. These partnerships help me support my small business which allows me to provide you with free crochet patterns. Thank you from the bottom of my heart for your support!
🌿 Eco-Friendly Crafting
What makes this crochet pattern eco-friendly and sustainable?
THE YARN: I use only sustainable and eco-friendly yarn that has been ethically grown/raised and processed, putting the people and the planet first. This is why I chose 100% natural yarn for this pattern.
HANDMADE FOR LONGEVITY: Creating your own clothes promotes mindful consumption and slow fashion. This durable, handmade crochet hoodie pattern reduces the need for mass-produced alternatives.
THE SLOW YARN MOVEMENT: I’m participating in the Slow Yarn Movement. There’s far too much to talk about here, but please take a few minutes to learn about what this means by reading the article I wrote about the Slow Yarn Movement as part of my 6-part Sustainable Crochet Series.
If you’re interested in learning more about sustainable crochet you can read all about it in the 6-part series I wrote covering everything about Sustainable Crochet and how to implement it into your own crafting starting today!
Solara Crochet Hoodie Pattern Guide:
Size & Gauge:
Size Chart: This pattern is written in size XS with sizes (S, M, L, XL)(2XL, 3XL, 4XL, 5XL) following in parenthesis. I am pictured wearing size XS – I’m 5’4″ with a 32“ bust.
| Size | To Fit Bust Size | Bust | Length | Sleeve Length | # Yards Needed |
| XS | 28″-30″ | 38″ | 22″ | 18.5″ | 1800 |
| S | 32″-34″ | 42″ | 23″ | 18.5″ | 1890 |
| M | 36″-38″ | 46″ | 23″ | 18.5″ | 1980 |
| L | 40″-42″ | 50″ | 25″ | 18.5″ | 2070 |
| XL | 44″-46″ | 54″ | 25″ | 18.5″ | 2160 |
| 2XL | 48″-50″ | 58″ | 25″ | 18.5″ | 2250 |
| 3XL | 52″-54″ | 62″ | 26″ | 18.5″ | 2340 |
| 4XL | 56″-58″ | 66″ | 27″ | 18.5″ | 2430 |
| 5XL | 60″-62″ | 70″ | 27″ | 18.5″ | 2520 |
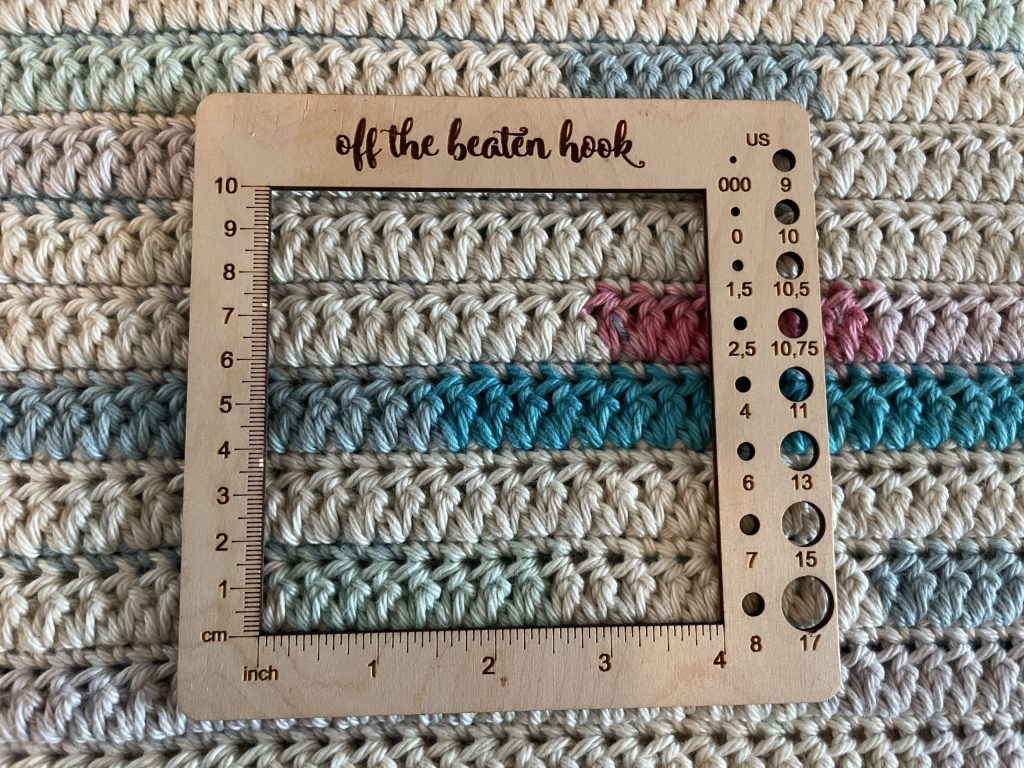
Gauge: 4″ x 4″ of stitch pattern: 13 stitches x 10 rows. Stitch pattern for gauge = 2 row repeat, alternating sc rows and forked cluster rows using the larger sized hook.
Materials you will need:
Yarn:
I originally designed this hoodie using Stylecraft Savannah which has since been discontinued. Here is a great substitute (or any other yarn that meets gauge!):
Cascade Yarns Nifty Cotton or Nifty Cotton Splash
100% Cotton | 4/Worsted | 185y (169m)/ball
- Color – Whatever you love!
- Quantity: See Size Chart Above
Other tools and materials needed:
- Crochet Hook Size: 5.00 mm (or as needed to obtain gauge)
- Crochet Hook Size: 5.50 mm (or as needed to obtain gauge)
- Tapestry Needle (bent tips make all the difference!)
- Stitch Markers
- Scissors
Abbreviations used in the Solara Crochet Hoodie Pattern:
This crochet hoodie pattern is written in English, using US terms. If needed, you can find a handy term conversion chart right here in my Resource Library.
ch – chain
st – stitch
hk – hook
st mk – stitch marker
sl st – slip stitch
sc – single crochet
dc – double crochet
FC – forked cluster (method below and as demonstrated in the video tutorial)
RS – right side
WS – wrong side
BLO – back loop only
rep – repeat
(…) x – repeat instructions indicated number of times
[…] – number of stitches in row/round
PH – photo reference number
The Solara Crochet Hoodie Pattern:
How to make a Forked Cluster (FC):
The forked cluster is a stitch that is a variation on crocheting 2 double crochets together. The 2 double crochets that make up this stitch, we refer to as “legs”. Here is how to make the stitch:
- Yarn over, insert hook into the same st as the 2nd leg of the last FC
- Yarn over and pull up a loop
- Yarn over, insert hook into the next st,
- Yarn over and pull up a loop (5 loops on the hook)
- Yarn over, and pull through 3 loops on the hook
- Yarn over and pull through final 3 loops on the hook
Ribbed Hem & Tube Body
NOTES:
- The hem and body of the sweater are worked in a “tube” from the bottom up.
- The ch 1 (on sc rows) or ch 2 loosely (on FC rows) at the end of each row does NOT count as a stitch
- Always make your first stitch of the turning rows of the body in the same stitch as where you made your sl st to join the rnd – for both the FC rows and the sc rows. For the FC rows, the first leg of your first FC will be made in the same place where you made your sl st join AND the last leg of your last FC of the row will be placed in that same st as well. This will ensure your st counts remain correct.
Begin with the smaller hook.
RIBBING: Begin by chaining 9
Row 1: sc in 2nd ch from hk and each ch thereafter, ch 1, turn [8]
Row 2-124(136, 152, 166, 180)(194, 208, 224, 238): sc through both loops of the first st, BLO sc in the next 6 st, sc through both loops of the last st, ch 1 turn [8]
Join into a circle. Being sure there are no twists in the hem, hold the last row and the first row together. Working through both layers, sl st through each st across [8], ch 1. The side you made your slip stitches on will be the wrong side (WS) of the sweater.
Switch to the larger hook size. With the WS facing out, begin straight away with the first row of the body going along the top edge of the hem…
We’ll start the row count over now as we begin the body:
Row 1 (WS): sc evenly across the top of the hem, placing one sc at the end of each of the rows of ribbing, sl st to first st to join the rnd, ch 2 loosely (doesn’t not count as a st), turn [124](136, 152, 166, 180)(194, 208, 224, 238)
Row 2 (RS): FC over the first 2 sc, making the first leg of the FC in the same st where you just sl st to join the previous row, FC across placing last leg of your last FC in the same st as the sl st as well, sl st to next st to join the rnd, ch 1, turn [124](136, 152, 166, 180)(194, 208, 224, 238)
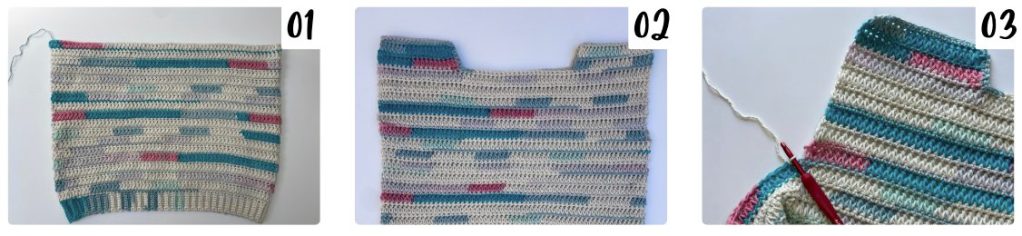
Row 3-34(36, 36, 42, 42)(42, 42, 46, 46): repeat rows 1 & 2, alternating between sc and FC rows, and ending with a row of FC | PH 01 [124](136, 152, 166, 180)(194, 208, 224, 238)
Upper Chest & Upper Back
We will split the tube and begin working just one side (half of the number of stitches in the tube rounds) in turning rows to extend the sweater up to the shoulders. We will do this on both sides – front and back – and then seam across the shoulders which will leave a neck opening and arm openings. Your sc rows will always be worked on the WS and your FC rows will always be worked on the RS.
Pick up where you left off with your working yarn after the last round of the tube. We’re going to restart the row count again as we start this new section…
Row 1 (WS): sc in next 62(68, 76, 83, 90)(97, 104, 112, 119) sts, ch 2 loosely (doesn’t count as a st), turn
Row 2 (RS): FC across, dc in same st, ch 1, turn [62](68, 76, 83, 90)(97, 104, 112, 119)
Row 3: sc across, ch 2, turn [62](68, 76, 83, 90)(97, 104, 112, 119)
Row 4-12(12, 12, 14, 14)(14, 16, 16, 16): repeat Rows 2 & 3, ending with a row of FC, ch 1, turn [62](68, 76, 83, 90)(97, 104, 112, 119)
We will now add some shorter rows on each side of the shoulder to create the neckline.
Row 13(13, 13, 15, 15)(15, 17, 17, 17)(WS): sc in next 18(21, 25, 28, 32)(35, 39, 42, 46) st, ch 2, turn
Row 14(14, 14, 16, 16)(16, 18, 18, 18)(RS): FC across, dc in same st, ch 1, turn [18](21, 25, 28, 32)(35, 39, 42, 46)
Row 15(15, 15, 17, 17)(17, 19, 19, 19): sc across, ch 2, turn [18](21, 25, 28, 32)(35, 39, 42, 46)
Row 16(16, 16, 18, 18)(18, 20, 20, 20): FC across, dc in same st, ch 1, turn [18](21, 25, 28, 32)(35, 39, 42, 46)
Row 17(17, 17, 19, 19)(19, 21, 21, 21): sc across. Next, working your way down the edge of the neckline extension you just created, sc your way down to the front of the neckline, making 1 sc in the end of each of the sc rows and 2 sc in the end of each of the dc rows, sc across to end of row, ch 2, turn
Row 18(18, 18, 20, 20)(20, 22, 22, 22): FC over next 18(21, 25, 28, 32)(35, 39, 42, 46) st, dc in same st, ch 1, turn [18](21, 25, 28, 32)(35, 39, 42, 46)
Row 19(19, 19, 21, 21)(21, 23, 23, 23): sc across, ch 2, turn [18](21, 25, 28, 32)(35, 39, 42, 46)
Row 20(20, 20 22, 22)(22, 24, 24, 24): FC across, dc in same st, ch 1, turn [18](21, 25, 28, 32)(35, 39, 42, 46)
Row 21(21, 21, 23, 23)(23, 25, 25, 25): sc across, fasten off [18](21, 25, 28, 32)(35, 39, 42, 46) | PH 02
With WS facing out, slip knot onto your hook and rejoin in first st of unworked section on the opposite side of the tube (PH 03), so as to repeat the above method to create another upper flap that will be stitched across the shoulders, completing the torso section of the sweater. Please note that only one edge of the neckline will end up having sc going down it (as completed in Row 17) – that is correct! You are welcome to create a short sc border going down the other side, after you complete Row 21, but it is not necessary.
Seam across shoulders: With RS facing each other (wrong side out), whip stitch or mattress stitch across both of the shoulders. Fasten off and weave in ends. PH 04


Sleeves
NOTES:
- The sleeves use the same 2-row repeat that the tube section of the sweater uses – joined rounds, alternating between sc and FC rows.
- The sleeves are the same length for all sizes. To adjust the length, simply add or remove rows. If you are going to do this, be sure to add or remove rows during the “Rnd 4-20” section, before the decreases begin to taper the sleeves.
- In order to keep your seam straight, always place your first st of the rnd in the same st as the sl st you made to join the previous rnd. Specifically, on sc decrease rounds, place your first sc in the same st as the sl st and decrease over the final 2 st of the rnd.
Slip knot onto your hook and with wrong side facing out, rejoin yarn at the bottom/armpit of the arm opening. Sl st to rejoin yarn and ch 1.
Rnd 1 (WS): sc around, placing one sc at the end of each of the sc rows and 2 sc’s at the end of each of the FC rows, sl st to first st to join, ch 2 loosely (doesn’t count as a st), turn
Rnd 2 (RS): FC over the first 2 sc, making the first leg of the FC in the same st where you just sl st to join the previous rnd, FC across placing last leg of your last FC in the same st as the sl st as well, sl st to next st join the rnd, ch 1, turn
Rnd 3: sc around, sl st to next st join the rnd, ch 2 turn
Rnd 4-20: repeat Rows 2 & 3, ending with a rnd of FC
Rnd 21: sc in each st around until the final 2 st of rnd, dec over the final 2 st, sl st to next st join the rnd, ch 2, turn
Rnd 22: FC around (as in Rnd 2), sl st to next st join the rnd, ch 1, turn
Rnd 23-30: repeat Rows 21 & 22, ending with a rnd of FC
Rnd 31: sc dec over the first 2 st, sc around until the final 2 st of rnd, dec over the final 2 st, sl st to next st join the rnd, ch 2, turn
Rnd 32: FC around (as in Rnd 2), sl st to next st to join the rnd, ch 1, turn
Rnd 33-45: repeat Rnd 31 & 32, with your final rnd being a repeat rnd of 31, sl st to next st join – do not fasten off as you will begin straight away with the cuffs
Sleeve Cuffs
Be sure the right side is facing out before continuing with the cuffs. Switch to the smaller hook size, and begin the cuff by chaining 9
Row 1: sc in 2nd ch from hk and next 7 st, sl st in next 2 st on last rnd of sleeve, ch 1, turn [8]
Row 2: skipping the ch and both sl st’s, BLO sc in next 7 st, sc through both loops of final st, ch 1, turn [8]
Row 3: sc through both loops of the first st, BLO sc in next 7 st, sl st in next 2 st on last rnd of sleeve, ch 1, turn [8]
Row 4+: repeat rows 2 & 3 all the way around cuff
Hold the last row and the first row together (with right sides together). Working through both layers, sl st through each st across Fasten off. Weave in end. PH 05

Hood
NOTES:
- The hood is crocheted directly onto the neck opening using turning rows with our normal 2-row repeat. It is then seamed closed across the top. After that, we come back and add the extension to house the drawstring.
- The hood is the same size for all sizes. If you want the hood smaller (to fit more tightly over your head), feel free to eliminate some rows from the “Row 4-33” section. Alternatively, if you want the hoodie to be bigger, add some rows.
- The ch 1 (on sc rows) or ch 2 loosely (on FC rows) at the end of each row does NOT count as a stitch.
- The hood uses the larger hook
Begin by ensuring the sweater is inside out (wrong side facing out) and choose which side of the sweater you want to be the front at this point. Next, identify the middle 2 stitches on the front of the neckline and stitch mark them (PH 06). I do this by counting evenly inward from the edges of the front of the neckline. Don’t stress if you come up with an uneven number of stitches – you won’t notice one stitch difference when you’re wearing it! The two stitch markers identify which stitch you will begin the first row of the hood in and which stitch you will end, thereby marking the beginning and end of each row of the hood.
Now, slip knot onto your hook and rejoin yarn to the sweater with a sl st at the first stitch marker (based on right hand/left hand crocheting direction) | PH 07
Row 1 (WS): sc in each st around the neckline, making your last sc in the other st mk, ch 2 loosely, turn
Row 2 (RS): FC across, dc in same st, ch 1, turn
Row 3: sc across, ch 2 loosely, turn
Rows 4-33: repeat rows 2 & 3, alternating between sc and FC rows, and ending with a row of sc
Fasten off and snip, leaving a long tail to seam the hood panel into a closed hood – PH 08. Fold the hood in half, ensuring the seam will be going front to back over the top of your head. With the wrong side facing, seam hood closed. Fasten off and weave in end – PH 09.

Drawstring
NOTES:
- I cover the technique for the drawstring, in detail, in the video tutorial.
- The drawstring uses two strands of yarn worked at the same time.
- Use the smaller hook size.
- Slip knot onto your hook with both ends of the two strands of yarn.
- Take one of the yarns into your hand as your working end. The other yarn will dangle forward towards you over the palm of your hand.
- Next, with the strand in your palm (the one dangling forward towards you), yarn over hook from front to back and hold it in in place on the shaft of your hook PHOTO A.
- Next, with the yarn in your working hand, yarn over hook from back to front (just like a normal yarn over) PHOTO B and pull through both loops on the hook PHOTO C.
- Repeat steps 3 & 4 until you reach 52″ long.
- When complete, pull both yarn ends through the final loops and tie off.

Drawstring Housing Extension
NOTES:
- We will now crochet several rows of sc to house the drawstring. Be sure to add the drawstring as you’re sewing it closed!
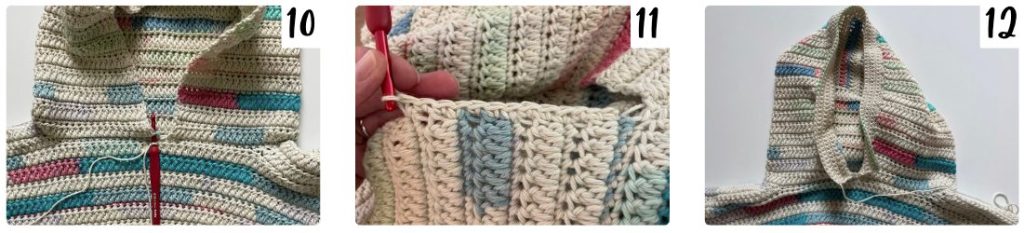
With wrong side facing out, slip knot onto your hook and rejoin at the front bottom opening of the hood and ch 1 – PH 10
Row 1 (WS): sc across the open edge of the hood, placing one sc at the end of each of the sc rows and 2 sc’s at the end of each of the FC rows, sl st to first st to join, ch 1, turn | PH 11
Row 2-6 (RS): sc across, ch 1, turn | PH 12
You do not need to ch 1 after Row 6. Fasten off, leaving a really long tail to use to sew the extension closed over the drawstring.
With wrong side facing out, sew the last row of the drawstring housing extension to the first row so it creates a tube to house the drawstring. Be sure the drawstring is inside the extension as you sew over it (otherwise it will be SUPER hard to get the drawstring through the housing later!)

NOTES:
- The pocket is worked in turning rows with our normal 2-row repeat.
- The ch 1 (on sc rows) or ch 2 loosely (on FC rows) at the end of each row does NOT count as a stitch.
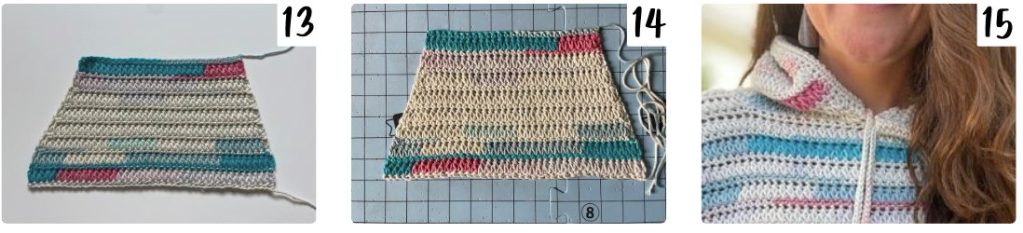
- The stitch pattern creates a bias shape where both angled sides of the pocket are angled at different degrees. You will correct this by blocking the pocket before sewing it onto the sweater – you can observe the difference between PH 13 & 14.
- The pocket uses the larger hook size.
Begin by leaving a long starting tail (to sew first row of pocket on later) and chain 41(41, 45, 45, 49)(49, 53, 53, 53)
Row 1 (WS): sc in 2nd ch from hk and each ch thereafter, ch 2 loosely, turn [40](40, 44, 44, 48)(48, 52, 52, 52)
Row 2 (RS): FC across, dc in same st, ch 1, turn
Row 3: sc dec over the first 2 st, sc across until the final 2 st, sc dec across the final 2 st, ch 2 loosely, turn
Rows 4-16*: repeat rows 2 & 3, alternating between sc and FC rows, and ending with a row of FC, ch 1, turn
Row 17: sc across | PH 13
*if you want your pocket to be taller, continue with the 2-row repeat before crocheting the final row of sc.
Fasten off and snip, leaving a long tail to sew the last row of the pocket onto the sweater. Align the pocket centered on the front of the sweater, leaving 4 rows between the ribbed hem and the bottom row of the pocket. Line up the sc rows and sew the pocket onto the sweater across the bottom of the pocket and the top of the pocket.
Blocking
Wet block or steam block your hoodie to finish it off and really make the stitch texture pop!
My recommended wet blocking method (see video tutorial here):
- Soak in lukewarm or cold water for 15 minutes (non-rinse wool wash optional, but I like it!)
- Dump or drain water and gently squeeze excess water out of garment without stretching or wringing – just push against the sink/tub/whatever.
- Lay gently in between towels and roll up.
- Press on towels to extract the rest of the additional water – you can use your hands, arms or feet for this step!
- Unroll towel and gently transfer to prepared blocking mats (or towels, etc).
- Without stretching excessively, gently shape garment to size and pin in place.
- Allow to fully dry in well ventilated area – depending on the size and thickness of the garment, this may take up to 2 days.
Crochet Hoodie Pattern Video Tutorial:
Show Off Your Work! ✨
I can’t wait to see your beautiful crochet hoodies! Be sure to tag me on social media @offthebeatenhook or use the hashtag #offthebeatenhook so I can admire your makes. ❤️
🔗 Other Cozy Wearable Patterns To Check Out:
- Airie Granny Square Cardigan Crochet Pattern
- Hoodoo Classic Cardigan Crochet Pattern
- Apricity Color Block Sweater Crochet Pattern
- Ivy Infinity Scarf Crochet Pattern
- Elowen Hexagon Cardigan Crochet Pattern
Pin this Crochet Hoodie Pattern Here:

Leave a Reply