
Whether you’re crocheting amigurumi, hats, or garments, knowing how to crochet an increase stitch is essential. This simple technique allows you to shape your work, add width, and create dimension in your crochet projects. In this tutorial, we’ll walk through what an increase is, when to use it, and how to crochet it step by step. Plus, I’ve included a video tutorial to make learning even easier!
Pin this Increase Stitch Tutorial for later reference here:

What is a Crochet Increase?
A crochet increase is a technique used to add stitches to your work, making it wider. This is done by placing two or more stitches into the same stitch from the previous row or round. Increases are commonly used in patterns for shaping and creating curves or expansions in your project.
In a pattern, an increase can also be called for by stating, “crochet 2 stitches into the next stitch” or “crochet 3 stitches into the next stitch”. You may ALSO see it as “doubling” or “tripling” a stitch.
When to Use a Crochet Increase
Amigurumi & Toys: Increases help create round or 3D shapes.
Hats & Beanies: Used in the crown of the hat to gradually widen it.
Garments: Increases help shape sleeves, yokes, and bust areas.
I’ll give you written steps below, but it might be quicker to just watch my ONE MINUTE tutorial which I’ve included below too!
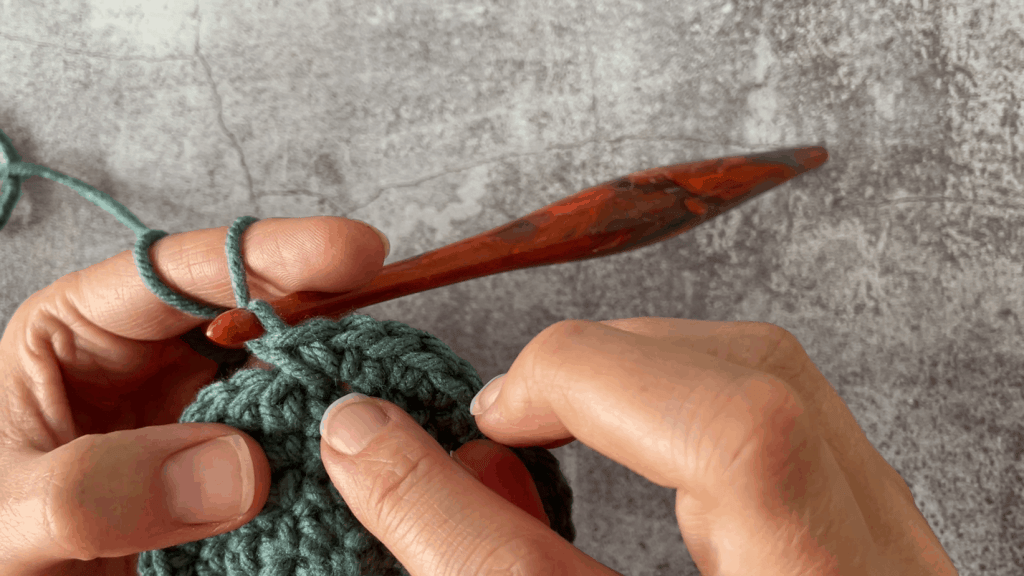
How to Crochet an Increase Stitch Step-by-Step:
Crocheting an increase is easy! Follow these simple steps to get started:
Step 1: Identify Where to Increase
Your pattern will specify which stitch needs an increase. If you’re designing your own project, choose a stitch that will maintain the desired shape.
Step 2: Work Two Stitches in One
Instead of placing just one stitch into the next space, you’ll place two stitches into the same stitch. Here’s how it looks for different stitches:
- Single Crochet (sc) Increase: Make two single crochet stitches in the same stitch.
- Half Double Crochet (hdc) Increase: Make two half double crochet stitches in the same stitch.
- Double Crochet (dc) Increase: Make two double crochet stitches in the same stitch.
Step 3: Continue Following the Pattern
Once you’ve made your increase, continue working the rest of the stitches as instructed in your pattern. It’s that simple!
Watch and Learn!
Sometimes, seeing it in action makes all the difference! I’ve put together a step-by-step video tutorial to show you exactly how to crochet an increase stitch. Watch it here:
Want more quick and easy tutorials? I’ve got a ton of them in the FREE Resource Library which you can find here.
Leave a Reply