
Are you tired of spending hours on a crochet project, only to end up with less-than-stunning results? If so, this comprehensive guide is for you. It’s time to unlock the secret to precise stitch counting and accurate measurements: understanding crochet gauge. This often-overlooked detail can make all the difference between a mediocre piece and a piece you reach for over and over again.
To be honest – the real party with this one is over on YouTube. In conversation and lots of visuals, my video tutorial is basically a full, 30 minute course on everything you’re about to read here. So if you’d rather skip to the video, you can scroll down to the bottom of this article, or or view it here on You Tube.
In this article, I dive into everything you need to know about crochet gauge. I explore what crochet gauge is, why it matters, how to accurately measure gauge, how to fix it, and how to avoid the common mistakes that can sabotage your hard work. Get ready to discover the key to creating stunning crochet projects every time!

What is Crochet Gauge?
Crochet gauge is written in a pattern as the number of stitches and rows within a provided measurement of crochet fabric. This seemingly simple metric is the foundation upon which any crochet project is built.
The standard gauge measurement is 4? x 4?, but that may change from pattern to pattern – so be sure to double check what the pattern states. To measure the gauge, make a gauge swatch using the recommended hook size and yarn weight. For example:
Gauge: 4?x4� = 13 hdc x 10 rows with 5.5mm hook
If the above were stated in a pattern, a 4? square of half double crochet stitches worked with a 5.5mm crochet hook would be 13 stitches wide and 10 rows high.
Taking the time to understand crochet gauge may seem tedious at first, but it is a fundamental step that will save you countless hours of frustration in the long run. By investing a little extra time and effort into achieving the proper gauge, you’ll be rewarded with stunning results that exceed your expectations.
We will make a sample gauge swatch and accurately measure it in just a bit, but first, let’s talk about WHY crochet gauge is so important.

Why Does Crochet Gauge Matter?
To truly master the art of crochet and produce stunning results, it’s imperative to understand the concept of crochet gauge. Matching gauge directly affects the size, fit, and overall appearance of your finished project. Without proper attention to gauge, you may find yourself frustrated with a project that turns out too small, too large, or just plain wonky.
The designer of the pattern crochets differently than you. You hold your hook differently, tension your yarn differently, and a host of other things that affect your stitches and gauge.
Well, that designer is providing measurements for their piece based on how THEY crochet, not you. That is why they provide a gauge – so you can match the size of their stitches and ensure the measurements of your finished product will match what they are providing for that piece.
So what will happen if your gauge doesn’t match the designers gauge?

WRONG SIZE: Your piece could turn out too big or too small
If you don’t measure and achieve gauge, you will probably end up having more or less stitches per inch (or 4 inches) of fabric. Your stitches might be smaller or bigger than the designers. So, if all you do is count your stitches, it doesn’t mean that that stitch count will automatically achieve the intended measurement.
If you carry this through your entire project, it could end up being several inches bigger or smaller than it’s supposed to. Disaster!
WRONG FABRIC: Your fabric could end up being too stiff and dense or too loose and breathable
Again, if your stitches are smaller or bigger than the designers, the texture and density of your fabric may differ. If your stitches are smaller than intended, the fabric will end up being stiffer. If your stitches are larger than intended, you’ll have a more breathable and drapey fabric.
YARN YARDAGE ISSUES: You might run out of yarn or have yarn left over
The pattern will recommend a yarn amount based on the designers measurements. If your gauge is off, then your measurements will be off as well. This means if you’ve purchased exactly the amount of yarn the pattern advises, you might run out of it. Or, you might have a random amount left over that you now have to decide what to do with.
Making a Guage Swatch
In order to check your gauge against the pattern’s gauge, you’ll make a small sample of fabric called a gauge swatch.
When you make your swatch, you’ll use the recommended yarn weight in the pattern, along with the hook size used in the pattern. Your swatch will be made of the stitch your pattern is made with. Our “example pattern” is made using hdc, so that’s what the swatch will be made using.
PRO TIP: To make a useful gauge swatch, you�ll want your swatch to be bigger than the stated gauge so you can accurately measure. Why? Because the edge stitches are inconsistent and can throw things off big time. Edge stitches tend to be looser or tighter than the rest of your piece. The center stitches more accurately illustrate your true tension.
So, let�s practice.
Take our example: Gauge: 4?x4� = 13 hdc x 10 rows with 5.5mm hook
Start with a chain a bit longer than recommended in the swatch. This swatch recommends 13 hdc for 4?, so start with a chain of 18, hdc in the 2nd chain from the hook and each chain across for a total of 17 hdc. Then crochet to 12 rows – a couple more than recommended in the gauge swatch.
Accurately Measuring Your Gauge Swatch
When measuring your gauge, make sure your swatch is laid flat (that’s right – NOT on your lap) and not stretched or distorted in any way. Using a rigid ruler or gauge tool, measure the number of stitches and rows within the given measurement (usually 4�x4�). Don�t skimp and try using your flexible fabric ruler. If you try to measure your swatch on an uneven/soft surface with a flexible ruler you can be off on your measurement by a CRITICAL number of stitches. Even two stitches multiplied by hundreds will throw off your final measurements dramatically.
Line up the first tick mark on your ruler with the very edge of the first stitch in your row, and straight along the bottom of your first row and count the number of stitches in the 4″ measurement. The end of that 4″ may not end exactly at the end of a stitch or row, so be sure it count to the half stitch/row at least (or even more precisely if you’re using a jumbo yarn).
Do the same for 4″ of rows vertically and now you have the results of your gauge matching.

By accurately measuring your gauge, you’ll be able to identify any discrepancies and make necessary adjustments before diving deep into your project. This step will ensure that your stitches align perfectly with the intended design, resulting in stunning and professional-looking crochet pieces.
Now, if you and I sat down together and did this exercise, it�s HIGHLY likely that our gauge would not only be different from each others�, but also likely that neither of us would hit gauge on this first try. The reason for this is that we hold and tension our yarn differently, we create our stitches differently, we hold our hook differently and we are in different moods. Don�t get discouraged! That�s where adjusting comes in.

How to Adjust Your Gauge
When it comes to crochet, precision is key. It may not be as vital in a blanket or a toy because you probably won�t care if the final project isn�t EXACTLY the same as the pattern.That toy or blanket or basket isn’t going to have to fit a exact space.
But think of a sweater, cardigan or other wearable garment! Imagine spending hours on a project, only for it to turn out too large or too small because you didn’t take the time to measure properly. Frustrating, right?
Once you have obtained your gauge measurements, it’s time to evaluate them against the pattern requirements. Compare the number of stitches and rows in your swatch to the recommended measurements provided in the pattern. If your gauge matches perfectly, congratulations! You can confidently follow the pattern instructions as written. However, if there are discrepancies, don’t panic. This happens all the time, and there are ways to adjust and achieve the desired outcome.
So, here’s how to make adjustments and achieve proper gauge:

ADJUSTING STITCH COUNT:
SCENARIO #1: Too many stitches in your row
If you find you have too many stitches in your gauge swatch (in our example, say, 15 stitches rather than the intended 13), then you�re crocheting tighter than the designer and your final result will be a smaller fit with a more dense, stiff fabric.
ADJUSTMENT OPTION #1 (preferable): Increase your hook size by one half (in our example, you would try a 6.00mm hook and remake the swatch). This will make your stitches larger which will decrease the number of stitches in your swatch. If you still have too many, go up another � hook size.
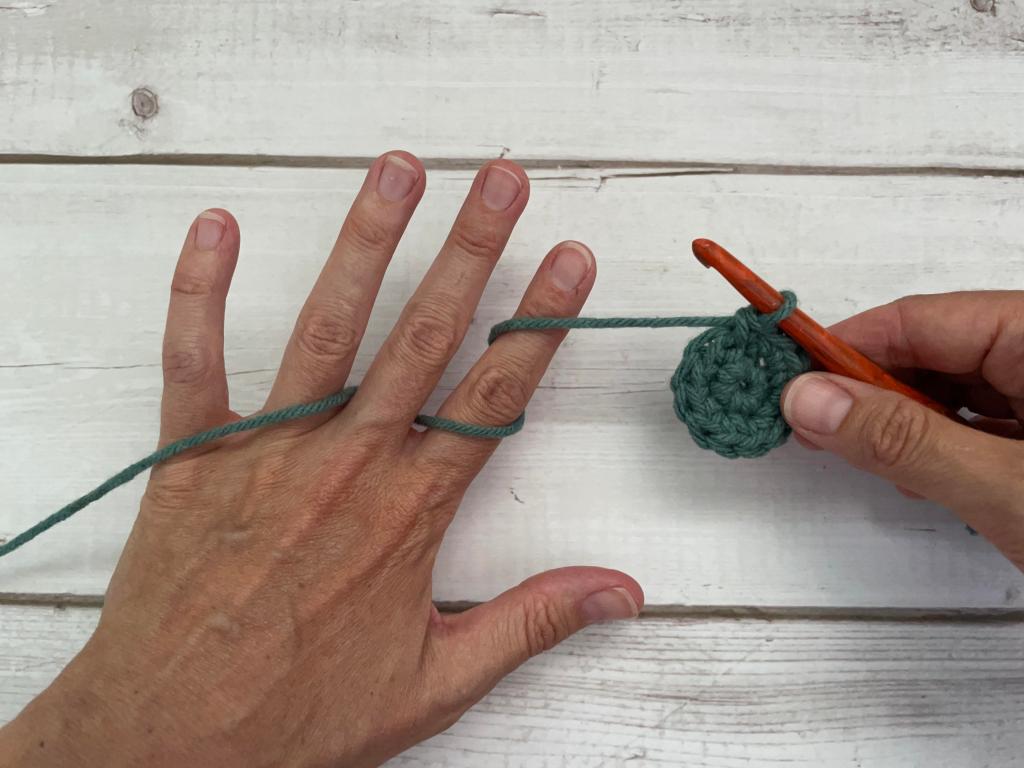
ADJUSTMENT OPTION #2: Loosen up on your tension. If you wrap your yarn around your finger, then drop it off your finger which will create less drag on your working yarn and allow more yarn to slip through your hand more easily, creating looser, larger stitches.
SCENARIO #2: Too few stitches in your row
If you find you have too few stitches in your gauge swatch (in our example, say 10 stitches rather than the intended 13), then you�re crocheting more loosely than the designer and your final result will be a larger fit with a more loose, drapey fabric.
ADJUSTMENT OPTION #1 (preferable): Decrease your hook size by one half (in our example, you would try a 5.00mm hook and remake the swatch). This will make your stitches smaller which will increase the number of stitches in your swatch. If you still have too few, go down another � hook size.
ADJUSTMENT OPTION #2: Tighten up on your tension. Add another wrap of yarn around your finger, which will create more drag on your working yarn so it doesn’t slip through as easily, creating tighter, smaller stitches.
ADJUSTING ROW COUNT:
Often times, simply adding or removing the number of rows to your project is a perfectly acceptable solution. A sweater with a simple 1-row repeat? Just add more rows to make the sweater longer or remove rows to make it more cropped.
However, if there are more complicated row repeats or you�re worried about running out of yarn, here are some things to consider when adjusting row count.
Have you ever heard of �the golden loop�? This loop is the one closest to your hook on the last step of your stitch. You�re either in the �lifter� camp or the �yanker� camp and whichever you are, dictates how tall or short your stitch will be.
SCENARIO #1: Too few rows in your gauge swatch
This means your rows are taller than the original design and that you are a �lifter�. You lift the final loop on your hook before yarning over and completing your stitch. This elongates your stitch and makes it taller.
SOLUTION: Tighten down on your loop before completing your stitch.
SCENARIO #2: Too many rows in your gauge swatch
This means your rows are shorter than the original design and that you are a �yanker�. You yank down on your working yarn before yarning over and completing your stitch. This tightens your stitch and makes it shorter.
SOLUTION: Loosen up on your working yarn before completing your stitch.
What Else Can Affect Crochet Gauge?
We’ve talked about how HOOK SIZE and YARN TENSION can affect your gauge. There’s several other factors that could affect your gauge and tension. Keep these in mind as tools in your toolbox of crochet gauge knowledge:
- Yarn Choice: Not all yarns within the same weight are created equal. GASP! I know, right? This is really important to realize so you don�t get super discouraged if you�re having a hard time hitting gauge. If you are using a yarn that is different than the recommended yarn in the pattern, it�s even that much more essential to gauge swatch.�
- Blocked or not blocked? Is the gauge given in the pattern blocked or not blocked? Blocking can stretch stitches significantly, so it�s important to know whether the gauge is provided blocked or before blocking
- Hook Brand: If you�ve been using the same hook brand for a long time and use them almost exclusively, it�s highly likely that your tension (and therefore gauge) will change if you try using a different hook. This could work to your advantage if you need another avenue to try to match gauge.
- Hook Hold: Pencil-holders are more likely to be yankers while knife-holders are more likely to be lifters. If you�re able to adjust your hook hold in order to adjust your tension and gauge, then you are my hero. This has never worked for me. I�m right handed and this feels, to me, like I�m trying to write with my left hand – so awkward! But, it�s worth try if it sounds appealing to you.
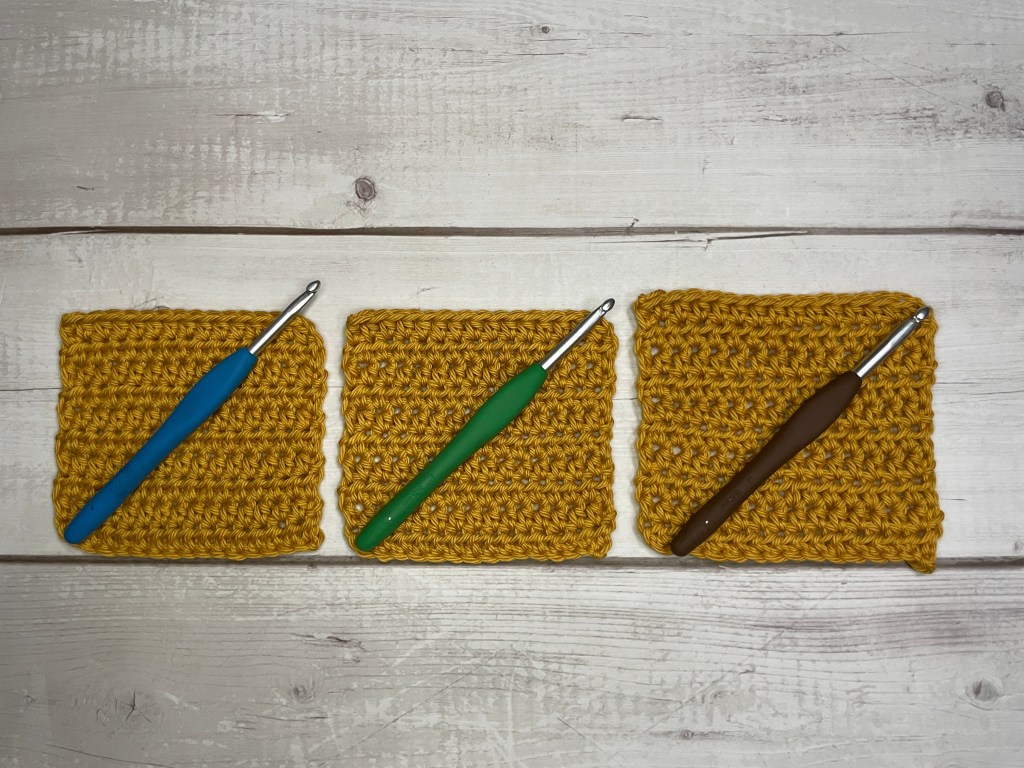
- Hook Material: The material of your hook plays a notable role on your tension. Wood hooks are the grippiest because they have more surface texture and grab. Metal hooks are the slipperiest because they are super smooth. Plastic is somewhere in between. It�s worth it to try a different hook material if you need a touch of extra pull one way or another to obtain gauge.
- Your Mood: This is probably the least talked about factor when we are discussing tension, but it�s so true nonetheless. If you are feelin� good and peaceful and relaxed, you�re more likely to have smooth, flowing tension. But, if you are stressed, distracted and wound-up, your body is also tense and stiff, and it is likely that this tension in your mind and body will play out through your yarn tension as well.

In summary, understanding the significance of crochet gauge is what sets apart ordinary projects from extraordinary ones. By accurately measuring your gauge and making necessary adjustments, you will unlock the potential to create professional-looking crochet pieces that look, fit and feel the way they were originally designed and intended.
So, before you jump straight into your next pattern, remember to take the time to measure your gauge and make adjustments as necessary. Believe me, taking the time to do this will either make your break your final result. Relax, don�t rush, and embrace the art of precision in your craft.
Crochet Gauge Video Tutorial:


Leave a Reply